Sailboat Parts Explained: Illustrated Guide (with Diagrams)
When you first get into sailing, there are a lot of sailboat parts to learn. Scouting for a good guide to all the parts, I couldn't find any, so I wrote one myself.
Below, I'll go over each different sailboat part. And I mean each and every one of them. I'll walk you through them one by one, and explain each part's function. I've also made sure to add good illustrations and clear diagrams.
This article is a great reference for beginners and experienced sailors alike. It's a great starting point, but also a great reference manual. Let's kick off with a quick general overview of the different sailboat parts.

General Overview
The different segments
You can divide up a sailboat in four general segments. These segments are arbitrary (I made them up) but it will help us to understand the parts more quickly. Some are super straightforward and some have a bit more ninja names.
Something like that. You can see the different segments highlighted in this diagram below:

The hull is what most people would consider 'the boat'. It's the part that provides buoyancy and carries everything else: sails, masts, rigging, and so on. Without the hull, there would be no boat. The hull can be divided into different parts: deck, keel, cabin, waterline, bilge, bow, stern, rudder, and many more.
I'll show you those specific parts later on. First, let's move on to the mast.

Sailboats Explained
The mast is the long, standing pole holding the sails. It is typically placed just off-center of a sailboat (a little bit to the front) and gives the sailboat its characteristic shape. The mast is crucial for any sailboat: without a mast, any sailboat would become just a regular boat.
I think this segment speaks mostly for itself. Most modern sailboats you see will have two sails up, but they can carry a variety of other specialty sails. And there are all kinds of sail plans out there, which determine the amount and shape of sails that are used.
The Rigging
This is probably the most complex category of all of them.
Rigging is the means with which the sails are attached to the mast. The rigging consists of all kinds of lines, cables, spars, and hardware. It's the segment with the most different parts.
The most important parts
If you learn anything from this article, here are the most important parts of any sailboat. You will find all of these parts in some shape or form on almost any sailboat.

Okay, we now have a good starting point and a good basic understanding of the different sailboat parts. It's time for the good stuff. We're going to dive into each segment in detail.
Below, I'll go over them one by one, pointing out its different parts on a diagram, listing them with a brief explanation, and showing you examples as well.
After reading this article, you'll recognize every single sailboat part and know them by name. And if you forget one, you're free to look it up in this guide.

On this page:
The hull is the heart of the boat. It's what carries everything: the mast, the sails, the rigging, the passengers. The hull is what provides the sailboat with its buoyancy, allowing it to stay afloat.
Sailboats mostly use displacement hulls, which is a shape that displaces water when moving through it. They are generally very round and use buoyancy to support its own weight. These two characteristics make sure it is a smooth ride.
There are different hull shapes that work and handle differently. If you want to learn more about them, here's the Illustrated Guide to Boat Hull Types (with 11 Examples ). But for now, all we need to know is that the hull is the rounded, floating part of any sailboat.
Instead of simply calling the different sides of a hull front, back, left and right , we use different names in sailing. Let's take a look at them.

The bow is the front part of the hull. It's simply the nautical word for 'front'. It's the pointy bit that cuts through the water. The shape of the bow determines partially how the boat handles.
The stern is the back part of the hull. It's simply the nautical word for 'back'. The shape of the stern partially determines the stability and speed of the boat. With motorboats, the stern lies deep inside the water, and the hull is flatter aft. Aft also means back. This allows it to plane, increasing the hull speed. For sailboats, stability is much more important, so the hull is rounded throughout, increasing its buoyancy and hydrodynamic properties.
The transom is the backplate of the boat's hull. It's the most aft (rear) part of the boat.
Port is the left side of a sailboat.
Starboard is the right side of a sailboat
The bilges are the part where the bottom and the sides of the hull meet. On sailboats, these are typically very round, which helps with hydrodynamics. On powerboats, they tend to have an angle.
The waterline is the point where the boat's hull meets the water. Generally, boat owners paint the waterline and use antifouling paint below it, to protect it from marine growth.
The deck is the top part of the boat's hull. In a way, it's the cap of the boat, and it holds the deck hardware and rigging.
Displacement hulls are very round and smooth, which makes them very efficient and comfortable. But it also makes them very easy to capsize: think of a canoe, for example.
The keel is a large fin that offsets the tendency to capsize by providing counterbalance. Typically, the keel carries ballast in the tip, creating a counterweight to the wind's force on the sails.
The rudder is the horizontal plate at the back of the boat that is used to steer by setting a course and maintaining it. It is connected to the helm or tiller.
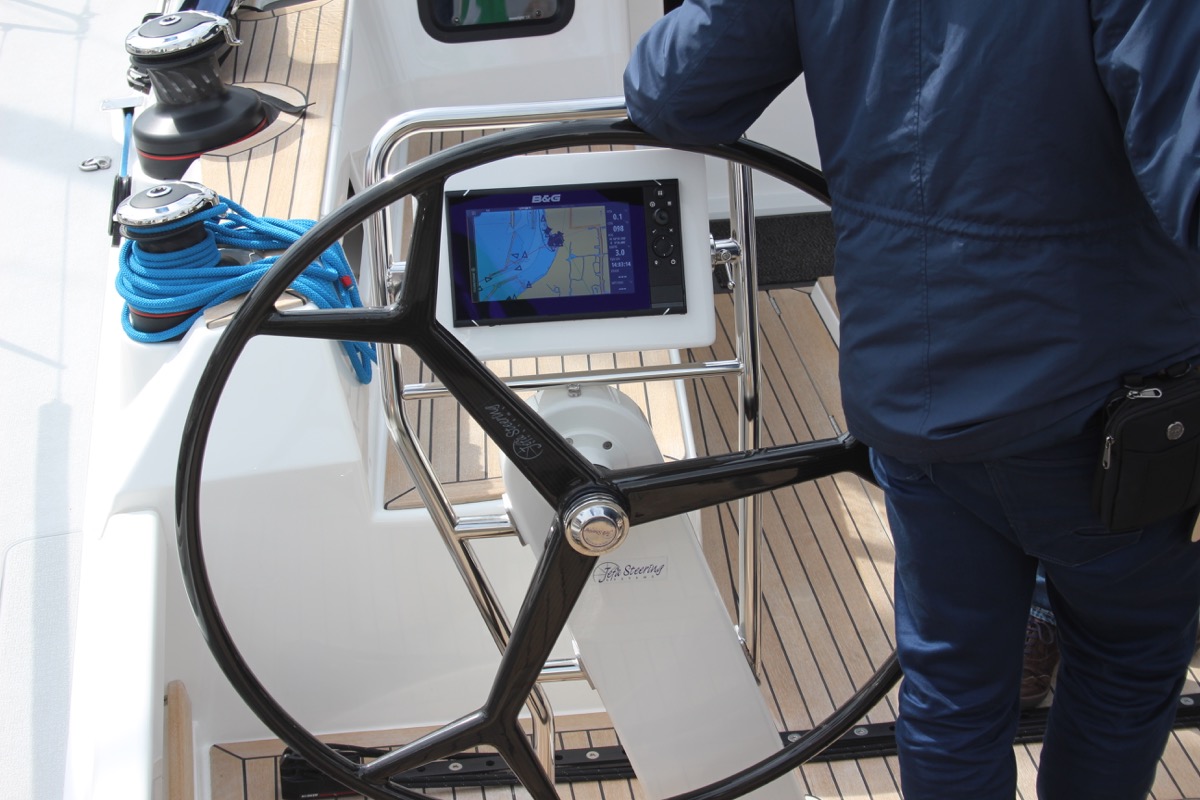
Tiller or Helm
- The helm is simply the nautical term for the wheel.
- The tiller is simply the nautical term for the steering stick.
The tiller or helm is attached to the rudder and is used to steer the boat. Most smaller sailboats (below 30') have a tiller, most larger sailboats use a helm. Large ocean-going vessels tend to have two helms.
The cockpit is the recessed part in the deck where the helmsman sits or stands. It tends to have some benches. It houses the outside navigation and systems interfaces, like the compass, chartplotter, and so on. It also houses the mainsheet traveler and winches for the jib. Most boats are set up so that the entire vessel can be operated from the cockpit (hence the name). More on those different parts later.
Most larger boats have some sort of roofed part, which is called the cabin. The cabin is used as a shelter, and on cruising sailboats you'll find the galley for cooking, a bed, bath room, and so on.
The mast is the pole on a sailboat that holds the sails. Sailboats can have one or multiple masts, depending on the mast configuration. Most sailboats have only one or two masts. Three masts or more is less common.
The boom is the horizontal pole on the mast, that holds the mainsail in place.
The sails seem simple, but actually consist of many moving parts. The parts I list below work for most modern sailboats - I mean 90% of them. However, there are all sorts of specialty sails that are not included here, to keep things concise.

The mainsail is the largest sail on the largest mast. Most sailboats use a sloop rigging (just one mast with one bermuda mainsail). In that case, the main is easy to recognize. With other rig types, it gets more difficult, since there can be multiple tall masts and large sails.
If you want to take a look at the different sail plans and rig types that are out there, I suggest reading my previous guide on how to recognize any sailboat here (opens in new tab).
Sail sides:
- Leech - Leech is the name for the back side of the sail, running from the top to the bottom.
- Luff - Luff is the name for the front side of the sail, running from the top to the bottom.
- Foot - Foot is the name for the lower side of the sail, where it meets the boom.
Sail corners:
- Clew - The clew is the lower aft (back) corner of the mainsail, where the leech is connected to the foot. The clew is attached to the boom.
- Tack - The tack is the lower front corner of the mainsail
- Head - The head is the top corner of the mainsail
Battens are horizontal sail reinforcers that flatten and stiffen the sail.
Telltales are small strings that show you whether your sail trim is correct. You'll find telltales on both your jib and mainsail.
The jib is the standard sized headsail on a Bermuda Sloop rig (which is the sail plan most modern sailboats use).
As I mentioned: there are all kinds, types, and shapes of sails. For an overview of the most common sail types, check out my Guide on Sail Types here (with photos).
The rigging is what is used to attach your sails and mast to your boat. Rigging, in other words, mostly consists of all kinds of lines. Lines are just another word for ropes. Come to think of it, sailors really find all kinds of ways to complicate the word rope ...
Two types of rigging
There are two types of rigging: running and standing rigging. The difference between the two is very simple.
- The running rigging is the rigging on a sailboat that's used to operate the sails. For example, the halyard, which is used to lower and heave the mainsail.
- The standing rigging is the rigging that is used to support the mast and sail plan.
Standing Rigging

Here are the different parts that belong to the standing rigging:
- Forestay or Headstay - Line or cable that supports the mast and is attached to the bow of the boat. This is often a steel cable.
- Backstay - Line or cable that supports the mast and is attached to the stern of the boat. This is often a steel cable.
- Sidestay or Shroud - Line or cable that supports the mast from the sides of the boat. Most sailboats use at least two sidestays (one on each side).
- Spreader - The sidestays are spaced to steer clear from the mast using spreaders.
Running Rigging: different words for rope
Ropes play a big part in sailing, and especially in control over the sails. In sailboat jargon, we call ropes 'lines'. But there are some lines with a specific function that have a different name. I think this makes it easier to communicate with your crew: you don't have to define which line you mean. Instead, you simply shout 'mainsheet!'. Yeah, that works.
Running rigging consists of the lines, sheets, and hardware that are used to control, raise, lower, shape and manipulate the sails on a sailboat. Rigging varies for different rig types, but since most sailboats are use a sloop rig, nearly all sailboats use the following running rigging:

- Halyards -'Halyard' is simply the nautical name for lines or ropes that are used to raise and lower the mainsail. The halyard is attached to the top of the mainsail sheet, or the gaffer, which is a top spar that attaches to the mainsail. You'll find halyards on both the mainsail and jib.
- Sheets - 'Sheet' is simply the nautical term for lines or ropes that are used to set the angle of the sail.
- Mainsheet - The line, or sheet, that is used to set the angle of the mainsail. The mainsheet is attached to the Mainsheet traveler. More on that under hardware.
- Jib Sheet - The jib mostly comes with two sheets: one on each side of the mast. This prevents you from having to loosen your sheet, throwing it around the other side of the mast, and tightening it. The jib sheets are often controlled using winches (more on that under hardware).
- Cleats are small on-deck hooks that can be used to tie down sheets and lines after trimming them.
- Reefing lines - Lines that run through the mainsail, used to put a reef in the main.
- The Boom Topping Lift is a line that is attached to the aft (back) end of the boom and runs to the top of the mast. It supports the boom whenever you take down the mainsail.
- The Boom Vang is a line that places downward tension on the boom.
There are some more tensioning lines, but I'll leave them for now. I could probably do an entire guide on the different sheets on a sailboat. Who knows, perhaps I'll write it.
This is a new segment, that I didn't mention before. It's a bit of an odd duck, so I threw all sorts of stuff into this category. But they are just as important as all the other parts. Your hardware consists of cleats, winches, traveler and so on. If you don't know what all of this means, no worries: neither did I. Below, you'll find a complete overview of the different parts.
Deck Hardware

Just a brief mention of the different deck hardware parts:
- Pulpits are fenced platforms on the sailboat's stern and bow, which is why they are called the bow pulpit and stern pulpit here. They typically have a solid steel framing for safety.
- Stanchons are the standing poles supporting the lifeline , which combined for a sort of fencing around the sailboat's deck. On most sailboats, steel and steel cables are used for the stanchons and lifelines.
Mainsheet Traveler
The mainsheet traveler is a rail in the cockpit that is used to control the mainsheet. It helps to lock the mainsheet in place, fixing the mainsails angle to the wind.
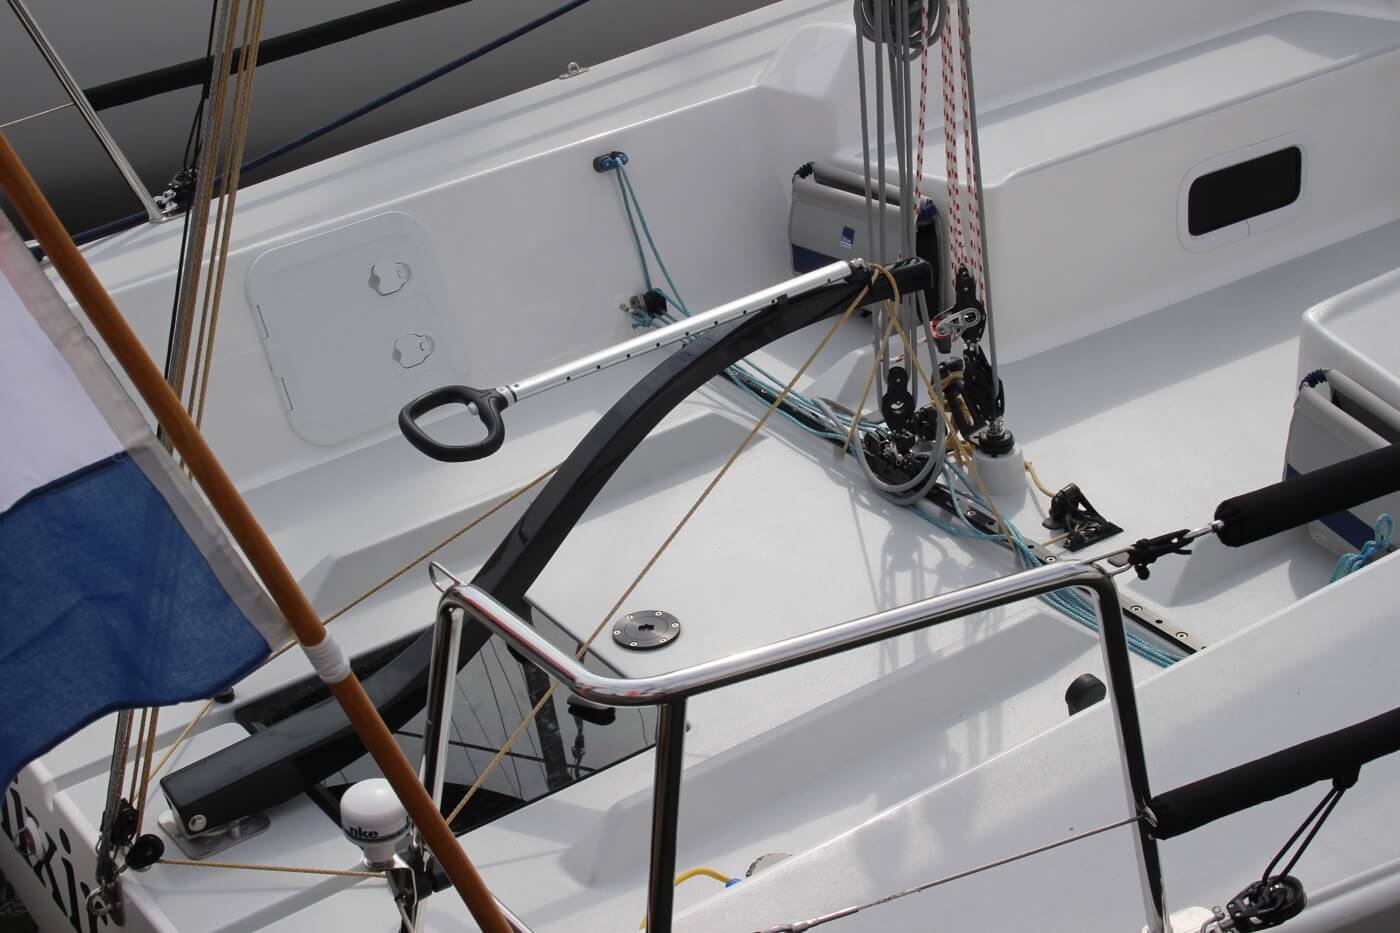
If you're interested in learning more about how to use the mainsheet traveler, Matej has written a great list of tips for using your mainsheet traveler the right way . It's a good starting point for beginners.
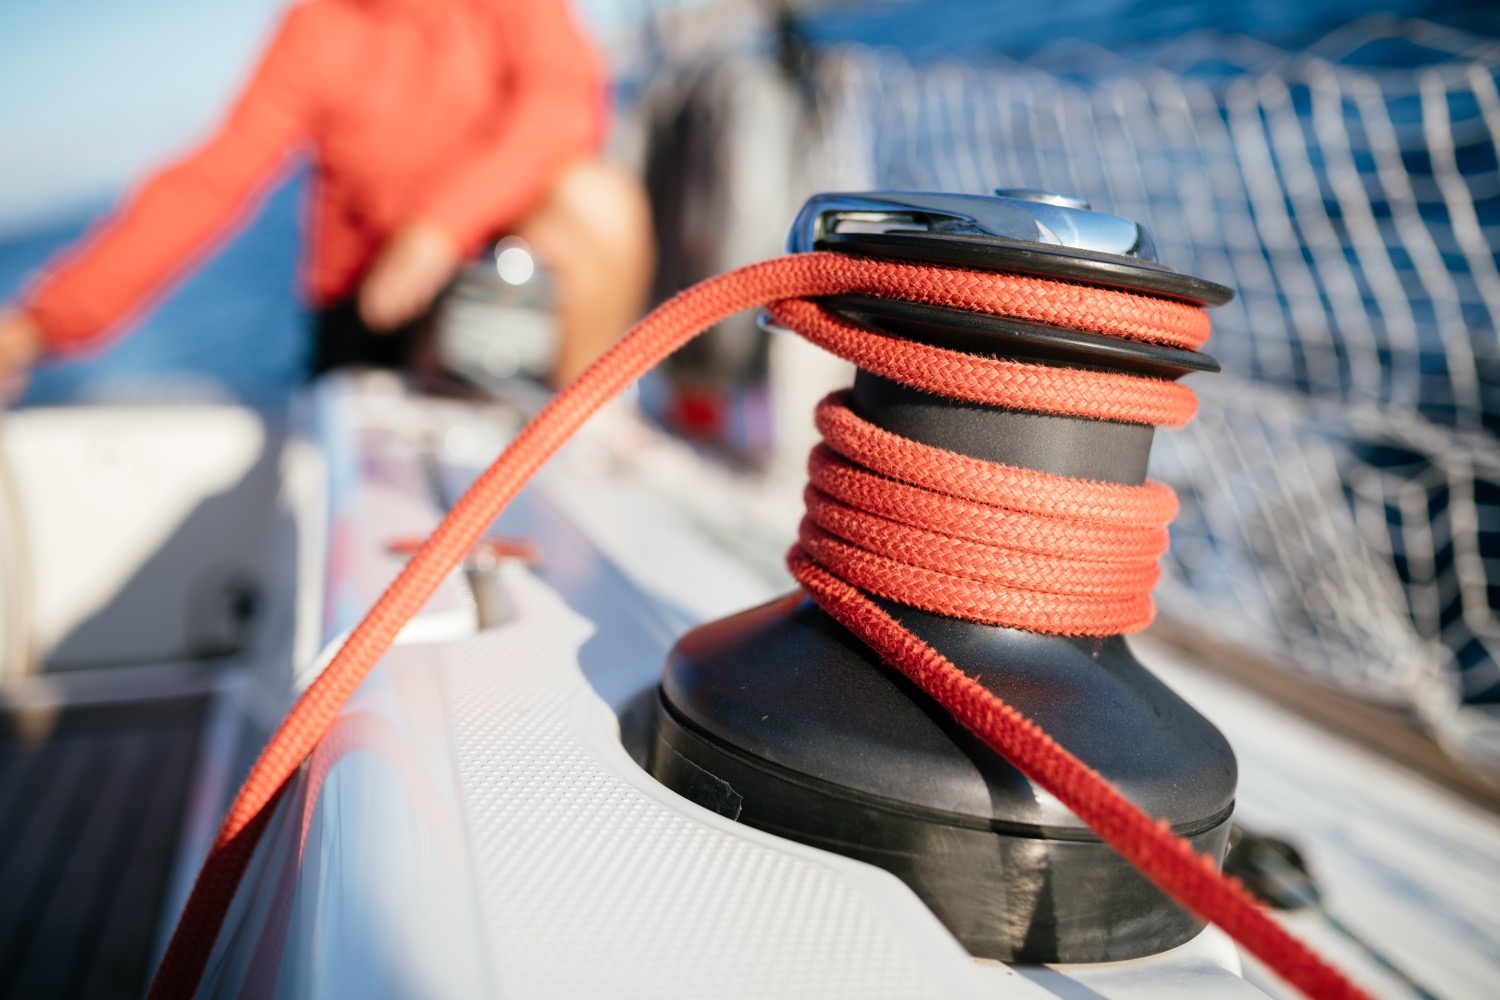
Winches are mechanical or electronic spools that are used to easily trim lines and sheets. Most sailboats use winches to control the jib sheets. Modern large sailing yachts use electronic winches for nearly all lines. This makes it incredibly easy to trim your lines.
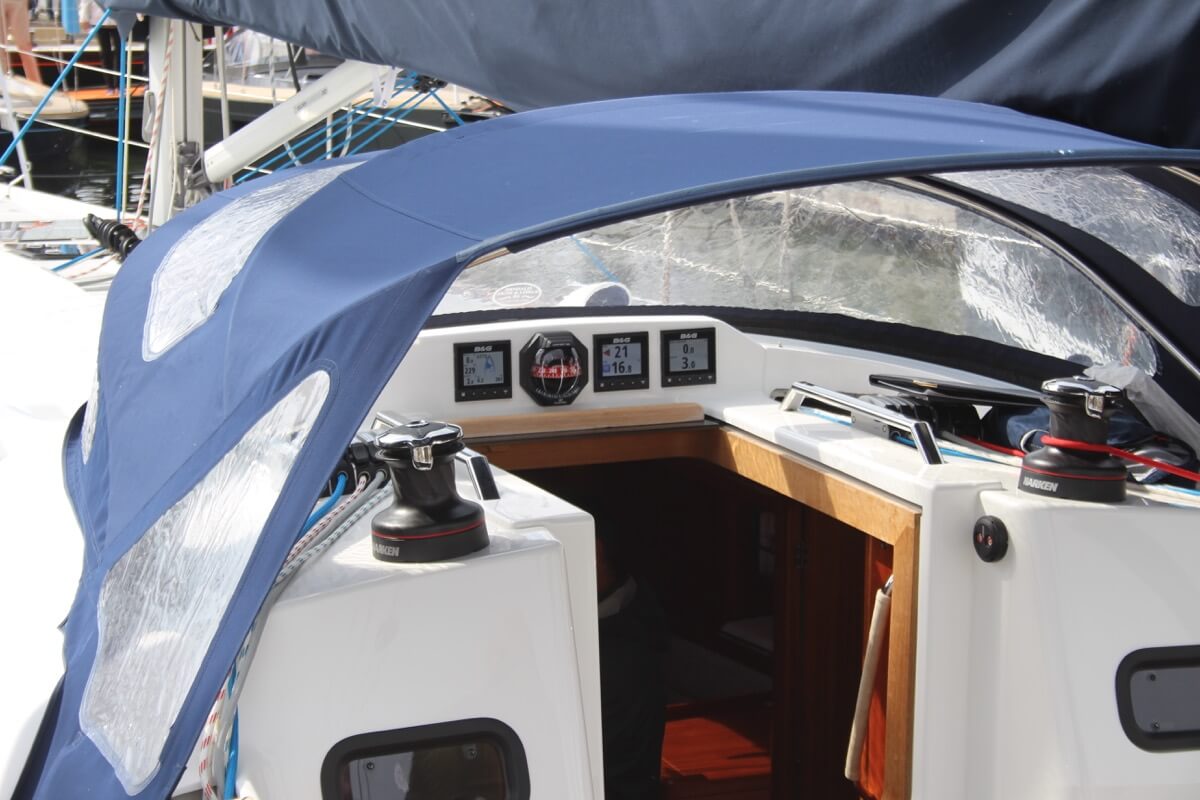
You'll find the compass typically in the cockpit. It's the most old-skool navigation tool out there, but I'm convinced it's also one of the most reliable. In any way, it definitely is the most solid backup navigator you can get for the money.
Want to learn how to use a compass quickly and reliably? It's easy. Just read my step-by-step beginner guide on How To Use a Compass (opens in new tab .
Chartplotter
Most sailboats nowadays use, besides a compass and a map, a chartplotter. Chartplotters are GPS devices that show a map and a course. It's very similar to your normal car navigation.
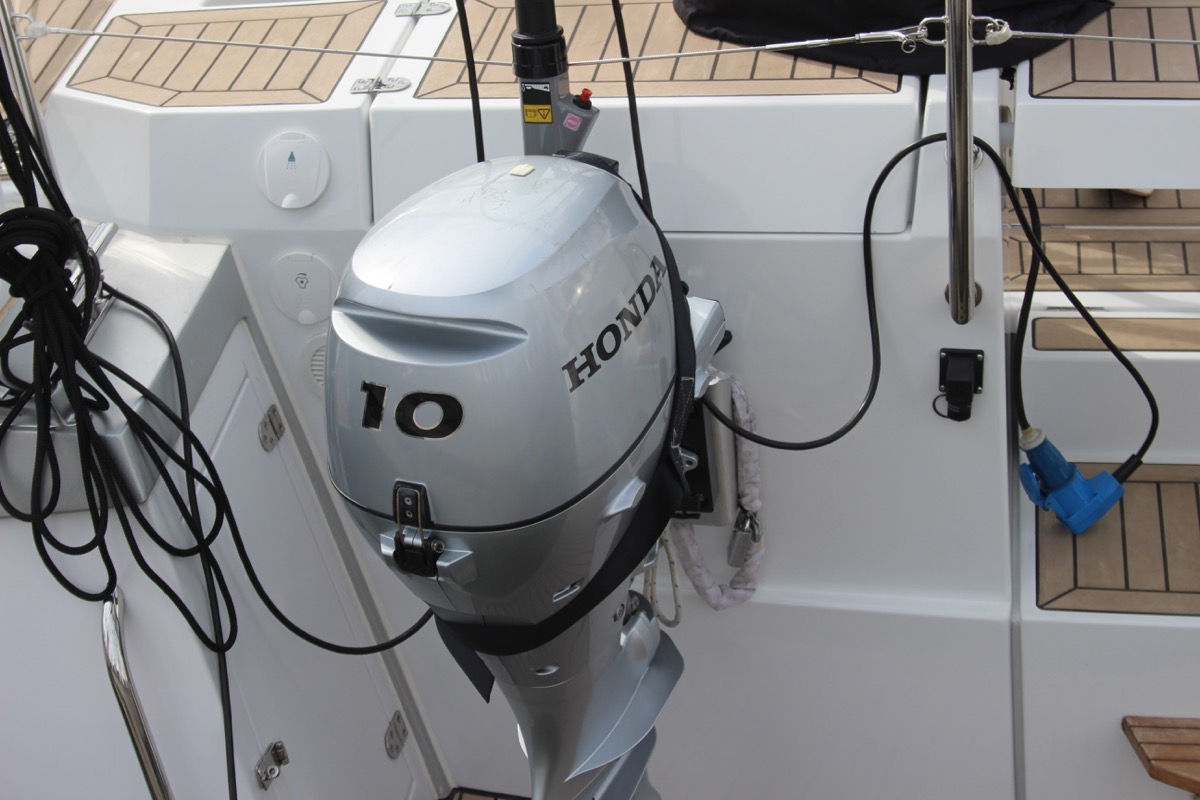
Outboard motor
Most sailboats have some sort of motor to help out when there's just the slightest breeze. These engines aren't very big or powerful, and most sailboats up to 32' use an outboard motor. You'll find these at the back of the boat.
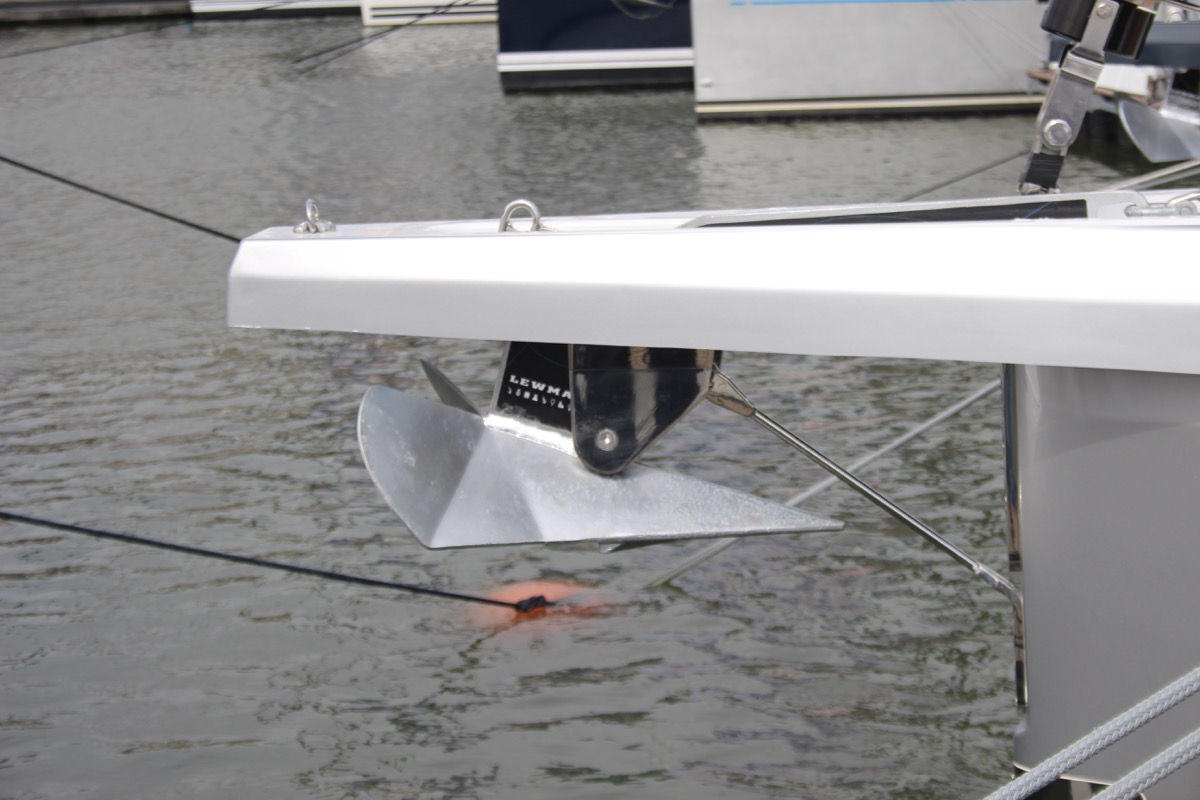
Most sailboats carry 1 - 3 anchors: one bow anchor (the main one) and two stern anchors. The last two are optional and are mostly used by bluewater cruisers.
I hope this was helpful, and that you've gained a good understanding of the different parts involved in sailing. I wanted to write a good walk-through instead of overwhelming you with lists and lists of nautical terms. I hope I've succeeded. If so, I appreciate any comments and tips below.
I've tried to be as comprehensive as possible, without getting into the real nitty gritty. That would make for a gigantic article. However, if you feel I've left something out that really should be in here, please let me know in the comments below, so I can update the article.
I own a small 20 foot yacht called a Red witch made locally back in the 70s here in Western Australia i found your article great and enjoyed reading it i know it will be a great help for me in my future leaning to sail regards John.
David Gardner
İ think this is a good explanation of the difference between a ”rope” and a ”line”:
Rope is unemployed cordage. In other words, when it is in a coil and has not been assigned a job, it is just a rope.
On the other hand, when you prepare a rope for a specific task, it becomes employed and is a line. The line is labeled by the job it performs; for example, anchor line, dock line, fender line, etc.
Hey Mr. Buckles
I am taking on new crew to race with me on my Flying Scot (19ft dingy). I find your Sailboat Parts Explained to be clear and concise. I believe it will help my new crew learn the language that we use on the boat quickly without being overwhelmed.
PS: my grandparents were from Friesland and emigrated to America.
Thank you Shawn for the well written, clear and easy to digest introductory article. Just after reading this first article I feel excited and ready to set sails and go!! LOL!! Cheers! Daniel.
steve Balog
well done, chap
Great intro. However, the overview diagram misidentifies the cockpit location. The cockpit is located aft of the helm. Your diagram points to a location to the fore of the helm.
William Thompson-Ambrose
An excellent introduction to the basic anatomy and function of the sailboat. Anyone who wants to start sailing should consider the above article before stepping aboard! Thank-you
James Huskisson
Thanks for you efforts mate. We’ve all got to start somewhere. Thanks for sharing. Hoping to my first yacht. 25ft Holland. Would love to cross the Bass Strait one day to Tasmania. 👌 Cheers mate
Alan Alexander Percy
thankyou ijust aquired my first sailboat at 66yrs of age its down at pelican point a beautifull place in virginia usa my sailboat is a redwing 30 if you are ever in the area i wouldnt mind your guidance and superior knowledge of how to sail but iam sure your fantastic article will help my sailboat is wings 30 ft
Thanks for quick refresher course. Having sailed in California for 20+ years I now live in Spain where I have to take a spanish exam for a sailboat license. Problem is, it’s only in spanish. So a lot to learn for an old guy like me.
Very comprehensive, thank you
Your article really brought all the pieces together for me today. I have been adventuring my first sailing voyage for 2 months from the Carolinas and am now in Eleuthera waiting on weather to make the Exumas!!! Great job and thanks
Helen Ballard
I’ve at last found something of an adventure to have in sailing, so I’m starting at the basics, I have done a little sailing but need more despite being over 60 life in the old dog etc, thanks for your information 😊
Barbara Scott
I don’t have a sailboat, neither do l plan to literally take to the waters. But for mental exercise, l have decided to take to sailing in my Bermuda sloop, learning what it takes to become a good sailor and run a tight ship, even if it’s just imaginary. Thank you for helping me on my journey to countless adventures and misadventures, just to keep it out of the doldrums! (I’m a 69 year old African American female who have rediscovered why l enjoyed reading The Adventures of Robert Louis Stevenson as well as his captivating description of sea, wind, sailboat,and sailor).
Great article and very good information source for a beginner like me. But I didn’t find out what I had hoped to, which is, what are all those noisy bits of kit on top of the mast? I know the one with the arrow is a weather vane, but the rest? Many thanks, Jay.
Louis Cohen
The main halyard is attached to the head of the mainsail, not the to the mainsheet. In the USA, we say gaff, not gaffer. The gaff often has its own halyard separate from the main halyard.
Other than that it’s a nice article with good diagrams.
A Girl Who Has an Open Sail Dream
Wow! That was a lot of great detail! Thank you, this is going to help me a lot on my project!
Hi, good info, do u know a book that explains all the systems on a candc 27,
Emma Delaney
As a hobbyist, I was hesitant to invest in expensive CAD software, but CADHOBBY IntelliCAD has proven to be a cost-effective alternative that delivers the same quality and performance.
https://www.cadhobby.com/
Leave a comment
You may also like, guide to understanding sail rig types (with pictures).
There are a lot of different sail rig types and it can be difficult to remember what's what. So I've come up with a system. Let me explain it in this article.

The Ultimate Guide to Sail Types and Rigs (with Pictures)

The Illustrated Guide To Boat Hull Types (11 Examples)

How To Live On a Boat For Free: How I'd Do It

How To Live on a Sailboat: Consider These 5 Things
Own your first boat within a year on any budget.
A sailboat doesn't have to be expensive if you know what you're doing. If you want to learn how to make your sailing dream reality within a year, leave your email and I'll send you free updates . I don't like spam - I will only send helpful content.
Ready to Own Your First Boat?
Just tell us the best email address to send your tips to:
Sailboat Rigging: A Guide to Achieve Smooth Sailing Bliss
Understanding sailboat rigging.
Sailboat rigging is the process of setting up the sails, ropes, and associated components of a sailboat to enable it to harness the power of the wind and navigate the waters efficiently. It is a crucial aspect of sailing that directly impacts the performance, safety, and overall experience on the water.
Proper sailboat rigging involves a combination of knowledge, skill, and attention to detail. Each component plays a specific role and must be correctly installed, adjusted, and maintained to ensure optimal performance. Understanding the fundamentals of sailboat rigging is essential for both seasoned sailors and beginners alike.
The Importance of Proper Sailboat Rigging
Proper sailboat rigging is essential for several reasons. Firstly, it directly affects the performance of your sailboat. Well-rigged sails and ropes allow you to harness the wind effectively, resulting in better speed, maneuverability, and control. On the other hand, poorly rigged sails can lead to reduced performance and frustrating sailing experiences.
Secondly, sailboat rigging is crucial for safety. A well-rigged sailboat ensures that the mast, rigging components, and sails are secure and can withstand the forces of wind and waves. It minimizes the risk of equipment failure, such as broken masts or snapped rigging, which can lead to accidents or stranded situations on the water.
Lastly, proper sailboat rigging enhances the overall enjoyment of sailing. When your rigging is set up correctly, you can focus on the beauty of the sea, the thrill of the wind, and the joy of gliding through the water. It allows you to fully immerse yourself in the experience and achieve a state of sailing bliss.
Types of Sailboat Rigging Systems
Sailboat rigging systems can vary depending on the type of sailboat and its intended use. The two main types of rigging systems are the masthead rig and the fractional rig.
The masthead rig is a traditional rigging configuration where the mast extends to the top of the sailboat, and the forestay is attached near the masthead. This rigging system is commonly found on cruising sailboats and provides excellent downwind performance and stability.
On the other hand, the fractional rig is a more modern design where the forestay is attached at a point below the masthead, typically around two-thirds of the way up the mast. This configuration is often used in racing sailboats as it allows for better upwind performance and increased maneuverability.
Understanding the different rigging systems is essential as it influences the setup and tuning of the sailboat rigging. Each system requires specific adjustments and considerations to achieve optimal performance.
Essential Components of Sailboat Rigging
Sailboat rigging consists of several essential components that work together to support the mast, control the shape of the sails, and enable efficient sail handling. These components include the mast, shrouds, stays, and halyards.
The mast is the vertical structure that supports the sails and rigging. It is typically made of aluminum or carbon fiber and must be strong, lightweight, and properly secured to the sailboat. The mast is connected to the hull through a step at the base, which distributes the loads from the rigging throughout the boat.
Shrouds and stays are the primary supporting elements that hold the mast in place and provide lateral and fore-aft stability. Shrouds are attached to the mast at various points and extend out to the sides of the sailboat, while stays run from the mast to the bow or stern of the boat. These components are typically made of stainless steel wire or synthetic fibers and must be tensioned correctly to maintain the integrity of the rig.
Halyards are ropes or wires used to raise and lower the sails. They run from the masthead to the sail and allow for the adjustment of sail shape and size. Proper halyard tension is crucial for controlling the shape of the sails and optimizing their performance in different wind conditions.
Each of these components plays a vital role in sailboat rigging, and understanding their functions and proper installation is key to achieving smooth sailing.
Inspecting and Maintaining Sailboat Rigging
Regular inspection and maintenance of sailboat rigging are essential to ensure its longevity, reliability, and safety. Before setting sail, it is crucial to conduct a thorough visual inspection of all rigging components.
Start by checking the mast for any signs of damage, such as cracks, corrosion, or loose fittings. Inspect the shrouds and stays for any broken strands, kinks, or signs of wear. Pay close attention to the connections between the rigging components and the mast, ensuring they are secure and free from any potential issues.
Next, inspect the halyards for fraying, excessive wear, or damage. Check the blocks, cleats, and winches associated with the halyards to ensure they are functioning properly and are appropriately lubricated.
Additionally, check the tension of the rigging by gently pushing on the shrouds and stays. They should have a slight amount of tension, but not be overly loose or overly tight. If any adjustments are needed, refer to the sailboat’s rigging guide or consult with a professional rigger.
Regular maintenance tasks for sailboat rigging include cleaning, lubricating, and replacing worn-out components. Cleaning the rigging with fresh water and mild soap helps remove salt and dirt buildup, preventing corrosion and extending the lifespan of the rigging. Lubricating moving parts, such as blocks and turnbuckles, with appropriate marine-grade lubricants helps ensure smooth operation and prevents rust.
It is important to note that if any significant damage or wear is detected during inspection, it is best to consult with a professional rigger for further assessment and repair.
Common Sailboat Rigging Problems and How to Troubleshoot Them
Despite careful inspection and maintenance, sailboat rigging problems can still occur. Understanding common issues and their troubleshooting techniques is essential for every sailor.
One common problem is rigging stretch, which can lead to reduced performance and compromised safety. Rigging stretch occurs when the shrouds and stays elongate over time, causing the mast to lose its proper shape and tension. To address this issue, adjust the rigging tension using the turnbuckles or tensioning devices provided. Refer to the sailboat’s rigging guide for specific instructions on proper tensioning.
Another common problem is rigging fatigue, especially in older sailboats or those exposed to harsh conditions. Rigging fatigue is characterized by broken strands, kinks, or signs of wear. If fatigue is detected, it is crucial to replace the affected rigging components promptly to avoid potential equipment failure. Consult with a professional rigger to ensure proper replacement and rigging setup.
Improper sail trim is another issue that can affect the performance of your sailboat. When the sails are not trimmed correctly, they can become overpowered or lose their shape, resulting in reduced speed and control. Experiment with different sail trim settings, such as halyard tension, sheet tension, and traveler position, to achieve the optimal sail shape for different wind conditions. Practice and experience will help you develop a keen eye for proper sail trim.
Upgrading and Optimizing Sailboat Rigging
Upgrading and optimizing your sailboat rigging can significantly improve performance, safety, and overall sailing experience. There are several areas where upgrades can be considered, depending on your sailboat’s design and intended use.
One common upgrade is replacing wire rigging with synthetic rigging, such as Dyneema or Spectra. Synthetic rigging offers several advantages, including reduced weight, increased strength, and lower maintenance requirements. However, it is crucial to consult with a professional rigger to ensure proper installation and tuning of synthetic rigging.
Another upgrade option is replacing older blocks and pulleys with modern, low-friction alternatives. High-quality blocks with ball bearings or roller bearings can significantly reduce friction and make sail handling smoother and more efficient. Upgrading winches and cleats to larger or more powerful models can also enhance control and ease of use.
Additionally, optimizing your sailboat rigging for specific sailing conditions can improve performance. This may involve adjusting the rig tension, changing the position of the mast rake, or experimenting with different sail combinations. Consulting with experienced sailors or professional riggers can provide valuable insights and recommendations for optimizing your rigging setup.
Hiring a Professional Rigger for Sailboat Rigging
While basic sailboat rigging tasks can be performed by experienced sailors, complex rigging projects or major upgrades are best left to professional riggers. Hiring a professional rigger ensures that the rigging is installed, adjusted, and maintained correctly, minimizing the risk of equipment failure and maximizing the performance of your sailboat.
Professional riggers have the knowledge, expertise, and specialized tools to handle various rigging projects, from simple replacements to complete rig overhauls. They can assess the condition of your current rigging, recommend necessary upgrades or repairs, and provide valuable advice on rig tuning and optimization.
When hiring a professional rigger, it is essential to do thorough research and choose a reputable and experienced individual or company. Seek recommendations from fellow sailors, check online reviews, and inquire about their certifications and qualifications. A reliable professional rigger will work closely with you to understand your sailboat’s specific requirements and ensure that the rigging is tailored to your needs.
Safety Considerations for Sailboat Rigging
Safety should always be a top priority when it comes to sailboat rigging. Here are some important safety considerations to keep in mind:
- Always wear appropriate personal protective equipment, such as a life jacket and harness, when working on the sailboat rigging, especially at heights or in challenging conditions.
- Use proper lifting techniques and equipment when handling heavy rigging components to prevent injuries.
- Be mindful of your surroundings and the potential hazards associated with sailboat rigging, such as moving parts, sharp edges, or overhead obstructions.
- Regularly inspect and maintain safety equipment, such as lifelines and jacklines, to ensure they are in good condition and properly secured.
- Follow manufacturer guidelines and recommended practices for rigging installation, adjustment, and maintenance.
- Stay updated on current safety standards and regulations related to sailboat rigging.
By prioritizing safety and adhering to these considerations, you can enjoy smooth sailing adventures with peace of mind.
Conclusion: Enjoying Smooth Sailing with Well-Maintained Rigging
Mastering the art of sailboat rigging opens up a world of endless possibilities and pure sailing bliss. By understanding the different types of rigging systems, essential components, and proper maintenance techniques, you can achieve optimal performance, safety, and enjoyment on the water.
Regular inspection, maintenance, and troubleshooting of sailboat rigging are essential to ensure its longevity and reliability. Upgrading and optimizing your rigging can further enhance your sailing experience and unlock new levels of performance.
While basic rigging tasks can be performed by sailors, complex projects or major upgrades are best left to professional riggers. Hiring a reputable and experienced rigger ensures that your rigging is expertly installed, adjusted, and maintained.
Remember to prioritize safety at all times and follow recommended practices to minimize risks associated with sailboat rigging.
So, set sail, embrace the wind, and experience the bliss of smooth sailing with well-maintained sailboat rigging. May your adventures on the water be filled with joy, excitement, and the sheer beauty of the sea.
Rigging - Turnbuckles , Toggles , Wire & Rod Components, Norseman Cones & Fittings.
Furling Systems - Systems and replacement parts from a variety of Manufacturers.
Traveller Systems - Adjustable Track Systems for Mainsheet and other applications.
Sailboat Hardware - Rope Clutches, Blocks, Track & Fittings, Winches, etc.
Custom Parts - Custom items, or those out of production or otherwise unavailable.
Consultation - Special projects, research, or information not detailed on-site.
Copyright 1996 - 2024, Rig-Rite, Inc. Disclaimer Web Site maintained by The WATER Group
No products in the cart.
Sailing Ellidah is supported by our readers. Buying through our links may earn us an affiliate commission at no extra cost to you.
The Running Rigging On A Sailboat Explained
The running rigging on a sailboat consists of all the lines used to hoist, lower, and control the sails and sailing equipment. These lines usually have different colors and patterns to easily identify their function and location on the vessel.
Looking at the spaghetti of lines with different colors and patterns might get your head spinning. But don’t worry, it is actually pretty simple. Each line on a sailboat has a function, and you’ll often find labels describing them in the cockpit and on the mast.
In this guide, I’ll walk you through the functions of every component of the running rigging. We’ll also look at the hardware we use to operate it and get up to speed on some of the terminology.
The difference between standing rigging and running rigging
Sometimes things can get confusing as some of our nautical terms are used for multiple items depending on the context. Let me clarify just briefly:
The rig or rigging on a sailboat is a common term for two parts, the standing , and the running rigging.
- The standing rigging consists of wires supporting the mast on a sailboat and reinforcing the spars from the force of the sails when sailing. Check out my guide on standing rigging here!
- The running rigging consists of the halyards, sheets, and lines we use to hoist, lower, operate and control the sails on a sailboat which we will explore in this guide.
The components of the running rigging
Knowing the running rigging is an essential part of sailing, whether you are sailing a cruising boat or crewing on a large yacht. Different types of sailing vessels have different amounts of running rigging.
For example, a sloop rig has fewer lines than a ketch, which has multiple masts and requires a separate halyard, outhaul, and sheet for its mizzen sail. Similarly, a cutter rig needs another halyard and extra sheets for its additional headsail.
You can dive deeper and read more about Sloop rigs, Ketch Rigs, Cutter rigs, and many others here .
Take a look at this sailboat rigging diagram:
Lines are a type of rope with a smooth surface that works well on winches found on sailboats. They come in various styles and sizes and have different stretch capabilities.
Dyneema and other synthetic fibers have ultra-high tensile strength and low stretch. These high-performance lines last a long time, and I highly recommend them as a cruiser using them for my halyards.
A halyard is a line used to raise and lower the sail. It runs from the head of the sail to the masthead through a block and continues down to the deck. Running the halyard back to the cockpit is common, but many prefer to leave it on the mast.
Fun fact: Old traditional sailboats sometimes used a stainless steel wire attached to the head of the sail instead of a line!
Jib, Genoa, and Staysail Halyards
The halyard for the headsail is run through a block in front of the masthead. If your boat has a staysail, it needs a separate halyard. These lines are primarily untouched on vessels with a furling system except when you pack the sail away or back up. Commonly referred to as the jib halyard.
Spinnaker Halyard
A spinnaker halyard is basically the same as the main halyard but used to hoist and lower the spinnaker, gennaker, or parasailor.
The spinnaker halyard is also excellent for climbing up the front of the mast, hoisting the dinghy on deck, lifting the outboard, and many other things.
A sheet is a line you use to control and trim a sail to the angle of the wind . The mainsheet controls the angle of the mainsail and is attached between the boom and the mainsheet traveler . The two headsail sheets are connected to the sail’s clew (lower aft corner) and run back to each side of the cockpit.
These are control lines used to adjust the angle and tension of the sail. It is also the line used to unfurl a headsail on a furling system. Depending on what sail you are referring to, this can be the Genoa sheet , the Jib sheet , the Gennaker sheet , etc.
The outhaul is a line attached to the clew of the mainsail and used to adjust the foot tension. It works runs from the mainsail clew to the end of the boom and back to the mast. In many cases, back to the cockpit. On a boat with in-mast furling , this is the line you use to pull the sail out of the mast.
Topping lift
The topping lift is a line attached to the boom’s end and runs through the masthead and down to the deck or cockpit. It lifts and holds the boom and functions well as a spare main halyard. Some types of sailboat rigging don’t use a topping lift for their boom but a boom vang instead. Others have both!
Topping lifts can also be used to lift other spars.
A downhaul is a line used to lower with and typically used to haul the mainsail down when reefing and lowering the spinnaker and whisker poles. The downhaul can also control the tack of an asymmetrical spinnaker, gennaker, or parasailor.
Tweaker and Barber Haul
A tweaker is a line, often elastic, attached to the sheet of a headsail and used to fine-tune the tension on the sheet.
Barber haul
A barber haul is a line attached to a headsail’s sheet to adjust the sheeting angle to the wind. It is often used to pull the clew further toward the center or outboard than the cars allow.
Boom Preventer
A boom preventer is a line attached to the boom’s end when sailing off the wind. Its function is to hold the spar in place and prevent it from swinging wildly.
If the boat were to get an accidental gybe, it could cause serious damage to the rigging or even harm people on board. It is important for the rigger to be cautious when setting up the boom preventer.
Running Backstay
Running backstays is similar to a normal backstay but uses a line instead of a hydraulic tensioner. Some rigs have additional check stays or runners as well.
Bonus tip: Reefing
The term reefing is used when reducing the effective sailing area exposed to the wind of a given sail. Headsails are usually reefed by partially furling them in, and they often have marks for what we refer to as 1st, 2nd, and 3rd reefs.
The mainsail is reefed similarly with an in-mast furling or in-boom furling system.
On a traditional mast, we use a system called slab reefing. The system has reefing lines running through the boom to reinforced points on the luff and leech, allowing you to pull the sail down to the boom and effectively reduce the sail area.
Having at least two reefing points in the mainsail is normal, but most cruising sailboats have 3. The 3rd is used for the heaviest conditions, giving you only a tiny bit of sail area exposed to the wind.
You want to reef your sails before the wind increases to a point where your boat gets overpowered.
It is essential to practice your reefing technique . You will find yourself in situations with rapidly increasing winds where you need to reduce your sails quickly.
Rule of thumb: If you think setting a reef might be a good idea, do it.
Shaking a reef is the term used when we sail with a reefed sail and want to increase the sail area back to full.
Hardware used for sail handling and the running rigging
Furling system.
Most sailboats have their headsail on a furling system. A furling system is a tube that runs along the forestay from the bottom furler drum to the masthead swivel.
This system allows you to roll the headsail around the forestay, making furling the sail in and out accessible. It is also convenient when reefing the sail when the wind picks up, as you can easily do this from the safety of the cockpit. These furling systems come in manual versions and electric versions.
In-mast furling
In-mast furling is a system that rolls the mainsail in and out of the mast. To unfurl the mainsail, we use the outhaul .
In-boom furling
In-boom furling is a system that rolls the mainsail in and out of the boom. This system has been costly and has mostly been seen on big yachts earlier. They are becoming more affordable and common on smaller boats, though. To unfurl this setup, we use the main halyard.
A Stack pack is also called a Lazy Bag or Lazy Pack. It is a bag with a zip attached to the boom where the mainsail is stored when unused. It protects the mainsail from UV rays from the sun and weather elements. It is a very nice and tidy way to store the mainsail and reefing lines if you don’t have in-mast or in-boom furling.
Lazy Jacks is a system of lines running from the stack pack to the mast. The Lazy Jacks guide the mainsail up and down from the Stack Pack and prevent it from falling down on the deck. It is also possible to rig Lazy Jacks without a Stack Pack.
A block is a pulley with a sheave wheel. Blocks are used to change the direction of a pull on a line or rope and give a mechanical advantage. They have many uses, especially onboard sailboats.
A winch is a metal drum that gives you a mechanical advantage to control and tighten lines. These can be operated by turning a rope around it and pulling manually or by a winch handle to get more force. Most modern winches are self-tailing, which means they lock the line on so you can winch the line without holding on to it. Some boats even have electrical winches operated by a button.
Mainsheet Traveler
The mainsheet traveler is a horizontal track that the mainsheet is attached to through a series of blocks. The traveler enables you to adjust and lock the boom at an angle and also plays a critical part in trimming the mainsail.
Most cruising sailboats have their traveler attached to the top of the coachroof in front of the spray hood. A racing boat typically has the traveler in the cockpit near the helm to give the helmsman better control over the mainsheet.
The cars are basically a pulley or block attached to a track on the port and starboard deck that your headsail sheets run through. Cars are used to control the angle of the sheet between the clew and the deck. The cars are handy when you trim the sail to set the right balance of tension between the foot and leech, depending on your point of sail.
The jammer is used to lock a line in place. Most sailboats use these for locking the halyards, mainsheet, outhaul, reef lines, traveler lines, boom vang lines, etc. You can pull or winch a line through a closed jammer, but it won’t run away if you let go of it unless you open the lock.
As I explained earlier, it is normal to have most or all of the lines led back to the cockpit, and they are usually run through a series of jammers.
The jammers are often labeled with the name of the line it locks, which makes it easier to remember which line goes where.
Spinnaker Pole
A spinnaker pole is a spar used to wing out a headsail when sailing off the wind, particularly the spinnaker. The spinnaker pole should have the same length as the distance between the mast and the forestay measured along the deck. We use a fore and aft guy and the pole’s topping lift to rig a pole correctly.
The rigging varies depending on the layout of the boat, but it usually looks like this:
- One line runs from the bow to the end of the pole.
- An aft line runs from near the stern to the end of the pole.
- A topping lift is used to raise and lower the pole.
Whisker Pole
A whisker pole is similar to the spinnaker pole and is rigged similarly. It is typically built lighter and attached to a track on the mast. These can be found in fixed lengths or adjustable lengths. Ideally, the length should be the same as the foot of the headsail you intend to pole out.
Boom Vang/Rod Kicker
The Boom Vang has a few different names. Rod-kicker, kicking strap, or kicker. It is used to tension the boom downwards. When you are sailing downwind and have the boom far out, the mainsheet won’t pull the boom down as much as inboard, and you can then use the vang to adjust the twist and shape of the mainsail.
Mooring line
A mooring line is a traditional rope lead through a fairlead to the vessel’s cleat and a mooring buoy, key, or pontoon.
Final words
Congratulations! By now, you should have a much better understanding of how the running rig on a sailboat functions. We’ve covered the different lines, their purpose, and the hardware used to operate them. I hope you’ve enjoyed this guide and learned something new.
Now it’s time to take what you’ve learned and put it into practice by getting out on the water, setting sail, and getting hands-on experience with the lines.
Or you can continue to my following guide and learn more about the different types of sails .
Sharing is caring!
Skipper, Electrician and ROV Pilot
Robin is the founder and owner of Sailing Ellidah and has been living on his sailboat since 2019. He is currently on a journey to sail around the world and is passionate about writing his story and helpful content to inspire others who share his interest in sailing.
Leave a Reply Cancel reply
Your email address will not be published. Required fields are marked *
Standing Rigging on a Sailboat: Everything You Need to Know
by Emma Sullivan | Aug 14, 2023 | Sailboat Gear and Equipment

Short answer standing rigging on a sailboat:
Standing rigging on a sailboat refers to fixed lines and cables that support the mast and help control its movement. It includes components like shrouds, stays, and forestays. These essential elements ensure stability and proper sail trim while underway.
Understanding the Importance of Standing Rigging on a Sailboat
Sailboats are marvels of engineering and ingenuity, capable of harnessing the power of the wind to transport us across vast oceans and explore far-flung destinations. As sailors, we often focus on the majestic sails, sleek hull designs, and cutting-edge navigation technology that make these vessels so awe-inspiring. However, there is one crucial component that sometimes goes unnoticed but plays a vital role in keeping our sailboats safe and seaworthy – the standing rigging.
The standing rigging refers to the network of wires and cables that support the mast and allow it to bear the tremendous loads exerted by the sails. It acts as the backbone of a sailboat’s rig , providing stability, strength, and balance. Understanding its importance is crucial for anyone who sets foot on a vessel with dreams of cruising or competing.
Firstly, let’s examine why standing rigging is essential for sailboat safety. Imagine being out at sea when suddenly your mast collapses due to faulty rigging . This nightmare scenario can easily be avoided by regularly inspecting your boat’s standing rigging for signs of wear or fatigue. Frayed wires or corroded fittings could weaken the entire structure, making it susceptible to failure under heavy winds or rough seas . By ensuring your standing rigging is in good shape through routine maintenance and inspections by professionals, you can significantly reduce this risk and ensure your own safety onboard.
Moreover, properly tensioned standing rigging is vital for maintaining optimum sailing performance. The tension in each wire within the standing rig allows for efficient transfer of power from sails to keel through mast compression. If your standing rigging is too loose or too tight, it can negatively impact your sail trim and overall boat handling capabilities. A well-tuned rig will provide better control over sail shape adjustments necessary for different wind conditions while maximizing speed potential – something every sailor strives for!
Beyond safety and performance, understanding the importance of standing rigging requires recognizing its impact on the overall balance of your sailboat. The rigging plays a crucial role in maintaining the boat’s equilibrium by counteracting the forces exerted by the sails. Without proper tension and alignment of the standing rig, a sailboat may become unbalanced, resulting in compromised stability. This imbalance can make steering more challenging, increase the risk of broaching, or even lead to capsizing in extreme cases. Therefore, paying close attention to your standing rigging ensures that your boat remains stable and enjoyable to sail.
Lastly, it is worth mentioning that investing in high-quality materials and professional rigging services will prove cost-effective in the long run . While it may be tempting to cut corners or delay necessary upgrades or maintenance, neglecting your standing rigging will only result in more significant expenses down the line. Inadequate rig tension can lead to excessive wear on other components such as sails or mast fittings, increasing their replacement frequency and cost.
In conclusion, understanding and valuing the importance of standing rigging on a sailboat is essential for sailors of all levels. It directly impacts safety at sea, enhances sailing performance, maintains balance and stability, ultimately contributing to an enjoyable experience on board. So next time you set foot on a sailboat or contemplate owning one yourself, don’t forget to give due attention to this often overlooked but vital aspect – your boat’s standing rigging!
Step-by-Step Guide: How to Inspect and Maintain Standing Rigging on a Sailboat
Title: Cracking the Code: A Step-by-Step Guide to Inspecting and Maintaining Standing Rigging on a Sailboat
Introduction: Ahoy, fellow sailors! Whether you’re an experienced seafarer or a sailing enthusiast ready to cast off, understanding how to inspect and maintain your sailboat’s standing rigging is crucial for smooth voyages on the high seas. In this detailed guide, we will unravel the mysteries of standing rigging examination and upkeep, enabling you to confidently navigate through any sailing adventure. So hoist your mainsail, secure your halyards, and let’s dive into the world of rigging maintenance !
1. Understanding Standing Rigging: Before we embark on our inspection journey, let’s clarify what exactly constitutes standing rigging. Embracing technical jargon like professionals often do, this refers to those sturdy wire cables that provide support to the mast and keep everything in place as your vessel slices through the waves. These cables are under constant stress from wind pressure and oceanic forces; therefore, routine inspections are vital.
2. Assemble Your Inspection Arsenal: Essential tools at hand? Check! Embark upon your quest equipped with binoculars (to assess hard-to-reach areas), a multimeter (for electrical testing), tape measure (we love accuracy!), a notepad (to document findings), lubricant spray can (to combat rust), and some good ol’ elbow grease.
3. Visual Inspection Bonanza: Begin by examining every component of your standing rigging thoroughly. Start from bow to stern – nothing should elude your gaze! Look out for signs of fraying wires, corrosion spots – identified by those elusive green spots -, improperly tightened connections or turnbuckles hanging loose like unfortunate pirate hooks. Pay close attention when checking shrouds and stays around their terminal points.
4. Tension Testing Zen: Employing a multimeter capable of measuring tension is vital for this next step. Like tuning an instrument, each cable must be correctly tensioned to ensure optimal performance . Begin at the base of your mast, working your way up one stay or shroud after another, carefully noting the readings. Adjust tensions as needed, using the manufacturer’s guidelines as your North Star.
5. Get Into Detailing Mode: To maintain a seaworthy craft, meticulousness is key! Start by cleaning every inch of standing rigging with fresh water and mild soap to rid it of salt crystals and other corrosive agents that Mother Nature throws our way. Once dry, inspect terminals for any hidden corrosion potential. Remember to apply lubrication around all fittings where metal meets metal – preserving their longevity on this salty adventure.
6. Diving into DIY Replacements: Sometimes, despite our best efforts, some elements may need replacement eventually. Worn-out or damaged fittings demand immediate action! While there are professionals who can lend a helping hand, attempting minor repairs yourself allows you to save time and money in the long run. Just remember safety first – secure your vessel properly before venturing aloft!
7. Periodic Inspections are Pathway to Peace: As the seasons go by and maritime miles accumulate beneath your hull’s keel, remember that rigging inspections should become regular occurrences in your life as a sailor. Incorporating these tasks into your annual maintenance routine will keep you up-to-date on the health of your standing rigging and reduce unexpected surprises during those thrilling offshore adventures.
Conclusion: With this comprehensive guide in tow, inspecting and maintaining standing rigging on a sailboat will no longer bewilder even the most landlocked soul. Armed with knowledge and armed-still-with tools-of-the-trade in hand – embark upon every voyage knowing that smooth sailing is within reach! Remember comrades: vigilance coupled with clever maintenance ensures many marvelous voyages atop Neptune’s watery kingdom!
The Key Components of Standing Rigging on a Sailboat Explained
When it comes to sailing, understanding the key components of standing rigging is crucial. This system of cables and wires plays a vital role in keeping a sailboat’s mast upright and ensuring the safety of everyone on board. So, let’s dive into these essential elements to unravel their importance and how they work together seamlessly.
1. Mast: The mast, often referred to as the backbone of a sailboat, is a tall vertical structure that supports the sails. It provides stability and acts as an attachment point for various components of the standing rigging.
2. Shrouds: Shrouds are strong steel or synthetic cables that extend from the top of the mast down to its sides, creating lateral support. Usually arranged in pairs, they help prevent excessive side-to-side movement and maintain proper alignment while under sail or at anchor .
3. Forestay: Situated at the front of the mast, directly opposite to where you stand while steering, is the forestay. This forward-facing cable keeps the mast from tipping backward due to wind pressure against the sails when sailing upwind. It ensures that your sailboat remains balanced even in gusty conditions.
4. Backstay: The backstay is another essential component that counterbalances the force exerted by the forestay on your sailboat’s mast when sailing upwind or under heavy loads. Most commonly attached at or near the highest part of your boat ‘s stern (aft end), this cable prevents undue bending or breaking caused by fore-aft pressure.
5. Tangs and Turnbuckles: These small yet mighty components connect shrouds and stays to both the hull and mast with ease and allow for easy adjustment and fine-tuning of tensioning within your standing rigging system. Tangs are fittings attached directly to masts or other structural components using bolts or screws, while turnbuckles provide threaded connections allowing for precise adjustments.
6. Spreaders: Installed horizontally on either side of the mast, spreaders play a crucial role in maintaining the integrity and proper angle of shrouds. They prevent excessive bending or twisting forces by creating a wider stance for the shrouds, ensuring even stress distribution.
7. Standing Rigging Lifelines: These lines, typically made of stainless steel wires or synthetic materials like Dyneema, serve as an additional safety measure by helping to prevent crew members from falling overboard while working on deck. Strategically placed along the sides of the sailboat, they offer stability and support during maneuvering or rough seas.
Understanding these key components is vital not only for sailboat owners but also for anyone interested in sailing . Proper maintenance and routine inspections are essential to ensure optimal performance and mitigate any risks associated with deficiencies within your standing rigging system.
So next time you set sail or find yourself gazing out at a beautifully rigged sailboat, take a moment to appreciate the intricate balance and coordination that these key components provide. It’s truly a remarkable collaboration between technology, engineering, and Mother Nature herself – allowing us to glide through the waves with grace and elegance.
Common FAQs about Standing Rigging on a Sailboats Answered
Introduction: Standing rigging is an essential component of sailboats, playing a crucial role in supporting the mast and ensuring optimal performance on the water. However, many sailors are often perplexed by various aspects of standing rigging, leading to a multitude of frequently asked questions. In this comprehensive blog post, we aim to answer some of the most common FAQs about standing rigging on sailboats, providing detailed and professional insights while adding a touch of wit and cleverness.
1. What exactly is standing rigging? Ah, standing rigging – the unsung hero of every sailboat! Standing rigging refers to all the fixed elements that support the mast in an upright position. These elements typically comprise stainless steel wires called shrouds and stays along with associated fittings like turnbuckles and tangs. Think of it as the sturdy backbone that keeps your mast from taking an inconvenient swim!
2. When should I inspect my standing rigging? Regular inspections are crucial for maintaining a safe sailing experience. We recommend inspecting your standing rigging at least once a year or before embarking on any long voyage. Additionally, keep an eye out for any signs indicating potential problems such as excessive rust, wire deformation, or frayed cables. Remember: It’s better to be safe on land than sorry at sea !
3. How do I know when it’s time to replace my standing rigging? While rigorous inspections can highlight any potential issues, there are certain indicators that suggest your standing rigging might need replacement sooner than later:
a) Age: As a general rule of thumb, consider replacing your standing rigging after 10-15 years. b) Visible damage: If you spot visible signs of wear and tear like broken strands or corroded fittings, it’s time for new gear. c) Elongation: In some cases, constant strain can cause wire elongation over time – if this exceeds manufacturer recommendations or 5%, it’s replacement time. d) Performance decline: Have you noticed reduced boat performance or excessive mast movement? Outdated rigging may be the culprit.
4. Can I inspect and replace standing rigging myself? Inspecting your own standing rigging is indeed possible if you possess adequate knowledge and experience. However, replacing it yourself requires specific expertise, so unless you’re a seasoned sailor with professional background in rigging, we highly recommend entrusting this task to certified riggers who can ensure everything is done correctly. After all, your safety should never be compromised!
5. How much does standing rigging replacement cost? Ah, the golden question! While costs can vary depending on factors like the size of your boat, the material used for new rigging (stainless steel or synthetic fibers), and labor expenses – expect to invest anywhere from a few thousand to tens of thousands of dollars for a complete standing rigging replacement. Remember that proper maintenance upfront can help extend the lifespan of your rigging and save you some precious doubloons!
6. Can I switch from stainless steel to synthetic fibers for my standing rigging? Absolutely! Synthetic fiber alternatives like Dyneema® have gained popularity due to their lighter weight, high strength-to-weight ratio, and lower corrosion risk compared to stainless steel. These materials offer enhanced performance capabilities and are a valid consideration when upgrading or replacing your standing rigging system entirely.
7. What’s the typical lifespan of synthetic fiber standing rigging? While longevity depends on various factors such as usage patterns and environmental conditions, well-maintained synthetic fiber standing rigging systems generally last around 10-12 years before requiring replacement – comparable to their stainless steel counterparts.
Conclusion: Standing rigging on sailboats may seem mysterious at first glance, but by answering these common FAQs with informative yet witty explanations, we hope to shed light on this crucial sailing component while bringing a smile to our readers’ faces. Remember, understanding and properly maintaining your standing rigging will ensure safe and enjoyable voyages for years to come. So, stay rig-ready and sail on!
Upgrading Your Standing Rigging: What You Need to Know
In the world of sailing, upgrading your standing rigging is a vital decision that can greatly impact your vessel’s performance and overall safety. The standing rigging, which includes the various wires and cables that hold the mast upright, plays an essential role in ensuring stability and proper sail control. In this blog post, we will delve into everything you need to know about this crucial aspect of sailing.
Firstly, why should you consider upgrading your standing rigging? Over time, wear and tear can take a toll on this crucial component of your boat . Exposure to harsh weather conditions, continuous strain from strong winds or heavy sails, and even galvanic corrosion can all lead to the degradation of your rigging. As a responsible sailor, it is imperative to regularly assess the condition of your standing rigging and determine when an upgrade is necessary.
When it comes to upgrading your standing rigging, there are several key factors you need to consider. One essential aspect is choosing the right materials for your new rigging. Traditionally, stainless steel has been widely used due to its durability and strength. However, recent advancements in composite materials have opened up new possibilities for sailors. High-tech fibers like carbon or aramid offer impressive strength-to-weight ratios while being less susceptible to corrosion than steel.
It is important to consult with an experienced rigger or marine engineer who can guide you in selecting the most suitable material for your specific sailing activities and vessel type. They will take into account factors such as boat size, intended use (racing or cruising), budget constraints, and local climate conditions before recommending the best material for your standing rigging upgrade.
Another crucial consideration in upgrading your standing rigging is determining whether you want to switch from wire rope-based rigging to rod-based systems or composite products. Rods are known for their superior stiffness and excellent fatigue resistance but may require specialized equipment for assembly and maintenance. Composite systems typically combine carbon fiber or fiberglass with a resin matrix, offering versatility and customization options.
Furthermore, when planning to upgrade your standing rigging, it’s essential to conduct a thorough inspection of the mast and fittings. Any signs of wear and tear, cracks, or deformations in the mast or associated hardware should not be overlooked. Reinforcing these components may be necessary before installing new rigging to ensure optimal safety and performance .
During the installation process itself, meticulous attention to detail is crucial. Proper tensioning and alignment of the rigging are vital for achieving optimal sailing performance . Consulting with professionals in the field will ensure that you avoid common pitfalls such as over-tensioning or under-tensioning your rigging, which can potentially compromise its strength and longevity.
Upgrading your standing rigging not only ensures a safer sailing experience but also presents an opportunity to enhance your vessel’s performance capabilities. By optimizing sail control and reducing overall weight aloft, you can achieve faster speeds and improved maneuverability on the water.
In conclusion, upgrading your standing rigging is an investment that should never be taken lightly. It requires careful consideration of multiple factors such as materials, boat specifications, and local conditions. Seeking expert advice throughout this process will help you make informed decisions that align with your sailing goals while ensuring maximum safety and enjoyment on the open seas . So don’t hesitate – take charge of your vessel’s integrity today by embarking on an exhilarating upgrade journey!
Troubleshooting Common Issues with Standing Rigging on a Sailboat
Title: Navigating the High Seas of Standing Rigging: Deconstructing Common Sailboat Troubles
Introduction: Setting sail on a beautiful day, wind in your hair, and salt in the air – there’s nothing quite like the freedom of sailing. But as any experienced sailor knows, with great freedom comes great responsibility; one must always be prepared to tackle common issues that can arise with standing rigging on a sailboat. In this comprehensive guide, we’ll be your navigational chart through the murky waters of troubleshooting these problems.
1. The Tale of Loose Wires: Picture this: you’re out at sea, enjoying the blissful embrace of nature when suddenly you notice an unsettling amount of slack in your boat’s rigging wires. As panic sets in, take a deep breath and remember that loose wires are not an uncommon predicament. Before jumping ship into despair, consider inspecting your turnbuckles for any signs of wear or corrosion. Often, a simple tightening or lubing can solve the issue and restore equilibrium to your rigging system.
2. Strange Groans from Your Mast: As the wind howls through your sails, does it feel like someone is playing an eerie tune on your mast? Fear not! These disconcerting noises can typically be traced back to halyards rubbing against sheaves or pulleys. Be diligent about inspecting these components and ensuring they are properly aligned and lubricated.
3. The Mystery of Shaky Connections: Imagine cruising along peacefully when you notice unsettling vibrations emanating from various connections within your standing rigging system – another nuisance faced by many sailors. Remember to check bolts and fittings for tightness and wear regularly; sometimes a mere tightening can spare you from enduring an inconvenient wobble during every voyage.
4. Elusive Corrosion Castaways: While corrosion may seem like a mythical creature lurking under layers of saltwater incantations, it sadly isn’t. The corrosive effects of the marine environment can take their toll on your rigging, leading to weakened and compromised wires. To avoid this encroaching villain, regularly inspect your rigging for signs of corrosion, paying extra attention to any dissimilar metals in contact with each other. When identified early, you can tackle this issue head-on through diligent cleaning and application of protective coatings.
5. That Perplexing Sag: No one wants a saggy rig! If you notice an unacceptable amount of slack or downward curve in your wire stays or shrouds when under load, it’s time to put on your problem-solving hat. Begin by ensuring that all turnbuckles are suitably tensioned and that the mast rake is properly adjusted. A little fine-tuning may be all it takes to regain the tautness required for smooth sailing .
6. Stay Seals Against Abrasion: Do you find your stay seals battling against wear and tear? It might be time to beef up their defenses! Insulate vulnerable areas with appropriately sized rubber tubing or durable tape like self-amalgamating tape. This extra layer of protection will help prevent damage from chafing lines or abrasive surfaces.
Conclusion: As sailboat enthusiasts know, standing rigging issues can arise unexpectedly and interrupt even the most idyllic voyages at sea. By keeping these troubleshooting considerations in mind while setting sail , you’ll have a handy compass to lead you through the challenges that come with maintaining a well-maintained rig. So next time the wind whispers trouble into your ears while adrift on your beautiful vessel, fear not – armed with knowledge and wit, you’ll conquer those common issues with ease and go back to enjoying the sublime freedom provided by sailing adventures!
Recent Posts
- Approaching a Mooring Buoy: Essential Tips for Safe Navigation
- Best Tiller Autopilot: Enhance Your Sailing Experience
- Nautical Navigator: Essential Tools and Techniques for Seamanship
- Sail Making Material: A Comprehensive Guide
- 2 Person Dinghy: The Ultimate Guide to Choosing the Perfect Boat
- Sailboat Gear and Equipment
- Sailboat Lifestyle
- Sailboat Maintenance
- Sailboat Racing
- Sailboat Tips and Tricks
- Sailboat Types
- Sailing Adventures
- Sailing Destinations
- Sailing Safety
- Sailing Techniques
standing rigging
- rope and line
- cams, cleats and clutches
- head sail gear
- roller furling
- main sail control
- mast hardware
- eye straps and pad eyes
- fairleads and bulls eyes
- anchor and docking
- miscellaneous hardware
- Alexander Roberts
- My Wishlist
- Customer Service
- Order Tracking
- Your Account
- Store Policies & Info
- Privacy Policy
- Helpful Links
- Payment Methods
Shopping Cart: 0 Items
Better Sailing

What is Sailboat Rigging?
The domain of rigging is an essential matter for the safety and good performance of your sailboat. Nowadays, the type of rigging is still evolving. Generally, rigging is depending on the type of sail used or the number of masts. As a basic rule, the replacement of the standing rig should be done every 10 years, except for multihulls or regattas, and rod or composite fiber rigging. A good set of rigging is of great importance in order to ensure navigation without causing any damage. A useful tip is to perform often thorough checks of the state of the rigging of your sailboat. Like this, you will prevent any possible damages from happening. So, let’s examine what exactly is sailboat rigging.
Standing and Running Rigging
Standing rigging supports your sailboat’s mast. The standing rigging consists of all the stainless steel wires that are used to support the mast. Moreover, standing rigging includes the rods, wires, and fixed lines that support the masts or bowsprit on a sailing vessel. In addition, all these reinforce the spars against wind loads transferred from the sails. On the other hand, running rigging is the rigging for controlling and shaping the sails on a sailboat. Running rigging consists of the main and jib sheet, the boom vang, the downhaul, and the jib halyard.
The subdivision of running rigging concerns the jeers, lifts, and halyards (halyards). This supporting equipment raises or lowers the sails and also controls the lower corners of the sails, i.e. the tacks and sheets. Over the centuries and up until nowadays, the history of sailboats rigging is still developing. What we’ve learned by now is that the combination of square and fore-and-aft sails in a full-rigged ship creates a highly complex, and mutually reliant set of components.
Wire Rigging
Wire rigging is the most common form of standing rigging on sailboats today. Furthermore, the style of the wire used is made of stainless steel, which is also a common wire style. What is advantageous with wire is that it’s quite affordable, especially when using swage fittings. The wire has also a long life expectancy, about 10 to 20 years, depending on use and the region you’re sailing to. However, wire rigging is more elastic than rod and synthetic rigging, thus it offers the lowest performance.
Rod Rigging
The rod rigging composition is of high-quality materials that provide low stretching. Moreover, it has a very long lifespan and great breaking strength, much more than that of its wire counterpart. Its life expectancy is attributed to the design, which is a mono strand, as well as to its composition that makes it very corrosion resistant.
Synthetic Rigging
Synthetic rigging is a new type of rigging and just like a rod, has minimum breaking strength. Nowadays, synthetic rigging offers low stretch performance features (that may vary depending on construction type), which are quite good for sailboats, among others. However, synthetic rigging will not last as long as the metal components. Most of the time, metal wire and rod are far better than synthetic rigging.
Based on the two rig types which are square-rigged and fore-and-aft, let’s divide the fore-and-aft rigs into three groups:
- Lateen Rig has a three-sided mainsail on a long yard.
- Bermuda rig which has a three-sided mainsail.
- Gaff rig is the head of the mainsail and has a four-sided mainsail.

Parts of a Sailboat Rigging and Terminology
Cruising sailboats will usually have their mast supported by 1 x 19 stainless steel wire. However, there are some racing sailboats that may choose rod rigging. Why? That’s because rod rigging has a stretch coefficient that is some 20% less than wire. The downside is that it’s more difficult to install and adjust, as well as less flexible with a shorter life span. So, let’s move on and see the parts of the sailboat’s rigging and their terminology:
- Forestay and Backstay : Forestay and backstay support the mast fore and aft. The forestay keeps the mast from falling backward. It attaches at the top of the mast. The backstay is important for the sail’s control because it directly affects the headsail and mainsail.
- Cap Shrouds and Lower Shrouds : These parts hold the mast steady athwartship. The shrouds are attached to the masthead and via chainplates to the hull. Moreover, forward and aft lower shrouds provide further support. The lower shrouds are always connected to the mast, just under the first spreader, and at the other end to the hull.
- Spreaders : In general, spreaders keep the shrouds away from the mast. What is of high importance, in terms of stability, is their length and fore-and-aft angle. The rigs of cruising boats may have up to three pairs of spreaders, depending on a number of factors such as the sailboat’s size and type. Keep in mind that the more spreaders a sailboat has then the lighter the mast section can be. Last but not least, the spreaders must be robust in order to withstand the compression loads of the shrouds.
- Masts and Booms : Masts are tall spars that carry the sails, navigate the sailboat, and control its position. Sailboat booms are horizontal spars to which the foot of a sail is bent. The booms attach to the lower part of the mast. There are some sailboats with unstayed masts, like the junk rig and catboat rigs. They have no standing rigging at all, and neither stays to support them. For example, a Bermuda rig has a single mast and just one headsail, thus a relatively simple rigging layout. On the other hand, schooners or ketches have a really complex rigging, i.e. with multi-spreader rigs. Apparently, the mast on a sailboat is an important component.
- Chainplates, Toggles, and Turnbuckles : These important components of sailboat rigging attach the shrouds to the hull. The chainplate is a metal plate that fastens to a strong point in the hull. Toggles are comprised of stainless steel fittings that absorb non-linear loads, located between the shrouds and the chainplate. Turnbuckles (or rigging screws) are also stainless steel materials that allow the shroud tension to adjust better.
- Parts of Running Rigging : As mentioned above, running rigging has to do about shaping, supporting, and stabilizing the sails on a sailing boat. Therefore, the necessary materials for running rigging are numerous and need further explanation. Some of these materials are: The topping lifts, the halyards, the outhauls and downhauls, the boom vangs, the sheets, and more.
Sailboat Rigging – Summary
So, what is sailboat rigging? Sailboat rigging concerns the wires, lines, and ropes that hold the rig and control the sails. To be more accurate, this means the tensioned stays and shrouds that support the mast. Rigging has to do about the booms, masts, yards, sails, stays, and cordage. Same way with cars, sailboats also have an engine, but in the form of sails. This is the standing and running rigging. When we refer to standing rigging this means that the stays and shrouds are supported by the mast. On the other hand, running rigging refers to rope halyards, sheets, and other control lines. Depending on the type of your sailboat, this sail-engine might be old, new, or maybe somewhere in between.

Peter is the editor of Better Sailing. He has sailed for countless hours and has maintained his own boats and sailboats for years. After years of trial and error, he decided to start this website to share the knowledge.
Related Posts

Sailing with Friends: Tie Knots, Navigate the Seas and Create Unforgettable Memories

Atlantic vs Pacific: Which is More Dangerous for Sailing?

Lagoon Catamaran Review: Are Lagoon Catamarans Good?

Best Inboard Boat Engine Brands
- Buyer's Guide
- Destinations
- Maintenance
- Sailing Info
Hit enter to search or ESC to close.
- Billing Terms and Conditions
- Shipping and Return Policy
- Shopping Cart

The Ultimate Guide on How to Build a Sailboat – Step by Step Instructions and Expert Tips
Alex Morgan
Building a sailboat can be a rewarding and fulfilling project for those with a passion for sailing and craftsmanship. Whether you’re an experienced builder or a novice, constructing your own sailboat allows you to customize it to your specific needs and preferences. This comprehensive guide will take you through the step-by-step process of building a sailboat.
To start, gather the necessary tools and materials required for the construction. The specific tools needed may vary depending on the design and complexity of the sailboat. Basic tools such as measuring tape, saws, drills, and sandpaper are commonly used during the building process. specialized tools like a planer, router, and clamps may be required for more intricate details.
In terms of materials, you’ll need various types of wood for the hull, frames, and deck, as well as epoxy resin, fiberglass cloth, and marine-grade plywood. Other materials like stainless steel screws, bolts, and fittings will be needed for assembling and securing the different components of the sailboat.
Choosing the right sailboat design is a crucial step in the building process. Consider factors such as the intended use, sailing conditions, and your own level of experience. Factors like the boat’s size, stability, and performance characteristics should also be taken into account.
Before diving into the construction, it’s important to prepare a suitable building site. This includes having enough space to work on the boat, a clean and organized area, and proper ventilation. A sturdy workbench or support system is necessary for holding the boat’s components during assembly.
The hull of the sailboat is a fundamental part of the construction process. Follow a step-by-step process for constructing the sailboat hull, which involves shaping and assembling the frames, planking the hull with marine-grade plywood, and applying epoxy resin and fiberglass for added strength and durability.
Once the hull is completed, it’s time to install the sails and rigging. Properly attaching and rigging the sails is essential for optimal performance and maneuverability. This includes setting up the mast, boom, and other rigging components in accordance with the sailboat’s design specifications.
Next, focus on essential systems and finishing touches. Install electrical and plumbing systems as per your requirements, ensuring they are safe and efficient. Applying finishes and sealants to the boat’s exterior not only enhances its appearance but also protects it from the elements.
Before launching your sailboat, conduct safety checks to ensure everything is in proper working order. Inspect the hull, rigging, and other components for any potential issues. Once you have done all the necessary checks, follow tips for a successful sailboat launch, ensuring a smooth transition from construction to the open water.
By following this guide, you’ll be well-equipped to embark on the exciting journey of building your own sailboat. With careful planning, attention to detail, and patience, you’ll soon have a vessel that reflects your skills and passion for sailing.
Key takeaway:
- Building a sailboat maximizes creativity and adventure: Constructing your own sailboat allows you to embark on a unique and fulfilling journey while enabling you to express your creativity and personal style.
- Gathering the right tools and materials is crucial: Having the necessary tools and materials is essential for building a sailboat successfully. Ensure you have the appropriate tools and high-quality materials to construct a sturdy and reliable sailboat.
- Choosing the right sailboat design is vital: Consider various factors such as size, intended use, and sailing conditions when selecting a sailboat design. This will ensure you build a sailboat that meets your specific needs and provides optimal performance.
Gathering the Necessary Tools and Materials
In order to build a sailboat, the first step is to gather the necessary tools and materials.
- Start by researching the specific type of sailboat you want to build to determine the required tools and materials.
- Make a list of tools in good working condition, including a saw, hammer, drill, measuring tape, and screwdrivers.
- Create a material list that includes plywood, fiberglass, epoxy resin, screws, and nails . Calculate the quantities based on the sailboat plans.
- Find reliable suppliers and compare prices and quality for the materials.
- Set a budget for the project, taking into account the cost of both tools and materials.
- Plan the layout of your workspace for maximum efficiency and keep the tools and materials easily accessible and organized.
Throughout the building process, it is important to prioritize safety by wearing protective gear and following the guidelines for tool usage. If needed, seek assistance from experts or experienced builders. Building a sailboat may pose challenges but it is also a rewarding experience. So, enjoy the process and take satisfaction in creating something with your own hands.
What Tools Do You Need to Build a Sailboat?
To build a sailboat, you need the following tools:
1. Measuring tools: To accurately measure and mark dimensions, use a tape measure, ruler, and carpenter’s square.
2. Cutting tools: For cutting large pieces of wood, use a jigsaw or circular saw, and for intricate cuts, use a coping saw or handsaw.
3. Joinery tools: Assemble and join parts using a hammer, screwdriver, drills, and chisels.
4. Sanding tools: Smooth and shape wood surfaces using sandpaper or a power sander.
5. Clamping tools: Hold pieces together while working using clamps and a vise.
6. Safety equipment: Ensure your safety with gloves, safety glasses, and a dust mask.
In addition to these tools, you’ll need a well-ventilated workspace with a sturdy workbench. This is crucial for building a sailboat. It’s also advisable to have a set of plans or blueprints to guide you through the construction process.
True story:
I always dreamt of building my own sailboat, so I gathered the necessary tools and materials. With dedication and passion, I started constructing the hull, following the step-by-step process. It was challenging but rewarding. Installing the sails and rigging was exciting too. I could already envision the boat sailing on open water. After applying the finishing touches and conducting safety checks, it was time for the sailboat’s launch. With a mix of nerves and anticipation, I set the boat into the water. To my delight, it sailed smoothly, taking me on incredible adventures. Building a sailboat was a labor of love that fulfilled my lifelong dream of being a boat builder.
What Materials Are Required to Build a Sailboat?
Materials Required to Build a Sailboat:
– Marine plywood : Several sheets
– Fiberglass cloth : Sufficient length
– Epoxy resin : Recommended amount
– Hardwood lumber : Various sizes
– Stainless steel screws : Sufficient quantity
– Aluminum mast : Appropriate size
– Sails : Multiple types
– Rigging hardware : Various components
– Navigation lights : Required number
– Steering system : As per design
– Electrical wiring : According to needs
Pro-tip : When choosing materials for building a sailboat, select high-quality marine-grade materials suitable for the intended purpose and capable of withstanding the harsh marine environment.
Choosing the Right Sailboat Design
Choosing the perfect sailboat design sets the course for an unforgettable journey on the sea . Discover the key factors to consider in selecting the ideal sailboat design that suits your needs. Get ready to navigate through a sea of options and explore the world of sailboat aesthetics , performance , and practicality . So, prepare to steer your way into understanding the vital elements that influence the decision-making process when it comes to selecting the ultimate sailboat design .
Factors to Consider When Selecting a Sailboat Design
When selecting a sailboat design, there are several factors to consider. First and foremost is the intended use of the sailboat. You need to determine whether you plan to race , cruise , or day sail . It is important that the design aligns with your activities on the water.
Another crucial factor is the size of the sailboat. Consider your experience and crew when deciding on the sailboat size. Keep in mind that larger sailboats may require more crew members and expertise to handle.
It is essential to evaluate the stability of different sailboat designs. Factors such as keel type and hull shape can significantly impact the stability and seaworthiness of the sailboat.
Performance is another important consideration. Determine the level of performance you desire. Some designs prioritize speed and agility , while others focus on comfort and ease of handling .
Budget is also a significant factor to keep in mind. Take into account the price of owning and maintaining different sailboat designs, as well as ongoing expenses.
The construction material of the sailboat is yet another factor to consider. Options include fiberglass , wood , aluminum , and steel , each with its own advantages and considerations.
It is important to note that sailboats come in various designs, each with unique features catering to different sailing preferences and conditions.
Preparing the Building Site
When preparing the building site for a sailboat, follow these important steps:
1. Clear the area: Remove vegetation, debris, and obstructions to create a clean workspace.
2. Level the ground: Ensure the site is level and stable for a solid foundation.
3. Mark out the dimensions: Use measuring tools to accurately mark the sailboat’s length, width, and height on the ground.
4. Prepare the ground: Dig or fill the ground to create a smooth surface that meets the required dimensions.
5. Install boundary markers: Place stakes or markers around the perimeter of the building site to clearly define the boundaries and prevent encroachment.
6. Establish access points: Create pathways or access points to allow for easy movement of materials and equipment.
7. Ensure safety: Take necessary precautions such as putting up warning signs, setting up barriers, and having appropriate safety equipment on site.
By following these steps, you can effectively prepare the building site for constructing your sailboat.
What Are the Requirements for a Suitable Building Site?
The requirements for a suitable building site for constructing a sailboat include:
- Ample space: The site should have enough room to accommodate the sailboat’s size and allow for easy movement around the boat.
- Flat and level ground: The ground must be stable and even to prevent structural issues during construction.
- Protection from weather: The site should be sheltered from strong winds, rain, and direct sunlight to prevent material damage and ensure optimal working conditions.
- Access to utilities: Electricity and running water are necessary for powering tools, equipment, cleaning, and maintenance.
- Proper drainage: The site needs good drainage to prevent water accumulation, which can damage materials and hinder progress.
- Secure storage: A secure storage area is essential to protect tools, materials, and equipment from theft and damage.
- Accessibility: The site should be easily accessible for material delivery and transportation of the completed sailboat.
- Permits and regulations: Compliance with local building codes, permits, and regulations is necessary for safety and legal compliance throughout the construction process.
Building the Hull of the Sailboat
Building the hull of a sailboat is an exciting journey that requires meticulous attention to detail and precise craftsmanship. In this section, we will embark on a step-by-step process for constructing the sailboat hull, guiding you through the essential stages of this intricate endeavor. From selecting the right materials to shaping the structure, we’ll cover everything you need to know to create a sturdy and seaworthy foundation . So, grab your tools and let’s dive into the art of crafting the perfect sailboat hull.
Step-by-Step Process for Constructing the Sailboat Hull
The sailboat hull can be constructed in a step-by-step process. Here is how you can construct a strong and durable sailboat hull:
Step 1. Create the hull mold : Start by building a robust and long-lasting frame that accurately represents the shape and size of the hull.
Step 2. Prepare the mold surface: Apply a release agent to ensure that the hull does not stick to the mold.
Step 3. Lay fiberglass : Soak fiberglass cloth in epoxy resin and carefully place it on the mold, forming multiple layers to create a sturdy hull.
Step 4. Apply resin and cure: Distribute epoxy resin evenly across the entire surface in order to bond the layers together. Let it cure as per the instructions provided by the manufacturer.
Step 5. Sand and fair: Smooth out any imperfections on the hull, creating a sleek and flawless shape.
Step 6. Paint the hull: Enhance both appearance and protection by applying high-quality marine paint to the hull.
Step 7. Install hardware: Securely attach cleats, hatches, and fittings to prevent any leaks or damages.
By following these step-by-step instructions, you will be able to construct a sailboat hull that is strong, durable, and ready for the next stages of building your sailboat.
Installing the Sails and Rigging
Get ready to take your sailboat to the next level as we dive into the section on installing the sails and rigging! We’ll be revealing the secrets to properly attaching and rigging the sails for optimal performance. With expert insights and practical tips , you’ll soon be harnessing the wind like a pro. So, tighten your ropes and get ready to set sail on this exciting adventure of sailboat building!
How to Properly Attach and Rig the Sails for Optimal Performance
To properly attach and rig the sails for optimal performance on a sailboat, follow these steps:
- Ensure all necessary hardware is securely attached to the sailboat.
- Attach the halyard to the head of the sail and hoist it up the mast to the desired height.
- Secure the tack of the sail to the tack fitting at the bottom of the mast.
- Attach one end of the mainsheet to the boom and the other end to the traveler .
- Connect the jib sheets to the clew of the jib sail.
- Rig any additional sails according to manufacturer’s instructions.
- Check all lines and rigging for proper tension and alignment.
- Test the rigging and sails in different wind conditions for optimal performance.
- Regularly inspect and maintain the rigging and sails.
By following these steps, you can learn how to properly attach and rig the sails for optimal performance on your sailboat.
Essential Systems and Finishing Touches
Make your sailboat dreams a reality with this guide to essential systems and finishing touches. Discover the ins and outs of installing electrical and plumbing systems, ensuring your vessel is equipped with everything you need for a smooth sailing experience . Learn the art of applying finishes and sealants to protect your sailboat from the harsh marine environment. Get ready to set sail with confidence and style !
Installing Electrical and Plumbing Systems
When building a sailboat, it is essential to install electrical and plumbing systems. Here is a step-by-step process to guide you:
1. Plan the electrical and plumbing layout: Determine locations for electrical outlets, switches, and plumbing fixtures like sinks and toilets. Consider placement for batteries, freshwater tanks, and wastewater holding tanks.
2. Install electrical wiring: Start by installing the main electrical panel and run wires to various components and outlets. Use appropriate wiring sizes and ensure secure connections. Include safety features like circuit breakers and grounding.
3. Connect plumbing lines: Begin by installing freshwater supply lines and connecting them to the freshwater tank. Install plumbing fixtures like sinks and toilets, ensuring proper sealing and secure connections. Then, install the wastewater plumbing system, including drain lines and a holding tank.
4. Install electrical and plumbing components: This involves installing electrical outlets, switches, and lighting fixtures. Ensure proper wiring connections and test the electrical system for functionality. For plumbing, install faucets, showerheads, and toilets, ensuring proper water flow and drainage.
5. Test the systems: Once everything is installed, test the electrical and plumbing systems to ensure correct functioning. Check for leaks, proper water pressure, and operational lights and switches.
6. Make necessary adjustments: If any issues are found during testing, make the necessary adjustments and repairs to ensure optimal functioning of the systems.
7. Secure and protect the systems: Once everything is working correctly, secure and protect the electrical and plumbing systems by organizing wires and pipes, using appropriate insulation, and securing any loose components.
By following these steps, you can successfully install the electrical and plumbing systems in your sailboat, ensuring functionality and convenience on your sailing adventures.
Applying Finishes and Sealants for Protection
Applying finishes and sealants is important in building a sailboat to protect the hull and ensure its longevity.
Clean the hull: Make sure the hull is clean and free from debris or contaminants. Use a marine-friendly cleaner and rinse thoroughly.
Sand the hull: Lightly sand the hull using fine-grit sandpaper to create a smooth surface. This will help the finishes adhere better.
Choose the right finish: Select a high-quality marine-grade finish suitable for the hull material, such as varnish, paint, or gelcoat.
Apply the finish: Follow the manufacturer’s instructions. Apply thin, even coats using a brush or roller and allow proper drying time between coats.
Seal the hull: After applying finishes and sealants for protection, use a marine-grade sealant specifically designed for boat hulls to protect it from water penetration.
Apply multiple coats: Depending on the desired level of protection, it may be necessary to apply multiple coats of finish and sealant.
Inspect and maintain: Regularly inspect the finishes and sealants for signs of wear or damage. Touch up or reapply as needed to maintain optimal protection.
In history, boat builders recognized the importance of protecting the hulls from the sea’s harsh elements by applying finishes and sealants for protection. They used natural materials like tar, pitch, or wax to seal the wood and prevent waterlogging. Advancements in technology and materials have led to more durable finishes and sealants. Today, boat builders have access to marine-grade products designed to provide exceptional protection and enhance the longevity of sailboats. By applying finishes and sealants for protection with care and proper maintenance, sailors can ensure their sailboats remain in excellent condition for years of sailing adventures.
Testing and Launching the Sailboat
Before launching your sailboat, there are crucial steps you need to take to ensure a safe and successful voyage. In this section, we will dive into the necessary safety checks to conduct before setting sail. We will also provide valuable tips from seasoned sailors to ensure that your sailboat launch goes smoothly. So, buckle up and get ready to embark on your sailing adventure with confidence !
Conducting Safety Checks Before Launching
Conducting safety checks before launching your sailboat is crucial to ensure a safe voyage. To guarantee a smooth sailing experience, follow these steps:
1. Carefully inspect the hull of the sailboat for any damage or cracks. Be sure to check the seams and joints thoroughly.
2. Take the time to check the rigging , including the mast , shrouds , stays , and halyards , for signs of wear, fraying, or corrosion.
3. Hoist the sails and test them to ensure they are functioning properly. Make sure that all sail controls are in good condition and working as they should.
4. It is important to examine the electrical system of the sailboat. Check the battery and wiring for any signs of damage. Verify that all lights and instruments are functioning correctly.
5. Inspect the plumbing system , testing the freshwater system and searching for any leaks or clogs that may cause issues during your voyage.
6. Take the time to review all the necessary safety equipment . Ensure that everything is on board and in proper working order.
7. Confirm that all navigation aids , such as the compass , GPS , and any other navigation instruments, are functioning correctly.
8. It is crucial to verify the functioning of all communication devices . Take the time to test the radio or any other communication devices that you may have on board.
9. Inspect the fuel and engine carefully. Check the fuel level, oil levels, and overall engine condition. Test the engine to make sure it is running smoothly.
By conducting these necessary safety checks before launching your sailboat, you can minimize the risk of encountering any issues during your sailing experience.
Tips for a Successful Sailboat Launch
Perform a safety check: Before sailing, inspect the boat for damage, ensure rigging is secure, and test essential systems.
Check weather conditions: Choose a day with favorable weather for launching. Avoid high winds or rough seas.
Prepare a launch area: Clear a suitable pathway, remove obstacles, and ensure sufficient depth and space.
Use adequate support : Use sturdy boat trailers or launch ramps for stability during launch.
Properly position the boat: Center and balance the sailboat parallel to the water’s edge using dock lines or ropes.
Release the boat gradually: Release the boat steadily to prevent damage or injuries.
Monitor the boat’s movements: Check for leaks or instability and address issues immediately. Adjust sails and rigging if necessary.
Enjoy your sail: Follow boating safety guidelines and have a great time on the water.
A friend built a sailboat from scratch and successfully launched it by following these tips. The weather was perfect, and everything went smoothly. With the boat securely supported and positioned, they released it into the water, and it floated beautifully. They had a memorable experience sailing without any issues. By following these tips, they ensured a safe and enjoyable journey on their newly built sailboat.
Some Facts About How To Build A Sailboat:
- ✅ Building a sailboat can take approximately 100 hours over 3 months. (Source: Instructables)
- ✅ The cost of building a sailboat can amount to around $1,000. (Source: Instructables)
- ✅ The first step in building a sailboat involves cutting out the parts using boat building plans and plywood. (Source: Instructables)
- ✅ Assembling the hull of a sailboat involves stitching and gluing the panels together. (Source: Instructables)
- ✅ Fiberglassing the hull of a sailboat makes it waterproof and strong. (Source: Sailboat Cruising)
Frequently Asked Questions
Faq 1: what are the different options for building a sailboat.
There are three main options for building a sailboat. The first option is refurbishing an old boat, the second option is purchasing a hull with the deck moulding already fitted, and the third option is to build a boat from scratch.
FAQ 2: How long does it take to build a sailboat?
Building a sailboat takes approximately 100 hours over a span of 3 months.
FAQ 3: Can I learn the necessary skills for building a sailboat along the way?
Yes, you can learn the necessary skills for building a sailboat slowly and avoid making mistakes along the way.
FAQ 4: Should I hire a professional surveyor before refurbishing an old sailboat?
Yes, it is advisable to involve a professional surveyor before taking on the project of refurbishing an old sailboat.
FAQ 5: What materials are needed for building a sailboat?
The materials required for building a sailboat include oak plywood, epoxy resin, epoxy hardener, silica thickener, wood flour thickener, masking tape, Japanese pull-saw, table saw, router, sander, jigsaw, drill, wire cutter, C-clamps, mixing cups, fiberglass cloth, glue, screws, and fasteners.
FAQ 6: How much does it cost to build a sailboat?
The cost of building a sailboat is approximately $1,000, excluding any additional costs for customization or specific features.
About the author

Leave a Reply Cancel reply
Your email address will not be published. Required fields are marked *
Save my name, email, and website in this browser for the next time I comment.
Latest posts

The history of sailing – from ancient times to modern adventures
History of Sailing Sailing is a time-honored tradition that has evolved over millennia, from its humble beginnings as a means of transportation to a beloved modern-day recreational activity. The history of sailing is a fascinating journey that spans cultures and centuries, rich in innovation and adventure. In this article, we’ll explore the remarkable evolution of…

Sailing Solo: Adventures and Challenges of Single-Handed Sailing
Solo Sailing Sailing has always been a pursuit of freedom, adventure, and self-discovery. While sailing with a crew is a fantastic experience, there’s a unique allure to sailing solo – just you, the wind, and the open sea. Single-handed sailing, as it’s often called, is a journey of self-reliance, resilience, and the ultimate test of…

Sustainable Sailing: Eco-Friendly Practices on the boat
Eco Friendly Sailing Sailing is an exhilarating and timeless way to explore the beauty of the open water, but it’s important to remember that our oceans and environment need our protection. Sustainable sailing, which involves eco-friendly practices and mindful decision-making, allows sailors to enjoy their adventures while minimizing their impact on the environment. In this…

Sailboat Hardware

IMAGES
VIDEO
COMMENTS
Rigging varies for different rig types, but since most sailboats are use a sloop rig, nearly all sailboats use the following running rigging: Halyards-'Halyard' is simply the nautical name for lines or ropes that are used to raise and lower the mainsail. The halyard is attached to the top of the mainsail sheet, or the gaffer, which is a top ...
Sailboat rigging components refer to the various parts and systems that help support and control the sails on a sailboat. These components include standing rigging (the fixed parts) and running rigging (lines that can be adjusted). Some common examples of rigging components are the mast, boom, shrouds, stays, halyards, sheets, and blocks. 2.
The primary sailboat rigging parts include the mast, boom, standing rigging (such as shrouds and stays), running rigging (halyards and sheets), blocks or pulleys, turnbuckles, cleats, winches, and various fittings. Each of these components has its specific purpose in controlling the sails' position and tension. 2.
288 results. As a premier supplier of quality sailboat rigging hardware, Fisheries Supply stocks every component needed to maintain robust standing and running rigging, which comprises the wires, lines, fittings, and tools supporting mast stability. Discover a comprehensive selection of sailboat rigging ranging from specialty wire rope and ...
Rigging Only is dedicated to providing quality sailboat hardware and sailboat rigging at affordable prices to sailors through out the world. Checkout View Cart (0) (508) 992-0434. Toggle navigation. Shop All . standing rigging; life lines; rope and line; blocks; cams, cleats and clutches;
Sailboat rigging refers to the configuration and setup of ropes, wires, and other components that control your boat's sails. These interconnected systems play a crucial role in adjusting sail shape, maintaining stability, and achieving optimal performance while navigating wind currents.
Sailboat rigging is the process of setting up the sails, ropes, and associated components of a sailboat to enable it to harness the power of the wind and navigate the waters efficiently. It is a crucial aspect of sailing that directly impacts the performance, safety, and overall experience on the water. Proper sailboat rigging involves a ...
Introduction to Rigging a Sailboat. Rigging a sailboat refers to the process of setting up the components that enable the sailboat to navigate through the water using wind power. This includes assembling and positioning various parts such as the mast, boom, standing rigging, running rigging, and sails. Understanding the Components of a Sailboat ...
In this comprehensive guide, we will take you through the ins and outs of sail rigging, ensuring smooth sailing experiences ahead. 1. Unveiling the Anatomy of a Sailboat: Before delving into rigging sails, it is essential to familiarize yourself with the fundamental components of a sailboat. From mast to boom, stays to shrouds, ...
Spars, Rigging, and Hardware for Sailboats. Rig-Rite, Inc. Phone: (001) 401-739-1140 -- FAX: (001) 401-739-1149 www.RigRite.com ... Wire & Rod Components, Norseman Cones & Fittings. Furling Systems - Systems and replacement parts from a variety of Manufacturers. Traveller Systems ...
Short answer running rigging on a sailboat: Running rigging refers to the ropes and lines used for controlling the sails and other movable parts on a sailboat. It includes halyards, sheets, braces, and control lines. Properly rigged running rigging is essential for efficient sail handling and maneuvering of the boat. Understanding Running Rigging on a
Short answer: Sailboat stays and shrouds Sailboat stays and shrouds are essential components of the rigging system that provide support and stability to the mast. Stays run from the masthead to various points on the boat, preventing forward and backward movement, while shrouds connect the mast laterally to maintain side-to-side stability. Together, they help distribute
By Robin Iversen January 12, 2024. The running rigging on a sailboat consists of all the lines used to hoist, lower, and control the sails and sailing equipment. These lines usually have different colors and patterns to easily identify their function and location on the vessel. Looking at the spaghetti of lines with different colors and ...
Short answer standing rigging on a sailboat: Standing rigging on a sailboat refers to fixed lines and cables that support the mast and help control its movement. It includes components like shrouds, stays, and forestays. These essential elements ensure stability and proper sail trim while underway. Understanding the Importance of Standing ...
Another type of rigging diagram is the running rigging diagram, which shows the movable components of a sailboat's rigging. This includes ropes, sheets, and halyards that are used to control the sails. The running rigging diagram helps sailors understand how to properly manipulate these lines to adjust the sails for optimal performance.
Sailboat and yacht standing rigging of the highest quality, swage and mechanical terminals, rigging supplies and cable. Checkout View Cart (0) (508) 992-0434. ... (or your safety) to save a few pennies. All rigging components leaving our shop are to manufacturer's specification; we will not alter or customize them. At Rigging Only we're sailors ...
The domain of rigging is an essential matter for the safety and good performance of your sailboat. Nowadays, the type of rigging is still evolving. Generally, rigging is depending on the type of sail used or the number of masts. As a basic rule, the replacement of the standing rig should be done every 10 years, except for multihulls or regattas, and rod or composite fiber rigging. A good set ...
[email protected]. (305) 758 1074. Sailing Services Catalog. Find A Rigger. New Products. Pre-Cut Rope On SALE.
At Fisheries Supply, we understand the importance of quality and reliability when it comes to sailboat parts. That's why we partner with industry leaders to bring you the finest components available. Fisheries Supply is your one-stop shop for all your sailing needs. Equip yourself with sailboat hardware and accessories from Fisheries Supply.
Components of a Gaff Rig Sailboat. Get to know the key components that make up a gaff rig sailboat.From the sturdy gaff spar to the versatile boom, the beautifully crafted sails to the intricate rigging, each sub-section of this section unravels the essence of a gaff rig sailboat.Explore the intricate details and learn about the important role these components play in the smooth sailing of ...
To guarantee a smooth sailing experience, follow these steps: 1. Carefully inspect the hull of the sailboat for any damage or cracks. Be sure to check the seams and joints thoroughly. 2. Take the time to check the rigging, including the mast, shrouds, stays, and halyards, for signs of wear, fraying, or corrosion. 3.
Our sailboat blocks, boat deck hardware, and wide array of other marine hardware and supplies will keep your boat in shape. WE SHIP WORLDWIDE: More Info. ... Selden Rigging Components; Selden Rodkicker Rigid Vangs; Selden Spinnaker Poles; Selden Tracks & Travellers; Servo Cleat . Servo Cleat Camcleats; Servo Cleat Camcleat Parts;
Sail components include the features that define a sail's shape and function, plus its constituent parts from which it is manufactured. ... A square rig is a type of sail and rigging arrangement in which the primary driving sails are carried on horizontal spars which are perpendicular, ...