Service Locator
- Angler Endorsement
- Boat Towing Coverage
- Mechanical Breakdown
- Insurance Requirements in Mexico
- Agreed Hull Value
- Actual Cash Value
- Liability Only
- Insurance Payment Options
- Claims Information
- Towing Service Agreement
- Membership Plans
- Boat Show Tickets
- BoatUS Boats For Sale
- Membership Payment Options
- Consumer Affairs
- Boat Documentation Requirements
- Installation Instructions
- Shipping & Handling Information
- Contact Boat Lettering
- End User Agreement
- Frequently Asked Questions
- Vessel Documentation
- BoatUS Foundation
- Government Affairs
- Powercruisers
- Buying & Selling Advice
- Maintenance
- Tow Vehicles
- Make & Create
- Makeovers & Refitting
- Accessories
- Electronics
- Skills, Tips, Tools
- Spring Preparation
- Winterization
- Boaters’ Rights
- Environment & Clean Water
- Boat Safety
- Navigational Hazards
- Personal Safety
- Batteries & Onboard Power
- Motors, Engines, Propulsion
- Best Day on the Water
- Books & Movies
- Communication & Etiquette
- Contests & Sweepstakes
- Colleges & Tech Schools
- Food, Drink, Entertainment
- New To Boating
- Travel & Destinations
- Watersports
- Anchors & Anchoring
- Boat Handling

Inspecting Sailboat Rigging
Advertisement
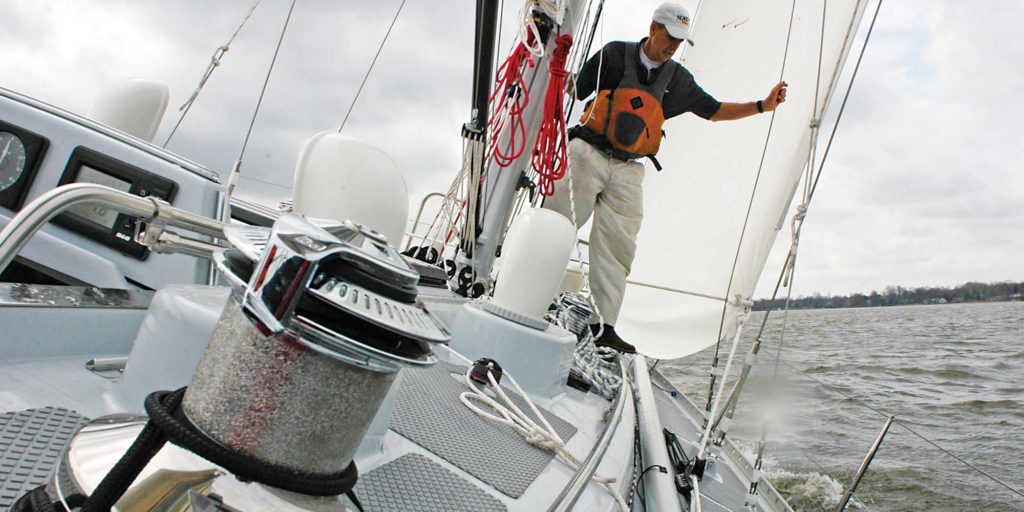
Here's how to go over your rig with a fine tooth comb.

Sight up the mast. Is it straight?
If there's one thing production sailboats have in common, it's that nearly all of them use stainless-steel standing rigging, whether wire or rod. There are likely also stainless steel fittings, chainplates and turnbuckles. Stainless steel is a great material for rigging but has its Achilles heel: corrosion. Stainless steel in a saltwater environment will eventually suffer from some form of corrosion, whether it's stress-crack corrosion, fatigue cracking or crevice corrosion. Sailboat rigging in freshwater may also suffer from stress and fatigue cracking (see below). What might appear to be a small crack or area of pitting will degrade the fitting by eating away at the metal. Any cracks or corrosion will weaken the fitting, and the failure of a single fitting can bring down a rig.
Stainless Steel Failures
Stainless-steel rigging under heavy stress can have stress cracking or fractures that will often be identified by hairline cracks. These cracks will lead to stress-crack corrosion and crevice corrosion in the saltwater environment.

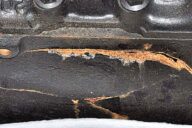
Crevice corrosion can also develop in areas of pitting when the stainless steel is devoid of oxygen. This is the most common form of corrosion on a stainless-steel chainplate. This chainplate was cut in half to demonstrate how far the pitting went into the metal.

1. Take a look at the overall rig
Sight up the rig from deck level. How is the geometry? All stays and shrouds should be run without any bends and at even angles. Are there hard spots or kinks where a stay has an awkward bend? Standing in front of the mast, sight up from the base. Is the mast in column (straight)? There should be no bends in the mast side-to-side or facing forward. Walk around to all of the shrouds and stays and give them a pull. They all should feel roughly at the same tension. To be accurate, you would want to use a tension gauge. But when I first start inspecting a rig, I'm mostly trying to get a feel if anything appears to be dramatically out of tune.

Left: Inspect swages carefully for corrosion; this swage has broken strands. Right: This crack was only visible after cleaning off the surface rust.
2. Inspect all the deck fittings and wire.
If the mast is deck-stepped, start at the base, looking for corrosion on the step and cracks in the base of the mast. Then working clockwise to make sure you don't miss anything, inspect all fittings from eye level to deck level including swages/mechanical fittings, turnbuckles, chainplates, and toggles. Start with the wire at eye level, and scan downward, checking for rust and broken strands. For rod rigging, we're looking for cracks or corrosion. Take a good look for corrosion where the wire enters the swage or mechanical fitting. Next check the t-bolts, tangs, turnbuckles, and pins. Clean any rust off with the Scotch-Brite pad. This is important: anything more than light rust staining could be an indication of crevice corrosion, which weakens the metal. You may not be able to remove all of the rust, but you do need to see the underlying metal. Use your magnifying glass to look for cracks and pitting on the fitting. The turnbuckles should be straight without any bend to them. Inspect the condition of the threads of the stud. Ensure the turnbuckles have locking pins. Photograph the fittings, especially where you think you have sighted a crack or pitting. Get up close with the camera on the macro setting and make sure that the area of concern is in focus; this is important when you enlarge the photo later.

This chainplate has a crack just above where it passes through the deck.
3. Pay attention to the chainplates.
Inspect the caulking where it enters the deck; it should not be cracked or peeling. Look for cracks in the chainplates on the edges and especially around the pinholes. For external chainplates, inspect along the edges for cracks and rust blooms. A small amount of rust may be OK; it might just be staining, though it should still be investigated. But significant rust is a sign that there may be crevice corrosion, which is a reason to pull and inspect the chainplates. Unfortunately, the area that is probably affected the most is buried and not visible unless the chainplate is removed. Stainless-steel corrosion happens much faster when there is no oxygen present — like where the chainplates pass through the deck, which is why we'll inspect them belowdecks as well.

Look for peeling paint, which may be a sign of corrosion, and cracks at the gooseneck and other boom fittings.
4. Inspect all attachments to the mast and boom on deck and at eye level.
Inspect the gooseneck fitting for the mast and the vang attachment for corrosion or cracks. Any attachment points on the boom for running rigging also need to be inspected. Again, take close-up photos if you find any problems. Check all blocks to make sure they turn freely. All shackles should be secured with seizing wire. The winches need to turn freely and stop when the direction is reversed. Do the line stoppers stop the line? Give the line a good tug with the line stopper closed. There should be no movement. Inspect each piece of the running rigging for wear. What is the condition of the halyard and the safety line (a second halyard) you will use for going aloft? Don't take chances here.

Check for white powder and pitting on aluminum mast steps and at the base of the mast.
5. Inspect the condition of the mast step.
Mast steps here are often in a damp environment, and a lot of mast steps are made from non-stainless steel on older boats, which can rust. Some boats have an aluminum mast step. If the step or base of the mast is corroding, it will have white powder on it. Remove the powder and look for pitting underneath. If you find pitting here, or on any other aluminum fitting, such as the mast or boom, have a rigger follow up with a professional inspection.

Painting chainplates is a bad idea because it hides corrosion. Once rust is visible through the paint, the corrosion is severe, and the chainplate will need to be replaced.
6. Go below to take a look at the chainplates.
Are there signs of water intrusion on the bulkheads? You might have to remove some cover panels to gain access to the chainplates. Are there signs of rust? Clean any rust with your nylon pad. Use a flashlight and your magnifying glass to inspect the chainplate carefully. Pay close attention to the edges of the chainplate for rust and cracks. Cracks and corrosion can develop behind the chainplate and where it passes through the deck. Again, these are areas that are deprived of oxygen where crevice corrosion will develop. Chainplates don't last forever, and if you want to be absolutely sure you can count on them, I'd recommend replacing them after 20 years of service or if there are any signs of crevice corrosion, which can happen in less than 15 years in harsh environments.

Broken wire at swage fitting on a catamaran mast head.
7. If you found no deficiencies then it is time to go up the mast.
If you are not comfortable, then I recommend having a professional rigger conduct the aloft part of the inspection. Never do this by yourself, even if you have a hoist that allows you to do so. Have someone there to assist you and to manage your safety line. For the aloft portion of the inspection, work your way up from the bottom, rather than starting at the top. This way, if you are at the spreaders and find a cracked swage fitting, you can make the decision to stop. This part of the inspection will be conducted in the same manner as the lower fittings and chainplates, this time also paying close attention to where fasteners are installed into the mast. On an unpainted aluminum mast, we are looking for the white powder and pitting which are signs of corrosion and can lead to hairline cracks. Again, if you clean the powder away and find pitting, you'll need to have a professional rigger take a look. On a wooden mast, you're looking for soft wood and discoloration where the fastener goes into the wood. For carbon fiber you're looking for cracks. Inspect the spreader ends and tips for wear and the condition of the boots.
8. Thought you were finished?
Not yet. Now go find somewhere comfortable and view all of your photos on a tablet or computer. Enlarge them to help find any cracks or pitting. This is why you took your photos in order and made notes about what was what. Discuss any of your findings that concern you with a professional rigger. Save all of your photos in a file so you can compare them the next time you do the inspection.
Now that you've done a bottom-to-top rig inspection, you can feel more comfortable the next time the wind pipes up. At the beginning of each season, take an hour or so to re-inspect the rig, focusing on the areas you might have noted to keep an eye on.
Related Articles
The truth about ceramic coatings for boats.
Our editor investigates the marketing claims of consumer-grade ceramic coatings.
Fine-Tune Your Side Scan Fishfinder
Take your side-scanning fishfinder off auto mode, and you’ll be spotting your prey from afar in no time
DIY Boat Foam Decking
Closed-cell foam flooring helps make boating more comfortable. Here’s how to install it on your vessel
Click to explore related articles
Dylan Bailey
Contributor, BoatUS Magazine
Dylan Bailey is a marine surveyor with more than 30 years in the marine industry.
BoatUS Magazine Is A Benefit Of BoatUS Membership
Membership Benefits Include:
Subscription to the print version of BoatUS Magazine
4% back on purchases from West Marine stores or online at WestMarine.com
Discounts on fuel, transient slips, repairs and more at over 1,200 businesses
Deals on cruises, charters, car rentals, hotel stays and more…
All for only $25/year!
We use cookies to enhance your visit to our website and to improve your experience. By continuing to use our website, you’re agreeing to our cookie policy.
- BOAT OF THE YEAR
- Newsletters
- Sailboat Reviews
- Boating Safety
- Sailing Totem
- Charter Resources
- Destinations
- Galley Recipes
- Living Aboard
- Sails and Rigging
- Maintenance
- Best Marine Electronics & Technology
Standing Rigging Inspection
- By Ralph Naranjo
- Updated: April 11, 2019
It’s easy to assume that a sailboat’s rig will perpetually point skyward. It has a lot to do with advances in engineering, material science and design priorities adopted by today’s boatbuilders. But with this uptick in reliability comes the downside of complacency. Time, metal fatigue and corrosion are co-conspirators, and they’re why every skipper needs to know where they sail on the rigging-failure timeline.
Most riggers generalize that the lifespan of a sailboat’s standing rigging is about a decade. This doesn’t mean that in the 11th season the mast is destined to go over the side. But it does mean that the trouble-free decade is astern and the likelihood of problems are on the rise. In terms of miles at sea, rigging lifespan is often defined as one circumnavigation’s worth of torment. But there’s much more to understand about standing rigging and when it’s time for replacement.
Whether your boat is gently rolling in a quiet mooring field or bashing to windward in a gale, cycle loading wears away on the components. Yes, the higher strain cycles take a greater toll, but all of the on-off energy transfers add up. There’s also a chemical war being waged between dissimilar metal alloys. It’s no surprise that rigging hardware on freshwater-sailed boats holds up better than aboard their saltwater sisterships. As time goes by, the structural safety factor built into a rig’s design starts to erode. At some point, the designer’s safety factor heads toward the negative part of the curve – a result of too many days at sea, an excess of spar-bashing tacks and jibes, and too much salt-laden spray. Fortunately, careful rig inspection and timely hardware replacement can help defeat the inevitable.
Sailboat rigs are perpetually in a compression/tension tug of war. On one side is the righting moment of the vessel, a force created by the buoyancy induced by hull shape and the location of the vessel’s center of gravity. At the other end of this tussle is the heeling moment, a force created by wind pressure on the sail plan.
The rig and rigging of most monohull sailboats are designed to handle a wind-induced, 90-degree knockdown. The load this imposes on the windward side’s rigging, spreaders, fittings and chainplates can be computer modeled. Engineers use this data to help select hardware according to the specific loads each piece must handle. The rig designer determines the max loads each piece of standing rigging is to carry, and adds a specific safety factor to the equation. If, for example, an upper shroud will be tensioned to 5,000 pounds during a knockdown, a 2-to-1 safety factor would result in wire with a 10,000-pound breaking strength. A greater safety factor would usually extend the lifespan of the wire, but it also adds undesirable weight aloft and additional expense to the bottom line. Doing so might make sense for a crew sailing the Roaring Forties, but it’s counterproductive for coastal cruisers planning a voyage to the Bahamas.
The Rig Inspection
In recent decades, winter storage and year-round, in-water berthing have lessened the opportunity for a full mast and rigging inspection. Add to this complications like a headstay hidden inside a roller-furling foil, and one can see why too many years go by between a thorough rig inspection. Ideally, this will happen with the spar unstepped in the boatyard on sawhorses. It’s true that, if the standing rigging has been designed with a higher safety factor, the boat has not been vigorously sailed, and home port is in the middle of a large freshwater lake, the aging process elongates and the rigging is likely to outlast an oceangoing production boat. That said, the more complex the rig and older the vessel, the more scrutiny is necessary.

With the rig removed, I begin in the boat looking over the mast step and determining how all the compression loads have been handled. In cases in which the mast step is in or just forward of the keel sump, it’s important to note how the compression load is spread transversely and longitudinally. Look for signs of crushed or cracked grids, floor frames or other support structure. Closely inspect the mast step. It should be free of corrosion and provide a means to pin the mast heel in place once the spar is stepped. Deck-stepped masts deserve the same detective work. With these rigs, the compression loads are usually shared between a compression post or bulkhead and the deck or coach roof itself. There are considerable side loads generated during beats to windward. Look for signs of fiberglass crazing or microcracking, or a change in the contour around the step. Deck-stepped masts are fine, as long as they do not overly flex and distort the structure that supports them.

The chainplates anchor the standing rigging and represent the other end of a load-bearing couplet. As with the mast step, the big concern is whether the structure remains intact or the tension has caused the laminate, wood bulkhead or metal webbing to deform. No matter how good the standing rigging happens to be, a chainplate or mast-step failure usually leads to a dismasting and major vessel damage.
Next comes a close look at the spar itself. I prefer a bottom-up approach, starting at the base, or the heel of the mast, and working toward the masthead. During the design and engineering of a mast and rigging, many spar builders use finite element analysis to model the loads that migrate through a rig. A computer graphic reveals a range of colors overlaid on the spar section, with red or magenta indicating where high-stress areas are located. These energy focal points are found at spreader roots, rigging attachment points, the mast-heel fitting, and other areas where tension, compression and bending moments stress the spar. These are the spots where potential problems lurk and indicators include stress cracks, surface deformation, pitting and corrosion. If you notice this type of deterioration, it’s time to have an experienced rigger or marine surveyor take a closer look.

A Look Aloft
Of course, not everybody pulls their rig on a regular basis and has the opportunity to inspect the mast when nestled on stands. But there’s plenty you can observe when sailing. During a race to Bermuda with the late Rod Stephens, the brother of Olin and one of the driving forces of Sparkman & Stephens, I learned why a cruiser at sea should do a daily “rigging walk around.” Rod’s morning rig check involved a slow amble forward on the windward deck glancing up and down to make sure toggles, clevis pins, and other bits and pieces were all in place, and none of the running rigging had been led incorrectly in the dark. Returning aft on the leeward side, he looked over the gooseneck fitting and glanced aloft at the spreaders, noting mast bend and the fall off to leeward that the spar had to endure.

Back in the cockpit, Rod would focus a pair of 7×50 binoculars on the masthead and work his way down to the lower spreader tips, looking for telltale signs of trouble. This is a good way for cruisers to make sure that the halyard lead to the headstay furler’s top swivel remains fairly led. If there’s a wrap or two around the foil, roller furling becomes difficult and foil damage will soon follow. Rod always insisted that this magnification-aided checkup was not a substitute for going aloft in a bosun’s chair. The latter should be done prior to heading offshore or embarking on a lengthy coastal cruise. Going aloft in a seaway, to cope with a problem that should have been sorted out prior to departure, raises the risk factor and complicates a repair. But at times it must be done. Keep in mind that the further aloft you go, the more violent the effect of the vessel’s pitch and roll. Make sure your mast-working equipment kit includes a harness tether that holds you to the spar, as well as safe hoisting tackle.

It’s important to identify what riggers call “critical components.” In this case, it’s the rigging hardware and wire, rod or rope that plays an essential role in keeping the rig in place. Rig loss can be attributed to something as simple as a missing cotter pin or loose Nylock nut holding a tension rod to a chainplate. Critical rigging components include a ring pin keeping a headstay turnbuckle in place. If it gets snagged and pulled out by a genoa sheet, the domino effect can lead to a dismasting. On the other hand, if the same thing happens to the clevis pin on the rear lower shroud or an intermediate shroud, the rig is likely to remain standing. Double checking critical rigging, like the headstay, upper shrouds and backstay, is a top priority.

Many old-school cruisers favored a cutter rig for more than headsail versatility. They knew that with an inner forestay and a running backstay set, they had hedged their bet if it came to the loss of a headstay or backstay. It also lessened mast pumping and its metal fatigue implications. During long distance passagemaking, tacks and jibes become less frequent and complaints about runners and a forestay disappear.

Contemporary cruisers have a new ally in high modulus (HMPE) line, not only as an optimum choice for running rigging, but also as a stand-in when and if a wire-rigging problem arises. The norm aboard most race boats, it has the crew attaching unused headsail and spinnaker halyards to a fitting or mini-rail just ahead of the mast. But aboard a cruising boat that’s headed offshore, it makes sense to keep a HMPE spinnaker/drifter halyard tacked forward, attached to a well-secured, anchor-roller strut or a mini bowsprit. This adds a backup safety margin, just in case the headstay gives way. The same halyard can also be moved to an amidships rail to help keep the mast up, if a spreader fails or there’s the loss of a shroud. In fact, high modulus line is a strong, lightweight standing-rigging alternative that’s proven its validity aboard multihulls and many high-performance monohulls. Chafe can be an issue, so those who settle on fiber rigging need to make sure their sheet and guys are fair led when going through a sail change, especially at night.
Keeping the rig where it belongs requires regular inspections and maintenance, and the recognition that, like anchor chain, one weak link can spell disaster.
Technical expert Ralph Naranjo is a veteran circumnavigator and ocean racer, and the author of the T he Art of Seamanship .
DIY Spar Inspection Checklist
Every few years, the rig should come out and a detailed inspection ensue. One of the reasons for such scrutiny is the chain-linklike behavior of standing rigging.
- Check mast for corrosion especially at heel, gooseneck, spreader tips and wherever stainless steel contacts aluminum.
- Inspect rigging hardware and note corrosion, pitting and elongation of clevis pin holes.
- Check swage fittings, clean with plastic scrub pad, and use magnifying glass to search for swage barrel cracks, pitting and wire cracks.
- If mechanical compression terminals have been used, look for signs of wire slippage or cracks in wire strands and terminal barrel.
- Rub down all 1×19 wire rigging with a nylon stocking that will snag on any cracks in wire strands.
- Check all clevis pins for wear and make sure that toggles connecting to stainless-steel chainplates have stainless-steel clevis pins, not bronze or chrome-plated pins.
- Wire brush away corrosion on alloy spars and inspect for cracks (if corrosion is minor, acid etch, epoxy prime and paint).
- Closely inspect top and bottom headstay fittings and roller furling system; service furler as per manufacture’s recommendations; and consider disassembly and replacing the headstay if over 10 years old.
- Those with an in-mast furling system should follow manufacturer’s recommendation for maintenance and lubrication/replacement of bearings.
- Visually inspect and heck mast electrical wiring for continuity; improve chafe protection.
- More: How To , mast , rigging
- More How To

3 Clutch Sails For Peak Performance

It’s Time to Rethink Your Ditch Kit

8 Ways to Prevent Seasickness

How To De-Winterize Your Diesel Engine

The Moorings Expands in Croatia

C-Map Updates North America Charts

New to the Fleet: Italia Yachts 12.98

St. Vincent Court Orders Deportation For Hijacking Suspects
- Digital Edition
- Customer Service
- Privacy Policy
- Terms of Use
- Email Newsletters
- Cruising World
- Florida Travel + Life
- Sailing World
- Salt Water Sportsman
- Sport Fishing
- Wakeboarding
Many products featured on this site were editorially chosen. Cruising World may receive financial compensation for products purchased through this site.
Copyright © 2024 Cruising World. A Bonnier LLC Company . All rights reserved. Reproduction in whole or in part without permission is prohibited.
- New Sailboats
- Sailboats 21-30ft
- Sailboats 31-35ft
- Sailboats 36-40ft
- Sailboats Over 40ft
- Sailboats Under 21feet
- used_sailboats
- Apps and Computer Programs
- Communications
- Fishfinders
- Handheld Electronics
- Plotters MFDS Rradar
- Wind, Speed & Depth Instruments
- Anchoring Mooring
- Running Rigging
- Sails Canvas
- Standing Rigging
- Diesel Engines
- Off Grid Energy
- Cleaning Waxing
- DIY Projects
- Repair, Tools & Materials
- Spare Parts
- Tools & Gadgets
- Cabin Comfort
- Ventilation
- Footwear Apparel
- Foul Weather Gear
- Mailport & PS Advisor
- Inside Practical Sailor Blog
- Activate My Web Access
- Reset Password
- Pay My Bill
- Customer Service

- Free Newsletter
- Give a Gift
Cal 2-46: A Venerable Lapworth Design Brought Up to Date

Rhumb Lines: Show Highlights from Annapolis

Open Transom Pros and Cons

Mailport: Charley Morgan, Locker Safety, Fast Bottom Paint

Do-it-yourself Electrical System Survey and Inspection

Install a Standalone Sounder Without Drilling

The Tricked Out Tillerpilot

Resolving Common Steering Problems

Rethinking MOB Prevention

Top-notch Wind Indicators

The Everlasting Multihull Trampoline

In Search of the Snag-free Clew

Breaking Point: What Can Go Wrong With Your Yanmar?

Rudder Mods for Low-speed Docking

Using Heat to Bend PVC Pipe

Mildew-resistant Caulks for Boats

Can We Trust Plastic Boat Parts?

Repairing Molded Plastics

Mailport: Marine plywood, fuel additives, through bolt options, winch handle holders

The Day Sailor’s First-Aid Kit

Choosing and Securing Seat Cushions

Cockpit Drains on Race Boats

Rhumb Lines: Livin’ the Wharf Rat Life

Sailing Harness Leg Loops

Resurrecting Slippery Boat Shoes

Tricks and Tips to Forming Do-it-yourself Rigging Terminals

Marine Toilet Maintenance Tips

Learning to Live with Plastic Boat Bits

The Ultimate Guide to Caring for Clear Plastic

Preventing Mildew in Marine Fabrics
- Inside Practical Sailor
- Sails, Rigging & Deck Gear
Sailboat Rig Inspection Tips
Some rigging woes are the result of our own good intentions..

Wandering among the boats stored for winter on Michigan’s Upper Peninsula, many with their masts removed and in storage, I’m reminded of how easy it is to overlook the warning signs of an impending rig failure. I figured that now, when some of us have our masts within reach from ground-level, would be a good time to share again this report on inspecting your mast, rigging, chainplates, and turnbuckles. It’s as pertinent today as it was then, back in the black-and-white, courier-font days.
How frequently do you bother removing spreader boots and taping to check the condition of the spreaders and rigging? No matter how well the spreader ends are protected, and whether you use ready-made vinyl spreader boots or conventional rigging tape, water will get through to the fittings inside. On a boat used in saltwater, the corrosive nature can cause rapid disintegration of aluminum fittings (nevermind the fact that the spreaders might be 25 feet or more off the water). The thorough taping job you did on the spreader ends may actually accelerate the problem by holding in water.
The problem can be just as bad on a boat with wooden spreaders. Wooden spreaders are usually spruce, a wood with very low resistance to rot. Water trapped by spreader boots, or taping at the inboard ends of the spreaders at the mast fittings, can rot a spruce spreader in a single season. Keeping wood spreaders varnished can help, but it is no guarantee of protection. Wooden spreaders are almost always fitted with metal ends, both at the mast and at the spreaders outboard end. If these fittings were not thoroughly bedded with compound when the spreader was assembled, all the varnish in the world won’t keep water out of the joint between the spreader and the metal end fitting.
And water sitting in this joint will eventually cause the spreader to rot. If the boat is decommissioned some time during the year, thats the time to make a careful inspection of the rig and rigging. Every component must be gone over thoroughly.
First, check the mast tube for problems. Do the masthead sheaves turn freely? Are the edges of the sheaves worn, so that a halyard might jump the sheave and wedge itself between the sheave and its box? Is the mast dimpled, or bent? Worn sheaves should be replaced.
Stainless-steel wire tends to chew aluminum sheaves over time, particularly those used for spinnaker halyards. Sheaves that show only slight wear or burrs should be dressed smooth with a file. There should be no sideways play in halyard sheaves. Space between the sheave and the sheave box can be eliminated with micarta shims, which will also help prevent the sheaves from seizing. Seized shims can usually be freed with liberal applications of a solvent and heat applied with a propane torch. Finding a replacement sheave for an older boat like John Foster’s Nonsuch 22 can open up a can of worms.
Physical damage to the mast tube in the form of dimpling, wrinkling, or bending requires professional analysis by a sparmaker. This type of damage rarely happens when the mast is in the boat. It is more likely to result from a shipping accident, or from stepping or unstepping the mast. A mast can become permanently bent through improper blocking during storage, however. Look for grooves in the mast extrusion where internal halyards exit the mast. Check the mast heel for corrosion. Corrosion at the heel of the mast is probably the most common problem with keel-stepped aluminum spars. The cure is to keep the area of the mast step in the bilge bone dry, and provide drain holes in the mast heel and mast step.
Deck-stepped spars are not immune to heel corrosion, and also require drain holes in both the heel and the step. Examine all mast fittings, winches, and cleats for signs of corrosion between the fitting and the mast. Unless the fittings are bedded, there’s a good chance of serious pitting here. The first clue is likely to be a powdery white deposit around the edge of the fitting. All fittings on the mast should be bedded in an elastometric marine sealant that will galvanically isolate the hardware, as well as protect damaged finish. (Riggers preferences for this job range from 3Ms 101 polysulfide to 3M UV4000 or Sikaflex 291-the latter two have the advantage of faster curing. See our article on marine sealants for more on this topic.) Other options include using either zinc chromate paste or plastic shims-neither of which have adhesive properties but do isolate the dissimilar metals. Check all the rigging tangs on the mast. Look particularly for elongated clevis pinholes or cracks radiating from clevis pin holes or points of attachment to the mast tube.
Any damage to tangs is unacceptable. Elongation or cracking means the metal of the tang is too thin for the load, or there is simply not enough metal between the clevis hole and the edges or end of the fitting. Brownish discoloration on tangs should be polished out using a stainless steel cleaner or buffing pad to make examination easier. Don’t use sandpaper or a harsh abrasive. You may destroy the surface polish of the stainless steel, which is its major source of discoloration protection. Badly discolored wire or fittings should probably be discarded. Any wire having a sharp kink in it should be replaced. Any swage fitting that is cracked should be replaced, although the lack of cracking is not necessarily an indication of health.
Stress corrosion cracking can be a serious problem with stainless steels on boats kept in salt water and warm climates. The greatest danger from stress corrosion is that a stressed fitting usually appears to be in perfect condition prior to failure. Many mysterious rigging failures are no doubt due to this little known and often misunderstood problem. There is evidence, however, that keeping rigging clean and polished with a product containing lanolin or silicone can decrease the possibility of a failure due to stress corrosion cracking.
Carefully examine each strand of rigging wire, including terminals, toggles, turnbuckles, clevis and cotter pins. Every season, a very expensive rig goes by the boards because a bolt is temporarily inserted in place of a missing clevis pin.
Any swage fittings having a banana shank, a curved shank that results from passing the fitting through the swaging machine without using the proper guide, should be replaced. Likewise, retire any cracked or bent turnbuckles or toggles. Seized turnbuckles should be freed using a penetrating oil such as WD-40, and heat from a propane torch. Brute force is almost guaranteed to ruin turnbuckles with screws under 3/8-inch.
Remove the tape and examine inboard and outboard ends of spreaders. Check leading and trailing edges of spreaders carefully, particularly if the spreaders are airfoil-shaped, welded aluminum sections. Wire halyards can wear through them very quickly.
Halyards should be carefully examined. Wire halyards, in particular, should be checked for meathooks. Running the halyard through your palm is an accurate, but sometimes painful way to detect meathooks. A better way to find burrs and broken strands is to rub over the shrouds and halyards with a piece of cheese cloth or an old nylon stocking. This method, however, is not a substitute for a careful visual examination.
The most likely places for meat hooks to develop are wherever the halyard changes direction over a sheave. As a rule, any halyard with more than one broken strand per 10 feet of length should be replaced. A halyard with a broken strand where the halyard wraps around a thimble should be shortened or replaced.
Check wire-to-rope splices for fraying. If the splice spends much of its life wrapped around a winch drum, the part of the wire inside the cover of the rope can chafe through the ropes cover. Chafe is also the enemy of all rope halyards, whether they are polyester, or more exotic materials like Spectra to Vectran. If you have switched from polyester halyards to one of these materials, you may also have to change sheaves. Halyard sheaves scored for both wire and rope are unsuitable for use with some other types of halyards.
Key wear spots for rope halyards are at the headboard shackle, over sheaves, and where the halyard is held by cam cleats or line stoppers. Rope halyards should be ordered with extra length to allow yearly shortening to remove the work sections at the top of the mast. This advice applies only to rope materials and braids that are easily re-spliced after moderate use, or those ropes that happily take a knot. Remember knotting will reduce strength significantly, so know your loads, the strength reduction a knot will impart, inspect frequently, and use common sense. Splices are preferable; but a halyard hitch (or some variation) serves fine on smaller vessels. On these boats typical halyard diameters offer a large safety margin, even when you take into account the strength reduction introduced by a knot. On larger vessels the safety margins in halyards are achieved through high-strength, low-stretch fibers and braids that may not lend themselves to knotting or re-splicing. For a guide to halyards materials and breaking strengths see Practical Sailors Guide to Choosing Cost-Efficient Halyard Materials .
Although re-splicing old rope is difficult, it is not impossible. Rigger Brion Toss gives the following advice for sending in old rope for splicing:
“ We prefer not to splice used rope, so if we agree to work on your used rope – we will ask you to first wash it with soap flakes. Put the coiled gasket of rope (see instructions in the Rigger’s Apprentice ) in the washing machine on gentle cycle. rinse well, and add fabric softener. Then undo the coil and loop it around the garage to dry in the air or take it outside and do the same. Now your rope will be soft and much nicer to handle.”
We also described the best way to clean rope in June 2011.
Halyard shackles also deserve close attention, as I explored in my blog on The Case of the Broken Snap Shackle .
Another surprising trouble spot on the average keel-stepped aluminum mast is the mast boot. Water lying between the rubber mast boot and the mast tube can cause severe corrosion of the aluminum tube on boats used in salt water. This is particularly common in mast boots secured with stainless-steel hose clamps, and corrosion can occur even when no water reaches the interior of the boat. At least once a year, loosen the mast boot. Bedding the boot to the mast will alleviate but not necessarily completely prevent this type of damage. The area under the mast boot is probably second only to the mast heel as a potential trouble spot.
A once a year top-to-bottom inspection of the rig is a simple way to prevent minor problems from becoming major. With the exception of structurally marginal racing masts, most rig losses are caused by component failures that are largely detectable before problems occur.
While it is far easier to examine the rig with it removed from the boat, the same inspection can be conducted, less quickly and comfortably, from the bosuns chair. Your time and effort will most certainly be rewarded, and if you’re lucky you’ll also enjoy the view.
RELATED ARTICLES MORE FROM AUTHOR
Well, in my opinion, there is one note missing in all articles about rigging replacement. It is the fact that the quality of the old standing rigging made in the USA or other countries (not China!) is way above today’s offers on the market! All China-made rigging like chains, cables, lines, etc, etc is not up to the standard specifications we used in the past, which leads to questionable dependability and safety. So, if one finds that old rigging, is not at visible fault one should think twice about replacing the old rigging. In the past, we used to replace standing rigging at least every 10 years. It did make sense. In the times when we are flooded with poor quality marine products from China, I find out in my practice that this is not necessary unless a REPUTABLE RIGGER will advise doing so! Then make sure it is not from China. I am not a rigger or marketer just a user with hundreds of miles at sea and experiencing/witnessing constant and growing problems with so-called cheap marine staff on boats! Now, remember it is how I see it, and you need to make your own decision in those matters, it’s your safety!
I’ve replaced rigging numerous times because it was time, but the actual failures and close calls deserve to be called out:
Toggles formed from bent stainless. I’ve had several crack mid-bend, aggravated by rigging that was a bit slack during hard going (it is hard to keep the leeward shrouds tight on light multihulls00the boat is not stiff enough)
Coated rigging. Just as coated lifelines are a risk factor, coated shrouds and waterstays are a menace. I’ve had two fail, fortunately with no more harm than a runaway reacher. No coated rigging.
Moused U-bolt pin backed out. The safety wire snapped. I only noticed it when it was on the last two threads! It was also not the first time I’ve seen rigging wire snap, almost certainly because it was over stressed when installing. That’s why you check.
Wire halyard grew some meat hooks. These jammed the head block, making it impossible to lower the main and requiring climbing underway (no climbing gear on the boat, so that was… different).
Dyneema. I know it’s the rage, but watch the age and condition. I had a shroud tensioner snap (did not result in dismasting) probably due to age, though it should have been 20 times the required strength. Perhaps there was unseen chafe (PS testing has shown that minor damamge can weaken it more than you would think, depending on the exact pattern). There is still a lot we don’t know about monitoring Dyneema.
LEAVE A REPLY Cancel reply
Log in to leave a comment
Latest Videos

Catalina 380: What You Should Know | Boat Review
- Privacy Policy
- Do Not Sell My Personal Information
- Online Account Activation
- Privacy Manager
Inspecting Your Mast and Rigging
")
Your sailboat rigging should be thoroughly checked once a season. The best way to do this is by pulling the mast or masts out of the boat and running down a check list. One can also spot most major problems from a bosun’s chair , and if done regularly, is generally more cost effective. It is strongly recommended that you have the spars pulled at least once every 5 years depending on the conditions that your boat and its rigging have been subjected to.
To help you do your own rigging check, here are some general guidelines for the average sloop rigged boat. For any specific questions or concerns, please don’t hesitate to call .
A. DECK LEVEL AND BELOW DECKS

1. Check the boom gooseneck for worn pins, cracked welds, etc.…
2. Check the boom for bends or dents.
3. Check all block attachment points on the boom for fatigue or wear, i.e. vang bails, sheet bails.
")
4. Check all blocks and shackle attachment points for bent pins, distorted shackles, missing or loose ring pins, etc.…
5. To check halyards, attach a spare line (or the bitter end of the same line) to the shackle end and pull up on the halyard slowly. Check the line and check the shackle for proper operation.
6. Check all shroud, stay, and lifeline swages for cracks.
")
7. Check lifelines where they go through stanchion post for excessive wear.
8. Make sure the mast sits flush on the mast step.
9. If your mast is keel stepped, make sure the mast is securely chocked where it goes through the deck.
")
10. Check the chain plate attachment points below deck for wear. Also check for signs of rot or any evidence of water damage.
11. Make sure the chain plates or chain plate cover plates appear sealed and tight where they go through the deck.
12. Check turnbuckles for bends in the body or stud, cracks, excessive rust, as well as ensure all turnbuckles are secured properly. Either by way of cotter pin, locking nut or ring pin.
")
B. THE MASTHEAD – Before going aloft please consult with a professional as severe injury or death can occur!!!
1. Check all welds for cracks.
2. Check any masthead gear for secure attachment.
3. Check that all pins are properly secured, either by way of cotter pin or ring pin.
")
4. Make sure the sheaves turn freely and the pins that hold them-in are secure.
5. Check for sharp edges where halyards exit.
6. Make sure all fasteners, rivets, screws are tight.
7. Check head and backstay swages for cracks.
")
8. If you have an external mainsail track, as you descend, check the fasteners to make sure they are tight .
C. SHROUDS
1. Check swages for cracks.
2. Check the shroud tangs for wear.
")
3. Check to make sure all clevis pins are properly secured.
4 . Make sure the tang bolt (if present) is tight and locked in a secure manner.

D. SPREADERS
1. If spreaders or brackets are welded, look for stress cracks (see pic below).
2. Make sure spreader bases are secure.
3. Make sure the spreader is well fastened to the base.

4. Tape or silicone over any sharp bolts or cotter pins in this area.
5. Check spreader tips, where spreader intersects the wire, for corrosion (remove any tape or boots) and ensure spreader tips are secured to upper shrouds by seizing or clamp s.
For rod rigging service and inspection intervals, read more here .
….Have a question? Drop us a line or leave a comment below. We’d love to hear from you.
Similar Posts
Reeving halyards.
Some people are daunted by the task of attempting to run-in or reeve new lines which run internally or cannot be easily accessed. Halyards for instance present the problem of, “how do I get the old one out and the new one in?”. Let’s address some technicalities first… ~Not all eye splices are created equally….

Views from Aloft
I struck gold again with another beautiful day in the Baltimore Inner Harbor! On this day we conducted an official sailboat rigging inspection for the United States Coast Guard…pretty cool eh? This is a shot of the bow and the USCG anxiously awaiting my return to earth to tell them about what I found. I…
First AC 72 Pitch pole…..
…..and it caused them almost loose more than the rig! [youtube http://www.youtube.com/watch?v=drgglIebuQY&w=560&h=315] Apparently it is quite the big deal when these things flip, unlike the smaller AC45’s that seem to go over regularly. After extensive hours, efforts and a strong ebb tide, the crew and the boat made it back to shore. The enormous wing however…
VOR- The Home Stretch
It almost seems as if Cape Reinga, New Zealand gets farther and farther away as the teams approach the final stretch. With the final 400 NM a-head, the wind has shifted forward, making the teams work up wind until the very end. Most of the teams are tired and beat up from the many sail changes…
Riggers Spotted in Grand Cayman
The Rigging Company was back at it again, but this time enjoying a little slice of paradise. I have to say there are many great things about this line of work, but being able to travel to desirable locations to work on peoples yachts has to top the list. The Cayman Islands has no shortage…
Antigua Sailing Week Wrap-up
This is perhaps one of the most beautiful regatta destinations in the world. Check out late last year’s highlights from the beautiful West Indies. Hopefully this year’s Antigua Sailing Week will bring just as much beautiful weather, big waves and plenty of breeze. Check out www.sailingweek.com for details on this years event. [youtube http://www.youtube.com/watch?v=vJ7P-gvE7f8&w=560&h=315]
Leave a Reply Cancel reply
Your email address will not be published. Required fields are marked *
Save my name, email, and website in this browser for the next time I comment.
Username or Email Address
Remember Me
Lost your password?
Review Cart
No products in the cart.
- Privacy Overview
- Strictly Necessary Cookies
This website uses cookies so that we can provide you with the best user experience possible. Cookie information is stored in your browser and performs functions such as recognising you when you return to our website and helping our team to understand which sections of the website you find most interesting and useful.
Strictly Necessary Cookie should be enabled at all times so that we can save your preferences for cookie settings.
If you disable this cookie, we will not be able to save your preferences. This means that every time you visit this website you will need to enable or disable cookies again.
- Marine Surveying St. Augustine, FL
- Marine Surveying, Thermal Imaging & Consulting
- Offshore Outfitting
- Presentations
- Thermal Imaging
- Ultrasound/Audiogauge
- Inspecting Sailboat Rigging
Rust is often a sign of crevice corrosion.
OLYMPUS DIGITAL CAMERA
Uncategorized
chainplate Crevice Corrosion Sailboat rigging
Recent Posts
- Trawler Fest 2016
- Carbon Fiber Rudder Inspection
- Inspecting Chainplates
Moisture trapped in a rudder
Delamination
- February 2016
- December 2015
- August 2015
- February 2015
- October 2014
- August 2014
Saving the World One Boat at a Time!
Mobile Marine Rigging Services
Mobile rigging service serving south florida & the florida keys.
Marine Rigging Services
Rigging Inspections
Architectural Rigging Services
Rope Splicing
SAVING THE WORLD, ONE BOAT AT A TIME!
Welcome to Keys Rigging
Keys Rigging is a marine and architectural rigging business, serving the Florida Keys. We specialize in sales, service and installations of modern sailboat rigging on cruising and racing monohulls and multihulls. We also sell and install architectural rigging as well as other steel wire applications. Our mission is to provide our customers not only the services they need to maintain a safe, efficient rig but furthermore, a better understanding of their rig.
You will be a better, more knowledgeable sailor when we are finished!
Keys Rigging
Mobile Rigging Services

MARINE RIGGING SERVICES
While Keys Rigging sells many marine rigging products, the most important service provided is our hands on rigging maintenance and installation. If you have been searching for an experienced sailboat rigger to service your rig, you will have noticed they are becoming few and far between.
RIGGING INSPECTIONS
Level 1 Inspection: Includes a full visual inspection of the accessible rigging-top to bottom. There is also a visual inspection of the mast base and chainplates, light fixtures and other mounted fixtures. Running rigging is assessed. The end of the inspection includes a verbal summary of any problems or potential problems sighted, and as quickly as…
ARCHITECTURAL RIGGING SERVICES
The same experience and commitment to detail that we apply to sailboat rigging, we can apply to your architectural rigging projects. From sourcing quality materials, factoring stretch and set, functional, to simple design concepts.
Mobile Marine Rigging Servicing

You are using an outdated browser. Please upgrade your browser to use our website.
Special Services
Additional boat inspection services.
We provide a variety of boat inspection services. All of our services are designed to ensure that our clients get the most information regarding the vessel being purchased or insured.
Service Types
Battery load, health, & charging system analysis, battery-capacity testing.
Battery-capacity testing is an essential part of battery maintenance. But how do you do it effectively? In theory, you add up the nameplate ratings on your battery strings and come up with an answer. The reality is this answer will invariably be wrong. Because cells age, battery ratings are always greater than their real capacity. The best way to get an accurate answer is to perform capacity tests on your batteries. Let’s begin by answering a basic question.
What is a battery’s capacity? In a nutshell, battery capacity is a measure of the energy it can store. When you test for capacity, you’re looking at the battery’s ability to deliver a specified amount of current at a constant rate to a specified end voltage for a specified time.
The main benefits of Battery Load testing are:
- Determining where the battery is on its predictable life curve.
- When to replace a battery.
- To locate weak cells and faulty intercell connectors.
Charging System Analysis
This will be the general health of the charging system and indicate how well the alternators and batteries are holding up and can indicate potential future replacement and reliability.
Rigging Inspection
A rigging survey is a type of boat inspection that evaluates a sailboat’s mast, boom, and associated rigging. Inspections are made at attachment points, welds, standing and running rigging, and includes the mast step and chain plates. Rigging surveys can be completed aloft or inspected while the rig is off the boat. Whether a rigging survey is needed depends on the age, prior use of the rig, and its intended purpose. It is recommended that a rigging survey be completed if the rigging is more than 10 years old or has seen heavy use. A rigging survey can help with early detection of damaged shrouds, cracked swages, and turnbuckles that are at the end of their service life. The rig also should be surveyed if the boat will be used offshore or heavily raced.
Corrosion Protection and Evaluation Survey
Dissimilar metals in the marine environment can lead to corrosion problems. Add the combined effect of separate electrical systems on each boat in a crowded marina, severe irreversible damage can occur in a very short time. Questions you might want to consider:
- Is damage occurring to the metal on your boat?
- What might be causing this corrosion to occur?
- What can be done to protect your boat?
This boat inspection survey can answer these questions and will evaluate the cathodic protection on your boat, check the AC and DC grounding systems and tell you the electrical potential of your vessel in relation to your marina. This information and any recommendations to improve your protection will be provided in a detailed report.
Lightning Strike Survey
The extent of the damage from a lightning strike is not immediately apparent. The lightning strike survey is a type of boat inspection that determines the condition of a boat, its electronics, rigging, steering, and other on board systems. The first thing that should be done if your boat is struck is to get it short-hauled as quickly as possible for a quick assessment of the hull. The reason is that when lightning exits your boat, it can leave via a through-hull fitting or even through the hull itself. Even if the force of the bolt doesn’t blow out a through-hull or cause hull damage, it may cause a gradual leak that could go unnoticed and sink your boat.
The amount of damage a boat sustains is determined in part by how the strike exits. In a properly bonded system that follows American Boat and Yacht Council standards, the strike should follow a low resistance path to a boat’s keel or an installed grounding plate, though few boats are equipped from the factory this way. While no two lightning strikes are exactly alike, examining a typical claim can shed some light on the possible damages your boat might have if it’s ever struck, some of which you may not have thought of. There can sometimes be collateral damage when a nearby boat gets hit, either the result of the lightning’s powerful electromagnetic field (EMF), or the current induced by the field running through the boat’s shore power cord. Some issues may not be obvious, but a direct hit usually causes more obvious and substantial damage.
Oil Analysis
Oil analysis is the easiest and cheapest way to regularly monitor the condition of your vessels engines, drives, generators and transmissions. With an oil analysis, you will get insights into your equipment and get the story without costly tear downs or unnecessary lubricant changes.
This type of boat inspection can reduce maintenance costs as well as provide peace of mind knowing that your equipment is safe and not wearing out at an excessive rate.
As part of a regular maintenance program, oil analysis allows potential engine problems to be indentified before the components actually fail or before the vessel is purchased. Oil analysis can show internal wear to the engine components and identify the existence of foreign substances that can be harmful to the engine and reduce its expected lifespan. This test includes a spectroscopic examination of the oil to determine the levels of metals, additives, water, and possibly coolant. The test will also measure viscosity and the percentage of solids in the oil. The test report will include possible causes of any irregularities. We are able to provide quality analysis no matter which type of lubricant is used. Other engine fluid analysis tests for diesel, gasoline, and coolant are also available.
Get a Quote
We’ve streamlined the marine survey process..
Fill out our easy-to-use form with the survey details and we’ll follow up with you to get the process started.
Attainable Adventure Cruising
The Offshore Voyaging Reference Site
- Cruising Sailboat Standing Rigging Inspection

In Part 1 we got the mast out of the boat and worked for hours inspecting a bunch of stuff…and now we get to work some more.
Still, all this effort is worth it to prevent a gravity storm, so let’s carry on.
And, just so you don’t totally despair at the prospect of reading all this boring detail, don’t forget that this is leading to the much-requested rig-inspection checklist .
So grab a cup of highly caffeinated coffee and let’s do it right. Deferred gratification is good for mast karma.
To continue reading:
Learn About Membership
Please Share a Link:
More Articles From Online Book: Sail Handling and Rigging Made Easy:
- Six Reasons To Leave The Cockpit Often
- Don’t Forget About The Sails
- Your Mainsail Is Your Friend
- Hoisting the Mainsail Made Easy—Simplicity in Action
- Reefs: How Many and How Deep
- Reefing Made Easy
- Reefing From The Cockpit 2.0—Thinking Things Through
- Reefing Questions and Answers
- A Dangerous Myth about Reefing
- Mainsail Handling Made Easy with Lazyjacks
- Topping Lift Tips and a Hack
- 12 Reasons The Cutter Is A Great Offshore Voyaging Rig
- Cutter Rig—Should You Buy or Convert?
- Cutter Rig—Optimizing and/or Converting
- Cruising Rigs—Sloop, Cutter, or Solent?
- Sailboat Deck Layouts
- The Case For Roller-Furling Headsails
- UV Protection For Roller Furling Sails
- In-Mast, In-Boom, or Slab Reefing—Convenience and Reliability
- In-Mast, In-Boom, or Slab Reefing —Performance, Cost and Safety
- The Case For Hank On Headsails
- Making Life Easier—Roller Reefing/Furling
- Making Life Easier—Storm Jib
- Gennaker Furlers Come Of Age
- Swept-Back Spreaders—We Just Don’t Get It!
- Q&A: Staysail Stay: Roller Furling And Fixed Vs Hanks And Removable
- Rigid Vangs
- Rigging a Proper Preventer, Part 1
- Rigging a Proper Preventer—Part 2
- Amidships “Preventers”—A Bad Idea That Can Kill
- Keeping The Boom Under Control—Boom Brakes
- Downwind Sailing, Tips and Tricks
- Downwind Sailing—Poling Out The Jib
- Setting and Striking a Spinnaker Made Easy and Safe
- Ten Tips To Fix Weather Helm
- Running Rigging Recommendations—Part 1
- Running Rigging Recommendations—Part 2
- Two Dangerous Rigging Mistakes
- Rig Tuning, Part 1—Preparation
- Rig Tuning, Part 2—Understanding Rake and Bend
- Rig Tuning, Part 3—6 Steps to a Great Tune
- Rig Tuning, Part 4—Mast Blocking, Stay Tension, and Spreaders
- Rig Tuning, Part 5—Sailing Tune
- 12 Great Rigging Hacks
- 9 Tips To Make Unstepping a Sailboat Mast Easier
- Cruising Sailboat Spar Inspection
- Cruising Sailboat Running Rigging Inspection
- Cruising Sailboat Rig Wiring and Lighting Inspection
- Download Cruising Sailboat Rig Checklist
- Cruising Compass Media Advertising & Rates
- Blue Water Sailing
- Multihulls Today
- Subscribe Today

Sailboat Rigging Inspection
Vloggers Follow the Boat interview a rigger on what to look for when inspecting boat rigging, offering tips and hints along the way. As they say “Keep everything clean and maintained, and the boat will look after you.” Watch Video

Sandy Parks
You might also like.

Problems with Paint Application Q & A

Dinghy Security
Winterizing Your Engine

Read the Summer-Fall Edition of Blue Water Sailing
Read the fall 2023 edition of blue water sailing, recent posts.

- Introducing the New Twin-Keel, Deck Saloon Sirius 40DS

- Survey of the Week

Please Visit Our Sponsor’s Webpages

- Media Advertising & Rates
Published by Blue Water Sailing Media, a division of Day Communications, Inc., Middletown, RI
Publisher & Editor: George Day
Blue Water Sailing Media publishes Blue Water Sailing magazine, Multihulls Today and other titles.
Cruising Compass Advertising Sales:
George Day, Newport, RI [email protected] 401-847-7612
- She Asked, How Hard Can It Be? Boys Do It
- New 2024 Bavaria C50 Tour with Yacht Broker Ian Van Tuyl
© 2014 Blue Water Media. All rights reserved. | Admin

Beginner’s Guide: How To Rig A Sailboat – Step By Step Tutorial
Alex Morgan
Rigging a sailboat is a crucial process that ensures the proper setup and functioning of a sailboat’s various components. Understanding the process and components involved in rigging is essential for any sailor or boat enthusiast. In this article, we will provide a comprehensive guide on how to rig a sailboat.
Introduction to Rigging a Sailboat
Rigging a sailboat refers to the process of setting up the components that enable the sailboat to navigate through the water using wind power. This includes assembling and positioning various parts such as the mast, boom, standing rigging, running rigging, and sails.
Understanding the Components of a Sailboat Rigging
Before diving into the rigging process, it is important to have a good understanding of the key components involved. These components include:
The mast is the tall vertical spar that provides vertical support to the sails and holds them in place.
The boom is the horizontal spar that runs along the bottom edge of the sail and helps control the shape and position of the sail.
- Standing Rigging:
Standing rigging consists of the wires and cables that support and stabilize the mast, keeping it upright.
- Running Rigging:
Running rigging refers to the lines and ropes used to control the sails, such as halyards, sheets, and control lines.
Preparing to Rig a Sailboat
Before rigging a sailboat, there are a few important steps to take. These include:
- Checking the Weather Conditions:
It is crucial to assess the weather conditions before rigging a sailboat. Unfavorable weather, such as high winds or storms, can make rigging unsafe.
- Gathering the Necessary Tools and Equipment:
Make sure to have all the necessary tools and equipment readily available before starting the rigging process. This may include wrenches, hammers, tape, and other common tools.
- Inspecting the Rigging Components:
In the upcoming sections of this article, we will provide a step-by-step guide on how to rig a sailboat, as well as important safety considerations and tips to keep in mind. By following these guidelines, you will be able to rig your sailboat correctly and safely, allowing for a smooth and enjoyable sailing experience.
Key takeaway:
- Rigging a sailboat maximizes efficiency: Proper rigging allows for optimized sailing performance, ensuring the boat moves smoothly through the water.
- Understanding sailboat rigging components: Familiarity with the various parts of a sailboat rigging, such as the mast, boom, and standing and running riggings, is essential for effective rigging setup.
- Importance of safety in sailboat rigging: Ensuring safety is crucial during the rigging process, including wearing a personal flotation device, securing loose ends and lines, and being mindful of overhead power lines.
Get ready to set sail and dive into the fascinating world of sailboat rigging! We’ll embark on a journey to understand the various components that make up a sailboat’s rigging. From the majestic mast to the nimble boom , and the intricate standing rigging to the dynamic running rigging , we’ll explore the crucial elements that ensure smooth sailing. Not forgetting the magnificent sail, which catches the wind and propels us forward. So grab your sea legs and let’s uncover the secrets of sailboat rigging together.
Understanding the mast is crucial when rigging a sailboat. Here are the key components and steps to consider:
1. The mast supports the sails and rigging of the sailboat. It is made of aluminum or carbon fiber .
2. Before stepping the mast , ensure that the area is clear and the boat is stable. Have all necessary tools and equipment ready.
3. Inspect the mast for damage or wear. Check for corrosion , loose fittings , and cracks . Address any issues before proceeding.
4. To step the mast , carefully lift it into an upright position and insert the base into the mast step on the deck of the sailboat.
5. Secure the mast using the appropriate rigging and fasteners . Attach the standing rigging , such as shrouds and stays , to the mast and the boat’s hull .
Fact: The mast of a sailboat is designed to withstand wind resistance and the tension of the rigging for stability and safe sailing.
The boom is an essential part of sailboat rigging. It is a horizontal spar that stretches from the mast to the aft of the boat. Constructed with durable yet lightweight materials like aluminum or carbon fiber, the boom provides crucial support and has control over the shape and position of the sail. It is connected to the mast through a boom gooseneck , allowing it to pivot. One end of the boom is attached to the mainsail, while the other end is equipped with a boom vang or kicker, which manages the tension and angle of the boom. When the sail is raised, the boom is also lifted and positioned horizontally by using the topping lift or lazy jacks.
An incident serves as a warning that emphasizes the significance of properly securing the boom. In strong winds, an improperly fastened boom swung across the deck, resulting in damage to the boat and creating a safety hazard. This incident highlights the importance of correctly installing and securely fastening all rigging components, including the boom, to prevent accidents and damage.
3. Standing Rigging
When rigging a sailboat, the standing rigging plays a vital role in providing stability and support to the mast . It consists of several key components, including the mast itself, along with the shrouds , forestay , backstay , and intermediate shrouds .
The mast, a vertical pole , acts as the primary support structure for the sails and the standing rigging. Connected to the top of the mast are the shrouds , which are cables or wires that extend to the sides of the boat, providing essential lateral support .
The forestay is another vital piece of the standing rigging. It is a cable or wire that runs from the top of the mast to the bow of the boat, ensuring forward support . Similarly, the backstay , also a cable or wire, runs from the mast’s top to the stern of the boat, providing important backward support .
To further enhance the rig’s stability , intermediate shrouds are installed. These additional cables or wires are positioned between the main shrouds, as well as the forestay or backstay. They offer extra support , strengthening the standing rigging system.
Regular inspections of the standing rigging are essential to detect any signs of wear, such as fraying or corrosion . It is crucial to ensure that all connections within the rig are tight and secure, to uphold its integrity. Should any issues be identified, immediate attention must be given to prevent accidents or damage to the boat. Prioritizing safety is of utmost importance when rigging a sailboat, thereby necessitating proper maintenance of the standing rigging. This ensures a safe and enjoyable sailing experience.
Note: <p> tags have been kept intact.
4. Running Rigging
Running Rigging
When rigging a sailboat, the running rigging is essential for controlling the sails and adjusting their position. It is important to consider several aspects when dealing with the running rigging.
1. Choose the right rope: The running rigging typically consists of ropes with varying properties such as strength, stretch, and durability. Weather conditions and sailboat size should be considered when selecting the appropriate rope.
2. Inspect and maintain the running rigging: Regularly check for signs of wear, fraying, or damage. To ensure safety and efficiency, replace worn-out ropes.
3. Learn essential knot tying techniques: Having knowledge of knots like the bowline, cleat hitch, and reef knot is crucial for securing the running rigging and adjusting sails.
4. Understand different controls: The running rigging includes controls such as halyards, sheets, and control lines. Familiarize yourself with their functions and proper usage to effectively control sail position and tension.
5. Practice proper sail trimming: Adjusting the tension of the running rigging significantly affects sailboat performance. Mastering sail trimming techniques will help optimize sail shape and maximize speed.
By considering these factors and mastering running rigging techniques, you can enhance your sailing experience and ensure the safe operation of your sailboat.
The sail is the central component of sailboat rigging as it effectively harnesses the power of the wind to propel the boat.
When considering the sail, there are several key aspects to keep in mind:
– Material: Sails are typically constructed from durable and lightweight materials such as Dacron or polyester. These materials provide strength and resistance to various weather conditions.
– Shape: The shape of the sail plays a critical role in its overall performance. A well-shaped sail should have a smooth and aerodynamic profile, which allows for maximum efficiency in capturing wind power.
– Size: The size of the sail is determined by its sail area, which is measured in square feet or square meters. Larger sails have the ability to generate more power, but they require greater skill and experience to handle effectively.
– Reefing: Reefing is the process of reducing the sail’s size to adapt to strong winds. Sails equipped with reefing points allow sailors to decrease the sail area, providing better control in challenging weather conditions.
– Types: There are various types of sails, each specifically designed for different purposes. Common sail types include mainsails, jibs, genoas, spinnakers, and storm sails. Each type possesses its own unique characteristics and is utilized under specific wind conditions.
Understanding the sail and its characteristics is vital for sailors, as it directly influences the boat’s speed, maneuverability, and overall safety on the water.
Getting ready to rig a sailboat requires careful preparation and attention to detail. In this section, we’ll dive into the essential steps you need to take before setting sail. From checking the weather conditions to gathering the necessary tools and equipment, and inspecting the rigging components, we’ll ensure that you’re fully equipped to navigate the open waters with confidence. So, let’s get started on our journey to successfully rigging a sailboat!
1. Checking the Weather Conditions
Checking the weather conditions is crucial before rigging a sailboat for a safe and enjoyable sailing experience. Monitoring the wind speed is important in order to assess the ideal sailing conditions . By checking the wind speed forecast , you can determine if the wind is strong or light . Strong winds can make sailboat control difficult, while very light winds can result in slow progress.
Another important factor to consider is the wind direction . Assessing the wind direction is crucial for route planning and sail adjustment. Favorable wind direction helps propel the sailboat efficiently, making your sailing experience more enjoyable.
In addition to wind speed and direction, it is also important to consider weather patterns . Keep an eye out for impending storms or heavy rain. It is best to avoid sailing in severe weather conditions that may pose a safety risk. Safety should always be a top priority when venturing out on a sailboat.
Another aspect to consider is visibility . Ensure good visibility by checking for fog, haze, or any other conditions that may hinder navigation. Clear visibility is important for being aware of other boats and potential obstacles that may come your way.
Be aware of the local conditions . Take into account factors such as sea breezes, coastal influences, or tidal currents. These local factors greatly affect sailboat performance and safety. By considering all of these elements, you can have a successful and enjoyable sailing experience.
Here’s a true story to emphasize the importance of checking the weather conditions. One sunny afternoon, a group of friends decided to go sailing. Before heading out, they took the time to check the weather conditions. They noticed that the wind speed was expected to be around 10 knots, which was perfect for their sailboat. The wind direction was coming from the northwest, allowing for a pleasant upwind journey. With clear visibility and no approaching storms, they set out confidently, enjoying a smooth and exhilarating sail. This positive experience was made possible by their careful attention to checking the weather conditions beforehand.
2. Gathering the Necessary Tools and Equipment
To efficiently gather all of the necessary tools and equipment for rigging a sailboat, follow these simple steps:
- First and foremost, carefully inspect your toolbox to ensure that you have all of the basic tools such as wrenches, screwdrivers, and pliers.
- Make sure to check if you have a tape measure or ruler available as they are essential for precise measurements of ropes or cables.
- Don’t forget to include a sharp knife or rope cutter in your arsenal as they will come in handy for cutting ropes or cables to the desired lengths.
- Gather all the required rigging hardware including shackles, pulleys, cleats, and turnbuckles.
- It is always prudent to check for spare ropes or cables in case replacements are needed during the rigging process.
- If needed, consider having a sailing knife or marlinspike tool for splicing ropes or cables.
- For rigging a larger sailboat, it is crucial to have a mast crane or hoist to assist with stepping the mast.
- Ensure that you have a ladder or some other means of reaching higher parts of the sailboat, such as the top of the mast.
Once, during the preparation of rigging my sailboat, I had a moment of realization when I discovered that I had forgotten to bring a screwdriver . This unfortunate predicament occurred while I was in a remote location with no nearby stores. Being resourceful, I improvised by utilizing a multipurpose tool with a small knife blade, which served as a makeshift screwdriver. Although it was not the ideal solution, it allowed me to accomplish the task. Since that incident, I have learned the importance of double-checking my toolbox before commencing any rigging endeavor. This practice ensures that I have all of the necessary tools and equipment, preventing any unexpected surprises along the way.
3. Inspecting the Rigging Components
Inspecting the rigging components is essential for rigging a sailboat safely. Here is a step-by-step guide on inspecting the rigging components:
1. Visually inspect the mast, boom, and standing rigging for damage, such as corrosion, cracks, or loose fittings.
2. Check the tension of the standing rigging using a tension gauge. It should be within the recommended range from the manufacturer.
3. Examine the turnbuckles, clevis pins, and shackles for wear or deformation. Replace any damaged or worn-out hardware.
4. Inspect the running rigging, including halyards and sheets, for fraying, signs of wear, or weak spots. Replace any worn-out lines.
5. Check the sail for tears, wear, or missing hardware such as grommets or luff tape.
6. Pay attention to the connections between the standing rigging and the mast. Ensure secure connections without any loose or missing cotter pins or rigging screws.
7. Inspect all fittings, such as mast steps, spreader brackets, and tangs, to ensure they are securely fastened and in good condition.
8. Conduct a sea trial to assess the rigging’s performance and make necessary adjustments.
Regularly inspecting the rigging components is crucial for maintaining the sailboat’s rigging system’s integrity, ensuring safe sailing conditions, and preventing accidents or failures at sea.
Once, I went sailing on a friend’s boat without inspecting the rigging components beforehand. While at sea, a sudden gust of wind caused one of the shrouds to snap. Fortunately, no one was hurt, but we had to cut the sail loose and carefully return to the marina. This incident taught me the importance of inspecting the rigging components before sailing to avoid unforeseen dangers.
Step-by-Step Guide on How to Rig a Sailboat
Get ready to set sail with our step-by-step guide on rigging a sailboat ! We’ll take you through the process from start to finish, covering everything from stepping the mast to setting up the running rigging . Learn the essential techniques and tips for each sub-section, including attaching the standing rigging and installing the boom and sails . Whether you’re a seasoned sailor or a beginner, this guide will have you ready to navigate the open waters with confidence .
1. Stepping the Mast
To step the mast of a sailboat, follow these steps:
1. Prepare the mast: Position the mast near the base of the boat.
2. Attach the base plate: Securely fasten the base plate to the designated area on the boat.
3. Insert the mast step: Lower the mast step into the base plate and align it with the holes or slots.
4. Secure the mast step: Use fastening screws or bolts to fix the mast step in place.
5. Raise the mast: Lift the mast upright with the help of one or more crew members.
6. Align the mast: Adjust the mast so that it is straight and aligned with the boat’s centerline.
7. Attach the shrouds: Connect the shrouds to the upper section of the mast, ensuring proper tension.
8. Secure the forestay: Attach the forestay to the bow of the boat, ensuring it is securely fastened.
9. Final adjustments: Check the tension of the shrouds and forestay, making any necessary rigging adjustments.
Following these steps ensures that the mast is properly stepped and securely in place, allowing for a safe and efficient rigging process. Always prioritize safety precautions and follow manufacturer guidelines for your specific sailboat model.
2. Attaching the Standing Rigging
To attach the standing rigging on a sailboat, commence by preparing the essential tools and equipment, including wire cutters, crimping tools, and turnbuckles.
Next, carefully inspect the standing rigging components for any indications of wear or damage.
After inspection, fasten the bottom ends of the shrouds and stays to the chainplates on the deck.
Then, securely affix the top ends of the shrouds and stays to the mast using adjustable turnbuckles .
To ensure proper tension, adjust the turnbuckles accordingly until the mast is upright and centered.
Utilize a tension gauge to measure the tension in the standing rigging, aiming for around 15-20% of the breaking strength of the rigging wire.
Double-check all connections and fittings to verify their security and proper tightness.
It is crucial to regularly inspect the standing rigging for any signs of wear or fatigue and make any necessary adjustments or replacements.
By diligently following these steps, you can effectively attach the standing rigging on your sailboat, ensuring its stability and safety while on the water.
3. Installing the Boom and Sails
To successfully complete the installation of the boom and sails on a sailboat, follow these steps:
1. Begin by securely attaching the boom to the mast. Slide it into the gooseneck fitting and ensure it is firmly fastened using a boom vang or another appropriate mechanism.
2. Next, attach the main sail to the boom. Slide the luff of the sail into the mast track and securely fix it in place using sail slides or cars.
3. Connect the mainsheet to the boom. One end should be attached to the boom while the other end is connected to a block or cleat on the boat.
4. Proceed to attach the jib or genoa. Make sure to securely attach the hanks or furler line to the forestay to ensure stability.
5. Connect the jib sheets. One end of each jib sheet should be attached to the clew of the jib or genoa, while the other end is connected to a block or winch on the boat.
6. Before setting sail, it is essential to thoroughly inspect all lines and connections. Ensure that they are properly tensioned and that all connections are securely fastened.
During my own experience of installing the boom and sails on my sailboat, I unexpectedly encountered a strong gust of wind. As a result, the boom began swinging uncontrollably, requiring me to quickly secure it to prevent any damage. This particular incident served as a vital reminder of the significance of properly attaching and securing the boom, as well as the importance of being prepared for unforeseen weather conditions while rigging a sailboat.
4. Setting Up the Running Rigging
Setting up the running rigging on a sailboat involves several important steps. First, attach the halyard securely to the head of the sail. Then, connect the sheets to the clew of the sail. If necessary, make sure to secure the reefing lines . Attach the outhaul line to the clew of the sail and connect the downhaul line to the tack of the sail. It is crucial to ensure that all lines are properly cleated and organized. Take a moment to double-check the tension and alignment of each line. If you are using a roller furling system, carefully wrap the line around the furling drum and securely fasten it. Perform a thorough visual inspection of the running rigging to check for any signs of wear or damage. Properly setting up the running rigging is essential for safe and efficient sailing. It allows for precise control of the sail’s position and shape, ultimately optimizing the boat’s performance on the water.
Safety Considerations and Tips
When it comes to rigging a sailboat, safety should always be our top priority. In this section, we’ll explore essential safety considerations and share some valuable tips to ensure smooth sailing. From the importance of wearing a personal flotation device to securing loose ends and lines, and being cautious around overhead power lines, we’ll equip you with the knowledge and awareness needed for a safe and enjoyable sailing experience. So, let’s set sail and dive into the world of safety on the water!
1. Always Wear a Personal Flotation Device
When rigging a sailboat, it is crucial to prioritize safety and always wear a personal flotation device ( PFD ). Follow these steps to properly use a PFD:
- Select the appropriate Coast Guard-approved PFD that fits your size and weight.
- Put on the PFD correctly by placing your arms through the armholes and securing all the straps for a snug fit .
- Adjust the PFD for comfort , ensuring it is neither too tight nor too loose, allowing freedom of movement and adequate buoyancy .
- Regularly inspect the PFD for any signs of wear or damage, such as tears or broken straps, and replace any damaged PFDs immediately .
- Always wear your PFD when on or near the water, even if you are a strong swimmer .
By always wearing a personal flotation device and following these steps, you will ensure your safety and reduce the risk of accidents while rigging a sailboat. Remember, prioritize safety when enjoying water activities.
2. Secure Loose Ends and Lines
Inspect lines and ropes for frayed or damaged areas. Secure loose ends and lines with knots or appropriate cleats or clamps. Ensure all lines are properly tensioned to prevent loosening during sailing. Double-check all connections and attachments for security. Use additional safety measures like extra knots or stopper knots to prevent line slippage.
To ensure a safe sailing experience , it is crucial to secure loose ends and lines properly . Neglecting this important step can lead to accidents or damage to the sailboat. By inspecting, securing, and tensioning lines , you can have peace of mind knowing that everything is in place. Replace or repair any compromised lines or ropes promptly. Securing loose ends and lines allows for worry-free sailing trips .
3. Be Mindful of Overhead Power Lines
When rigging a sailboat, it is crucial to be mindful of overhead power lines for safety. It is important to survey the area for power lines before rigging the sailboat. Maintain a safe distance of at least 10 feet from power lines. It is crucial to avoid hoisting tall masts or long antenna systems near power lines to prevent contact. Lower the mast and tall structures when passing under a power line to minimize the risk of contact. It is also essential to be cautious in areas where power lines run over the water and steer clear to prevent accidents.
A true story emphasizes the importance of being mindful of overhead power lines. In this case, a group of sailors disregarded safety precautions and their sailboat’s mast made contact with a low-hanging power line, resulting in a dangerous electrical shock. Fortunately, no serious injuries occurred, but it serves as a stark reminder of the need to be aware of power lines while rigging a sailboat.
Some Facts About How To Rig A Sailboat:
- ✅ Small sailboat rigging projects can improve sailing performance and save money. (Source: stingysailor.com)
- ✅ Rigging guides are available for small sailboats, providing instructions and tips for rigging. (Source: westcoastsailing.net)
- ✅ Running rigging includes lines used to control and trim the sails, such as halyards and sheets. (Source: sailingellidah.com)
- ✅ Hardware used in sailboat rigging includes winches, blocks, and furling systems. (Source: sailingellidah.com)
- ✅ A step-by-step guide can help beginners rig a small sailboat for sailing. (Source: tripsavvy.com)
Frequently Asked Questions
1. how do i rig a small sailboat.
To rig a small sailboat, follow these steps: – Install or check the rudder, ensuring it is firmly attached. – Attach or check the tiller, the long steering arm mounted to the rudder. – Attach the jib halyard by connecting the halyard shackle to the head of the sail and the grommet in the tack to the bottom of the forestay. – Hank on the jib by attaching the hanks of the sail to the forestay one at a time. – Run the jib sheets by tying or shackling them to the clew of the sail and running them back to the cockpit. – Attach the mainsail by spreading it out and attaching the halyard shackle to the head of the sail. – Secure the tack, clew, and foot of the mainsail to the boom using various lines and mechanisms. – Insert the mainsail slugs into the mast groove, gradually raising the mainsail as the slugs are inserted. – Cleat the main halyard and lower the centerboard into the water. – Raise the jib by pulling down on the jib halyard and cleating it on the other side of the mast. – Tighten the mainsheet and one jibsheet to adjust the sails and start moving forward.
2. What are the different types of sailboat rigs?
Sailboat rigs can be classified into three main types: – Sloop rig: This rig has a single mast with a mainsail and a headsail, typically a jib or genoa. – Cutter rig: This rig has two headsails, a smaller jib or staysail closer to the mast, and a larger headsail, usually a genoa, forward of it, alongside a mainsail. – Ketch rig: This rig has two masts, with the main mast taller than the mizzen mast. It usually has a mainsail, headsail, and a mizzen sail. Each rig has distinct characteristics and is suitable for different sailing conditions and preferences.
3. What are the essential parts of a sailboat?
The essential parts of a sailboat include: – Mast: The tall vertical spar that supports the sails. – Boom: The horizontal spar connected to the mast, which extends outward and supports the foot of the mainsail. – Rudder: The underwater appendage that steers the boat. – Centerboard or keel: A retractable or fixed fin-like structure that provides stability and prevents sideways drift. – Sails: The fabric structures that capture the wind’s energy to propel the boat. – Running rigging: The lines or ropes used to control the sails and sailing equipment. – Standing rigging: The wires and cables that support the mast and reinforce the spars. These are the basic components necessary for the functioning of a sailboat.
4. What is a spinnaker halyard?
A spinnaker halyard is a line used to hoist and control a spinnaker sail. The spinnaker is a large, lightweight sail that is used for downwind sailing or reaching in moderate to strong winds. The halyard attaches to the head of the spinnaker and is used to raise it to the top of the mast. Once hoisted, the spinnaker halyard can be adjusted to control the tension and shape of the sail.
5. Why is it important to maintain and replace worn running rigging?
It is important to maintain and replace worn running rigging for several reasons: – Safety: Worn or damaged rigging can compromise the integrity and stability of the boat, posing a safety risk to both crew and vessel. – Performance: Worn rigging can affect the efficiency and performance of the sails, diminishing the boat’s speed and maneuverability. – Reliability: Aging or worn rigging is more prone to failure, which can lead to unexpected problems and breakdowns. Regular inspection and replacement of worn running rigging is essential to ensure the safe and efficient operation of a sailboat.
6. Where can I find sailboat rigging books or guides?
There are several sources where you can find sailboat rigging books or guides: – Online: Websites such as West Coast Sailing and Stingy Sailor offer downloadable rigging guides for different sailboat models. – Bookstores: Many bookstores carry a wide selection of boating and sailing books, including those specifically focused on sailboat rigging. – Sailing schools and clubs: Local sailing schools or yacht clubs often have resources available for learning about sailboat rigging. – Manufacturers: Some sailboat manufacturers, like Hobie Cat and RS Sailing, provide rigging guides for their specific sailboat models. Consulting these resources can provide valuable information and instructions for rigging your sailboat properly.
About the author

Leave a Reply Cancel reply
Your email address will not be published. Required fields are marked *
Save my name, email, and website in this browser for the next time I comment.
Latest posts

The history of sailing – from ancient times to modern adventures
History of Sailing Sailing is a time-honored tradition that has evolved over millennia, from its humble beginnings as a means of transportation to a beloved modern-day recreational activity. The history of sailing is a fascinating journey that spans cultures and centuries, rich in innovation and adventure. In this article, we’ll explore the remarkable evolution of…

Sailing Solo: Adventures and Challenges of Single-Handed Sailing
Solo Sailing Sailing has always been a pursuit of freedom, adventure, and self-discovery. While sailing with a crew is a fantastic experience, there’s a unique allure to sailing solo – just you, the wind, and the open sea. Single-handed sailing, as it’s often called, is a journey of self-reliance, resilience, and the ultimate test of…

Sustainable Sailing: Eco-Friendly Practices on the boat
Eco Friendly Sailing Sailing is an exhilarating and timeless way to explore the beauty of the open water, but it’s important to remember that our oceans and environment need our protection. Sustainable sailing, which involves eco-friendly practices and mindful decision-making, allows sailors to enjoy their adventures while minimizing their impact on the environment. In this…
Argonautrigging.com
Signed in as:
Ormond Beach, Florida. 954-599-3425 . Sailboat rigging specialist.
27 Years Experience sailboat standing rigging and rigging services.
Jason of Argonautrigging.com has 27 years of experience with formal large sailboat rigging parent companies of South Florida and most recently on his own. We are " Bringing " business to our area!
We are the only fully equipped rigging shop in N.E Florida
- We offer sailboat rigging services with a Wireteknik A-300 swage machine for standing rigging 1/4 inch wire rope up to 5/8 inch wire rope swage services in house.
- Kearney ( mobile ) hand machine swaging for small boat standing rigging and life line services. 3/32 inch to 1/4 inch.
- Wire rope Nicopress services for lifting applications. 1/8 to 3/8 inch wire rope.
- Hydraulic power supply system for Nitronic Rod rigged vessel services.
- Wire Rope Standing rigging and Rod Rigging tuning services utilizing Loose Branded tension gauges for small vessels. Dylan Branded Digital Electronic tuning gauge for wire rope 7/16 inch / 11mm up to 5/8 inch / 16 mm.
Formally trained in the many secrets of sailboat rigging with certifications to show. Always taking continuing education training with new technology arriving in the industry.
Veteran Owned and Operated
As a prior Coast Guard Member safety at sea has always been priority number 1. Sailboat rigging.
All of my prior Coast Guard Units have been rigging related. Add another 4 years of rigging service to my history!
Cross training has always been a part of my past sailboat rigging service! We have done amazing things!
View our Video and watch how we look at your sailing vessel.
https://www.youtube.com/watch?v=bk2A60ymfB0
Sailboat rigging inspection.
Standing Rigging
In house, standing rigging swaging services..
New additions to our sailboat rigging capabilities!
WireTeknik Wire Rope Swaging up to 5/8 Inch - 16 MM.
Mobile Life Line and Architectural Services
Kearney MK 2 Mobile wire swaging services for the perfect touch every time.
Rod Rigging Specialist formally trained in Christ Church England. Ocean Yacht Services. Up to - 540 sized rigging.
Running rigging / splicing / mooring lines / ground tackle, sail boat running rigging, mooring line / storm line manufacturing , splicing, sales, ground tackle chain sales / anchor snubbers.
Splicing Services- Halyard, Guys, Hauls, Lifts, Travelers, Rope in general sales.
All types of Lines.
Dyneema / Spectra / AmSteel
Polyesters
3 Strand, Double Braid, Mega Braid, Plated Line
Recovery / Farm Tractor / Off Road Vehicle rescue lines.
Thats right off road enthusiasts. All of your new high tech tow or winch systems started with a sailor and sailboat rigging professionals!
High Line / Utility Service / Linesman Services
We have spliced for:
Florida Power and Lighting
Duke Energy
Chain Plate Replacement Services
Refreshment in process.
Bigger, heavier, Stronger sailboat rigging. Sail harder with a peace of mind!
Total sailing re fit services.
Mast on ground, standing re- rig / re- fit.
Some owners prefer a fresh slate. For the rest of the vessels life span.
Everything from a primer coating to a full sailboat rigging refreshment.
Trampoline Sales and Replacement Services
Service and replacemt, drop us a line.
This site is protected by reCAPTCHA and the Google Privacy Policy and Terms of Service apply.
Argonautrigging.com. ASK FOR JASON!
Sandra Drive, Ormond Beach, Florida 32176, United States
954-599-3425 [email protected]
Copyright © 2021 Argonautrigging.com - All Rights Reserved.
Powered by GoDaddy
- Privacy Policy
- Terms and Conditions
This website uses cookies.
We use cookies to analyze website traffic and optimize your website experience. By accepting our use of cookies, your data will be aggregated with all other user data.
FREE SHIPPING ON ALL ORDERS OF $150, UNDER 50LBS
- Shop Products ▼
- Order Status
- Shipping Return
- Request Quote

Welcome to www.usrigging.com , your premier destination for top-quality rigging supplies and solutions. At US Rigging, we pride ourselves on being a trusted source for a wide range of rigging products, from wire rope and slings to hoists and hardware. With a commitment to excellence and safety, we cater to the diverse needs of industries such as construction, maritime, and manufacturing. Whether you are a seasoned professional or a DIY enthusiast, our user-friendly platform offers a comprehensive selection of reliable rigging equipment, accompanied by expert guidance and resources. Explore our extensive catalog and experience unparalleled service as you embark on your rigging projects with confidence. At US Rigging, we elevate your lifting and rigging experience to new heights.

TRENDING ITEMS

Gripple No. 1 Express Wire Rope Grip Joiner
 - Wire Rope Joiner (G-RG-04)")
Gripple Gripple® Lockable Wire Rope Grip - For 1/8”

DuraBrite 316 Stainless Steel Eye Bolt
")
DuraBrite 316 Stainless Steel Eye Nuts

Gripple No. 2 - Express Wire Rope Grip

Gripple Gripple Replacement Standard Wire Rope Grip - No. 3 - WLL 200 lbs.
")
Gripple Gripple Standard Loop Hangers - No. 2 - WLL 100 lbs. HVAC, lighting, electrical - (SOLD IN PACKS)

Safe-T-Strap 4' Low Rise Safety Strap w/ D-Ring

Gripple Gripple Express Loop Pipe Hangers - XP 1 - WLL 25 lbs. - Ideal for signage, shop fitting, lighting, and other lightweight fixtures

DuraBrite 5/8" - Tactical 316 Stainless Steel Trigger Snap

Safe-T-Strap 4' Residential Choker Strap w/ D-Ring & Loop

SWAGE-IT Swage-Right Swager - Light-Duty, Single Cavity - 1/16" Wire Rope
U.S. Rigging Supply is your trusted partner for rope, safety and rigging products. Trusted for over 40 Years. U.S. Rigging Supply is a certified ISO 9001:2015 standard company.
SHOP ROPE BY CONSTRUCTION

GEAR YOU WILL LOVE

Kong KNG-538-12

ProClimb Twist Lock Oval I-Beamer

ProClimb Triple Lock Oval I-Beamer

Swage-Right Deluxe SRS Hand-Swaging Tool Kit w/ Cutter
")
Swage-Right 7x19 | 304 Stainless Steel Guy Wire Rope (Aircraft Cable)

Pelican Rope 1/2" - Arborist-16™ Freedom Arborist Climbing Line

Pelican Rope 5/8" - 3 Strand Composite Vertical Lifeline - Hook & Thimble

ProClimb Twist Lock Modified D Steel Carabiner

ProClimb Copper Head Carabiner

ProClimb Large Aluminum Rope Pulley

Swage-Right Medium-Duty 6-Cavity Swager

Shop Arborist
U.S. Rigging Supply offers quantity price breaks on most items and special quotes for orders exceeding our price breaks. If you currently are or would like to become a distributor of our products, please call 888-260-7444 for current distributor pricing.
Recent Blog Posts

The Importance of Using Tool Lanyards on the Jobsite - ProClimb Self-Locking Tool Lanyards
Tool lanyards are an essential piece of safety equipment for any worker who works at heights. They c
Continue Reading

Why do we call it Guy Wire?
Have you been curious where the term "guy wire" came from? Perhaps you've wondered whether the corre
U.S. RIGGING CINEMA
- Vessel Reviews
- Passenger Vessel World
- Offshore World
- Tug and Salvage World
- Maritime Security World
- Specialised Fields
- Marine Projects World
- Small Craft World
- Tanker World
- Dry Cargo World
- Boxship World
- Aquaculture World
- Trawling World
- Longlining World
- Seining World
- Potting World
- Other Fishing Methods
- Regulation & Enforcement
- Feature Weeks
- Classifieds
- Book Reviews
VESSEL REVIEW | Sinichka – Electric commuter boats designed for Russia’s Moskva River

A series of three new electric monohull commuter ferries have already begun operational sailings on the Moskva River in the Russian capital Moscow.
Built by Russian shipyard Emperium, sister vessels Sinichka , Filka , and Presnya – all named after rivers in Moscow – are being operated by the Moscow Department of Transport and Road Infrastructure Development (Moscow Deptrans). They are the first units of a planned fleet of 20 vessels that will serve the capital city and other nearby communities. The new ferry system will be the water transport system to be operated on the Moskva River in 16 years.
Each vessel has a welded aluminium hull, an LOA of 21 metres, a beam of 6.2 metres, a draught of only 1.4 metres, a displacement of 40 tonnes, and capacity for 80 passengers plus two crewmembers. Seating is available for 42 passengers on each ferry, and the main cabins are also fitted with USB charging ports, wifi connectivity, tables, toilets, and space for bicycles and scooters. The cabin layout can be rearranged to allow the operator to adjust the distances between the seats and to install armrests of varying widths.
An open upper deck is also accessible to passengers and is the only area on each ferry where smoking is allowed.
The ferries are all of modular construction with each ferry’s wheelhouse, main cabin, and other structural elements being built as complete, separate components. This enables the ferries to be easily dismantled for transport to anywhere in Russia by rail and then quickly re-assembled within seven days.
The ferries are also ice-capable. Recently completed operational trials on the Moskva showed that the vessels can also easily navigate under mild winter conditions with broken surface ice, though year-round operations are planned for the entire fleet.
The ferries are each fitted with 500kWh lithium iron phosphate battery packs that supply power to two 134kW motors. This configuration can deliver a maximum speed of 11.8 knots, a cruising speed of just under 10 knots, and a range of 150 kilometres.
Emperium said the transfer of rotation of electric motors to the propeller is carried out by direct drive. As a propulsion installation, a pulling rotary propeller-steering column with double screws is used. The installation of double pulling screws, with similar power, allows an operator to increase the efficiency of the propulsion system to deliver a slightly higher speed or to reduce energy consumption. This arrangement also provides the ferries with enhanced manoeuvrability necessary for navigating in close quarters.
The batteries themselves have projected service lives of 10 to 12 years and are fitted with safety features such as built-in fire extinguishers and gas vents. Quick-disconnect features allow the batteries to be easily removed for replacement or maintenance.
Some of our readers have expressed disquiet at our publication of reviews and articles describing new vessels from Russia. We at Baird Maritime can understand and sympathise with those views. However, despite the behaviour of the country’s leaders, we believe that the maritime world needs to learn of the latest developments in vessel design and construction there.
Click here to read other news stories, features, opinion articles, and vessel reviews as part of this month’s Passenger Vessel Week.
Related Posts

Baird Maritime
Tags: Emperium Filka Moscow Moscow Department of Transport and Road Infrastructure Development Moskva River Presnya Russia Sinichka WBW newbuild
- Previous VESSEL REVIEW | Ferry Rokko – Second 194m Ro-Pax for Miyazaki Car Ferry
- Next Brighton man to be charged for illegal abalone haul
Baird Maritime , launched in 1978, is one of the world's premier maritime publishing houses.
The company produces the leading maritime new portal BairdMaritime.com , home of the world famous Work Boat World, Fishing Boat World, Ship World, Ausmarine, and Commercial Mariner sub-sites, and the industry-leading ship brokerage platforms WorkBoatWorld.com and ShipWorld.com .
Contact us: [email protected]
© Copyright - Baird Maritime
- Terms & Conditions
- Advertise with Baird Maritime
- Submit News/Leads
- Bahasa Indonesia
- Slovenščina
- Science & Tech
- Russian Kitchen
Cruising the Moskva River: A short guide to boat trips in Russia’s capital

There’s hardly a better way to absorb Moscow’s atmosphere than on a ship sailing up and down the Moskva River. While complicated ticketing, loud music and chilling winds might dampen the anticipated fun, this checklist will help you to enjoy the scenic views and not fall into common tourist traps.
How to find the right boat?
There are plenty of boats and selecting the right one might be challenging. The size of the boat should be your main criteria.
Plenty of small boats cruise the Moskva River, and the most vivid one is this yellow Lay’s-branded boat. Everyone who has ever visited Moscow probably has seen it.

This option might leave a passenger disembarking partially deaf as the merciless Russian pop music blasts onboard. A free spirit, however, will find partying on such a vessel to be an unforgettable and authentic experience that’s almost a metaphor for life in modern Russia: too loud, and sometimes too welcoming. Tickets start at $13 (800 rubles) per person.
Bigger boats offer smoother sailing and tend to attract foreign visitors because of their distinct Soviet aura. Indeed, many of the older vessels must have seen better days. They are still afloat, however, and getting aboard is a unique ‘cultural’ experience. Sometimes the crew might offer lunch or dinner to passengers, but this option must be purchased with the ticket. Here is one such option offering dinner for $24 (1,490 rubles).

If you want to travel in style, consider Flotilla Radisson. These large, modern vessels are quite posh, with a cozy restaurant and an attentive crew at your service. Even though the selection of wines and food is modest, these vessels are still much better than other boats.

Surprisingly, the luxurious boats are priced rather modestly, and a single ticket goes for $17-$32 (1,100-2,000 rubles); also expect a reasonable restaurant bill on top.
How to buy tickets?
Women holding photos of ships promise huge discounts to “the young and beautiful,” and give personal invitations for river tours. They sound and look nice, but there’s a small catch: their ticket prices are usually more than those purchased online.
“We bought tickets from street hawkers for 900 rubles each, only to later discover that the other passengers bought their tickets twice as cheap!” wrote (in Russian) a disappointed Rostislav on a travel company website.
Nevertheless, buying from street hawkers has one considerable advantage: they personally escort you to the vessel so that you don’t waste time looking for the boat on your own.

Prices start at $13 (800 rubles) for one ride, and for an additional $6.5 (400 rubles) you can purchase an unlimited number of tours on the same boat on any given day.
Flotilla Radisson has official ticket offices at Gorky Park and Hotel Ukraine, but they’re often sold out.
Buying online is an option that might save some cash. Websites such as this offer considerable discounts for tickets sold online. On a busy Friday night an online purchase might be the only chance to get a ticket on a Flotilla Radisson boat.
This website (in Russian) offers multiple options for short river cruises in and around the city center, including offbeat options such as ‘disco cruises’ and ‘children cruises.’ This other website sells tickets online, but doesn’t have an English version. The interface is intuitive, however.
Buying tickets online has its bad points, however. The most common is confusing which pier you should go to and missing your river tour.

“I once bought tickets online to save with the discount that the website offered,” said Igor Shvarkin from Moscow. “The pier was initially marked as ‘Park Kultury,’ but when I arrived it wasn’t easy to find my boat because there were too many there. My guests had to walk a considerable distance before I finally found the vessel that accepted my tickets purchased online,” said the man.
There are two main boarding piers in the city center: Hotel Ukraine and Park Kultury . Always take note of your particular berth when buying tickets online.
Where to sit onboard?
Even on a warm day, the headwind might be chilly for passengers on deck. Make sure you have warm clothes, or that the crew has blankets ready upon request.
The glass-encased hold makes the tour much more comfortable, but not at the expense of having an enjoyable experience.

Getting off the boat requires preparation as well. Ideally, you should be able to disembark on any pier along the way. In reality, passengers never know where the boat’s captain will make the next stop. Street hawkers often tell passengers in advance where they’ll be able to disembark. If you buy tickets online then you’ll have to research it yourself.
There’s a chance that the captain won’t make any stops at all and will take you back to where the tour began, which is the case with Flotilla Radisson. The safest option is to automatically expect that you’ll return to the pier where you started.
If using any of Russia Beyond's content, partly or in full, always provide an active hyperlink to the original material.
to our newsletter!
Get the week's best stories straight to your inbox
- What to do in Moscow City, if you’re not mega-rich
- Moscow after dusk: 10 places to drink, dance, and groove
- 5 things you must do in Moscow in 2018 between football matches (or without them)
- Sandwiched between Moscow and St. Petersburg: How to spend a perfect weekend in Tver
- 24 or 48 hours in Moscow: Where to go and what to do in 2019
This website uses cookies. Click here to find out more.
IMAGES
VIDEO
COMMENTS
4. Inspect all attachments to the mast and boom on deck and at eye level. Inspect the gooseneck fitting for the mast and the vang attachment for corrosion or cracks. Any attachment points on the boom for running rigging also need to be inspected. Again, take close-up photos if you find any problems.
Aug 14, 2015. It's one of the most important features on a sailboat, but many owners put standing rigging at the back of their minds when it comes time to do their pre-season safety checks. A prudent sailor should inspect his or her standing rig at least once each season and should know when the time comes to replace most or all of it.
My inspection process includes a rigging-wire wipe-down with a rag that easily snags on tiny cracks. It includes careful scrutiny of hardware junctions. I search for signs of chafe, especially where fiber or wire running rigging makes directional changes at sheave boxes, and around where the headsail furler's top swivel rides.
Ever wondered how to inspect your rigging? We share tips from our rigger. Subscribe for more sailing videos: https://ftbyoutube.page.link/subscribe Trained b...
Standing Rigging Inspection Ralph Naranjo. It's easy to assume that a sailboat's rig will perpetually point skyward. It has a lot to do with advances in engineering, material science and design priorities adopted by today's boatbuilders. But with this uptick in reliability comes the downside of complacency. Time, metal fatigue and ...
Likewise, retire any cracked or bent turnbuckles or toggles. Seized turnbuckles should be freed using a penetrating oil such as WD-40, and heat from a propane torch. Brute force is almost guaranteed to ruin turnbuckles with screws under 3/8-inch. Remove the tape and examine inboard and outboard ends of spreaders.
Check that all internal halyards and reefing lines are run correctly and are not crossed over each other. Article—running rigging. 3 Years / 30k Miles. Check that all internal halyards run aft of the spreader bars or bolts. Article—running rigging. 3 Years / 30k Miles. Rig Wiring and Lighting Inspection.
Inspecting Your Mast and Rigging. By The Rigging Company November 18, 2015. Your sailboat rigging should be thoroughly checked once a season. The best way to do this is by pulling the mast or masts out of the boat and running down a check list. One can also spot most major problems from a bosun's chair, and if done regularly, is generally ...
February 3, 2016 / RDB. In the January issue of the Boat US Marine Insurance Magazine I have written an article on how to inspect your rigging. I did this because a lot of us sailboat owners are in areas where it is difficult to locate a rigger to do inspections for us. We as sailboat owners need to be able to keep an eye on our rigging.
Level 1 Inspection: Includes a full visual inspection of the accessible rigging-top to bottom. There is also a visual inspection of the mast base and chainplates, light fixtures and other mounted fixtures. Running rigging is assessed. The end of the inspection includes a verbal summary of any problems or potential problems sighted, and as ...
A rigging survey is a type of boat inspection that evaluates a sailboat's mast, boom, and associated rigging. Inspections are made at attachment points, welds, standing and running rigging, and includes the mast step and chain plates. Rigging surveys can be completed aloft or inspected while the rig is off the boat.
The generally accepted lifespan of standing rigging is 10 to 15 years. Ask your insurance company whether you can save on your premium by completely replacing your rig. This might ease the pain considerably. Mike Allen of Beaufort, South Carolina, asks: "My standing rigging is 22 years old. It seems to be in good shape, but there is some ...
Wire standing rigging on an offshore cruising boat should be replaced every 10 years, or 30,000 miles, whichever comes first. The time requirement is because wire is more prone to corrosion than rod (see below). This recommended replacement cycle can certainly be argued over, for example extended for boats sailing in fresh water, but our ...
Sailboat Rigging Inspection. By Sandy Parks · On October 23, 2020. Vloggers Follow the Boat interview a rigger on what to look for when inspecting boat rigging, offering tips and hints along the way. As they say "Keep everything clean and maintained, and the boat will look after you.". Watch Video.
Sailboat rigging inspection is a critical aspect of maintaining a vessel's safety and performance. It's a meticulous process that demands attention to detail and a deep understanding of the ...
To step the mast of a sailboat, follow these steps: 1. Prepare the mast: Position the mast near the base of the boat. 2. Attach the base plate: Securely fasten the base plate to the designated area on the boat. 3. Insert the mast step: Lower the mast step into the base plate and align it with the holes or slots. 4.
- We offer sailboat rigging services with a Wireteknik A-300 swage machine for standing rigging 1/4 inch wire rope up to 5/8 inch wire rope swage services in house. - Kearney ( mobile ) hand machine swaging for small boat standing rigging and life line services. 3/32 inch to 1/4 inch. ... Sailboat rigging inspection. Standing Rigging. In House ...
Quality Sailboat Rigging. Whether your boat is big or small, Puget Sound Rigging is a trusted resource for sailboat rigging. Our friendly riggers provide high-quality modern rigging solutions to maximize the performance and safety of your vessel. Our goal is to build lasting relationships with our customers so that we can provide the best ...
U.S. Rigging Supply is your trusted partner for rope, safety and rigging products. Trusted for over 40 Years. U.S. Rigging Supply is a certified ISO 9001:2015 standard company. SHOP ROPE BY CONSTRUCTION. Kernmantle > 3-Strand > 12-Strand > 16-Strand > 24-Strand > Double Braid > GEAR YOU WILL LOVE. Sale.
About Us. Baird Maritime, launched in 1978, is one of the world's premier maritime publishing houses.. The company produces the leading maritime new portal BairdMaritime.com, home of the world famous Work Boat World, Fishing Boat World, Ship World, Ausmarine, and Commercial Mariner sub-sites, and the industry-leading ship brokerage platforms WorkBoatWorld.com and ShipWorld.com.
On this map you can see the details of the longest and most classic of the Flotilla Radisson boat tours: 2. Companies that do boat tours on the Moskva River. There are many companies that do cruises on the Moskva River, but the 4 main ones are: Capital River Boat Tour Company (CCK) Mosflot. Flotilla Radisson.
Prices start at $13 (800 rubles) for one ride, and for an additional $6.5 (400 rubles) you can purchase an unlimited number of tours on the same boat on any given day.