🚚 FREE US SHIPPING ON ORDERS OVER $25 🚚

The Complete Guide to Solar Panel Mounts for Boats (and Where to Position Them)

How many boaters invest hours researching solar panels? They go all wide-eyed at the shiny panels, marveling at their ingenuity, but how many consider the humble mounts those bright panels sit on?
Let's face facts: Solar panels get all the glory, but spare a thought for the mounts? A good mount can help you get the most out of your solar, increasing your capacity by up to 40 percent.
So maybe it's time for mounts to step out of the shadows of solar panels and into the sunlight (bad pun, I know). Seriously, let's give them some glory.
The type of mounts you have depends on what you want the solar to do and the space available. Is it to charge a cell phone or mobile GPS unit? Or is it to power your entire onboard needs when stationary?
The engine does the hard work when you're moving, so you only really need solar when you're moored up, right? To find out what solar mounts are right for you, we first need to discover what type of boater you are.
Are You a Liveaboard Boater?
Being a liveaboard boater is a different experience to being a leisure boater. You can't just plug-in to a marina or get into an SUV and tow the boat home at the first sign of a rain cloud. The boat is your home.
So power is something you need to manage carefully. And the right solar panel mounts for your boat are essential to optimize the performance of your solar panels.
Are You a Leisure Boater?
As a leisure boater, you'll have different priorities than a liveaboard, and your need to manage power is not so crucial. You'll watch for sunny weather and head out in the boat for a day or weekend excursion . So why do you need solar?
Coolers need power to chill their contents and cell phones need charging. But in the main, the boat engine will power the electrical equipment onboard, because there won't be long periods when you're not moving, unlike a liveaboard boater.
Liveaboard or not, if the sun's power reduces your costs, minimizes the engine's wear and tear and you can afford it, why not?
What Are the Best Boats for Solar Panel Mounts?

Pontoon Boats
It depends on the size and shape of your pontoon boat . Smaller vessels are designed to make the most of the available space, which means seating and guests take priority on the deck .
Newer models, like the Cypress Cay Sea breeze SL 250, have virtually no surface to put solar mounts. Some pontoons have living space.
The Canadian manufacturer South lands builds hybrid pontoon boats, but the average pontoon vessels are for day trips and fishing. Some pontoons have fixed canopies so solar mounts can fit the available flat surfaces .
If you're in the market for a pontoon boat, solar panels and how to mount them are way down on your list of priorities.
Yachts offer a multitude of opportunities to fit solar mounts. Pole mounts are popular with yacht owners, as are fixed and angled mounts . And because most yachts are seafaring, there's little to obstruct the sun's rays way out in the ocean.
In addition, yachts are designed to travel farther, making extended periods onboard inevitable. This means that choosing the right mount is crucial to achieving maximum input.
Canal Boats
A canal boat's design makes them ideal vessels to fit solar mounts. Their robust, steel roofs can withstand the most durable solar panel mounts. This means larger panels can be attached to increase onboard power input.
Because of their long shape, canal boats also allow various panel mount options too. In fact, the only solar panel mount that's unsuitable for a canal boat is the pole mount because of low canal bridge clearances.
Motor Cruisers
Motor cruisers, because of their shape, often have plenty of space for panel mounts to be fitted. With long flat roofs, most motor cruisers (even the mid-range ones) are excellent boats for fixed, angled and even pole mounts .
Featured Boat Care Product
Check Price on Amazon - Better Boat's exterior cleaning kit comes with everything you need to keep your boat clean and shiny from bow to stern. It comes with boat soap, a soap foam spray gun, two microfiber towels, a large sponge and a boat eraser.
The Best Ways to Fix Solar Panel Mounts to Your Boat
Glue adhesives.
There are numerous products available to bond panel mounts to any surface. If you choose this option, it's worth remembering there's some prep work before applying the glue.
Most manufacturers recommend cleaning the surface area before bonding, and some recommend lightly sanding the surface before applying adhesive.
I recommend this Sikaflex-252 White Polyurethane Adhesive The most significant advantage of this glue is that once dried, it can be sanded and painted. Oh, and when choosing adhesives, there's the small matter of no holes .
The fixing solution you choose depends on the boat you have and where it's used. Gluing solar mounts on a seafaring yacht may not be the best idea, especially if you're mid-Atlantic in force nine gales.
You want to know that the mounts are going to do their job and hold your solar panels in place. This Temco Z Bracket Stainless Steel Mount Kit (Available on Amazon) can be easily installed on solar panels. The stainless steel material means it'll never leave rust on your boat.
You're gonna need to bolt the mounts to the roof. Just make sure that when you've drilled the holes, you have enough marine-grade sealant to plug the gaps.
Panel Sizes Versus Types of Mounts for Your Boat
Some solar panel mounts aren't suitable for different-sized panels. The most robust by far is the fixed mount system. If you cruise a lot and don't mind the panels being permanently flat, then these mounts can handle whatever weight you throw at them.
If you want tilt and angled mounts, then you'll need to check with the manufacturer what the maximum load is. The general rule of thumb is: the larger the mount, the bigger the panel it will hold.
Panel weights 100 w or less will fit cheaper mounts. If you want panels over 100 w, check with the bracket manufacturer to see the maximum load weight.
The Best Way to Position Solar Panel Mounts on the Boat
Your first consideration is the obstructions that might hamper the performance of the panels. Get it wrong and all that hard-earned cash you shelled will be for nothing.
Putting a fixed mount for solar on a deck of a motor cruiser isn't any good if you then use a retractable canopy to shield you from the sun and it blocks the panel producing energy. You've just wasted hundreds of dollars.
Another consideration is the mount type, especially if you're stationary for long periods. Tracking the sun by tilting the panels when not moving will increase power input massively.
If you're mostly moving and rarely still, then flat is best. This position optimizes the sun's rays, drawing power in whichever position the boat sits.
Look at your own boat. Does it have large flat areas, preferably high up and unaffected by shadows or obstructions? If the answer is yes, then the next consideration is what type of solar panel mount is best for you.
The Different Types of Solar Panel Mounts for Boats

Fixed Mount
The HQST Z-Bracket is an excellent example of a fixed mount. It's lightweight and inexpensive. And I mean cheap!
It isn't complicated to fit, although it does require you to drill holes in whatever surface you attach it to. This bracket also enables you to mount the panel to many styles of vessels. The manufacturer even recommends them for RVs.
The other advantage of a fixed mount system is its ability to handle panel sizes from the smallest all the way up to 300w. While these look like a good option, it's worth remembering that if you need the flexibility of moving the panels to chase the sun, fixed mounts won't be for you.
On an ocean-going yacht or a pontoon boat (space permitting) on a lake, the fixed mount system would be worth considering. There'll be minimum obstructions, and while you're always moving, the flat fixed mounts will optimize the charge into the batteries.
There are other types of fixed-mount systems that don't require any drilling.
The Renogy Solar Panel Drill-Free Corner Bracket is a good choice if you don't want to drill holes in your boat roof. They aren't as cheap as the Z-Brackets, but primarily they do the same job.
If you own a boat with a fiberglass body, drilling into the roof simply isn't an option. So how are they fixed? Good old bonding adhesive like Sikaflex 252 (Available on Amazon) .
Adjustable Mounts
The Renogy Adjustable Tilt Mount Bracket mount enables the solar panel to be adjusted to directly face the sun, a feature commonly used when the boat is still.
For the liveaboard boater, the adjustable mount is crucial. By adjusting the angle of the panels, you can increase the input of energy by up to 40 percent.
This particular model can only support a maximum panel of 150w, and the adjustment angle does decrease depending on the size of the panels. So it's worth considering that the max 150w panel, while the most powerful, could give less performance with this bracket, because of the angle that it can be mounted.
What makes this mount different is that the brackets that attach to the roof of your boat are independent of each other, rather than on a long aluminum bracket joining them together.
It means the roof doesn't have to be completely flat. Canal boats would benefit from this type of bracket because they have slightly curved roofs.
The Link Solar Adjustable Rack Solar Panel Mount is another adjustable bracket, enabling the maximum performance of the panels.
It's a rack system, so it has a long strip bracket that attaches to the roof. The beauty of this system is the capacity it can handle.
If you invest in the 41-inch bracket, it'll take the weight of a 300w solar panel. It may cost more, but given that you'll probably only need two brackets if you're mounting 300w solar panels, it could still be a cost-effective choice.
Just remember where you're going to mount it. Because it's a rack system panel mount, it only fits on perfectly flat surfaces.
AM Solar 35mm Tilting Mount Okay, I'm a bit sneaky here. Technically, these mounts are for RVs. But if it attaches to RVs, it'll attach to your boat. They're light, compact and give vital adjustability to maximize the sun's power.
This mounting system's advantage is you'll avoid drilling holes in your roof. Each bracket has a VHB tape strip, which bonds to most surfaces. Fiberglass gives the best bond, but if it works for RVs, then metal surfaces will work too.
A word of caution: These brackets attach by drilling into the solar panel's side. This is the crucial bit: If you're piercing the side of your panel, there's a strong chance you'll invalidate the warranty.
It's worth checking before you do. AM Solar sells compatible panels with pre-drilled holes, which massively cuts down on your choices and ability to shop around for the best price.
Pole Mounts
Missouri Pole Mount
Let's start with a positive: This pole mount is 100% American. That's got to be a good thing, right?
Pole mounts are excellent for panels that can be raised up to avoid obstructions. They're also good for boats with limited solar panel mounting space.
Pole mounts are popular with yacht owners due to their maneuverability and height adjustment properties. This particular pole system can handle two 100w panels, so there's no need to compromise on the energy you create.
What We've Learned
All the solar panel mounts featured are value for money. What to consider is the panel size. Is it better to have two 300w panels, reducing the number of solar mounts? Or do you go for six 100w panels, increasing the mount's overall cost? That'll depend on your boat's available space.
By far, the easiest to use is the fixed flat system . Glue or bolt the brackets on and away you go. No fuss. But again, mounting space may be an issue, so this type of mount won't be for everyone.
The most efficient is the angled, adjustable mount . Liveaboards should consider this when buying solar. Increasing your panel's performance with the ability to angle towards the sun is vital if you're stationary for extended periods.
In winter, when the sun sits lower in the sky, you'll reap the benefits of angled mounting systems for sure.
To clean your solar panels, simply rinse with a boat hose and nozzle and swipe with a silicone squeegee . This is a quick task to do when you've got out the boat soap or hull cleaner for the rest of the vessel.
One Final Point

- choosing a selection results in a full page refresh
How to Mount Solar Panels on Your RV: Step by Step Installation
You’ll need to know how to mount solar panels on your RV roof if you want to DIY-install your RV solar system.
The mounting gear you’ll require to attach solar panels on your RV also depends on the kind of panels you have (flexible or tempered glass), the roof material you have (usually rubber/TPO or fiberglass), and if you need your panels to tilt.
Step 1: Attaching Solar Panels to an RV Roof Made of Rubber
Rubber, sometimes referred to as EPDM or TPO, is the most used material for RV roofs.
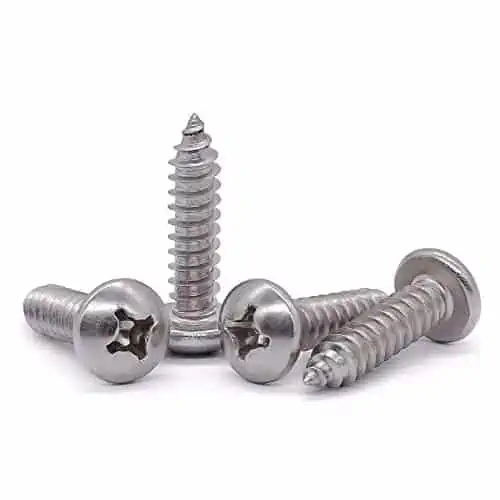
The easiest approach to attach solar panels to this sort of roof is to screw them in using stainless steel lag bolts or something similar to #14 stainless steel screws since the rubber sheet is placed over a layer of wood.
Don’t forget to choose the right screw length for your roof installation!
#14 x 1″ Pan Head Sheet Metal Screw, 304 Stainless Steel 18-8, Phillips Drive Self Tapping Screw, Round Head Wood Screw, Bright Finish, Full Thread, Pack of 50
The glass solar panels will require mounting brackets to connect to them.
You will then screw the glass solar panels straight into your roof, taking care to position them so that they don’t cast any shadows or obstruct the usage of any other roof accessories.
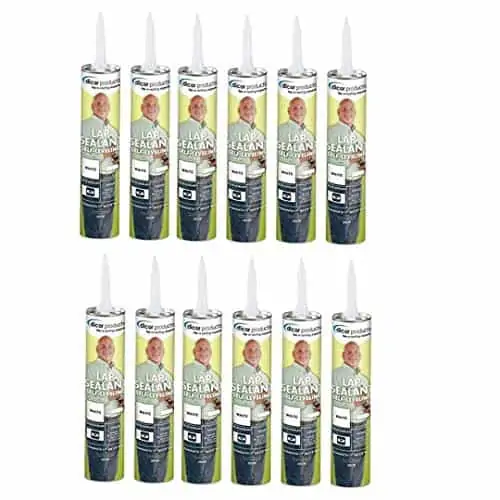
You should seal each hole with Dicor or similar RV-safe self-leveling lap-sealant once they have been screwed in.
The case is the most economical method to purchase Dicor.
Dicor 501LSW-1 RV Rubber Roof Sealant Self Leveling Caulk, Case of 12
The “Z” bracket is the most basic piece of mounting gear for solar panels.
The mounting bracket that is included in RV solar kits the most often is of this sort.
Renogy Solar Panel Mounting Z Brackets Lightweight Aluminum Corrosion-Free Construction for RVs, Trailers, Boats, Yachts, Wall and Other Off Gird Roof Installation, one set of 4 Units
Additionally, you may purchase tilting hardware, create your own brackets, or utilize brand-specific hardware, such as the brackets from Renogy.
Renogy 28in Adjustable Solar Panel Mount Brackets, with Foldable Tilt Legs on Any Flat Surface for RV, Roof, Boat, Any Off-Grid Systems

When installing solar panels on a rubber roof, one thing you don’t want to do is use VHB tape, despite what some RVers advise.
This is because your roof’s top is only a sheet that might rip off if the adhesive were sufficiently dislodged.
Similar to sticking wrapping paper to your wall and pasting a picture frame to it.
The picture will also fly off if the wrapping paper can.
Step 2: On A Rubber Roof, Install Flexible Solar Panels As Follows:
Simply secure the panel to the roof using the adhesive suggested by the solar panel manufacturer.
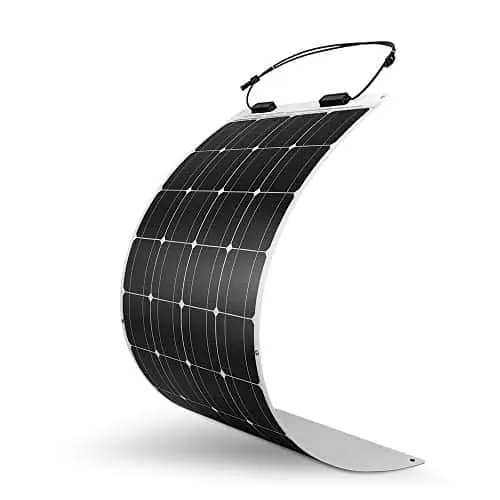
Flexible solar panels don’t need holes at all! These flexible Renogy panels are a fantastic alternative.
Renogy Flexible Solar Panel 100 Watt 12 Volt Monocrystalline Semi-Flexible Bendable Mono Off-Grid Charger for Marine RV Cabin Van Car Uneven Surfaces
Step 3: Installation of Solar Panels on a Fiberglass Roof
Fortunately, you do not need to drill holes into your RV roof if it is constructed of fiberglass in order to place your solar panels.
Simply use VHB (Very High Bond) tape, which when used properly will be almost hard to remove.
3M VHB Tape RP32 2″ x 5 yards Gray
You should still put your solar panel using the proper mounting bracket.
When it tries, mark where the bracket feet will fall, wipe the roof and foot with alcohol, and wait before installing the VHB tape in accordance with the manufacturer’s instructions.
Once everything is in place, your panels won’t move, which is wonderful news since it means you won’t have any more roof holes to check for leaks.
Regardless of whether your mounting hardware is tilting or not, this way works.
The procedure described above still holds true if you’re installing flexible solar panels; all you have to do is adhere them to the RV roof using the adhesive the panel manufacturer suggests.
RV Roof Mount Solar Panel Videos Suggestions From Youtube
Updated on October 29, 2023

Meet Bob & Sarah

We're Bob & Sarah, the RVers behind RVing Beginner. We love RV travel, useful gear, and all things nature. Read more…
About Us - Contact Us - Privacy Policy - Terms Of Service - Affiliate Disclosure - Sitemap
Copyright © RVing Beginner 2022

JavaScript seems to be disabled in your browser. For the best experience on our site, be sure to turn on Javascript in your browser.
- My Requisition Lists
- Partner Program
- Solar Forum
- Get A Quote
- $0.00 - $99.99 7 item
- $100.00 and above 3 item
- Solarland USA 10 item
Professional Services
- Contact Information
- Request Additional Information
- Solar Rail Mounts
- Davit Mount - Fixed
- Davit Mount - Pivoting
- Stanchion to Stanchion Mounts
- Side of Pole Mounts
- Z-Brackets - Flat Surface Mounts
Solar Mounting Solutions
Subcategories.
- Test Sub Category Link
- Another Sub Category Link
Mounting Systems
Rail mounts.
Perfect for mounting solar panels in rail mount, davit mount or "over the bimini" mount installations.These versatile, heavy duty rail mount clamps attach to a variety of rail sizes, by simply tightening the thumb screw. The quick release design allows fast, easy removal for storage. Fits 3/4", 1" & 1-1/4" rails. Sold in pairs & includes stainless mounting hardware.
This semi-custom kit attaches your solar panel to any boat rail in seconds.
Ferris Solar Davit Mounts - Pivoting
Universal Pivoting Davit Mount design allows you to mount solar power on any set of boat davits. The included Rail-Mount Clamp Kit, provides simple rotation/ adjustment for up to a 200 watt solar panel.
Ferris Solar Davit Mounts - Fixed
Our Fixed Davit Mount allows you the freedom to install multiple panels for the power you need. These universal kits can also accommodate large panels up to 400 watts. Complete instructions allow you to install this kit on your own for a custom look at a fraction of the custom cost.
Ferris Stanchion to Stanchion Mounts
A unique, universal design - The SSM-1, solar mounting system attaches a horizontal stainless tube between two vertical stanchion posts. The included Rail-Mount Clamp Kit attaches the solar panel to the included stainless tube. Rugged design and easy installation make this a favorite. Specify panel make and model.
Side of Pole Mount
A single solar panel, side of pole mount, for most solar panels. Four sizes available to fit solar panels from 13" to 26" wide. The item number dictates the size of the panel - Ex. SOPM-2.5-13 equals a Side of Pole Mount for solar panels having a surface area of up to 2.5 square feet, and a width up to 13".
Z-Brackets For Flat Surface Mounting
As the name implies, the Z brackets look like the letter Z, in that they are formed aluminum, flat roof mounting brackets for solar panels. Perfect for small solar panels or arrays that are being attached to a building or an RV roof. Kit includes four Z brackets and hardware. For solar panels above 100 watts, we recommend 2 kits per panel.
Ferris Solar Arch Mounts
Our Universal Arch Mount kits allow you to mount a solar panel on any arch. More info to come...
Aluminum Ground or Roof Mounts
Our AGRM Mounts are designed to endure tough conditions. The pair of 84" aluminum channels allow mounting of all large-frame solar panels. Simply divide the rail length by the width of the solar panel to determine how many will fit per rail. For larger arrays, we offer a splice bar to attach 2 rails together. Call for more info.
Solar Wiring Accessories
From custom cables to additional fittings, we have the accessories you need for your installation
Special Offers
Sign up for E-mail updates for our SPECIAL OFFERS & SALE ITEMS!
Use our FAQ's to get answers to your questions! Don't see the question? Send it to us and we'll answer it!
- Power Surveys
- Consultation
- On-Board or On-Site Evaluation
- Powerboats and Sailboats
- RV and Mobile Vehicles
- Homes and Remote Sites
Product Installation Services
- Sail and Powerboats
© 2012 HAMILTON FERRIS CO - POWER PRODUCTS 3 Angelo Drive, Bourne, Cape Cod, MA 02532 USA PHONE: 508-743-9901 | FAX: 508-743-9961 | E-MAIL: [email protected]
Website design and website hosting by IHS Website Solutions
- RV and Marine
Solar Panels for RVs: Racking Solutions
If you love your RV enough to install solar panels on it, you probably know that there is nothing more valuable in an RV than wisely used space. This applies just as much to the outside of the RV as to the inside. Just as there are different solutions for the kind and size of solar panels you use for your RV energy needs, so there are some choices in the mounting solutions that you have.

Flat mounting is the simplest solution
The simplest form of RV solar panel mounting is to mount the solar panel flat on the roof of your vehicle. You can use this approach for both thin film solar panels and crystalline solar panels. Some thin film module manufacturers have a self-adhesive backing on the back of the panels so that you can apply them directly to most surfaces, although you need to check with the manufacturer specifications to make sure that the surface of your RV is a proper surface for thin film modules.
This installation is the simplest and most hands off installation, but it isn't usually the most efficient use of space. These are some of the pros and cons for mounting solar panels flat on the roof of your RV.
- No need to adjust or rotate the solar modules
- No need to consider the angle of the vehicle when parked
- Provides continuous power, even when driving
- Less racking hardware required
- Faster installation
- Gets dirty easily, especially when left stationary
- Gets hotter than other mounting options, causing some power fluctuation
- Sub-optimal angle to the sun, resulting in lower power production
- Must park in the sun to be effective
Related article : Solar Panels: Thin Film or Crystalline
Tilted mounting systems will provide more output but require more hassle

- Up to 35% more efficient power production than flat mounting
- Heat dissipates more easily, causing less power fluctuation
- Easier to keep clean
- Can break if not put down before driving
- Most must be lowered manually, meaning a trip to the top of the RV before every drive
- Can't be used in high wind, and may be damaged by unexpected wind gusts
- Will raise the vehicle's profile
- More racking hardware required
Portable modules can be utilized when the RV is not moving
While not strictly a "mounting" option, using portable solar modules is an effective option for RV travel, so long as the equipment for properly connecting the modules to your battery setup has been installed.
- Can be positioned at the most optimal angle to the sun for optimal efficiency
- Can be set up in the sun, while the RV is parked in the shade
- Little heat buildup, resulting in low power fluctuation
- Can be cleaned and set up without ever visiting the roof
- Has the potential for larger solar arrays than could be mounted on the vehicle
- Must be set up and torn down whenever the RV is moved
- Must be stored, taking up valuable interior space
- Provides no power while driving
- Higher risk of accidental damage or vandalization by others
- Cables can be unsightly
- Site prep and installation more intensive
Different mounting solutions suit different needs
Which mounting solution is right for you is depends on how you use your RV. If you plan on frequently traveling in the vehicle, then the simplicity of a set-up and tear-down free configuration might recommend flat mounting. If you plan on staying in one place for extended periods of time, you should consider the higher efficiency tilted configuration. If staying cool is a high priority and you plan on using your air conditioner frequently, then a portable system that allows you to park your vehicle in the shade might save you far more energy than the system itself generates.
Whatever you choose, just remember that mounting solar panels to your RV can be just as important to performance as how much capacity your solar array has.
Mounting Solar Panels On An RV (Complete guide)
If you’re yet to install solar panels on your RV, then it’s about time you do. Doing so will guarantee you greater energy independence during your travels. But before you jump headfirst into this investment, you must ensure you’re doing it right. Indeed, there isn’t a one-size-fits-all approach to mounting solar panels on an RV. But which way works the best? In this guide, we walk you through everything you need to know about mounting solar panels on your RV, including determining the best setup for your needs, finding the optimal mounting location, and securing your panels for safe use.
- Affiliate Disclaimer
Table of Contents
Different Ways To Mount Solar Panels On An RV
There are multiple ways to mount solar panels on your RV , depending on the type of setup you desire and the design of your vehicle.
Flat Mounting Method With Brackets
If you’re using a smaller system to power a few appliances, mounting brackets attached directly to the roof may be enough.
Mounting Solar Panels With Z Brackets
Z-bracket mounting is a standard method for mounting solar panels on an RV roof. These brackets provide a solid and secure mounting option, ensuring your panels stay in place during travel.

Remember, you may require additional hardware for proper installation on an RV roof. Consult a professional or carefully follow included instructions for proper mounting and safety.
Drill-Free Brackets
Another option for mounting solar panels on an RV is to use corner bracket drill-free mounting. This method utilizes adhesive and mounting brackets, allowing for quick and easy installation without the need to drill holes in the roof.

It also allows for easier removal or repositioning of panels if necessary. However, this method may not be as secure as drilling into the roof, so it may not be suitable for areas with severe weather or heavy winds.
Ultimately, it’s up to the individual to determine if drill-free mounting meets their needs and safety concerns.
Adjustable Tilt Method

Another option for mounting solar panels on an RV is adjustable tilt mounting brackets. These allow you to angle the panels towards the sun, maximizing their efficiency and power production .
This method also makes cleaning and maintaining the panels easier, as you can adjust them for easy access. Remember that tilt mounting may not be suitable for all RV roofs, so check compatibility before purchasing mounting brackets.
Source: Renogy
Retractable Awning

Some RV owners even mount their panels on a retractable awning .
An RV awning has an innovative design with gaps between the panels, allowing wind to pass through when slightly retracted. This not only adds to the aesthetic of the awning but also ensures stability in windy conditions.
With the push of a button, the panels can open and begin generating power. When it’s time to move on, the panels retract neatly into their enclosure. Not only does this provide a reliable source of energy, but it also adds an elegant touch to your RV.
Source: Xpanse
Mounting Solar Panels With Strut Channel
One option for mounting your panels is using a strut channel with an adjustable tilt bracket. This method offers flexibility in positioning the panels for optimal efficiency and can also accommodate panel expansion in the future.
Start by attaching the strut channel to your RV’s roof, ensuring that it is securely fastened and not prone to movement or vibration. Next, attach the tilt brackets to the strut channel at desired positions, leaving room for any additional panels you may add later. Lastly, place your solar panels onto the tilt brackets and secure them with mounting hardware.
It would be best to tighten all mounting hardware properly to avoid potential damage to your RV and the solar panels. Also, as with any roof mounting on an RV, be mindful of weight limitations and consult a professional if necessary.
With proper installation and positioning, a strut channel mounting method can provide a durable and adjustable solution for mounting your solar panels on an RV.

No matter which mounting method you choose, secure your panels properly for safe and efficient use.
Related Reading: How Many Solar Panels Do I Need For My RV? (Expert Advice)
What Is The Best Way To Mount Solar Panels On An RV?
When mounting solar panels on an RV roof, choosing a mounting system is vital to adjust the tilt angle. This maximizes the panel’s efficiency by allowing you to position it at the optimal angle to capture sunlight.
A strut channel with an adjustable tilt bracket is one of the best options for mounting solar panels on an RV roof. It’s sturdy and secure while also offering easy adjustment capabilities.
Additionally, a strut channel mounting system leaves room for expansion. Overall, using a strut channel with an adjustable tilt bracket provides flexibility and maximizes the efficiency of your RV’s solar panel system.
Issues To Avoid When Mounting Solar Panels On An RV
When mounting solar panels on an RV, there are a few things to avoid to ensure optimal performance.
- Keep panels clear of obstructions . Make sure you mount your panels so branches or other objects will not obstruct them. This also means keeping them away from your roof’s edge. Doing so will reduce the risk of damage.
- Maximize efficiency . Optimize the tilt angle of your panels so they can receive direct sunlight.
- Electrical wiring can be hazardous . Be careful not to drill through any electrical wiring when mounting the panels. This could create a fire hazard.
- Make maintenance easy . Mount the panels to make them accessible for maintenance and repairs.
Related Reading: RV Solar System (Complete guide to going off-grid)
3 Mounting Brackets You Can Use
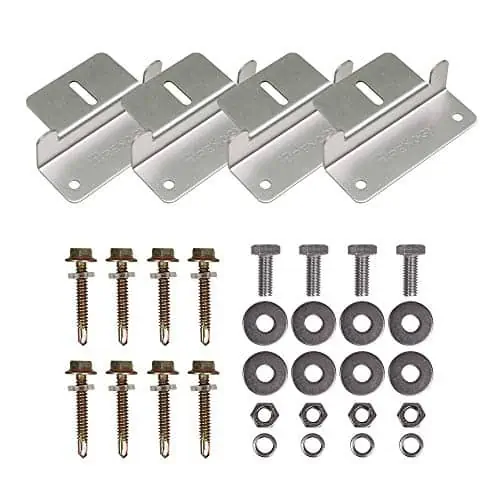
1. z-mounting bracket.

- Set includes : 4 x Z Mounting Brackets
- 4 x Split Lock Washers
- 4 x M6 Split Lock Washers
- 4 x M6-16 Hex Cap Bolts
- 8 x M6 Flat Washers
- 8 x No 11 Self-Drilling Cap Screw and Plastic Retaining Ring
- Warranty: 1 Year
Explicitly designed for off-grid installations, the Z bracket mounting system is ideal for RV roof mounting.
The system comes with all the necessary fasteners for secure installation. It supports the installation of a single solar panel, and the system works best with rigid panels of less than 100W.
When mounting solar panels on your RV, you must consider the weight and durability of the mounting system. In this instance, the aluminum mounting brackets are lightweight and corrosion-resistant, making them ideal for mounting small solar panels.
These pre-assembled brackets come with bolts and washers for added convenience and ease of installation. Moreover, you can easily install them onto RVs, trailers, boats, yachts, and even on irregular surfaces.
2. Drill-Free Corner Mounting Bracket

- Weight: 7.2 oz. (per component)
- Material: UV-resistant ABS Plastic
- Adhesive: Sikaflex 252 (recommended)
- Dimensions (corner bracket): 5.9 x 5.9 x 2.3 in
- Dimensions (side bracket): 7.0 x 4.6 x 2.3 in
The corner mounting brackets, made with corrosion-resistant ABS plastic, offer a durable and long-lasting solution for mounting your solar panels. These brackets are also 100% recyclable and UV resistant to withstand the elements on your travels.
Additionally, the mounting brackets feature a drill-free installation process, making the setup more manageable. They are suitable for mounting virtually any aluminum framed solar panel on flat roofs made of aluminum, wood, or GRP material.
3. Tilt Mount Bracket

- Weight: 3.5 lbs
- Dimension (tilt bracket): 14.57×0.79×0.98 in.
- Dimension (fixed bracket): 27.95×1.97×0.98 in.
Tilt mount brackets allow for easy adjustment and optimization of performance, whether your vehicle is stationary or in motion. Moreover, they are suitable for any flat surface.
These RV mounting brackets are designed specifically for off-grid solar systems. They fit on the top of RVs and are adjustable. The brackets support solar panels up to 100W. Assembly is quick and easy, with precise hole placement and stainless steel fasteners. These mounting brackets are a great addition to any RV or off-grid setup.
Related Reading: What Will A 200-Watt Solar Panel Run In An RV?
Final Thoughts
Mounting your solar panels on an RV can provide a reliable energy source and add a stylish touch to your vehicle. However, you must choose the correct mounting system and avoid any potential issues for the panels to work efficiently.
Properly installing and positioning the panels can ensure they perform at their best while keeping your RV safe on the road.
Happy travels!
Tags: RV solar energy solar panels

Bramwill Bruinders is an electrical engineer who specializes in utilities engineering and 4IR automation technology. He has over 15 years of experience in engineering management and is passionate about sustainability and clean technology. Bramwill earned his MBA from the Nelson Mandela University and is a strong advocate for the use of clean technology to protect our environment. He believes that electrical engineers have a responsibility to lead the way in developing sustainable solutions to the world's energy needs. Bramwill is committed to helping create a better future for our planet, and he is constantly looking for ways to reduce our reliance on fossil fuels.

SunPower vs. Sunrun: Which should you choose?

5 Types of Solar Panel Protective Covers – Sunny Power!

What solar panels does Tesla use?

Can you power an AC with solar panels?
Climatebiz is reader-supported. When you buy through links on our site, we may earn an affiliate commission. As an Amazon Associate, we earn from qualifying purchases. Learn more
- Privacy Policy

Top 10 Energy Saving Gadgets for Your Smart Home (2024)

Hydroponic Kits (Budget-Friendly Grow Kits For Beginners)

20 Best Batteries For Solar Lights (Buyer’s Guide)
- Solar Calculator
- Solar Savings Estimate
- Buyers Guide
- About Climatebiz
- Climatebiz Community
- Advertise with Climatebiz
How to Mount Flexible Solar Panels: A Comprehensive Guide for DIY Enthusiasts

Mounting flexible solar panels involves applying an adhesive to the back of the panel and pressing it onto the desired surface, usually a roof or deck of an RV, boat or van. It’s essential to clean and prep the surface ahead to ensure a strong bond. Some people combine adhesive with screw-in methods for added security, but screwing panels should be done carefully to avoid damaging them.
Introduction
Having spent the past two decades working with solar energy, I’ve come to appreciate the distinct advantages of flexible solar panels. I still remember as though it were yesterday when I first got my hands on one. Their ability to conveniently curve around surfaces opened up a whole new realm of possibilities!
Why Flexible Solar Panels?
Traditional rigid solar panels have their place, but in some scenarios, flexible solar panels are distinctly advantageous. Imagine you’re decking out your RV or remodeling your boat – you’d prefer the smooth contour of flexible solar panels over the boxy rigidity of traditional panels. Plus, you can’t ignore their lightweight nature making the job of mounting them a lot less physically demanding!
The Advantages of Using Flexible Solar Panels
Aside from their flexibility and lightweight, these adaptable panels are robust, meaning they can withstand rough conditions without cracking or shattering. And did I mention how sleek they look? There’s an aesthetic edge that flexible solar panels bring, that’s hard to beat!
Preparatory Work
Before diving straight into “how to mount flexible solar panels”, let’s walk through what we need to get started.
Tools and Materials Required for Mounting
The list is pretty straightforward, really. You’re going to need the flexible solar panels-refer to our top picks on our “/flexible-solar-panels” page. You’ll also need a high-quality adhesive, a measuring tape, a clean cloth, and your personal protective equipment (PPE), such as gloves and goggles.
Safety Measures to Take Before Installation

Make sure your work surface is flat and stable. If you’re working on a roof, use appropriate safety gear to prevent falls. Always remember, no amount of solar energy is worth risking your safety!
Choosing the Right Mounting Method for Flexible Solar Panels
Remember when you used to stick posters up in your bedroom as a kid? The same principle applies here!
Comparison of Different Mounting Methods
There are two main methods of mounting flexible solar panels: peel-and-stick adhesive and screw-in. While screw-in provides more security, it risks damaging the panels if not done correctly.
Determining What Suits Your Needs
Consider the surface you’re mounting the panels on and the environment in which they’ll be operating. Are there intense winds or is the vessel prone to vigorous movement? Screwing might be a safer bet. If screwing is not an option for you, choose a high-quality adhesive that can withstand harsh weather conditions.
How to Mount Flexible Solar Panels
Alright, let’s get to the good part – how to mount flexible solar panels.
Surface Preparation
Cleaning the surface.
Just like how you would never paint over a dirty, dusty wall, you need a clean surface for the adhesive to stick properly. Wipe any dust, dirt, or grime off your mounting surface. Let it dry completely before moving on to the next step.
Measuring and Marking the Installation Location

Use your measuring tape to choose the spot where you’ll mount your panels, mark it if necessary. Remember, solar panels need maximum exposure to sunlight, so place them accordingly.
Applying the Adhesive
Attention to detail is key here. Apply a generous and even layer of adhesive on the back of the flexible solar panel. Make sure you cover everything, from corner to corner.
Laying Out the Panels
Aligning the panels properly.
Carefully align your panel with the marked positions on your mounting surface. Precision at this stage will make the difference between a professional-looking job and a clumsy DIY project.
Pressing Down to Secure Adhesive Bond
Press the panel down firmly, ensuring a solid bond between the panel and the surface.
Wiring Your Solar Panels
Series or parallel connection.

The good news is that flexible solar panels use the same wiring methods as any other solar panel. Choose between a series or parallel connection based on your individual power needs.
Routing the Cables
Once connected, route your cables to the solar controller. Remember, the neater the better!
Connecting the Solar Controller
Your final step will be to connect the wires to your solar controller and voila! You’re now harnessing the power of the sun!
Post Installation
Testing your installation.
After mounting and wiring, it’s crucial to properly test your installation. Use a multi-meter to check the output of your panels and ensure they’re working as expected.
Maintenance of Flexible Solar Panels
The plus side that always gets me grinning is the fact that these panels require next to no maintenance. Give them a wipe down now and then to ensure they’re clean and performing at their maximum efficiency.
Learning how to mount flexible solar panels is just one step in your journey to creating a more sustainable future. They’re stylish, versatile, and above all, a fuss-free addition to your renewable energy setup. As an experienced solar energy enthusiast named Elliot, I guarantee that once you’ve turned to flexible solar panels, there’s no turning back! Remember to refer to our in-depth guide on “/flexible-solar-panels” before making your purchase. Here’s to soaking up the sun, sustainably!

SolVoltaics is an affiliate and an Amazon Associate, we earn from qualifying purchases - at no extra cost to you.
FIND WHAT YOU'RE LOOKING FOR

Recent Update
Industry-leading Panels in performance & efficiency. FULL Off-Grid systems under $1/Watt !
SOL VOLTAICS
SolVoltaics 1043 Garland Ave Unit C #737 San Jose, CA 95126

FREE Shipping & 11 Year Warranty
- CUSTOM / WHOLESALE / B2B
- We Are Dakota Lithium
- Affiliate Program
- Contact & FAQ
- 1-855-743-3279
- Trolling Motor Batteries
- RV, Vans & Camper Batteries
- Marine & Boat Batteries
- Golf Cart Batteries
- Fish Finder Batteries
- Starter & Automotive Batteries
- Ice Fishing Batteries
- 12v Batteries
- 24V Batteries
- 36V Batteries
- 48V Batteries
- 72V Batteries
- Off-Grid Power Systems
- Power Box & Mobile Power
- Ham Radio Batteries
- Mobility Scooter & Wheelchair
- Inverters & Monitors
- Wiring Kits
- Solar Panels
- Battery Trays
- Apparel & Decals
- 12V Batteries
- Powerbox Solar Generators
- RV, Vans, & Camper Batteries
- Ham Radio & UPS

Dakota Lithium 100-Watt Flexible Marine Solar Panel Kit
Live a life without limits! For unlimited freedom, take your boat, RV, truck, or trailer off-the-grid with Dakota Lithium. This kit offers enough power to charge most single 12-volt battery banks (combine 100 watts of solar with 100Ah of Dakota Lithium batteries – additional panels recommended for colder climates, faster charge time, or winter activities). Designed for decades of rugged use in extreme conditions, this flexible, marine grade solar panel is waterproof, flexible for curved roofs and boat decks, and is backed up by a 25 year output warranty. Universal installation hardware included.
100-Watt Dakota Lithium Solar Kit Includes:
100-Watt Dakota Lithium Solar Panel
Quick-connect solar plug
Stainless steel mounting hardware and double sided industrial welding tape. Easy installation on most surfaces.
Please note: A lithium compatible solar charge controller is recommended for connecting solar panels to 12V Dakota Lithium batteries. Choose either the Solar Integration Kit & DL Dashboard Bluetooth Battery Monitor, or the Victron SmartSolar MPPT 75/15 Solar Charge Controller . Both are rated at 15 Amps and can support up to 300 watts of solar (3 x 100 watt panels).
See our solar panel size chart for what and battery combination is appropriate to your needs.
- Free Shipping to Lower 48
- 25 year warranty
- Free mounting hardware
$ 599 $ 399
Live a life without limits! Take your boat, RV, truck, or trailer off-the-grid with Dakota Lithium. This kit offers enough power to charge a single 100Ah battery. Designed for decades of rugged use in extreme conditions, this flexible, marine grade solar panel is waterproof, flexible for curved roofs and boat decks, and is backed up by a 25 year output warranty.
Available on backorder
Specifications
100 Watts power output
5.56 amps peak power generation. Latitude and season will impact solar panel output. If you spend a lot of time winter camping in northern latitudes you may want to think about adding an additional panel
18 Volts (V). Can be connected directly to the battery for simple and smaller systems. A solar charge controller is highly recommended since it lowers the voltage to 14.4V and greatly increases the efficiency of the system.
Installation is a breeze with the pre-assembled mounting hardware and wiring. Add a DL Dashboard integration kit for a solar charge controller, battery monitor, and additional wiring harness.
Dakota Lithium's innovative mounting hardware lets you to mount the panels wherever you need them, and the stainless steel mounting hardware ensure your panels won’t budge in route—no matter how far off-road you go. Additional double sided industrial welding tape is included as an alternative to using the hardware, and may be preferable on curved surfaces like boat decks or airstream trailers.
Semi-flexible, marine grade solar panel on a ruggedized waterproof backing. Optimal for rooftops and boat decks. Not designed for walking on. Foot traffic will reduce the lifespan and warranty of the panel.
Divide the Ah (capacity) of your battery by 5 to determine how many hours to charge your battery.
3 ft wire harness with waterproof MC4 connectors.
47.25 in (1200.15 mm) x 21.25 in (539.75 mm) x 0.1 in (3 mm) per panel
25 year power output warranty, meaning the panels are guaranteed to generate power for 25 years.
IP67 Marine grade waterproof rating for use on boats, RVs, and rooftops in the rain
Suitable for:
- RV Camping & Boondocking
- #VanLife, Truck, Overland, Trailers
- Boats & Marine Applications
- Tiny Homes and Off-the-Grid Cabins
- 100 watts charges 50Ah to 100Ah of Dakota Lithium batteries
- Add additional panels for larger systems
- Living off the grid
OTHER BATTERIES AND PRODUCTS
Dakota lithium #vanlife, rv trailer & truck 12v 100ah power system, dakota lithium & zamp solar 12v 200ah off-grid power system.
The product itself is of great quality. It is boxed well and comes with all you need. I would recommend it over “less expensive ” and lesser quality items of similar type.
For more information or larger quantity inquiries, visit our B2B page or please call our sales team at 1-855-743-3279.
Be The First to Know
- Shop Batteries
- Custom / Wholesale / B2B
- Lithium Battery Chargers
- News, Blog, & Events
- Certifications & Safety
- Best in Class Warranty
- About Dakota Lithium
- Battery Charging Guide
- Customer Service / FAQ
- Battery Collection
- In the Press
- Warranty / Returns
- Find A Dealer
- Become A Dealer
- Meet Our Athletes
- Privacy Policy
- Our Most Popular
- Starter & Cranking Batteries
- RV & Camper Lithium Batteries
- Marine & Sailboat Batteries
Dakota Lithium 225 S Lucile St Seattle, WA 98108
1-855-743-3279.
No products
Product successfully added to your shopping cart
There are 0 items in your cart. there is 1 item in your cart..
- Wind Generator
- Turbine Nose Cone +Hub+Turbine Blade
- Solar & Wind Controller
- Grid Tie Inverter
- Solar Panel +Parts
- LED Bulbs / LED Panels

7 foot Solar Panel Mounting Rack Rail with clamps + brackets for Boat + RV
Condition: New product
Warning: Last items in stock!
Availability date:
Send to a friend

Recipient :
Name of your friend * :
E-mail address of your friend * :
* Required fields
Send or Cancel
The minimum purchase order quantity for the product is 1
Add to cart
Add to wishlist
- H-Type bases are much stronger than L brackets, they are more stable and are able to withstand heavy weight and wind load
- Panel will have 3 inches of elevation / surface clearance to dissipate heat with free flow of air
- Minimum Panel Thickness: 35mm, 1 3/8 inches
- 6061 Aluminum
- 3.5mm thickness
- Extendable to 14, 21 28 feet etc with coupler / splicer
Installation
![https://greenergystar.com/eBay/Energy/Solar%20Mount/SolarRac/7footkit_with_panels[gs].jpg](https://greenergystar.com/eBay/Energy/Solar%20Mount/SolarRac/7footkit_with_panels%5Bgs%5D.jpg "yacht & rv solar mounting")
End Clamp + Rail Mount:

No customer reviews for the moment.
Write a review

Submit or Cancel
- Patio, Lawn & Garden
- Generators & Portable Power
- Solar & Wind Power
- Solar Panels

Image Unavailable

- To view this video download Flash Player
Adjustable Solar Panel Mount Mounting Rack Bracket with Large 28" Mounting Arms - Boat, RV, Roof Off Grid
About this item.
- Mount up to a 100 Watt solar panel
- Solar panel mounting angle is user adjustable
- Anodized aluminum construction
- Stainless steel assembly hardware included. Fasteners for attaching solar panel to mount included.
- 2 year warranty
Additional Details

Customers also viewed these products

Product information
Technical details, additional information, warranty & support, product details.
- Is Discontinued By Manufacturer : No
- Product Dimensions : 27.99 x 1.5 x 2.5 inches; 3 Pounds
- Item model number : SOL-AJBR-01
- Date First Available : October 8, 2012
- Manufacturer : WindyNation
- ASIN : B079ZK4JZF
Product Description
WindyNation Adjustable Solar Panel Mounting Kit is designed to mount/rack solar panels up to 28 inches in width. Includes: Adjustable mounting frame and fasteners (see photos above). Note: No solar panel is included with your purchase
Important information
To report an issue with this product or seller, click here .
Looking for specific info?
Customer reviews.
Customer Reviews, including Product Star Ratings help customers to learn more about the product and decide whether it is the right product for them.
To calculate the overall star rating and percentage breakdown by star, we don’t use a simple average. Instead, our system considers things like how recent a review is and if the reviewer bought the item on Amazon. It also analyzed reviews to verify trustworthiness.
Customers say
Customers like the quality, ease of assembly, performance, and fit of the outdoor living product. They mention that it's very good construction, works well, and fits perfectly. That said, opinions are mixed on value, rust, and tilt adjustability.
AI-generated from the text of customer reviews
Customers are satisfied with the quality of the outdoor living product. They mention that it is well-constructed, stable, and adjustable to get the correct angle for their needs. The bracket itself is fine, and all hardware is of good quality.
"This is a nice set of mounting brackets , no sharp edges and all hardware is a good grade...." Read more
"Easy to mount even without instructions, excellent quality on parts .PS...." Read more
"...The aluminum brackets are sturdy and robust , however after 3 months of use, the wing nuts and knob with stainless steel screws have shown quite a..." Read more
"...A little more money than DIY but I was really impressed with the quality of the materials and the brackets are taller than the angle stock I was..." Read more
Customers find the installation process of the outdoor living product to be easy. They mention that it is sturdy and works well. Some say that they have no problems getting the panel connected.
" Easy to mount even without instructions , excellent quality on parts.PS...." Read more
"The solar panel rack was easy to put together and works great with my Windy Nation 100 Watt solar panel...." Read more
"...This kit is very convenient and a big time saver i purchased four of them." Read more
"Very good construction and easy to install . Did not give 5 stars because they were 3 steel knob bolt and 3 steel wing nut missing...." Read more
Customers are satisfied with the performance of the product. For example, they mention it works well and takes a while to change positions.
"...But it is nice, worked good with my solar panels . I bought two and one came missing 6 pieces of hardware...." Read more
"This bracket worked great on my zamp solar panel I would've gave it five but I thought it was a little on the high side for pricing other than that..." Read more
" Does the job . Quality product. Might be priced a little high but when I went to build one myself I didn't come in much lower." Read more
Customers like the fit of the Renorgy 100 Watt Solar Panel. They mention that it fits perfectly, is light weight, and is a great looking mount.
"...Haven't attached our solar panel yet but did a test fit and it seems to fit fine ...." Read more
"Good quality and YES! A Renorgy 100 Watt Solar Panel fits perfectly . The assembly is easy...." Read more
"...to mount it to a Renogy 100W panel you will find that the longer brace is too short for a "portrait" mount because the shorter earth rest is..." Read more
"Not much to say about it. It perfectly fit my renogy 50w panel and I mounted it to a board for use with a portable solar generator setup...." Read more
Customers have mixed opinions about the value of the outdoor living product. Some mention it's great value, while others say that it' s pricey for what it is. The brackets are a little on the pricy side, considering you could make them yourself for half the price.
"...The brackets are a little on the pricy side considering you could make them yourself for half the price, I did not have the time or inclination to..." Read more
"Seems to be over priced for what you get. However to me it was worth the money to hold an expensive solar panel. I would buy again." Read more
"I think it is extremely expensive for what it is, I mean just a couple of aluminum pieces with some nuts and bolts...." Read more
" seems good little pricey but am making my own from one i bought." Read more
Customers are mixed about the rust of the product. Some mention that it's nicely done in aluminum for corrosion protection, while others say that the stainless steel screws have shown quite a bit of rust and the bolts and wing nuts are welded together with rust.
"...use, the wing nuts and knob with stainless steel screws have shown quite a bit of rust ...." Read more
"Exactly what I was looking for, nice aluminum brackets with stainless steel hardware ...." Read more
"...are fine, but the so called stainless steel bolts and wing nuts are welded together with rust ...." Read more
" Nicely done in aluminum for corrosion protection , very sturdy, I have 3 panels mounted to a pair of these brackets with no problems what so ever" Read more
Customers are mixed about the tilt adjustability of the outdoor living product. Some mention that it has plenty of adjustability and mounting holes with nice knobs for tilt adjustment, and it is very stable and easily adjustable to get the correct angle for max. efficiency; while others say that it is difficult to readjust, too difficult to adjust while on the roof of RV so they use it for their portable panel, and that it takes a while to change positions.
"High quality but an awkward design to use on a roof. Too difficult to adjust while on roof of RV so I use it for our portable panel on the ground..." Read more
"...Plenty of tilt adjustability and mounting holes with nice knobs for tilt adjustment ...." Read more
"...angle adjustment from the southern to the northern side it's very difficult to readjust ...." Read more
"...It is very stable and easily adjustable to get the correct angle for max. efficiency." Read more
Customers are dissatisfied with the attachment of the outdoor living product. They mention that the product arrived with missing hardware. Some customers also mention that it is difficult to find similar hardware at places such as Home Depot.
"...Unfortunately, it seems difficult to get similar hardware at places such as homedepot...." Read more
"...I bought two and one came missing 6 pieces of hardware . I wrote them and they responded and said they were going to send the missing hardware...." Read more
"...The kit does not come with hardware to attach to your RV or anything else the attachment hardware will vary from install to install so its up to..." Read more
"...Did not give 5 stars because they were 3 steel knob bolt and 3 steel wing nut missing . How can I receive them?" Read more
Reviews with images

- Sort reviews by Top reviews Most recent Top reviews
Top reviews from the United States
There was a problem filtering reviews right now. please try again later..

- Amazon Newsletter
- About Amazon
- Accessibility
- Sustainability
- Press Center
- Investor Relations
- Amazon Devices
- Amazon Science
- Start Selling with Amazon
- Sell apps on Amazon
- Supply to Amazon
- Protect & Build Your Brand
- Become an Affiliate
- Become a Delivery Driver
- Start a Package Delivery Business
- Advertise Your Products
- Self-Publish with Us
- Host an Amazon Hub
- › See More Ways to Make Money
- Amazon Visa
- Amazon Store Card
- Amazon Secured Card
- Amazon Business Card
- Shop with Points
- Credit Card Marketplace
- Reload Your Balance
- Amazon Currency Converter
- Your Account
- Your Orders
- Shipping Rates & Policies
- Amazon Prime
- Returns & Replacements
- Manage Your Content and Devices
- Recalls and Product Safety Alerts
- Conditions of Use
- Privacy Notice
- Your Ads Privacy Choices
Tel: +86-592-5023035
Email: [email protected]
ABS Yacht And RV Solar PV Mounting Brackets
Material:ABS Plastic Color:White&Black Installation Site:Lat or curved roofs, RV, caravan, yacht and motorhome etc Paking:Carton Lead Time:7 working days Payment:T/T
Description
Stock Available ABS Plastic Yacht and RV Solar Panel Mounting Brackets

1.An ideal way to fix solar panels on the roof or deck of motor home,caravans,boats & roof. 2.The mounts can be safely bonded to the surface removing the need to drill holes using drilling screws. 3.Mounts also act as a wind deflector and maintain the correct air gap between the solar panel and the roof top/deck. 4.The Panel Corner Bracket protect the corners of the solar panels from damage. 5.Reduces sharp corners on the solar panel and helps make protective storage covers easier to put on and off. 6.ABS plastic made, environment friendly and UV resistance.

Main Fetures of Solar ABS Mounting Bracket
1. Non-corrosive and high quality ABS plastic construction.
2. 100% recyclable and UV resistant.
3. Easier and more flexible installation.
4. Designated for virtually any aluminum framed solar panels.
5. Best suitable for flat roofs of aluminum, wood, or GRP material.

Application

Hot Tags: abs yacht and rv solar pv mounting brackets, suppliers China, manufacturers, factory, customized, buy, price, pricelist, quotation, free sample
Send Inquiry
You might also like.

ABS Plastic Solar Mounting For RVs

ABS Plastic Solar Extra Long Installation

OEM RV/Boat/Caravan ABS Solar Panel Mounts

Solar Panel Z Mounting Brackets

Roof ABS Plastic Solar Panel Mounts

Caravan Solar Panel Mounting Brackets
Optimum Tilt of Solar Panels
To get the most from solar panels, you need to point them in the direction that captures the most sun. But there are a number of variables in figuring out the best direction. This page is designed to help you find the best placement for your solar panels in your situation.
This advice applies to any type of panel that gets energy from the sun; photovoltaic, solar hot water, etc. We assume that the panel is fixed, or has a tilt that can be adjusted seasonally. (Panels that track the movement of the sun throughout the day can receive 10% (in winter) to 40% (in summer) more energy than fixed panels. This page doesn’t discuss tracking panels.)
Solar panels should always face true south if you are in the northern hemisphere, or true north if you are in the southern hemisphere. True north is not the same as magnetic north. If you are using a compass to orient your panels, you need to correct for the difference, which varies from place to place. Search the web for “magnetic declination” to find the correction for your location.
The next question is, at what angle from horizontal should the panels be tilted? Books and articles on solar energy often give the advice that the tilt should be equal to your latitude, plus 15 degrees in winter, or minus 15 degrees in summer. It turns out that you can do better than this - about 4% better.
Fixed or Adjustable?
It is simplest to mount your solar panels at a fixed tilt and just leave them there. But because the sun is higher in the summer and lower in the winter, you can capture more energy during the whole year by adjusting the tilt of the panels according to the season. The following table shows the effect of adjusting the angle, using a system at 40° latitude as an example. (The comparison would be a little different for different latitudes.) Each option is compared with the energy received by the best possible tracker that always keeps the panel pointed directly at the sun.
In short, adjusting the tilt twice a year gives you a meaningful boost in energy. Adjusting four times a year produces only a little more, but could be important if you need to optimize production in spring and fall. You can jump to the section on the best fixed tilt angle, or skip to the sections on two-season or four-season adjusting.

If your solar panels will have a fixed tilt angle, and you want to get the most energy over the whole year, then this section is for you. A fixed angle is convenient, but note that there are some disadvantages. As mentioned above, you’ll get less power than if you adjusted the angle. Also, if you live where there is snow, adjusting the panels to a steeper angle in winter makes it more likely that they will shed snow. A panel covered in snow produces little or no power.
This table gives some examples for different latitudes. It also shows the average insolation on the panel over the year (in kWh/m 2 per day), and the energy received compared to the best possible tracker.
Adjusting the tilt twice a year
If you are going to adjust the tilt of your solar panels twice a year, and you want to get the most energy over the whole year, then this section is for you.
The following table gives the best dates on which to adjust:
If your latitude is between 25° and 50°, then the best tilt angle for summer is the latitude, times 0.93, minus 21 degrees. The best tilt angle for winter is the latitude, times 0.875, plus 19.2 degrees. If your latitude is outside this range, see Other Situations below. This table gives some examples:
Adjusting the tilt four times a year
If you are going to adjust the tilt of your solar panels four times a year, and you want to get the most energy over the whole year, then this section is for you. This would be your situation if you are connected to the grid and can use or sell all the power you produce.
If your latitude is between 25° and 50°, then the best tilt angles are:
If your latitude is outside this range, see Other Situations below.
If you want to adjust the tilt of your panels four times a year, you can use these figures to keep capturing the most energy year-round. This table gives some examples:
In winter, a panel fixed at the winter angle will be relatively efficient, capturing 81 to 88 percent of the energy compared to optimum tracking. In the spring, summer, and autumn, the efficiency is lower (74-75% in spring/autumn, and 68-74% in summer), because in these seasons the sun travels a larger area of the sky, and a fixed panel can’t capture as much of it. These are the seasons in which tracking systems give the most benefit.
Note that the winter angle is about 5° steeper than what has been commonly recommended. The reason is that in the winter, most of the solar energy comes at midday, so the panel should be pointed almost directly at the sun at noon. The angle is fine-tuned to gather the most total energy throughout the day.
The summer angles are about 12 degrees flatter than is usually recommended. In fact, at 25° latitude in summer, the panel should actually be tilted slightly away from the equator.
Tilt Fixed at Winter Angle
If your need for energy is highest in the winter, or the same throughout the year, you may want to just leave the tilt at the winter setting. This could be the case if, for instance, you are using passive solar to heat a greenhouse. Although you could get more energy during other seasons by adjusting the tilt, you will get enough energy without making any adjustment. The following tables assume that the tilt is set at the winter optimum all year long. They show the amount of insolation (in kWh/m 2 ) on the panel each day, averaged over the season.
Confused about tilt angles?
Time-of-use rates, other situations.
Perhaps your panels are on a roof that is not oriented exactly to the south. Or you are at a latitude outside the range for which these formulas work. These situations are more complex than can be handled by a simple formula.
Assumptions
You may need to make adjustments for your situation. For example, if you have trees to the east but not the west, it may be better for you to aim your solar panels slightly to the west. Or if you often have clouds in the afternoon but not the morning, you might aim your panels slightly to the east.
The calculations also assume that you are near sea level. At very high altitude, the optimum angle could be a little different.
If you are estimating energy output, remember that temperature affects the efficiency of photovoltaic panels. They produce less power at higher temperatures. Panels vary so you will need to contact your panel manufacturer for their specifications.
Don’t obsess about the exact angles just because I’ve calculated them to the tenth of a degree. A difference of a few degrees will make very little difference in the energy you gather.
Why does this work?
The recommended angles can seem counterintuitive. For example, consider summer at 40° latitude. At noon on the solstice, the sun is 40° - 23.5° which is 16.5° from directly overhead. To capture the most sun at that time you would tilt the panel 16.5° to point it directly at the sun. On other days of the summer it is a bit lower in the sky, so you would want to tilt the panel a bit more. Yet we say to tilt it only 12.5°. The sun is never that high. How can that be right?
The answer is that we are considering the whole day, not just noon. In the morning and evening, the sun moves lower in the sky and also further north (if you are in the northern hemisphere). It is necessary to tilt less to the south (or more to the north) to collect that sunlight.
How these numbers were calculated
intensity in kw/m 2 = 1.35 * (1.00/1.35) sec(angle of sun from zenith)
This formula assumes that the earth is flat, so a factor was applied to account for the curvature of the earth (and therefore the earth’s atmosphere). These factors, and the angle of the sun with respect to the panel, then determine the insolation on the panel. An iterative method then determined the angles that give the maximum total insolation during each season. Given those angles, the beginning and ending dates of the season were then adjusted to the optimum, then the angles recalculated, until the process converged. After the optimum dates and angles were calculated, it was determined that a linear formula closely approximates the optimum. The formulas are only accurate within the specified range.
Other published articles on tilt angles have used less accurate calculations. For example, Richard Perez and Sam Coleman, in “PV Module Angles”, Home Power n.34 p.14-16, 1993, recommend an angle that puts the panel perpendicular to the sun’s rays at noon. That is indeed the best angle at noon on that day, but it does not take into account the best angle for capturing solar energy at other times of the day. That article also leaves it to the reader to estimate the best angle over the period until the next time the tilt is adjusted.
Percentages may not be exact due to rounding.
This page was last updated on 18 March 2017.
- Bahasa Indonesia
- Slovenščina
- Science & Tech
- Russian Kitchen
Moscow skyline: explore the city from the rooftops

1. Moscow-City tower The Empire and the Federation Towers, which are located in the new business center in the immediate vicinity of the city center, are part of the tallest complex of buildings in Russia’s capital. Standing on the high-altitude terraces of Moscow-City (Moscow International Business Center buildings) you can enjoy truly inspiring views of the Moscow River and the western part of the city.
The Sixty Restaurant - Bar (the name refers to the interior, which has been executed just like in the 1960s) on the 62 floor of the Federation tower , which makes it the highest restaurant in Europe.
You can enjoy views of the city from a bird's eye view free of charge too – you will just have to reach the new terrace of the Empire Tower on an express elevator (the 58th floor), located at an altitude of 238 meters.
2. The Vorobyevy Gory and the main Moscow State University building One of the most popular "postcard" views of Moscow is from the observation deck of Vorobyevy Gory (Sparrow Hills). The landscape is especially beautiful on a clear day and late at night when the city lights are turned on. The capital can be seen as if it were in your hands; this is definitely the best place for gazing at the seven Stalin skyscrapers – the famous “Seven Sisters” . From the upper floors of the Moscow State University main building , you can take in an even more breathtaking panorama.
3. Time Out Bar A bar with rather affordable prices and a terrace with simply stunning views of Moscow. Time Out Bar is located on the 12th and 13th floor of a rather old hotel Beijing in the heart of the capital. This is one of my favorite places, which can be found in Moscow skyscrapers; here bartenders prefer making signature cocktails.
4. City Space – a panoramic bar City Space is the highest bar with a 360-degree view of the capital. It is located on the 34th floor of the Swiss Hotel Red Hills , and according to the 2008 Bartender's Guide, it was included in the top 10 bars in the world, and the top 50 best bars in the world by Drink International 2011. The price of one cocktail is around 900 rubles, a must drink for the capital guests is the legendary Moscow Spring Punch with ginger, raspberry and honey.
5. Ivan the Great Bell Tower You can have the possibility of seeing old Moscow from a bird’s eye view if you go up to the 80-meter bell tower of Ivan the Great – "the capital’s first skyscraper" which was built in the 16th century. The belfry is located in the heart of the city – right in the Cathedral Square , adjacent to Red Square. The exhibition is open to visitors and there is also an observation deck, which offers a wonderful view of the Kremlin's Cathedral Square and the old streets of Zamoskvorechye . You can enter with a ticket from the Kremlin Museums.
You can enjoy the view from above with a cup of coffee, which you can get close by – on the rooftop of the Ritz Carlton , where there is a cozy 02 Lounge , which offers an unforgettable view of the Kremlin. The average bill is approximately 2500 rubles.
5. The Ostankino Television Tower The Ostankino Television Tower observation deck has been open to visitors for over 40 years. During this time it has been visited by over 10 million people – from a height of 340 meters you can take a look at northern Moscow and the Moscow region. You can get to the site only as a part of a tour and preferably having booked in advance.
Duration of the tour is 1 hour, the tower is open to the public from 10.00 am to 21.00 pm.
7. Kalina bar Located on the 21st floor of the Lotte Plaza on Novy Arbat , Kalina Bar offers visitors a panoramic view of the Moscow-City towers , hotel Ukraine , Old Arbat street , Cathedral of Christ the Savior , and many other monuments in the city center. Besides this it offers great Western and Asian cuisine with a bill of approximately 2,000 rubles.
All rights reserved by Rossiyskaya Gazeta.
to our newsletter!
Get the week's best stories straight to your inbox
- Moscow for two: 5 romantic spots in the capital
- Meal with a view: Best rooftop restaurants in Moscow
This website uses cookies. Click here to find out more.
IMAGES
COMMENTS
Adjustable Solar Panel Mount Mounting Rack Bracket Set Rack Folding Tilt Legs, Boat, RV, Roof Off Grid (41-inch Length) The Link Solar Adjustable Rack Solar Panel Mount is another adjustable bracket, enabling the maximum performance of the panels. It's a rack system, so it has a long strip bracket that attaches to the roof.
The "Z" bracket is the most basic piece of mounting gear for solar panels. The mounting bracket that is included in RV solar kits the most often is of this sort. Renogy Solar Panel Mounting Z Brackets Lightweight Aluminum Corrosion-Free Construction for RVs, Trailers, Boats, Yachts, Wall and Other Off Gird Roof Installation, one set of 4 Units
Solarland SLB-0119 Side of Pole Solar Clamp Mount for Solarland SLP003-5 Solar Modules. $11.25. Add to Cart. Solarland SLB-0120 Side of pole Solar mount bracket for Solarland SLP010-25 panels. $18.20. Add to Cart. Solarland SLB-0121 L-Bracket with hardware for Solarland SLP003-20 Series Solar Modules. $14.95.
Solar Panel Bracket. from $16.99. The Better Mounts solar panel bracket is designed to mount virtually all aluminum framed solar panels to flat or gently curved surfaces. We use inherently UV stable ASA plastic for this bracket, which outperforms ABS in outdoor applications. This bracket can be used to mount solar panels to an RV or motorhome ...
Mounting Solar Panels to a Rubber RV Roof. The most common RV roof type is rubber, made out of a material known as EPDM or TPO. The sheet of rubber lays over a layer of wood, so the best way to mount solar panels to this type of roof is to screw them in with stainless steel lag bolts or something like #14 stainless steel screws.
Universal Pivoting Davit Mount design allows you to mount solar power on any set of boat davits. The included Rail-Mount Clamp Kit, provides simple rotation/ adjustment for up to a 200 watt solar panel. ... Perfect for small solar panels or arrays that are being attached to a building or an RV roof. Kit includes four Z brackets and hardware ...
However, most solar panels will break from the force of the wind if left in this position while driving, so tilted mounting racks are designed to be able to return to a flat mounted position. Pros. Up to 35% more efficient power production than flat mounting. Heat dissipates more easily, causing less power fluctuation. Easier to keep clean.
Issues To Avoid When Mounting Solar Panels On An RV. When mounting solar panels on an RV, there are a few things to avoid to ensure optimal performance. ... boats, yachts, and even on irregular surfaces. 2. Drill-Free Corner Mounting Bracket. View Product. Weight: 7.2 oz. (per component) Material: UV-resistant ABS Plastic; Adhesive: Sikaflex ...
Attach mounting brackets to each panel. Set panels in place and mark where you need to drill holes. Make sure your holes will hit studs in your RV so your panels are secure. Each RV will be different, but the studs are usually visible with a 2-3inch wide grey line going width wise of your RV roof.
This item: Solar Panel Mounting Bracket Aluminum Solar Panel Z Brackets Roof Solar Panel Bracket for RV, Boat, Wall, Caravans, Yacht and Other Off Gird Installation, Set of 4 Units, Black $13.99 $ 13 . 99
Specification The ABS solar mounting bracket can be used with any aluminium framed solar panel to provide a secure fixing for vehicles, caravans, boats, outbuildings etc. ... Harvest up to 12 A-Hr a day of energy Portable 30W Solar Fishing Pole is an easy way to keep your fishing boat batteries fully charged when not in use. ... RV Tilt Mount ...
These panels are ideal for mounting on a slightly curved rigid boat or RV surface or on our top-of-pole mounting system. We use premium SunPower Gen III solar cells with an efficiency rating of up to 23.7%, the highest efficiency available anywhere.
Mounting flexible solar panels involves applying an adhesive to the back of the panel and pressing it onto the desired surface, usually a roof or deck of an RV, boat or van. It's essential to clean and prep the surface ahead to ensure a strong bond. Some people combine adhesive with screw-in methods for added security, but screwing panels ...
Dakota Lithium 100-Watt Flexible Marine Solar Panel Kit. Live a life without limits! For unlimited freedom, take your boat, RV, truck, or trailer off-the-grid with Dakota Lithium. This kit offers enough power to charge most single 12-volt battery banks (combine 100 watts of solar with 100Ah of Dakota Lithium batteries - additional panels ...
What are included? 2x H-type 7 foot Aluminum Rails. 6x H-type 70mm Aluminum Solar Mounting Brackets (Rail Mounts) 12x M6x15Stainless steel bolts M6X15. 4x Z-type Aluminum Solar Mounting Brackets (End Clamps) 4x M6x15Stainless steel bolts M6X15. 4x H-type 30mm Aluminum Solar Mounting Brackets (Mid Clamps) 4x M6x30Stainless steel bolts.
Today on HamRadioComms I show my 2 Renegy 100W solar panels mounted to my new Adjustable Aluminum Solar Mounting Brackets.The are from a company called LGB, ...
Adjustable Solar Panel Mount Mounting Rack Bracket with Large 28" Mounting Arms - Boat, RV, Roof Off Grid Visit the WindyNation Store 4.2 4.2 out of 5 stars 120 ratings
ECO-WORTHY 28" & 41" Length Adjustable Solar Panel Tilt Mounting Brackets designed for off-grid solar systems, like RV, marine, motor-home, roofs, sheds, etc...
1.An ideal way to fix solar panels on the roof or deck of motor home,caravans,boats & roof. 2.The mounts can be safely bonded to the surface removing the need to drill holes using drilling screws. 3.Mounts also act as a wind deflector and maintain the correct air gap between the solar panel and the roof top/deck. 4.The Panel Corner Bracket protect the corners of the solar panels from damage. 5 ...
If your latitude is between 25° and 50°, then the best tilt angles are: For summer, take the latitude, multiply by 0.92, and subtract 24.3 degrees. For spring and autumn, take the latitude, multiply by 0.98, and subtract 2.3 degrees. For winter, take the latitude, multiply by 0.89, and add 24 degrees.
Our professional installers and state-of-the-art equipment mixed with our competitive prices ensure that going solar is both environmentally and economically beneficial for years to come. Electric City Solar Co. is a locally owned and run residential solar company serving the residents of Northeast PA and the Pocono regions of Pennsylvania.
You can enter with a ticket from the Kremlin Museums. You can enjoy the view from above with a cup of coffee, which you can get close by - on the rooftop of the Ritz Carlton, where there is a ...
Radisson cruise from Gorky park. 2,5 hours. Yacht of the Radisson Royal flotilla. Best water route in Moscow. Panoramic views of the capital from the water in winter and in summer. Restaurant with signature cuisine. Next tour: 1600 ₽. Learn more.