Bloke's Post
One bloke's post about camping, 4wd'ing, travel, cycling, music, and more., updated boat launching trolley (dolly) design.
Before I started to build my first dinghy launching trolley (dolly), I scoured the internet for design ideas. One thing was evident — people make do with some really dodgy launching trolleys! This view was backed up by walking around the launching area of my local sailing club when all the boats are out on the water and the trolleys are left on the beach. There are some truly awful dinghy launching trolleys in use! A simple, sturdy and functional launching trolley makes using my boats so much easier and more pleasurable. I hope that by sharing this information, I can help others to enjoy their boating more too.
I own six boats with various launching trolley/dolly designs. I have also built two wooden launching trolleys, with a third in production and a fourth trolley on order (I am building it as a favour for someone at our local sailing club). Based on my own trial and error, I have a few ideas on how to refine my dinghy launching trolley design further.

Lessons learned
My second boat launching trolley built for a Sabre sailing dinghy is described in some detail on this page .
Nearly completed Sabre launching trolley — the padding is yet to be glued on the bunks.
Things that worked well on my second dinghy launching trolley build were:
- Epoxy glue — epoxy mixed with a suitable filler to form epoxy glue has proven to be a good way to construct the frame. Given that this method is used to construct boats, it should also work for wooden launching trolleys. Using epoxy eliminates all metal fastenings (screws/nuts/bolts) that would be prone to rust.
- A-frame design — sufficiently strong without too much weight. It would be difficult to provide sufficient bracing for the forward bunk if it was mounted on only one length of wood (such as used on a T-style frame).
- Handle bracing — the joint between the handle T-piece and the A-frame rails takes all of the pushing and pulling forces of the trolley. I think this joint is overbuilt, but I want it to be strong.
- Handle — the 25 mm dowel handle is okay, but you might want to make it 30 mm for larger hands.
- Axle case — the axle case has proven to be a strong, reliable and easy way to attach the axle without using metal fittings that can rust. I think that I can use lighter pieces of wood in the future to build the axle case.
- Bunks — the fibreglass bunks have proven to be sufficiently strong and easy to build. I can stand on them (75 kg with a point load) without any issue. The 18 mm marine plywood bunk supports are sufficiently strong.
- Wheels — the poly rim hub wheelbarrow wheels have a 180 kg load rating for each wheel and came with plastic bushes (to replace the roller bearings) for use in wet environments. The wheels will not rust and are sufficiently strong. I recommend using the widest wheels possible if the launching trolley is intended to launch heavy boats over soft sand.
Things that could be improved for future trolley builds are:
- Aft bunk supports most of the boat weight — with my previous launching trolley design, the aft bunk supports most of the boat weight, with the remaining weight supported on the forward bunk. I would like to balance the weight distribution better, without loading up the trolley handle with too much weight.
- Forward bunk support bracing is over built — for my 41 kg hull Sabre sailing dinghy, the additional brace for the forward bunk support is not required. The brace also makes it difficult to adequately finish the joint between the brace and the bunk.
- Axle aluminium rod/bar — I used solid bar to help weigh down the back of the trolley. I think this is not necessary and would prefer to have a lighter trolley.
- The trolley is overbuilt — lighter wood stock could be used for the weight of my boat.
Based on the above lessons learned, I have revised my trolley design. I have not had a chance to build this design yet, but based on my experience with my first three trolleys, I do not see any issues. Note that building techniques are all outlined on this page , with only the updated design changes discussed below.
Forward bunk support
For future builds, I would simply attach the forward bunk support to the frame rails by epoxy gluing it in place with a large fillet and overlaid by one or two layers of 420 gsm double bias fibreglass tape.
Aft bunk location
Based on my lessons learned, I would like to balance the weight better between the forward and aft bunk so that the boat is better supported on the trolley.
In my original design, the aft bunk and axle case are laminated together, so moving the aft bunk towards the transom would also move the axle aft and lead to unacceptable weight at the trolley handle. While some people solve this weight issue by placing a small wheel at the front of the trolley, this is not a good solution, particularly if the trolley is to be pulled across soft sand. I have owned two trolleys constructed in this manner and they are absolute pigs to move across soft sand!
A better solution is to separate the aft bunk and the axel case as per the following sketch (better sketch to come).
Updated boat launching trolley (dolly) design sketch
My approach to finding the correct location for the aft bunk and axle case is:
- Find the balance point of the boat fore and aft by gently placing the boat on a piece of wood and moving it fore and aft until the balance point is found.
- The aft bunk should be around 1/3 to 1/2 the distance from the balance point to the transom of the boat.
- Build the A-frame, handle and bunks.
- Build the axle case but do NOT attach it to the A-frame.
- Place the axel case under the trolley and then place the boat on top of the trolley. Move the axle case fore and aft under the trolley/boat until you find a position where the weight at the handle is acceptable. I think I would aim for about 10-12 kg at the handle (use your bathroom scales to measure the weight at the handle).
- Mark the location for the axle case and then remove the boat.
- Epoxy the axle case in the correct position under the trolley A-frame.
Aluminium axle
Replace the solid aluminium bar/rod axle with an aluminium tube of suitable dimensions.
Different wood stock
My view is that this trolley is overbuilt for my boat which has a 41 kg hull plus mast, sails, etc — probably 55 kg maximum. I have used 70×35 mm MGP10 structural pine for the A-frame and 18 mm marine plywood for the bunk supports.
I have been looking for some lighter timber stock for the A-frame, but have not yet sourced some suitable timber. If I can find the right length timber but too small in cross-section, then epoxy gluing/laminating two smaller pieces of wood together to make the right sized timber may be a practical and easy solution.
The next smaller sized marine plywood from my local hardware store is 12 mm, which I think is probably too thin. If I could source 15 mm marine plywood, I think that would be okay. Laminating a 6 mm sheet of marine plywood to a 9 mm sheet would get the same result. For the weight and hassle, I think I will probably stick with the 18 mm plywood.
2 thoughts on “ Updated boat launching trolley (dolly) design ”
Trolley for Encore P Pedalboat by Nauticraft-launching dollies for beach and soft sand – made in GER
Just what I needed. Thanks. I was wondering what the heck those plastic bushes on the bunnings wheels were for. Perfect for sea water submersion!
Leave a Reply Cancel reply
Your email address will not be published. Required fields are marked *
Save my name, email, and website in this browser for the next time I comment.

- My Boats & Boat Articles
- First Dolly Broke
- Successful Dolly for Tender
The Lowly Launching Dolly
My club has a great number of home-made boat launch dollies. Here are a few. Some have lasted better than others. I dug a few derelicts from a corner and admired the ingenuity with which they were put together.
Since my Skerry dolly had failed because I had not made the handle strong enough and the boat support had also bent, I was trying to sort out how other people had made their launching dollies!
Plastic Pipe Dinghy Dolly

There were several dollies made from black plastic pipe. A few had failed at the joints which were not well glued. They were made from 3 inch pipe. I think black pipe can be made to work for light boats, I don't think it is really quite strong enough. It also bends quite a lot.
The wheels are attached with cotter pins mostly. There is usually a wood or metal axle.
Below the dolly wheel were held by a pipe attached to an aluminium bar by u clamps. Lots of washers to stop the plastic wheel hub from rubbing. Wheel assembly still strong. Some of the pipes were broken.

Wood dinghy cart on a welded pipe frame.
This wheel is made from wood and is still strong! Looks medieval. 2 layers of 2x6 lumber going in opposite directions. There are a few Robertson screws on each side. In the centre there is a square plywood plate bolted on.
The steel bar which acts as an axle, is made from a piece of rebar and just fits in a hole drilled in the wheel and held in place with a cotter pin. There is not even a washer.
The wheel is about 12 inches in diameter. The wood is quite soft, not oak or any such lumber. There were not any knots that I saw. It rolled quite well. I find this quite brilliant in it's simplicity and retro cool.
It would also not float very high. Floating dollies is not a great advantage and makes taking the boat out of the water more difficult.
Aluminium pipes and fiberglass box.

Simple little tender launch trolley. Aluminium pipe fits into holes in the fiberglass box. Steel pipe holds the wheels and also goes through the fiberglass box. An aluminium brace is broken and replaced by green rope. This makes the launch dolly a bit floppy but it's still working.
2 Launching Trollies made from angle iron

These 2 Dinghy dollies on the left, are both put together from angle iron. The top one is not welded. The lower one is welded and has a triangular configuration.
Dolly welded from square steel pipe

Welded sturdy boat dolly
Steel dollies are very sturdy but heavy. They has quite large wheels. The pile of boat dollies are used for the school boats. They can take a lot of abuse. The length of the dolly can be adjusted. There is a screw that allows the long square iron pipe to slide forward or back. The dolly can be shortened that way. That's the kind I finally decided to use for the Skerry.
Because it comes apart, it is easy to put the dolly in the boat when I trailer it out.
If I was set up to weld, I would use that method to make a new dolly.

Read about my Launch Dolly
This is the dolly I finally made for my little Apple Pie Tender. The dolly has been working very well. I would not change anything. I used old iron pipe, an aluminium tube and glued the joints with carbon fibre. The Carbon Fiber joint is holding perfectly. The dolly works very well and after 2 years is not showing any wear except for some rusting on the wheel.
Construction details are here. NOTE: I have now been using this new dolly for a couple of years and it has held up really well.
Boat and Knots
Members: Sign in Here --> Members: Sign in Here Contact Us
Email This Page to a Friend Preview: Small Boat Dolly
May 1, 2012

H ere’s an idea for moving small boats around the dooryard using a wheeled dolly—one that I bought at Home Depot for $49, then modified as shown to support a boat. The big job is in grinding off about 2/3 rd of the heel plate so it clears the boat. (It’s hardened steel, so forget the hacksaw; it will strip the teeth right off in the first dozen passes.)

Building a Homemade Small Boat Dolly
A short length of 2×4 placed crosswise near the wheels (hard against what’s left of the heel plate) carries most of the weight, and built up from that cross-piece are the cradle arms that hold the boat more or less upright. The boat’s keel nestles in the space beteen the arms.
. . . sign up to the right to get immediate access to this full post, plus you'll get 10 of our best videos for free.
Get Free Videos & Learn More Join Now!! for Full Access Members Sign In
GET THIS FULL POST!
Get Immediate Access, Plus 10 of Our Best Videos
- Email Address
- Bass Fishing
- Fly Fishing
- International
- Fishing Gear
- Hunting Gear
- Sign in / Join
- About Country Hookers
- Advertising
A Pro’s Guide to Battling the Dog Days of Summer
10 tips to improve your fly fishing technique
Pro Fishing Tips: 6 Pro Tips to Becoming a Better Fisherman!
Fishing The Beaver River and the Lakes and Ponds around Beaver, Utah
Best Bass Lures: The Top Go-To Bass Lures that are Guaranteed to Catch Fish
Ed Brown Products to show EVO KC9-LW at SHOT Show
RCBS Introducing Multiple New Products for Reloaders at 2020 SHOT Show
Savage Arms Unveils 2020 SHOT Show Lineup
Federal Launching Over 130 New Products at This Year’s SHOT Show
Federal Expands HEAVYWEIGHT TSS Turkey Line
Unlocking the Secrets of the Provo River: Fishing Tips & Techniques for the Provo in Utah
Utah Fishing: Nine of the Top Fishing Spots in Utah
Fishing the Muddy River in Southern Nevada
Fishing Little Reservior in the Tushar Mountains near Beaver, Utah
Backcountry Fishing Rods: The Beartooth by Tenkara Rod Co.
Gold Tip announces new Black Label Premium Arrows
Abu Garcia REVO X Baitcast Combo Review
Booyah Bait Poppin Pad Crasher Frog Review
Jon boat dolly: diy boat cart for launching lightweight boats.

If you don’t have a trailer, getting your boat down to the water can be challenging – especially if you’re fishing solo. To make launching my new Tracker Jon boat a little easier, I built this easy DIY boat dolly. I use it for my 12 foot Jon boat, and can successfully launch the boat in areas where I would never be able to use a trailer.
There are tons of different boat dolly designs online, and there are even some that you can purchase –unfortunately, most of them cost about as much as a good used boat trailer. After looking at all the options, I decided to build my own out of some PVC, a couple of Harbor Freight wheels, and a threaded metal rod. Here is the design I went with.
Custom PVC Boat Cart & Jon Boat Launching Dolly
Jon Boat Dolly Parts List:
- 3 – Sections of 1 1/2 inch PVC
- 2 – 1 1/2 inch PVC Caps
- 2 – 1 1/2 inch PVC threaded adapters
- 6 – 1 1/2 inch PVC tees
- 1 – 3ft long 5/8 Threaded Rod
- 2 – Heavy Duty Harbor Freight Cart Wheels
- 4 – 5/8 Washers
- 2 – 5/8 Locking Nuts
Tools Needed to build the Boat Cart:
- 5/8 Drill Bit
Step by Step instructions for building the Boat Dolly
The first thing I did was drill out a 5/8 inch hole in each of the caps. This is where the threaded axle rod will be placed to hold the wheels on your cart.

Next, I cut out my sections on PVC and started to add the PVC Tees. The width of your PVC sections will be determined by the size of your boats and the threaded rod and wheels that you go with.

Once your main axle section is assembled, you can slide your threaded rod through the end caps.

Place a washer on each side of the wheels and tighten the nuts on to the threaded axle rod.

Assemble the top PVC sections that will be used to hold the boat.

And now you’re ready to launch your boat with your new custom boat cart.

RELATED ARTICLES MORE FROM AUTHOR
Kayak Camping Gear for your next Fishing Adventure
Was wondering how much weight between your jon and gear you might have on this setup? Like this dolly that you came up with but trying to figure out how much weight it may hold. The place I need to walk it out to is about a 15 minute push/pull but a great fishing hole that nobody uses due to the walk. My buddy made one out of steel but it’s quite heavy when assembled so trying to lighten the load a bit.
Do you have any problems with the wheels bending out, would like to make one for my sneak boat for duck hunting, carrying my 120 lb. boat plus another 20 to 50 lbs of gear. Would the pvc hold up to 250? Does it slip out when pulling it?
The PVC Bends a bit but so far it’s holding up, and it does slip a bit on rough terrain so I usually bring a couple of straps to make sure everything stays in place.
Easy to build and works like a charm. Thanks for the write up. Holds my inflatable, 2.3 hp outboard, and accessories.
Do you by any chance have a photo of your inflatable on your dolly and pic of your dolly without it on it? I’m right in the middle of creating one for mine.
Are the wheels under the transom area when you are operating the dolly? Thanks.
I am in the midst of building a wooden Bayou Skiff and was wondering if this cart will carry it? My skiff is made of 3/8′ Plywood and is 12′ long.
I see you don’t monetize your site, don’t waste your traffic, you can earn extra bucks every month because you’ve got hi quality content. If you want to know how to make extra money, search for: Ercannou’s essential adsense alternative
What’s the point of the threaded caps and threaded male adaptors at the cross member…seems like just 2 slip caps would serve exactly the same purpose. The nuts at the axle ends should provide all the adjustment necessary.
Thanks for this. So smart and easy. My solution was way to complicated and with yours, it seems a breeze.
LEAVE A REPLY Cancel reply
Save my name, email, and website in this browser for the next time I comment.

EVEN MORE NEWS
Standing Up for Firearm Owners: Franklin Armory’s Lawsuit Against California DOJ...
Expansive Worlds’ Call of the Wild: The Angler Brings Fishing Thrills...
POPULAR CATEGORY
- Bass Fishing 22
- Firearms 14
- Fishing Gear 14
- Legal & Disclaimers
- Beginner Info
- Buyer’s Guide
- Recommended Gear

Jon Boat Dolly: Manufactured and DIY Options for Any Boat Length

One of the benefits of owning a jon boat is the ability to transport without a trailer. Many smaller models can be loaded into the back of a pickup truck or even onto the roof of your vehicle. But what do you do when it is time to launch? While lugging a 10 or 12ft aluminum jon boat a couple hundred yards is an easy feat when your fishing buddy is there to share the load, even a few yards can seem impossible on solo outings. The answer- a jon boat dolly.
Jon boat dollies make transporting your jon boat extremely easy without the help of a vehicle. Dollies come in pre-assembled packages or you can pursue a DIY solution. The main factor in your dolly selection is selecting the appropriate size, weight capacity, and any additional features like the ability to disassemble for easy storage.
Why get a jon boat dolly?
Each year hundreds of anglers become boaters by adding a small jon boat to their arsenal of fishing gear. Most of these new boat owners do not think of themselves as boaters – they are anglers looking for a way to access new potential hot spots.
This is what makes the small jon boat so popular. There is no need for all the other expenses associated with a larger boat – the trailer, large motor, dock space, winter storage etc. Just the boat, a small motor, some safety equipment and off you go.
That is until you get to the water for the first time.
Manufacturers advertise these boats as being able to be loaded into the bed of a pickup truck, or even onto a vehicle roof rake, and it is true. But what they do not fully communicate is how you will get the boat AND all your gear to the water.
Unfortunately, this is something that many new owners do not consider until they are at the ramp with a boat, trunk full of gear and a daunting 200 yard drag to the water. Even if you make multiple trips, carrying your gear and motor to the water and returning for more, there is still the matter of your new boat. Dragging it by yourself is a sure recipe for damage, either to your back you’re the boat’s hull.
By utilizing a boat dolly you can not only avoid damage to your boat but in many cases move your boat and gear in one swift trip. Plus, it will allow you to take full advantage of your jon boat by accessing additional areas. When you are rolling, rather than carrying, it is possible to launch in areas otherwise inaccessible.
You may even find it possible to launch in areas a normal trailer would not go such as the local beach or back cove you with no parking area. If you can get the dolly to the water’s edge and find a shallow sloping bank you have your very own launch area.
Jon Boat Dolly: Pre-Manufactured Options
Getting the most from a boat dolly means finding the best one for your situation. That’s where we come in. We have researched some of the most popular models and picked the best of the best for your consideration. Each has its own advantages and there is something for almost any situation so we think that you will find one that suits your needs. We have even added some information for those that want to build their own dolly. So, take a look, compare and before you know it you will be rolling – right to the water and into your next adventure.
Side note: an important part of dolly selection is getting the length and weight capacity correct for your particular boat. If you aren’t sure how much your boat weighs, as a general guide here’s a post we wrote that covers average weights by boat length taken from 33 different specific boats examples.
Seamax Portable Boat Carry and Launch Hand Dolly Set

The idea of using a cart to launch a small boat is not new, although it has gained increased popularity due to the interest from paddlers looking for an easy means for transporting kayaks from the car to the water.
Lifeguards, rescue personnel and small boat enthusiasts has been using cart for years, many of which were fashioned from small, light weight trailer.
Seamax decided not to reinvent the wheel and instead relied on this original design for their small boat dolly. It resembles a small traditional cart, and even includes a ball hitch for use with an ATV, golf cart etc. But it is light enough to be towed by hand and adjustable to fit a wide range of smaller jon boats.
The frame is constructed using powder coated steel with two 16” inflatable tires and plastic supports to prevent hull damage. An optional trailer hitch is included and can be used with a variety of off-road vehicles. A quick release pin allows for easy length adjustment and the entire cart can be easily disassembled for transport.
Maximum weight capacity: 250 lbs.
Maximum boat length: 14 ft.
Total weight: 47 lbs.
- Can be adjusted to fit boats up to 14 ft. in length
- Provides full support the length of the hull
- Allows for use with ATV, golf cart, tractor etc.
- Disassembles for transport
- Not the best selection for off-road or trailer use
- Even disassembled it is bulkier than other options
- Use of steel rather than aluminum adds unnecessary weight
For additional information, availability and current pricing click here (link to read reviews on Amazon).
Seattle Sports Paddleboy ATC All-Terrain Center Dolly Cart

When it comes to portable carts for your jon boat it is going to be hard to beat the Paddleboy ATC by Seattle Sports. This cart is versatile, heavy duty, low profile and built to take your jon boat & gear where it needs to go.
The large bicycle style wheels are designed to make this cart easy to move and are specifically intended for rough terrain. Ruts, rocks or trail are not match for these large profile, treaded wheels. Of course, if you are going to go off-road you need more than good tires.
The heavy-duty steel powder coated frame is capable of holding a total weight of 300 lbs., perfect for transporting your boat & gear in one swift trip. Thanks to the adjustable padded top rails and included tie down strap this cart can be used with almost and size small jon boat. This cart also breaks down quickly for transport or storage when not being used.
Maximum weight capacity: 300 lbs.
Maximum boat length: Unlimited
Total weight: 16 lbs.
- Heavy duty construction designed for off-road use
- Large bicycle tires make for easy movement by single user
- Can be used with a wide range of boat sizes
- Cost, this cart is twice the cost of many competitors
- Although smaller than a traditional cart it is still larger than many other options
- Steel frame will need additional maintenance if used in or near saltwater
Giantex Aluminum Jon Boat Gear Trolly

If you are looking for a reliable yet economical option for moving your jon boat, then the Giantex Gear Trolly. This cart was originally designed for kayaks, but thanks to an overall capacity of 220 lbs. it is more than capable of moving your jon boat with confidence.
This cart’s small size makes it perfect for those transporting their jon boat on a car top. With an overall width of 28” and height of only 16” it is smaller than the tires used on some other models and can be transported in a truck or even backseat if needed.
Despite its small size the construction and design make it bigger than it appears in terms of strength. The aluminum frame, pneumatic tires and web straps can support up to 220 lbs., almost as much as even the most rugged carts on the market.
Depending on the size of the your jon boat this cart can be mounted under the stern or amidships and secured with the included tie down strap. Although there are many similar designs on the market one feature that makes the Giantex stand out is the full-length kickstand, which is more stable on soft terrain.
Maximum weight capacity: 220 lbs.
Total weight: 3 lbs.
- Lightweight, easy to store and transport
- High weight capacity
- Narrow width is more unstable than large models
- Pneumatic tires may puncture on rougher terrain
C-Tug Boat Cart

Two of the concerns faced by jon boat users are (1) what to do with the cart once launched and (2) how will the cart hold up to rust and corrosion? The C-Tug boat cart makes both those concerns obsolete.
Thanks to a design that allows quick tool-free assembly/disassembly and its compact size it can be taken apart and stored in your boat once you reach the water. Perfect for those who wish to launch & retrieve at different locations.
Because the entire unit is constructed of care-free high impact plastics there is no need to worry that consistent exposure to the elements will cause your cart to fail sooner than expected. Even if you use your jon boat in brackish or saltwater this little cart will provide many seasons of service without worry of rust or corrosion.
The puncture resistant wheels are also an ideal choice for both the beach and off-road, increasing your ability to traverse sand or other soft surfaces and eliminating the worry you will encounter a flat. Furthermore, the flat padded supports and included tiedown straps allow the dolly to be mounted in any location along the hull necessary.
Total weight: 10 lbs.
- Lightweight and easy to transport
- Can be disassembled without tools for storage in boat
- Corrosion resistant high impact plastic construction
- Small wheels may make navigating some obstacles difficult
Bonnlo Kayak, Canoe & Boat Cart Carrier Dolly Trolly

The Bonnlo Dolly Trolly offers a highly portable, practical and durable means of moving your jon boat from your home or vehicle to the water no matter the terrain. The solid aluminum frame and 2mm kickstand provides a sturdy, easy to use platform for holding any small boat.
Two 12 ft. tie down straps secure your vessel during hauling and can also be used to secure it in your vehicle during transport. The entire dolly breaks down quickly and easily, thanks to the folding design & removable wheels, for storage. It will even fit into your vessel when on the water, eliminating the worry it will be stolen or otherwise lost when away.
One of the most prominent feature of this dolly would be the solid PU tires. No rubber to give off a chemical smell when transported in your vehicle or stored in your home. The solid construction means no worry you will encounter a flat during use and offers the ability to traverse rough terrain without concern.
If there is one concern regarding this dolly it would be the lighter than usual capacity of only 165 lbs.
Maximum weight capacity: 165 lbs.
Total Weight: Unknown, less than 10 lbs.
- Compact, folding design for transport and storage
- Solid wheel design eliminated flat tires
- Wide tires will roll over multiple surfaces including grass, sand, mud and rock.
- Light weight capacity
Wilderness Systems Heavy Duty Cart with Flat-Free Wheels

If you are in need of a heavy duty jon boat dolly capable of transporting a slightly heavier boat you need to consider the Wilderness Systems Heavy Duty Cart with Flat-Free wheels. With a total capacity of 450 lbs. this dolly has the ability to carry over 50% more than most competitors.
The first thing you will notice with this dolly is the unique design. Where other dollies utilize a “v” shaped cradle Wilderness Systems relies on a longer, flat pair of supports with dual 32 inch arms on which the boat sits. This design provides increased contact with the hull, resulting in improves weight distribution and easier control when rolling.
The pair of solid, wider no-flat wheels will not only improve control on soft terrain they also eliminate the concern you will encounter a flat during use. The overall height is also adjustable to better accommodate use with different hull designs or over different types of terrain.
The entire dolly breaks down quickly and easily for transportation and storage. Easy to follow instructions are included but once you have practiced a time or two they should not be needed. Two included 12 ft. tie downs are able to be used to secure your jon boat to the dolly or to your vehicle during transport.
Maximum weight capacity: 450 lbs.
Total weight: Unknown
- Heavy duty design with high overall weight capacity
- Twin bunk design for easier control
- Breaks down easily for compact storage
- Cost – as much as 3x as much as similar models from competitors (but it will carry a lot more)
DIY Jon Boat Dolly
There are many reasons to construct your own jon boat dolly and it is not limited to cost. In all honesty once you factor the cost of supplies and your time in completing the construction it is probably cheaper to buy one.
However, by constructing your own dolly you can make sure it fits your specific needs and in the long run avoid additional costs accrued by making multiple purchases trying to find the right fit. Here are some tips to keep in mind when deciding on a final design.
- Size – although most commercially available jon boat dollies are small, compact designs this does not mean you must follow the same model. One of the benefits of DIY is the ability to customize the end product to fit YOUR needs. When it comes to moving a jon boat a larger dolly with more support, and possibly multiple axels, will make moving your boat easier. The drawback of a larger design is transport to and from the launch. You need to determine how you will be using the dolly and which set up is best.
- Materials – many DIYers rely on PVC tubing as for the frame construction due to its light weight and ease of use. However, when constructing a dolly for a larger, heavier boat it is important to remember that PVC will flex under weight. If you decide to use PVC you may need to add additional support, such as web strapping, to prevent difficulties. Aluminum, wood or even high impact plastic can also be used during construction but require additional tools and some specialized experience.
- Wheels – one of the biggest mistakes builders make is choosing the wrong wheels for their dolly. Large bicycle wheels are easy to roll and will cover rough terrain easily but take up much more space when storing. Inflatable pneumatic tires will work well on soft surface but include the risk of a flat and some users complain of the chemical smell they put off. Finally, there are solid plastic wheels. This final option is becoming increasingly popular in the commercial dolly design and offers many advantages. If big enough they will roll as easily as bike wheels, they will not suffer from a flat and are not impacted by corrosion so are an excellent choice for saltwater. However, solid wheels can slip on wet or rough terrain if not equipped with a soft rubber exterior and offer no suspension resulting in a rougher ride. Overall it is generally best to select a wider, larger tire with an aggressive tread as it will ensure the best performance on a variety of surface.
Check out this YouTube video for an example of what is possible when you DIY a jon boat cart.
- Seacycle
- Spring Creek
Seitech Models are available for any Boat, Canoe or Sailboat
Typical Seitech Launching Doll Specifications
Seitech Launching Dolly Wheel Options
The 7 Best DIY Outboard Stand and Dolly Ideas [Video]
Based on our research, the best materials and bases for building a DIY outboard stand or dolly are as follows:
- Mixed materials
- Medical walker
- Shopping cart
- Engine stand
Let’s drill into the details and talk about each in detail!
The 7 Best DIY Outboard Stand Ideas
It’s safe to say that the best material for building a DIY outboard stand is wood.
Lumber is relatively cheap, available, and easy to work with. It can also be strengthened with metal angle braces and plywood gussets for extra rigidity.
Here’s a great tutorial on how to build a wooden outboard stand:
And here’s another one, built of 2x4x8 lumber:
Metal is also commonly used as a material for DIY outboard stands.
You can use aluminum or steel profiles or even pipes – which you can easily access if you love working with metal.
Just make sure to carefully plan the stand, so that it can handle the weight of the motor.
You will also need some metal fabrication tools like a welder, grinder, or even a pipe bender.
Here’s a great example of a DIY metal outboard stand:
3. Mixed Materials
If wood and metal work well, why not use them together?
The use of mixed materials offers many possibilities for creating unique designs.
One of the most common designs is when a solid wooden board is installed on a metal stand:
If are looking for something more stylish, don’t miss this video below:
4. Medical Walker
If you don’t want to build a stand from scratch, you can use a base to speed up the work.
Believe it or not, a sturdy outboard stand can even be built with a used medical walker.
Medical walkers are typically made of high-quality materials and can be purchased from a thrift shop for literally a couple of bucks.
All you need to do is to mount a piece of lumber directly above the cross brace.
5. Hand Truck
If you are looking for a movable solution, you may want to use a hand truck as the base of your DIY outboard dolly.
These heavy-duty units are designed for transporting heavy items even on stairs.
Therefore, they come standard with durable wheels and feature an easy-to-move design.
If you don’t want to invest in a new hand truck, you can build one from scratch using metal pipes.
Plumbing pipes can even do the job, but they offer a far less massive structure than a factory-built dolly.
6. Shopping Cart
Interestingly, many builders use a salvaged shopping cart as a base for their DIY outboard dolly.
If you want to drill into the details, here’s a great step-by-step tutorial on th is conversation.
7. Engine Stand
If you are looking for a massive outboard stand that can hold a large outboard motor, you may want to consider an engine stand as the base.
With careful design and construction, these DIY stands allow you to lay the motor horizontally, which comes in handy for some repairs.
Just make sure that you bolt the motor to the stand and use an engine hoist or other support as an extra layer of security.
Conclusion – How do You Make an Outboard Motor Stand?
Home-made outboard motor stands are most often made of wood (lumber and plywood) or metal profiles (aluminum or steel).
These materials can often be found around the house, so they are essentially available for free.
However, medical walkers, hand trucks, shopping carts, or engine stands can also be used as the base for your DIY stand.
When it comes to the designing your stand, it’s wise to position the motor high enough so that a bucket will fit under it. This can come in handy when you want to flush the motor during the annual service.
Others prefer to add an extra tray or shelf to the stand, which can also make life easier during a maintenance procedure.
But no matter what design or material you use, make sure that the stand or dolly can handle the weight of your motor. Outboards can be pretty heavy, especially midsize and high-performance models.
This is why DIY outboard stands are typically built for portable motors .
Recent Content
Ski-Doo MXZ 700 Specs and Review [Video]
The MXZ 700 was a very popular high-performance trail snowmobile manufactured in the early 2000s. It was built on the innovative ZX chassis, which housed the extremely reliable 698cc...
‘99-‘02 Ski-Doo MXZ 600 Specs and Review [Video]
The ’99-’02 MXZ 600 was a high-performance trail Ski-Doo marketed around the Millennium. It was built on the ZX chassis, which featured different rear suspensions depending on the year...
19 DIY Trailer Dolly Projects For Towing Heavier Objects
Trailer dollies make it a snap to move large, awkward items. Trailers are designed for easy maneuvering and hauling of almost any size load. The heavy-duty steel construction features a powder coat finish for durability that lasts. When you need a trailer , you can count on our versatile DIY Trailer Dolly Projects line to do the job. These Trailer dollies are great when loading up one or two things, but they're not so easy to move around when you have a lot of weight or things to move in different directions at once. Building one of these will help you move those big pieces without sweat!

DIY Trailer Dolly Plans
No matter what kind of trailer dolly you build, the main objective is to make it as strong and reliable as possible while still being cheap. This will enable you to drag the trailer around without fear of breaking your dolly or your back! Also, be sure that your DIY trailer dolly is easy to construct and maintain so that you can use it for many years.
Trailer Dolly is the ultimate tool for helping you keep your bike secure and safe on the road. The dolly can transport any bicycle with a trailer, even a tandem or cargo bike . It's also especially handy when moving your bike into your home or business, such as an indoor parking garage, back porch, basement, or garage. Here we come with this series of DIY trailer dolly projects for you . If you are a DIY enthusiast and have skills in carpentry, metalwork, welding, and so on, you can turn your trailer into a real masterpiece built to last. Some projects require little to no special tools apart from a drill, saw, and a few other common tools.
Motorized DIY Trailer Dolly
If you are an avid camper , you know that the most strenuous part of your adventures is hauling your gear to remote locations . It would help if you had a way to tow your trailer, but you also need a way to level it so that the ride is smoother; for this, we all need something super useful, like a DIY Motorized trailer dolly . It will help us make our moves faster and allow us to keep the gear and all the heavier stuff with minimal or zero effort. These DIY Motorized Trailer Dolly plans bring lots of surprises and help you perform various activities of daily living, and they have many amazing features.
Modern DIY Vehicle Dolly
Vehicle dollies are carrying devices that allow you to move heavy objects with less effort, especially when you do a lot of moving. This DIY vehicle eliminates the need for a trailer and uses the engine and an axle to allow moving. This is a heavy-duty, easy-to-use product that will make your life easier. We've made it with durable materials so that you can use this item for years! Now you can take advantage of our specially designed modern DIY vehicle dolly that will make your life easier and save energy.
Electric Trailer Dolly For Boats
Are you tired of lugging your boat around on a trailer? Want to pull your boat out of the water and carry it down to the beach whenever you want? The Roll-N-Go pontoon boat dolly makes that easy for you. This lightweight and durable dolly is made of high-strength composite materials, which feature four 8" pneumatic wheels that glide over uneven terrain without effort. It even has an extra long handle so you can easily roll it down the ramp into the water. Step on and push from one end of your pontoon boat onto the roller frames on either side, then push off again when ready to launch.
Power Trailer Dolly Under $250
Trailer Dolly From A Handtruck
DIY Trailer Dolly Tutorial
Motorized Trailer Dolly
This guide shows you how to build a motorized dolly for less than $100. The creator says the idea came to him when he noticed a trailer dolly while moving to his new home. He then bought a new trailer dolly from a local store and set it up to run on two wheels and be controlled by an extended handle that contains a wireless controller. All you need are parts from a hardware store and the expertise to put them together, as instructed in this video guide. Once it’s there, it’s good to go!
Simple Trailer Dolly Project

Broken and outdated trailers can prove problematic. If you do not have a trailer dolly, it can be hard to maneuver around on any terrain. So we decided to make our trailer dolly out of an old skateboard and some standard 2X4 lumber. This is a cool project because it will cost you nothing regarding materials but is incredibly effective and durable. It's large enough to carry an adult and has a swiveling foot that allows the user to steer. This is super cheap, it cost the creator $5 to make, and that is because he already had some of the materials available at home.
nstructables
How To Make A Tow Dolly

If you already have a trailer dolly like this at home, it makes your job easier; watch the video guide, and follow the process appropriately. This easy-to-follow video will show you how to assemble a tow dolly easily. First, grab your trailer and ensure it is safe for towing. Then fasten it securely per your vehicle specifications: Next, attach the tow dolly using two ½-inch j bolts or anchor plates. Finish off by ensuring all nuts and bolts are fully tightened before you head out with your new trailer dolly!
brilliantdiy
Trailer Dolly Idea

If you are looking for an excellent trailer maneuvering dolly, look no further than this homemade trailer dolly. It is made from a front axle of a garden tractor and includes a handlebar, chain, bolts, and other supplies. This trailer dolly is useful for people who want to tow their trailer on rough roads and avoid damaging it. If you’re looking for an easy way to tow your trailer, the trailer dolly may be perfect. Here are the instructions on making this dolly from start to finish.
instructables
Power Trailer Dolly Plan

This DIY Power Trailer Dolly will be a great addition to your garage. It’s really simple to build, and you only need basic tools such as a vice, jigsaw, and a couple more. You can adjust the height of this dolly based on your needs. The design is also flexible and customizable. So, if you want it longer or wider, you can modify it accordingly by adding more pieces of metal for you to use. It’s adjustable in size, so you don’t need to buy extra parts or components such as wheels or axles.
proud-canadian
Trailer Dolley Using Scrap Materials
Powered Trailer Dolly
If you’re looking for a way to make moving your trailer easier, look no further than this powerful DIY Trailer Dolly project. Watch this video and learn how to make a trailer dolly from scratch using common household materials. First, watch the making process, and then start building your own! With its swivel casters and convenient battery life, this dolly is the perfect tool for getting your boat or utility trailer wherever you want with little effort.
Trailer Dolly From Scrap
How To Build An Electric Dolly
Make An Electric Hand Truck
How To Make A Car Truck Tow Dolly

We know you want to tow your car, truck, or other heavy vehicles anytime, anywhere. The best way is to build a DIY trailer that will be cheap, efficient, and reliable. The need for an appropriate towing package can vary from one vehicle to the other, so designing a homemade car dolly could be a useful solution for many cases. This car dolly can bring several benefits once installed on any vehicle if it is well done. This is an easy project you can take care of independently.
Towable Trailer Dolly Tutorial
This towable trailer dolly is a one-of-a-kind creation built using some spare materials you might have lying around. The video shows how to construct the dolly, and its features include carrying your lawnmower, easily towing trailers and tarps, and moving trailers without any problem. This dolly can handle difficult jobs using an old four-wheeler rear end, which is perfect for rough terrain. It also uses a 2-inch ball coupler for towing and another for moving trailers. The materials used are all scrap parts that you may have lying around your garage, making it easy and affordable for anyone to make their towable trailer dolly.
DIY Motorized Trailer Dolly

Handy people love the Motorized Trailer Dolly for the quality and to make several jobs easier. This battery-powered device safely lifts a trailer load off the ground and holds it steady for service or repair. The motor is located on one end, so you can move loads from either side of your truck, jeep, or ATV. The Motorized Trailer Dolly is a unique tool that is easy to set up and use. It helps lift heavy objects and makes it much easier to move them around your garage or workshop.
Sharing is caring!
- Pinterest 1
Jon Boat Dolly: A Tool to Easily Launch Your Jon Boat
By: Author Staff Writer
Posted on Last updated: December 29, 2021
Categories Boating , Jon Boat

Jon boats are becoming more and more popular, and this isn’t surprising. Their size and flat bottom make them very versatile besides being affordable.
And the biggest advantage about owning a jon boat is that you don’t need a trailer to transport it. However, you definitely need a dolly to launch your boat.
Whether you want to buy a dolly or make one on your own, you’ll find this article helpful. Let’s get started!
Why Use a Jon Boat Dolly?
One of the main reasons to buy a jon boat is ease of loading. You can easily load a jon boat on your car’s roof rack or the bed of your truck.
However, beginners don’t know that to get their boat and all of their gear to the water, they need a dolly. Even if you have a buddy to give you a hand, it’s still a daunting task to drag a boat full of gear for a good distance.
Besides that, dragging isn’t good for your boat and you for sure don’t want to damage it. Having a boat dolly will save you all the trouble.
On top of that, with a boat dolly, you can access new spots that you might not have been able to access with a trailer.
How to Choose the Best Jon Boat Dolly
It’s not hard to find a dolly that is suitable for your jon boat. You just need to know what are the things to look for in a jon boat dolly. And this is where I’m here to help.
The first thing I always look for when buying a boat dolly or cart is weight and length capacity. If you don’t check those two things, you might end up with a dolly that won’t even fit your jon boat.
It’s better to look for one that can handle high weight capacities and be adjusted for higher lengths. This way you know for sure it’ll handle your boat and you can also use it for other types of boats.
The second thing to look for in a dolly is a durable but lightweight build. Most dollies are either made of steel or aluminum frames. Both provide a durable build, however, aluminum is much lighter.
Plus steel frames might not be the best option to be used next to saltwater. The size of the wheels is also important. I find that bigger wheels make it easier on my back to roll the boat.
It might not be a problem if you’re used to having someone to help with this task. However, if you like to go fishing solo, then look for options with bigger wheels.
Last but not least, choose a dolly that is foldable for better storage. Also, check its size after folding. Some options can still be big and take a lot of space even when it’s folded.
My Favorite Jon Boat Dolly
I always like to know people’s recommendations when it comes to their boating equipment. So, I think it’s a great idea to recommend my favorite two jon boat dollies.
These are affordable and functional options that I’ve tried before and they’ve worked for me. Here are my recommendations:
1. Bonnlo Jon Boat Dolly Tote

What I like the most about this dolly is that it features airless tires. So, you can use it on different terrains without worrying about getting a flat tire.
Another thing that I look for in a boat dolly is the option to fold it, and this dolly nails this feature! Keep in mind that its weight capacity isn’t the most accommodating.
2. VEVOR Adjustable Trailer Dolly

This is a trailer dolly, which I think makes it easier to roll your jon boat. It flaunts pneumatic tires, adjustable height range, 800 lbs weight capacity, and a sturdy build.
I think this is a great option for heavier boats. However, it comes with no assembly instructions.
DIY Jon Boat Dolly
It’s so easy to make yourself a jon boat dolly, especially if you’re a handy person. DIYing your own jon boat dolly won’t take a lot of time or money, in fact.
The best thing about making your own boat dolly, besides cutting on the costs, is customizing the dolly to your needs.
If you have a hacksaw, drill, and a wrench, you’ll be able to make a DIY PVC jon boat dolly in no time.
Don’t worry; even though it’s PVC, it’s quite sturdy and will handle the weight of your boat while being lightweight.
Here’s the list of the materials you’ll need to make a two-wheel dolly system:
- Two Harbor Freight 10″ pneumatic tires ⅝ inner diameter
- ⅝ steel thread rod 36″, 3 ft long
- Two 1½” PVC Caps
- Six 1½” PVC tees
- Three sections of 1½” PVC
- Four ⅝ washer
- Two ⅝ locking nuts
- ⅝ drill bit
Instructions
- Cut the three sections needed from the PVC.
- Add the PVC tees to the sections to connect the axle together.
- With the ⅝ drill bit, drill a hole in each of the caps.
- Now, that you have your axle ready, slide the threaded rod through the holes in the caps.
- Install the wheels and place a washer on each side of the wheels.
- Tighten the nuts securely on the threaded rod to hold the wheels in place.
- Lastly, add the top PVC segments that will hold your jon boat and now you’re DIY jon boat dolly is ready.
Keep in mind to change the width of the PVC and the measurement I used here depending on your boat’s size. Also, take into consideration the width of the threaded rod and the size of the wheels.
Of course, the PVC frame isn’t the best for heavier boats. So, if you need a sturdier frame, consider making it from steel or wood .
It’s the same idea as the PVC frame, however, I think it’ll need more tools. So, if you got the equipment and the skill for it, go ahead and make it.
The Wrap Up
I believe that every jon boat owner needs a dolly. With the aid of the above-listed tips on how to choose a dolly for your boat, you should be able to pinpoint the perfect dolly with ease.
And if you want to make one by yourself, the DIY dolly project that I discussed above is easy to make. Feel free to share with us any recommendations or DIY tips.
Hopefully, you found all the information you needed in this article, and good luck!

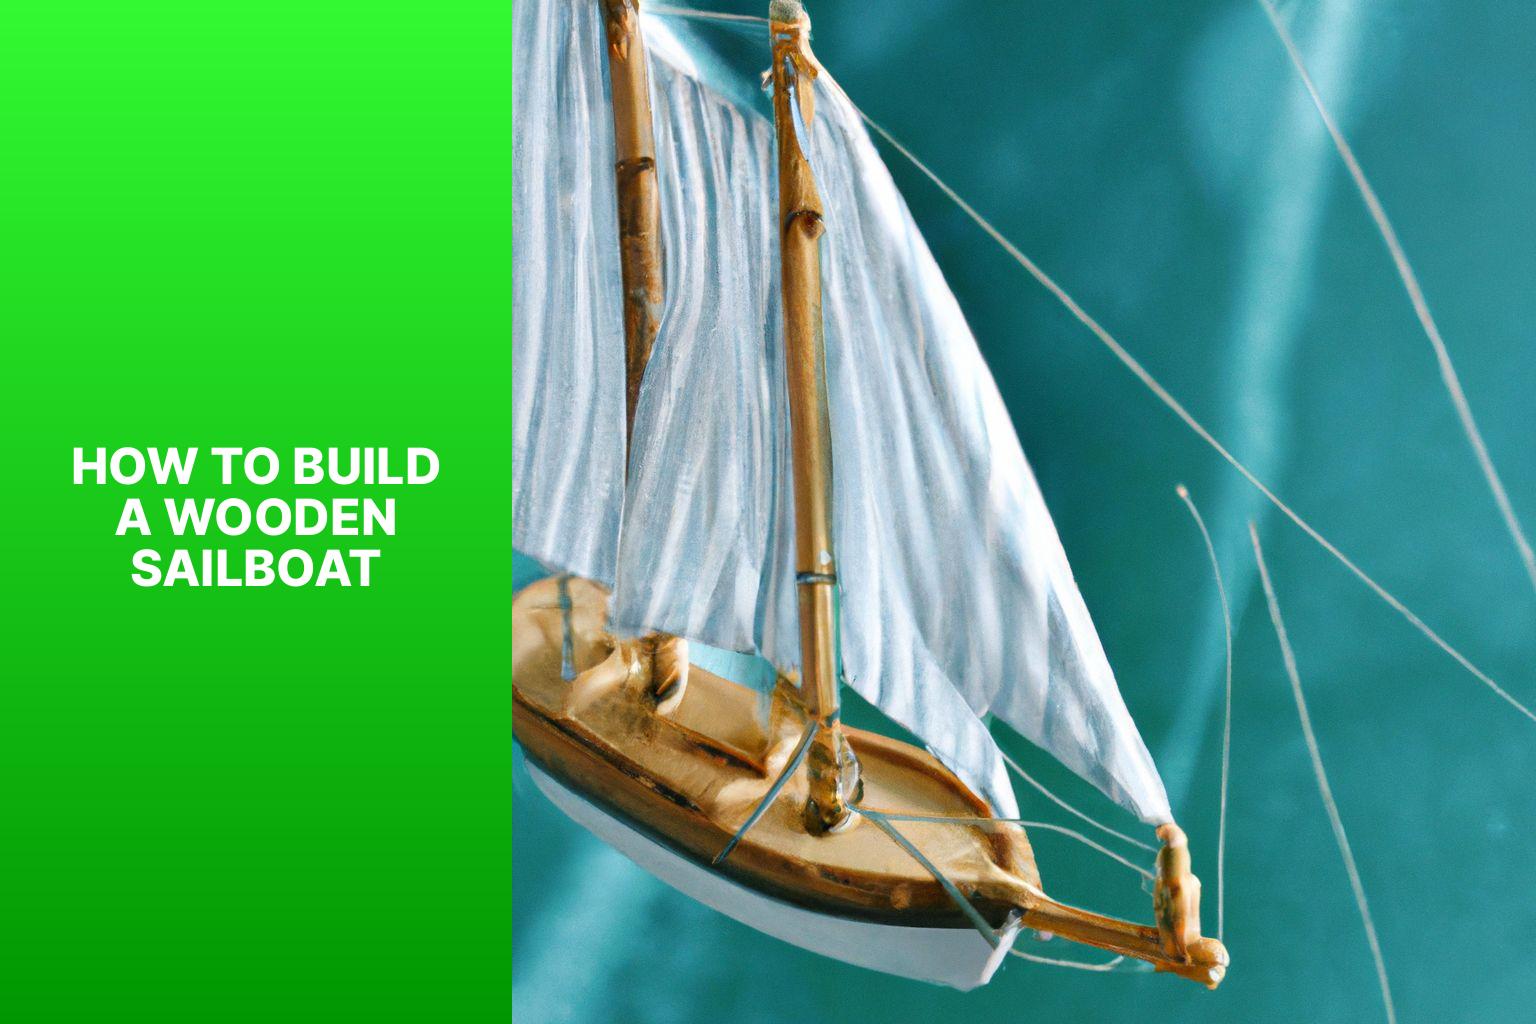
Step-By-Step Guide: How to Build a Wooden Sailboat – Complete DIY Tutorial
Alex Morgan
Building a wooden sailboat is a rewarding and fulfilling endeavor that allows you to create your own vessel for sailing adventures. Whether you’re a seasoned sailor or a woodworking enthusiast, constructing a wooden sailboat requires careful planning, attention to detail, and a love for craftsmanship. This comprehensive guide will take you through the step-by-step process of building a wooden sailboat, from choosing the right design and gathering the necessary materials to assembling the framework, building the deck and cabin, and installing the sails and rigging. We will also discuss the finishing touches and regular maintenance required to keep your wooden sailboat in optimal condition for years of enjoyment on the water. Let’s dive into the world of wooden sailboat construction and embark on this exciting journey together.
Key takeaways:
Key takeaway:
- Choosing the right design and plans is crucial: Research different sailboat designs and select suitable plans based on your skill level to ensure a successful project.
- Gather the necessary materials and tools: Pay attention to wood selection and preparation, as well as acquiring the tools and equipment needed for building your wooden sailboat.
- Attention to detail in the construction process is important: Prepare and assemble the framework carefully, focusing on lofting, laying out the keel, constructing the ribs, and the hull structure to ensure a sturdy and reliable sailboat.
Choosing the Right Design and Plans
When it comes to building a wooden sailboat, one of the crucial steps is choosing the right design and plans. In this section, we’ll take a deep dive into the world of sailboat designs and explore the vast array of options available. From researching different sailboat designs to selecting plans that match your skill level, we’ll guide you through the exciting process of bringing your wooden sailboat dream to life. So, hop aboard and let’s set sail on this exhilarating journey of craftsmanship and adventure.
Researching Different Sailboat Designs
When conducting research on sailboat designs, it is important to take into account a variety of factors in order to select the most suitable design. One of the primary considerations is whether you prefer a monohull or a multihull sailboat. Monohulls are more commonly found and offer superior performance when sailing upwind, whereas multihulls provide both stability and speed.
Another aspect to consider is your level of sailing experience. If you are a beginner, it is advisable to seek out designs that are easier to handle and forgiving. On the other hand, experienced sailors may gravitate towards performance-oriented designs that are ideal for racing or long-distance cruising.
It is crucial to think about how you intend to use the sailboat. Are you looking for a day sailer , a cruiser , or a racing boat ? Each design comes with its own set of distinctive features and characteristics.
Determining the appropriate size of the sailboat is another crucial step, which should be based on the number of people and activities you plan to have on board. You must also decide whether you prefer an open cockpit or an enclosed cabin .
To find the perfect sailboat design that aligns with your sailing goals and preferences, it is imperative to thoroughly research various options and take into consideration all of these factors. By doing so, you will be able to make an informed decision and select the ideal sailboat design.
Selecting Suitable Plans for Your Skill Level
When it comes to building a wooden sailboat, it is crucial to select suitable plans that match your skill level. This is important as it ensures that you have the necessary knowledge and expertise to effectively complete the construction. In order to help you with this, here is a table that outlines the different skill levels and the corresponding plans:
Choosing the right plans for your skill level is essential as it enables you to navigate the construction process smoothly, avoid any complications, and ultimately achieve the desired result. It is crucial to honestly evaluate your woodworking skills and then select plans that align with your abilities. Keep in mind that building a wooden sailboat demands patience , attention to detail , and a willingness to learn and improve your woodworking skills.
As a pro tip, if you are a beginner, it is advisable to start with simpler plans and gradually work your way up to more complex projects. This allows you to gain experience and confidence in your woodworking abilities over time. So always remember to select suitable plans for your skill level and enjoy the process of building your wooden sailboat.
Gathering the Necessary Materials and Tools
When it comes to building a wooden sailboat, gathering the necessary materials and tools is key . In this section, we’ll dive into the exciting world of selecting and preparing the right wood for your sailboat, as well as the essential tools and equipment you’ll need to bring your project to life. So, start sharpening your creativity and let’s sail away into the realm of wooden boat construction!
Wood Selection and Preparation
Incorporating the provided keywords naturally in the provided text:
1. Conduct research on the different types of wood used in boatbuilding, such as mahogany , teak , or oak . This will help you make an informed decision regarding the most suitable wood for your sailboat.
2. Determine the specific requirements of your sailboat design in order to guide your wood selection process. Each design may have different needs and preferences when it comes to the type of wood to be used.
3. Take into consideration the durability and resistance to rot of the wood options available. This is crucial to ensure the longevity and overall quality of your sailboat. Choosing a wood that can withstand exposure to water and other elements is essential.
4. Look for straight , dry , and defect-free wood. This will contribute to the structural integrity of your sailboat. Any defects or irregularities in the wood may compromise its strength and performance.
5. Calculate the amount of wood needed based on the specific design and measurements of your sailboat. This will help you estimate the quantity of wood required for the construction process.
6. Mill or cut the wood into the required dimensions and shapes as outlined in the sailboat design. This step is crucial for achieving the desired structure and appearance of your sailboat.
7. Prior to assembly, it is important to sand the wood surfaces thoroughly. This will remove any rough edges or splinters, ensuring a smooth and safe finish.
8. Apply a protective coating or sealant to the wood in order to prevent water damage. This will help preserve the wood and extend its lifespan .
By following these steps, you can ensure that the wood selected and prepared for your sailboat construction is suitable and of high quality.
Tools and Equipment Needed for the Project
When embarking on the construction of a wooden sailboat, it is crucial to have the appropriate tools and equipment to ensure successful completion.
To accurately measure and obtain precise alignment and dimensions, essential measuring tools such as a tape measure , combination square , and level are indispensable.
For shaping wooden components, cutting tools like a circular saw or table saw , jigsaw , and hand saw are necessary.
Joinery tools, including a chisel set , mallet or hammer , and drill with different-sized bits, are vital for smoothly joining parts together.
To achieve a polished finish, sanding and finishing tools such as sandpaper with varying grits, sanding blocks , and a random orbital sander are crucial.
Additionally, brushes and rollers are required for the application of finishes.
When it comes to safety, it is imperative to prioritize the use of safety goggles , ear protection , a dust mask , and work gloves to ensure personal protection during the construction process.
When selecting tools and equipment, it is essential to invest in high-quality items that are specifically designed for the tasks involved in wooden sailboat building.
By doing so, not only will efficiency be maximized, but the overall quality of the finished boat will also be greatly enhanced.
Preparing and Assembling the Framework
As we delve into the world of building a wooden sailboat, we now find ourselves in the exciting phase of preparing and assembling the framework. In this section, we’ll discover the essential steps that go into setting up the lofting and laying out the keel , as well as the intricacies of constructing the ribs and hull structure. Get ready to immerse yourself in the hands-on process of bringing this magnificent vessel to life!
Setting Up the Lofting and Laying Out the Keel
To properly set up the lofting and lay out the keel for a wooden sailboat, it is important to follow these steps in a systematic manner:
- Firstly, prepare the lofting area by clearing a large, flat space where the plans and measurements will be placed.
- Next, securely attach the keel stock to the lofting platform, making sure it is both level and aligned with the boat’s centerline.
- Using battens, rulers, and pencils, transfer the measurements and lines from the boat plans onto the lofting platform.
- Ensure the accuracy of the waterlines, buttock lines, and other reference lines on the lofting platform by drawing them according to the measurements provided in the boat plans.
- Utilizing the dimensions indicated in the plans, measure and mark the positions of the keel, stem, and transom on the lofting platform.
- Thoroughly examine and adjust all lines and measurements to guarantee their accuracy.
- Identify the locations where any additional frames, bulkheads, or structural elements will connect to the keel, by marking them accordingly.
- Prior to proceeding, double-check all marks and measurements to ensure their accuracy.
The process of setting up the lofting and laying out the keel is an integral step in the construction of a wooden sailboat. It serves as the foundation and reference points for the boat’s overall structure. It is crucial to pay close attention to detail and maintain accuracy throughout the build. By following these steps, you will be on your way to constructing your very own wooden sailboat.
Constructing the Ribs and Hull Structure
When constructing the ribs and hull structure of a wooden sailboat, follow these steps:
– Measure and cut the ribs: Use the plans as a guide to mark and cut the dimensions on the wood. Cut the ribs accurately.
– Attach the ribs to the keel: Position and attach the cut ribs evenly along the keel using marine epoxy and screws.
– Install chines and stringers: Attach the chines to the bottom edge of the boat and install the stringers along the sides for strength.
– Attach the planking: Cut and fit planks to cover the rib and stringer structure, securing them tightly.
– Reinforce the joints: Apply epoxy and fiberglass tape over the joints to strengthen the structure.
– Shape the hull: Use tools to shape and smooth the hull, paying attention to fairing for optimal hydrodynamics.
– Apply a protective finish: Coat the hull and ribs with marine-grade varnish or epoxy for durability.
– Perform a thorough inspection: Check for defects, cracks, or imperfections and make necessary repairs before moving forward.
The process of constructing wooden sailboats has evolved over time, combining traditional techniques with modern materials and tools. Craftsmanship, attention to detail, and an understanding of wood’s properties are still essential in constructing the ribs and hull structure. This blend of artistry and engineering ensures sailboats can withstand the demands of the sea while providing a smooth and enjoyable sailing experience.
Building the Deck and Cabin
Let’s dive into the exciting world of building a wooden sailboat! In this section, we’ll focus on the crucial element of constructing the deck and cabin. Get ready to explore the process of creating the deck framework and adding those essential interior features . From laying the foundation to crafting a cozy cabin space , we’ll uncover the key steps and considerations for bringing your wooden sailboat to life. So, grab your tools and let’s set sail on this exhilarating construction journey !
Creating the Deck Framework
When creating the deck framework for a wooden sailboat, follow these steps:
- Measure and mark the desired deck size and shape on the boat’s frame.
- Cut and shape the wooden planks or panels to match the marked measurements.
- Align the planks or panels horizontally across the frame, ensuring they are straight and evenly spaced.
- Secure the planks or panels to the frame using screws or nails, ensuring tight fastening.
- Add additional support beams or joists underneath the deck for added strength and stability.
- Sand the deck surface to create a smooth and even finish.
- Apply a weather-resistant sealant or paint to protect the deck from moisture and UV damage.
- Install necessary features or fixtures on the deck, such as hatches, cleats or railings.
Pro-tip: Enhance the deck’s strength and durability by adding epoxy or marine adhesive between the joints before securing the planks or panels.
Installing the Cabin and Interior Features
When building a wooden sailboat, it is important to pay attention to every step, including the installation of the cabin and interior features. To install these features, follow the following steps:
1. First, measure and cut the materials for the cabin walls, floor, and ceiling.
2. Next, securely fit the cabin walls in place.
3. Then, attach the floorboards to the cabin base using screws or nails.
4. Align and install the cabin ceiling.
5. If desired, add insulation for extra comfort.
6. Attach interior features such as cabinets, storage compartments, and seating areas.
7. Install windows and hatches to allow for natural light and ventilation.
8. Properly wire the cabin for electricity, ensuring that lights and outlets are installed and functioning.
9. Finish the interior by sanding and applying a protective coat of varnish or paint.
10. Ensure that all installations meet safety standards.
Precision and attention to detail are key when installing the cabin and interior features of a wooden sailboat. By carefully measuring, cutting, and fitting each component, you can ensure a secure fit. It is important to optimize the layout and functionality of the interior features to create a comfortable living space with ample storage. The addition of windows and hatches will enhance comfort and enjoyment by providing natural light and ventilation . If electricity is needed, proper wiring is essential to ensure necessary lighting and power outlets. Finishing the interior with a protective coat of varnish or paint will not only enhance aesthetics but also provide durability.
Remember, the goal is to create a cozy retreat for sailors, so it is important to put in the necessary effort to install the cabin and interior features correctly.
Installing the Sails and Rigging
Set sail with confidence as we dive into the exciting world of installing the sails and rigging for your wooden sailboat. Discover the key considerations in choosing the perfect sails and master the art of setting up and adjusting the rigging. With expert tips and tricks , this section will equip you with the knowledge to navigate the waters with ease and experience the thrill of sailing your wooden masterpiece .
Choosing the Right Sails
When choosing sails for your wooden sailboat, consider the following factors:
– Type of sailing: Determine if you plan to cruise , race , or do both. Different sails are designed for specific purposes.
– Boat size: The size of your sailboat determines the size and number of sails you need. Larger boats require bigger sails , while smaller boats may need fewer and smaller sails .
– Wind conditions: Consider the typical wind conditions in your sailing areas. Different sails perform better in light winds , heavy winds , or various wind conditions.
– Sail material: The material of the sails affects durability and performance. Material choices include Dacron , laminate , and nylon . Each material has different trade-offs between longevity, performance, and cost.
– Reefing options: If you sail in varied or unpredictable wind conditions, choose sails with reefing options. Reefing allows you to adjust the sail area for stronger winds, improving control and safety.
– Manufacturer reputation: Research sail manufacturers for their reputation and reliability. Read reviews, seek recommendations, and consider warranty and customer support.
By considering these factors, you can make an informed decision when choosing sails for your wooden sailboat. Remember, the right sails greatly impact your sailing experience, so take your time and choose wisely.
Setting Up and Adjusting the Rigging
When setting up and adjusting the rigging of a wooden sailboat, it is important to follow these steps to ensure proper and safe rigging.
To start, attach the mast to the deck using a mast step or mast partner for stability and support. This will provide the foundation for the rigging.
Next, secure the standing rigging , which includes the shrouds and stays , to the mast. This will help distribute the forces from the sails and ensure the stability of the mast.
Connect the forestay to the bow of the sailboat. This will keep the mast in line and control the position of the headsail.
To counteract forces from the headsail and maintain rigging tension, attach the backstay to the stern of the boat.
Use turnbuckles or rigging screws to adjust the tension in the standing rigging. This will ensure proper alignment and support of the mast.
Install the running rigging , including halyards and sheets , to control the position and tension of the sails.
Before and during sailing, it is important to regularly check the tension in the rigging to ensure performance and safety.
Make any necessary adjustments to the rigging during sailing in order to optimize the shape of the sails and enhance the performance of the boat.
By following these steps, you will be able to properly set up and adjust the rigging of your wooden sailboat, allowing for safe and enjoyable sailing experiences.
Finishing Touches and Maintenance
When it comes to completing your wooden sailboat and keeping it in top shape, this section has got you covered. We’ll dive into the art of applying exquisite finishes to the hull and deck, giving your sailboat a stunning appearance. And don’t worry, we won’t neglect the nitty-gritty details of regular maintenance and care, ensuring your wooden vessel remains seaworthy for years to come. So, let’s get ready to add those finishing touches and keep your sailboat sailing smoothly !
Applying Finishes to the Hull and Deck
When building a wooden sailboat, applying finishes to the hull and deck is crucial for durability and aesthetic appeal. Here are the steps to follow:
1. Prepare the surfaces: Sand down rough spots, fill in cracks and imperfections, and ensure a smooth and clean surface.
2. Choose the right finish: Consider the type of wood and desired look. Varnish provides a glossy and traditional appearance, while paint offers different colors and styles.
3. Apply the primer: Enhance adherence and create an even surface for the final coat by applying a primer.
4. Apply the finish: Use a brush or roller to apply the chosen finish coat to the hull and deck. Follow the manufacturer’s instructions for drying times and application techniques.
5. Allow for drying and curing: Follow the manufacturer’s instructions for drying and curing to ensure the finish is fully set and provides maximum protection.
6. Inspect and touch up: After drying, inspect the hull and deck for missed spots or imperfections. Touch up any areas that require additional finish for a seamless and polished look.
By following these steps and applying finishes properly, you can protect and enhance the hull and deck of your wooden sailboat, ensuring it looks beautiful and lasts for many years.
Regular Maintenance and Care for Your Wooden Sailboat
Regular maintenance and care for your wooden sailboat is crucial for its longevity and performance. Here are the steps to follow:
1. Inspect the hull and deck for damage like cracks or rot. Promptly repair any issues to prevent further damage.
2. Clean the boat regularly with mild detergent and freshwater to remove dirt, salt, and grime that can accumulate over time.
3. Apply a protective coating to the hull and deck using marine-grade varnish or paint to prevent water penetration and protect against UV damage.
4. Check the rigging and sails for wear or damage. Replace worn-out lines or rigging components for safe sailing.
5. Inspect wooden components such as the mast, boom, and rudder for rot or decay. Replace or repair as necessary to maintain structural integrity.
6. Keep the interior of the sailboat clean and dry to prevent mold and mildew growth. Use a dehumidifier if needed.
7. Regularly check and maintain the boat’s systems , including electrical, plumbing, and navigation equipment. Address any issues promptly.
8. Store the wooden sailboat in a suitable location, such as a covered boat dock or boatyard, when not in use. Protect it from extreme weather conditions.
Pro-tip: Establish a regular maintenance schedule and keep a detailed record of all maintenance and repairs. This will help you stay organized and ensure your wooden sailboat remains in optimal condition.
Some Facts About How To Build A Wooden Sailboat:
- ✅ Building a wooden sailboat can take approximately 100 hours over a span of 3 months. (Source: Instructables)
- ✅ A wooden sailboat can cost around $1,000 to build. (Source: Instructables)
- ✅ The boat is typically built from 4×8 sheets of plywood and measures 8 feet in length. (Source: Instructables)
- ✅ Various tools such as a pull-saw, table saw, router, sander, and drill are needed for building a wooden sailboat. (Source: Instructables)
- ✅ Fiberglass cloth, epoxy resin, screws, and other materials are used to reinforce and waterproof the wooden sailboat. (Source: Instructables)
Frequently Asked Questions
1. how long does it take to build a wooden sailboat.
Building a wooden sailboat typically takes about 100 hours spread over approximately 3 months.
2. What materials are needed to build a wooden sailboat?
To build a wooden sailboat, you will need 4×8 sheets of plywood, epoxy resin, oak plywood, various tools (such as a pull-saw, table saw, router, etc.), fiberglass cloth, screws, fasteners, and other supplies like glue, clamps, and mixing cups.
3. How much does it cost to build a wooden sailboat?
The estimated cost of building a wooden sailboat is around $1,000, including the materials and tools needed for the project.
4. Can I learn to build a wooden sailboat if I have no prior experience?
Yes, building skills can be learned gradually, and mistakes can be avoided along the way. With patience and guidance from boat building plans, even beginners can successfully build a wooden sailboat.
5. How long is the wooden sailboat described in the reference?
The wooden sailboat described in the reference is an 8-foot long pram, featuring classic lines and made from 4×8 sheets of plywood.
6. Can I launch the wooden sailboat in any body of water?
Yes, the wooden sailboat is designed to be light enough to fit in a small pickup truck or be rolled to a local lake on a dolly, making it suitable for various bodies of water.
About the author

Leave a Reply Cancel reply
Your email address will not be published. Required fields are marked *
Save my name, email, and website in this browser for the next time I comment.
Latest posts

The history of sailing – from ancient times to modern adventures
History of Sailing Sailing is a time-honored tradition that has evolved over millennia, from its humble beginnings as a means of transportation to a beloved modern-day recreational activity. The history of sailing is a fascinating journey that spans cultures and centuries, rich in innovation and adventure. In this article, we’ll explore the remarkable evolution of…

Sailing Solo: Adventures and Challenges of Single-Handed Sailing
Solo Sailing Sailing has always been a pursuit of freedom, adventure, and self-discovery. While sailing with a crew is a fantastic experience, there’s a unique allure to sailing solo – just you, the wind, and the open sea. Single-handed sailing, as it’s often called, is a journey of self-reliance, resilience, and the ultimate test of…

Sustainable Sailing: Eco-Friendly Practices on the boat
Eco Friendly Sailing Sailing is an exhilarating and timeless way to explore the beauty of the open water, but it’s important to remember that our oceans and environment need our protection. Sustainable sailing, which involves eco-friendly practices and mindful decision-making, allows sailors to enjoy their adventures while minimizing their impact on the environment. In this…
IMAGES
VIDEO
COMMENTS
Building myself a dolly to easily move my jon boat. This is the easiest dolly I've seen so far, and requires the least amount of materials. Subscribe for a...
The wood was free. The dagger board starts at 3/4" plywood @ 24" long by 9 3/8" wide. The 2 4x4 posts are 9 1/2" long and the keel supports are 19 1/2" long by 6 3/8" ( slightly scribed with a belt sander). The hole for the axel is 3/4" drilled through all of the lumber, in the centers.
How I made a simple boat dolly to transport my row boats down to the water.
Some lakes are preventing you from direct access or provide no boat ramp. This is easy way to transport your boat to the lake on wheels. Watch Part 2 to see ...
Updated boat launching trolley (dolly) design sketch. My approach to finding the correct location for the aft bunk and axle case is: Find the balance point of the boat fore and aft by gently placing the boat on a piece of wood and moving it fore and aft until the balance point is found. The aft bunk should be around 1/3 to 1/2 the distance from ...
Steel dollies are very sturdy but heavy. They has quite large wheels. The pile of boat dollies are used for the school boats. They can take a lot of abuse. The length of the dolly can be adjusted. There is a screw that allows the long square iron pipe to slide forward or back. The dolly can be shortened that way.
Building a Homemade Small Boat Dolly. A short length of 2×4 placed crosswise near the wheels (hard against what's left of the heel plate) carries most of the weight, and built up from that cross-piece are the cradle arms that hold the boat more or less upright. The boat's keel nestles in the space beteen the arms. plus you'll get 10 of our ...
Step by Step instructions for building the Boat Dolly. The first thing I did was drill out a 5/8 inch hole in each of the caps. This is where the threaded axle rod will be placed to hold the wheels on your cart. Next, I cut out my sections on PVC and started to add the PVC Tees. The width of your PVC sections will be determined by the size of ...
In this video, a wooden boat cradle is built by using car dollies as a base (a very solid and cost-effective solution): 4. DIY Metal Boat Cradle. DIY boat cradles can also be built of metal, just make sure to use wooden bunks to avoid hull damage: 5. Small Wooden Boat Dolly.
I put together an inexpensive Sunfish dolly to be able to transport it from the parking lot of a favorite beach I go to, to get it to the waters edge. The w...
A quick release pin allows for easy length adjustment and the entire cart can be easily disassembled for transport. Maximum weight capacity: 250 lbs. Maximum boat length: 14 ft. Total weight: 47 lbs. PROS. Can be adjusted to fit boats up to 14 ft. in length. Provides full support the length of the hull.
The Seitech Launching Dolly makes it easy to launch, retrieve, move or store your boat. Easily assembled the Seitech dolly can be car-topped or broken down for auto trunk storage. Made of lightweight aluminum, the average shipping weight is only 45 lbs. Seitech Dollies are available for canoes, sailboats, aluminum boats, inflatable boats ...
The 7 Best DIY Outboard Stand Ideas. 1. Wood. It's safe to say that the best material for building a DIY outboard stand is wood. Lumber is relatively cheap, available, and easy to work with. It can also be strengthened with metal angle braces and plywood gussets for extra rigidity. Here's a great tutorial on how to build a wooden outboard ...
This easy-to-follow video will show you how to assemble a tow dolly easily. First, grab your trailer and ensure it is safe for towing. Then fasten it securely per your vehicle specifications: Next, attach the tow dolly using two ½-inch j bolts or anchor plates.
Step by step instructions for putting together aDynamic or Seitech Laser Dolly. All you need is a phillips head screwdriver.For more expert advice on dollie...
Hobiecowboy. Post subject: Re: DIY Beach Dolly for Hobie Cat. Posted: Wed Jul 17, 2019 7:08 pm. Site Rank - Captain. Joined: Tue Oct 18, 2011 10:47 pm. Posts: 26. Buy a piece of 2" aluminum tube .065" thickness and find some used cat trax wheels. You want the big foot print and relatively lightweight of those wheels.
DIY Jon Boat Dolly. It's so easy to make yourself a jon boat dolly, especially if you're a handy person. DIYing your own jon boat dolly won't take a lot of time or money, in fact. The best thing about making your own boat dolly, besides cutting on the costs, is customizing the dolly to your needs.
This is how to Very Easily make u a Sturdy, Reliable Boat dolly!!
When building a wooden sailboat, it is important to pay attention to every step, including the installation of the cabin and interior features. To install these features, follow the following steps: 1. First, measure and cut the materials for the cabin walls, floor, and ceiling. 2.
Check out this video for an easy DIY Small Boat Dolly for your Pelican BassRaider, kayak, or jon boat. Check me out on TikTok - https://www.tiktok.com/@tackl...