Rigging Small Sailboats - Part 1
Rigging small sailboats.
Part 1 - Rigging in General

Introduction
T his is a basic "how-to" guide for rigging modern single masted sailboats up to about 25' in length. Any person building his own small sailboat, buying a new boat, or one who already owns a boat and wants to replace or change the rig on his boat will find this book valuable. We have attempted to write the book so it can be easily understood by both the beginning sailor as well as the "old salts". However, if you are looking for a "how-to-sail" book, or a book on competition "tuning and racing", or a book on "sailing theory," then this is not the book for you. What is here is practical information on basic rigging and how to install it.
R igging means putting the spars and related equipment in position so the boat is ready for sailing. Rigging also means these items as a functional unit once installed in the boat and made operational. Many terms used herein may sound strange to the beginner and appear to have no relation to the part they describe. Also, many of these terms have no similarity or counterparts to terms used on shore. Nevertheless, they are necessary to the business at hand. Important terms that you should know are initially noted in BOLD type and will be defined where they first appear, as well as in the glossary. Don't try to remember them all once, because after you see them a few times, you'll be able to relate the term to the function, and soon it will become second nature.
T he book is arranged in a logical sequence. PART I concerns mainly the definition and function of the various equipment used in rigging. PART II is the practical "how-to" section on rigging sailboats. All illustrations are noted by a "Figure number", the first number listed referring to the chapter. With the basic information presented, we think you will be able to completely outfit and rig your sailboat with ease and confidence. We have purposely limited the scope of this book so as not to overwhelm the beginner, and yet provide useful information to the large majority of small boat sailors; those who sail the modern rigged boats under 25' in length.
Rigs and Sails
E veryone knows what a sailboat is and most people have heard expressions such as "sloop" or "ketch." These words describe the configuration of the sails and masts on the boat, and we refer to this configuration as the RIG. Rigs have names which are defined by the number of masts the boat has; the number, shape, and locations of the sails; and sometimes by the position of the rigging on the boat. Most small sailboats under 25' have a single mast with one or two sails being used under normal sailing conditions.
T he SLOOP rig has one sail forward of the mast, and one sail aft of the mast. The stoop rig generally comes in one of two variations depending on where the FORESTAY (the wire which supports the mast from the forward side) joins to the mast. A MASTHEAD RIG, such as shown in Fig. 2-1, has the forestay connected to the mast at the very top of the mast (or MASTHEAD). A JIBHEAD RIG, as shown in Fig. 2-2, has the forestay connected to the mast at a point somewhat below the top of the mast. So, when we see a single masted sailboat with a sail fore and aft of the mast and with a forestay that goes to the top of the mast, we call it a "masthead rigged sloop"; and when the forestay is below the masthead, we call it a "jibhead rigged sloop".
A boat with a single mast located well forward in the boat and only one sail, which is aft of the mast, is called a CAT RIG (Fig. 2-3). Do not confuse this term with "catamaran," which is a twin hulled boat, but which may also have a "cat rig." Depending on the design, the mast of a cat rigged boat may or may not be supported with wires (called "stays"; see Chapter 4). Figure 2-4 shows a cat rig with a mast not supported with wires, and is referred to as a "freestanding" or "unstayed" mast.
A nother common rig used in small sailboats is the LATEEN RIG illustrated in Fig. 2-5. This rig uses a single mast, somewhat short, and usually unsupported with wires, onto which is attached two poles. A triangular shaped sail is then attached to these two poles, but not to the mast. The lower pole is sometimes not used, but the rig is still called a "lateen." The rigging of a lateen is usually very simple and uncomplicated.
S ails can be considered the "engine" or power plant of the sailboat, while the rigging can be considered the "transmission," or the means by which the power is transferred to the boat to create motion. Therefore, to understand the rigging, it is necessary to know something about the sail configuration, because both work together as a unit.
J ust about all small sailboat sails are triangular in shape, and the terms used in describing one will generally apply to all. Modern sails are most often made of synthetic fabric, usually polyester (Dacron or equivalent). Some Nylon is used but it is considered inferior because it stretches too much in use, except for special sails such as spinnakers (see following). Sails in the past were made from cotton fabric, and may be to this day, but these require more maintenance and care. The sail of Dacron is virtually maintenance-free; just keep them clean and dry, and check occasionally for damage (see Chapter 11).
S ails have names determined by their function and location on the boat. On boats which have only one sail, this sail is always called the MAINSAIL (the "main" sail on the boat). The lateen rig sail, while still a mainsail, is commonly called a "lateen" sail. Sloop rig sailboats have a mainsail also, and this is the sail located on the aft side of the mast. On sloop rigs, the sail forward of the mast is called the JIB, and the main and jib sail when used in combination for normal sailing are called the WORKING SAILS. The boat in Fig. 2-2 is under sail with main and jib working sails.
S ails other than working sails are sometimes used, especially when racing or cruising. Two of the most popular types are the GENOA jib and the SPINNAKER. The Genoa (commonly called "jenny") is actually just an oversize jib used to increase the sail area, and hence the performance of the boat. The boat in Fig. 2-1 is designed to use a Genoa jib. Sailboats under about 16' long seldom use a Genoa. The spinnaker is a parachute shaped sail (hence the nickname, "chute") used forward of the mast in place of the jib when sailing before or with the wind. Because the spinnaker is considered a "competition" item usually associated with larger boats, and requires specialized gear, it is beyond the scope of this book.
ANATOMY OF SAILS
T he common triangular sail is best discussed by referring to parts OF the sail, and parts IN the sail, or the actual components used in the construction of the sail. Our discussion of sail anatomy is comprehensive, but note that not all sails will have all the items mentioned. Fig. 2-6 should be followed in the discussion of sail parts. Now for the parts OF a sail.
T he LUFF of the sail is the forward part, or the part which is considered to meet the wind first. The LEECH is the aftermost part, while the FOOT is the lower edge of the sail. The HEAD of the sail is the topmost corner; the TACK is the forwardmost corner, and the CLEW is the aft corner of the sail. The ROACH refers to the up and outward curve in the leech of the sail. The amount of roach will vary with the sail. The lateen-type sail has little or no roach, while mainsails used on catamaran sailboats have considerable roach. Next, we will describe the parts built IN a sail.
T o the beginner, the most obvious part built into the sail is the INSIGNIA and sometimes a group of numbers. The insignia usually tells graphically what the name of the boat class is, while the number refers to the registration number given to that particular boat in the class organization. Obviously, not all sailboats belong to a class, nor do they all have numbers on the sails.
M ost mainsails have BATTENS built into them. These are semi-rigid thin strips, either of wood or synthetic material such as fiberglass or plastic, used to maintain the shape of the sail when underway. The battens fit into BATTEN POCKETS sewn into the sail. Battens in order to stay in the pocket can be tied in. A better type uses what is called a "lock-sleeve" pocket which makes it impossible for the batten to slip out, but can readily be removed so the sail can be folded. Battens are usually located at almost right angles to the leech, but sometimes one or two battens are located along the foot at right angles on LOOSE FOOTED mainsails and some jibs. A loose footed sail is one that is attached only at the tack and clew points along the foot. The boats in Figs. 2-2, 2-3, 2-4, and 2-5 all have loose footed mainsails. The position and size of the battens is usually determined by the sailmaker or the designer of the boat. Some sails, especially on certain catamarans, use battens which span clear across the sail.
O ther parts built into the sail are primarily those used to attach the sail to the rigging. At the head, tack, and clew, most sails have CRINGLES built in for attaching the sails. These are merely grommets which reinforce the sail at the hole. Most mainsails have extra sail reinforcing at the head of the sail and this is called the HEADBOARD. The strains on the sail at this point are great, and the headboard with a cringle through it distributes the stresses.
S everal methods are used to attach the sails to the mast, boom, or rigging. The jib and Genoa are attached to the forestay in sloop rigs with HANKS or snaps (Figs. 2-7 and 2-8). These are special hooks or rings used to secure the sails to the forestay as well as allowing them to slide up and down. The hanks are usually sewn into the luff of the sail. Probably the simplest method of attaching the mainsail on lateen rigs, or in boats which have free standing masts, is by means of a "sock" sewn right into the sail which slips onto the spars. Two varieties of sock-type sails are shown by Figs. 2-4 and 2-5. The sock-type sail is limited to very small boats, but makes a neat and inexpensive sail. Also used on small sails are loops or line which fasten around the spars.
O n most boats, the mainsail is attached to the aft side of the mast in usually one of two ways. The first method is with TRACK SLIDES, pieces of hardware sewn to the luff of the sail at intervals of several inches, and which slide on a track fastened to the mast. A better and more common method is the use of a BOLT ROPE. This is a piece of rope the length of the luff and sewn right into it. The bolt rope fits into a groove built into the aft side of the mast. On sails which are not loose footed, this same bolt rope and groove can also be used for attaching the foot to the boom. Or, if track slides have been used on the luff, they too can be used on a track fixed to the boom. For details on spars (mast and boom), see the next chapter.
Masts and Booms
M ost people know a SPAR when they see one, and in sailing, the spars are the "sticks" (mast and boom) to which the sails are attached. To BEND the sails means to attach the sails to the spars and rigging. The MAST is the more-or-less vertical member, while the BOOM is the more-or-less horizontal member attached in some manner to the mast, and usually capable of pivoting about the mast. Most sailboats of the type discussed in this book have one of each. One exception is the lateen rig, which often has two booms, with the upper boom correctly referred to as the "yard" (see Fig. 2-5).
S pars on sailboats are usually made either of wood (solid or hollow), or aluminum (extrusions or tubing, both hollow). It is not uncommon nor undesirable to have an aluminum mast and wood boom in combination. Some typical sections through masts and booms are shown in Figs. 3-1 and 3-2, both for wood and aluminum. Masts made from aluminum should be "anodized"; a special coating process which minimizes oxidization. It is also desirable to wax aluminum masts.
O bserve the methods used for sail attachment. The groove-type mast in either wood or aluminum makes the neatest installation besides being the most efficient. Wood booms are usually solid in the size boats being discussed in this book, due to the small relative size required for the boom. On small sails such as used on lateen rigs, the spars are often nothing more than round wood poles or aluminum tubing.
T he base of the mast always fits into some type of receptacle or apparatus which is called the MAST STEP. Many types of mast steps are used depending on the configuration desired. Putting the mast in position on the mast step is called STEPPING the mast (see Fig. 9-1). Some masts go through holes in the deck or cabin top and step onto the hull structure, while others bear directly on the deck or cabin top. The simplest type of mast step is the fixed type such as shown by Figs. 3-3 and 3-4. The mast is fixed in position on the step and no movement of the mast is possible, short of removing the mast. Most masts stepped through the deck use fixed steps. Another type is the rotating mast step shown in Fig. 3-5. This type allows the mast to turn or rotate with the direction of the mainsail for greater sail efficiency.
A convenient type of mast step, as far as ease of stepping the mast is concerned, is the pivoting type such as shown in Fig. 3-6. This type allows the mast to be laid into the step fitting, bolted, and pivoted up in position, as opposed to trying to lift it onto the step, which can be tricky, especially on a windy day or if it is a tall mast. With lightweight aluminum spars, it is desirable to use a mast base stiffener at the step when using the pivoting step in order to provide adequate bearing for the pivot bolt.
M any masts require extra reinforcement, and one method of doing this is by utilizing SPREADERS. These are cross members located on the mast at a predetermined location and jutting out sideways. Spreaders are always arranged in pairs, one on each side of the mast. The spreaders "push out" or spread the SHROUDS (the wires supporting the mast from the sides; see Chapter 4) to help stiffen the mast. While spreaders can be made of wood, it is common on small sailboats to have them made of metal tubing, usually stainless steel or aluminum, even when wood masts are used. Some boats do not have any spreaders, while others may have one, two, or more sets. Since spreaders are a necessary evil, (they get in the way and foul things aloft, not to mention added resistance and weight), it is best to have as few as possible.
T wo types of spreaders are used. One is the fixed-type where the spreader is rigidly mounted to the mast such as shown in Fig. 3-7. The other type is the pivoting or swinging type which is allowed to swing horizontally along a pivot point located on the mast. This type is illustrated in Fig. 3-8. Use the type specified for the boat you have in any case. Where the shrouds pass over or through the spreaders, there should be special fittings or spreader tips which prevent chafing of the shroud by the spreader. Often the spreader tips are adjustable in order to vary the tension of the shrouds. Most spreader tips have an open groove or hole through which the spreader passes. Note that the shrouds are allowed to move or slide on their own against the spreader tip. However, with the open groove type, some means of lashing or taping the shroud to the spreader tip must be provided. The reason for this is that when sailing at an angle of heel, the WINDWARD* shroud will be taut, and the LEEWARD* shroud becomes slack, which could allow the shroud to fall out of the leeward groove if not secured in place.
*WINDWARD - Toward the direction from which the wind is blowing. *LEEWARD - Downwind, or with the direction of the wind.
T wo other types of spreaders which are used for supplemental strengthening of the mast, or to combat localized stresses, are DIAMOND SPREADERS and JUMPER STRUTS (see Fig. 4-4 'a'). Diamond spreaders are cross members in pairs always used in conjunction with DIAMOND STAYS, which are wire rope stays fixed at either end to the mast. The diamond spreader "spreads out" the diamond stays at their mid-length each side of the mast. The term diamond comes from the fact that when the diamond stays and spreaders are in position, they form a shape like a diamond. An exception to this is when more than one diamond spreader pair is used per stay. Diamond spreaders are just like regular spreaders, except that they are usually smaller and shorter in length.
T he jumper strut is usually used only on jibhead rigs to reinforce the upper part of the mast. The jumper strut is located on the forward side of the mast jutting out horizontally forward, and combats the strain of the mainsail pulling aft on the mast. The JUMPER STAY passes through the strut, and is fastened to the mast at each end of the stay. The jumper strut is usually positioned to bisect the length of the jumper stay. Diamond stays and jumper stays are not required on all boats; just on those masts which require additional support.
T he top of the mast is called the MASTHEAD, and depending on the type of rig, the fittings located here will perform various functions. Masthead fittings will also vary depending on whether a wood or aluminum mast is being used. The masthead fitting for wood masts is usually a custom unit made by the builder (see Fig. 3-9). When building a boat using wood spars, it is usually necessary to fabricate a masthead fitting. The designer should provide details for making the masthead fitting. For aluminum masts, the masthead fitting is usually a ready-made unit or "kit"-type assembly to match the mast extrusion, such as illustrated in Figs. 8-4 and 8-5. Obviously a masthead fitting for a masthead rig will be more complex than for a cat or jibhead rig. In any case, the masthead fitting contains at least one SHEAVE (a grooved wheel or pulley) for the main HALYARD, the line used to hoist the sail. With masthead rigs, the masthead fitting has a sheave for the jib halyard as well, and usually incorporates attachment fittings for the stays, and sometimes for the shrouds also. When a sock-type sail is used, and when the mast has no stays, then no masthead fittings are required. In any case, the top of hollow spars should be capped to keep water out. On wood spars this can be a sheet metal cap, and with aluminum spars, the masthead fitting will usually do the job.
O n boats where the stays and shrouds do not go to the masthead, but fasten to the mast at some lower point as in jibhead rigs, other means are used to secure stays and shrouds to the mast. With wood spars, the conventional method used to attach the shroud and forestay is to use TANGS. Tangs are short metal straps usually with a crimp or bend to splay them out from the mast when in position. Another type does the same job, but these are of cast metal. The strap type usually has at least two holes; one for the stay attachment, and the other for fastening the tang to the mast. When aluminum masts are used, tangs bolted together through the mast can also be used for the shrouds, but the forestay usually uses another fitting called a HOUND (see Figs. 3-10 and 3-11). The hound wraps around the mast for bearing and has a fitting to receive the forestay. If used on a boat with a jib, then a JIB HALYARD BLOCK (fitting with a sheave used to lead the halyard and change its direction) is attached to the hound. If the shrouds and forestay land at the same point on the mast, then the tangs for the shrouds can be integral with the hound fitting.
W hen using internal halyards (those which run inside the mast), some type of fitting must be provided for the mast where the halyards exit the mast. Internal halyards can only be used in a hollow mast, and where used, they usually exit at or near the mast base. The simplest fitting is merely a hole through the mast fitted with a FAIRLEAD (a fitting to give a line a "fair lead") to prevent chafing the line (see Fig. 3-12). Another arrangement is to use COAMING PULLEYS or SHEAVE BOXES which not only act as a fairlead, but have sheaves incorporated to change direction of the halyards as well as preventing chafing of the line (see Fig. 3-13). These fittings are usually fitted into the mast near the base. In selecting coaming pulleys and sheave boxes, be sure the sheave of the fitting will protrude far enough into the mast so the halyards will not chafe along the inside mast surface.
T he GOOSENECK is the fitting used to connect the boom to the mast and allow it to move freely, like a universal joint. On the small lateen rig boats the gooseneck is two connected loops which rotate independently (see Fig. 3-14). On conventional rigs, a basic gooseneck is the fixed base type which fastens to the mast. For better sail adjustment, the type of gooseneck which slides on a track or in the mast groove is superior (see Fig. 3-15). Whichever of these types is used, they can be bought as non-swiveling or as a ROLLER REEFING type. The non-swiveling type as shown in Fig. 3-15, does not permit the boom to rotate. The roller reefing type shown in Fig. 3-16, is used so the boom can rotate and allow the sail to be rolled onto the boom in order to reduce sail area when sailing in heavy winds. Goosenecks come in many styles both for wood and aluminum booms with or without the roller reefing feature.
T he CLEW OUTHAUL at the other end of the boom is similar in function to the masthead fitting. It is used to attach the clew of the sail to the boom. Where the mainsail is small, the clew outhaul is sometimes nothing more than a line tied to a cleat. Another method is to use a sheave in the end of the boom in order to gain some leverage so the sail can be pulled taut (see Fig. 3-17). With larger mainsails, the clew outhaul is best a slide fitting located on a length of track, or a type which fits into the boom groove if there is one (see Fig. 3-18). On aluminum booms, and especially when roller reefing is used, a boom outhaul fitting is used which performs the clew outhaul function as well as providing a tang for attaching the hardware used to control the sail .
O ther incidental fittings may often be attached to the spars as well. CLEATS (a fitting used to belay or secure a line, Fig. 3-19) or BOOM BAILS ("U"-shaped straps used to attach blocks to the boom, Fig. 6-2) are commonly used. A BOOM CRUTCH is another item sometimes used, which is not really a part of the boom. The boom crutch holds up the boom when the sails are furled and when hoisting the sail, in order to keep the boom in its proper position.

FIG. 3-19-A CLEAT is a fitting to which a rope may be belayed. This metal cleat is fastened to the side of a mast to belay a halyard, and is a typical example of a cleat.
Click HERE for Part 2
How to Rig Your Small Sailboat and Prepare to Sail
In this lesson, you will learn how to rig a small sailboat to prepare for sailing. For reference purposes, a Hunter 140 daysailer was used for this learn-to sail tutorial. Before you begin, you can familiarize yourself with the different parts of a sailboat.
Install (or Check) the Rudder
Typically the rudder of a small sailboat like this one is removed after sailing to prevent wear and tear while the boat remains in the water. You need to reinstall it before sailing, or if it is already in place, check that that it is firmly attached (with optional safety lanyard securing it to the boat).
On most small boats, the top of the leading edge of the rudder has attached pins (called pintles) that are inserted downward into round rings (called gudgeons) attached to the stern. This is rather like the familiar “Insert tab A into slot B.” While the exact configuration may vary among different boat models, it’s usually obvious how the rudder mounts to the stern when you hold the rudder beside the stern.
The rudder may or may not already have a tiller mounted on it. The next page shows how to attach the tiller on this boat.
Attach (or Check) the Tiller
The tiller is a long, thin steering “arm” mounted to the rudder. If the tiller is already attached to the top of the rudder on your boat, check that it is secure.
On this Hunter 140, the tiller arm is inserted in a slot at the top of the rudder, as shown here. A pin is then inserted from above to lock it in position. The pin should be tied to the boat with a lanyard (short light line) to prevent being dropped.
Note that this tiller also includes a tiller extension, which allows the sailor to still control the tiller even when sitting far out to the side or forward.
With the rudder and tiller in place, we’ll now move on to the sails.
Attach the Jib Halyard
Because sunlight and weather age and weaken sailcloth, the sails should always be removed after sailing (or covered or bagged on a larger boat). Before you get started, you have to put them back on (called “bending on” the sails).
The halyards are used to raise both the jib and mainsail. At the sail’s end of a halyard is a shackle that attaches the grommet at the head of the sail to the halyard.
First, spread out the sail and identify each of its corners. The “head” is the top of the sail, where the triangle is the most narrow. Attach the jib halyard shackle to this corner, making sure the shackle is closed and secure.
Then follow the front edge of the sail (called the “luff”) down to the next corner. The luff of the jib of a small sailboat can be identified by the hanks every foot or so that attach this edge to the forestay. The bottom corner of the luff is called the sail’s “tack.” Attach the grommet in the tack to the fitting at the bottom of the forestay -- usually with a shackle or pin. Next, we’ll hank on the sail.
Hank the Jib on the Forestay
Hanking on the jib is a simple process, but it can feel unwieldy if the wind is blowing the sail in your face.
First, find the other end of the jib halyard (on the port, or left, side of the mast as you face the bow of the boat) and keep a good grip on it with one hand. You will be slowly pulling it in to raise the sail as you hank it on.
Beginning with the hank nearest the head of the jib, open it to clip the hank onto the forestay. It will be obvious how to open the hanks, which are usually spring-loaded to close automatically when released.
Then raise the sail a little by pulling on the halyard. Making sure there isn’t any twist in the sail, attach the second hank. Raise the sail a little more and move on to the third hank. Keep working your way down the luff, raising the sail a little at a time to make sure it isn’t twisted and the hanks are all in order.
When all the hanks are attached, lower the jib back down to the deck while you route the jib sheets in the next step.
Run the Jibsheets
The jib sail is positioned while sailing by using the jibsheets. The jib sheets are two lines that come back to the cockpit, one on each side of the boat, from the aft lower corner of the sail (the “clew”).
In most small sailboats, the jib sheets are left tied to the sail’s clew and stay with the sail. On your boat, however, the jibsheets may remain on the boat and need to be tied or shackled to the clew at this stage. Unless there is a shackle on the sheets, use a bowline to tie each to the clew.
Then run each sheet back past the mast to the cockpit. Depending on the specific boat and the size of the jib, the sheets may run inside or outside the shrouds -- the tensile lines that run from the deck to the mast, holding in place. On the Hunter 140 shown here, which uses a relatively small jib, the jibsheets pass from the sail’s clew inside the shrouds to a cam cleat, on each side, as shown here. The starboard (right side as you face the bow)) jibsheet cleat (with the red top) is mounted on the deck just to the starboard of this sailor’s right knee. This cleat secures the jibsheet in the desired position while sailing.
With the jib now rigged, let's move on to the mainsail.
Attach Mainsail to Halyard
Now we’ll attach the mainsail halyard shackle to the head of the mainsail, a process very similar to attaching the jib halyard. First spread the mainsail out to identify its three corners as you did with the jib. The head of the sail, again, is the most narrow angle of the triangle.
On many small sailboats, the main halyard does double duty as a topping lift -- the line that holds up the aft end of the boom when it is not being held up by the sail. As shown here, when the halyard is removed from the boom, the boom drops down into the cockpit.
Here, this sailor is shackling the halyard to the head of the mainsail. Then he can go on to secure the sail’s tack in the next step.
Secure the Mainsail’s Tack
The forward lower corner of the mainsail, like that of the jib, is called the tack. The grommet of the tack is installed at the bow end, usually by a removable pin inserted through the grommet and secured on the boom.
Now the luff (leading edge) of the mainsail is secured at both the head and the tack.
The next step is to secure the clew (aft lower corner) and foot (bottom edge) of the sail to the boom.
Secure the Mainsail Clew to the Outhaul
The clew (aft lower corner) of the mainsail is secured to the aft end of the boom, usually using a line called the outhaul that can be adjusted to tension the foot of the sail.
The sail’s foot (the bottom edge) itself may or may not be secured directly to the boom. On some boats, a rope sewn into the foot (called the boltrope) slides into a groove in the boom. The clew enters the groove first, forward by the mast, and is pulled back in the groove until the whole sail’s foot is held to the boom in this groove.
The boat shown here uses a “loose-footed” mainsail. This means the sail is not inserted into the boom groove. But the clew is held at the end of the boom in the same way by the outhaul. Thus both ends of the sail’s foot are firmly attached to the sail and drawn tight -- making the sail work the same as if the whole foot was also in the groove.
A loose-footed mainsail allows for more sail shaping, but the sail cannot be flattened quite as much.
With the clew secured and outhaul tightened, the mainsail luff can now be secured to the mast and the sail raised to go sailing.
Insert the Mainsail Slugs in the Mast
The mainsail’s luff (forward edge) is attached to the mast, as the jib’s luff is to the forestay – but with a different mechanism.
On the aft side of the mast is a groove for the mainsail. Some sails have a boltrope on the luff that slides upward in this groove, while others have sail “slugs” mounted every foot or so on the luff. The sail slugs, as you can see in this photo just forward of the sailor’s right hand, are small plastic slides inserted into the mast groove where it widens out into a sort of gate.
Again, first inspect the whole sail to make sure it’s not twisted anywhere. Hold the main halyard in one hand during this process – you will be gradually raising the mainsail as you insert the slugs into the mast groove.
Begin with the sail slug at the head. Insert it into the groove, pull the halyard to raise the sail a little, and then insert the next slug.
Before completing this process, be sure you’re ready to go sailing soon after the mainsail is up.
Continue Raising the Mainsail
Continue raising the mainsail with the halyard as you insert one slug after another into the groove.
Note that this sail already has its battens in place. A batten is a long, thin, flexible strip of wood or fiberglass that helps the sail keep its proper shape. They are positioned in pockets sewn into the sail in a generally horizontal direction. In this photo, you can see a batten near the top of the blue section of the mainsail over the sailor’s head.
If the battens were removed from the sail, you would insert them back into their pockets either before beginning to rig the boat or now, as you raise the mainsail in stages.
Cleat the Main Halyard
When the mainsail is all the way up, pull hard on the halyard to tension the luff. Then tie the halyard to the cleat on the mast, using a cleat hitch.
Notice that the mainsail when fully raised holds the boom up.
Now you’re almost ready to go sailing. This is a good time to lower the centerboard down into the water if you haven’t done so already. Note that not all small sailboats have centerboards. Others have keels that are fixed in place. Both serve similar purposes: to prevent the boat from skating sideways in the wind and to stabilize the boat. Larger keels also help lift the boat to windward
Now you should raise the jib. Simply pull down on the jib halyard and cleat it on the other side of the mast.
Start Moving
With both sails raised, you’re ready to start sailing . One of the first steps to getting underway will be to tighten the mainsheet and one jibsheet to adjust the sails so you can get moving forward.
You may also need to turn the boat so that the wind fills the sails from one side. A boat on a mooring, such as shown here, will naturally be blown back such that the bow faces directly into the wind – the one direction you can’t sail! Being stalled facing the wind is called being "in irons."
To turn the boat out of irons, simply push the boom out to one side. This pushes the back of the mainsail into the wind (called "backing" the sail) -- and the wind pushing against the sail will start the boat rotating. Just be sure you’re ready to take off!
Learn the Parts of a Sailboat and How to Communicate Them
Buying a Sailboat: Sloop vs. Ketch
Learn How to Sail a Small Sailboat
The 9 Best Recreational Kayaks
The Various Types of Sailboats and Rigs
The 9 Best Beach Chairs of 2024, Tested and Reviewed
West Wight Potter 19 Sailboat Review
Owner's Review of the MacGregor 26 Sailboat Models
The 11 Best Two-Person Tents of 2024, Tested and Reviewed
12 Best Things to Do in Juneau During an Alaska Cruise
The Best Tandem Kayaks for a Smooth Ride
The 9 Best Hybrid Golf Clubs
The 14 Best RV Accessories
A Beginner's Guide to Sailing a Sailboat
The 12 Best Inflatable Stand-Up Paddleboards of 2024, Tested and Reviewed
Honolulu, Waikiki, and Oahu Gay Guide and Photo Gallery
Free Shipping Over $99* - 366 Day Returns - Dedicated Customer Support
- Call Us +1-503-285-5536
- Sign in & Register
- Recently Viewed
- Guides & Advice
Rigging Guides

Not sure how to rig your boat or looking to brush up on a certain part of your rigging? Check out these Rigging Guides with photos and tips for rigging a variety of small sailboats. Available as PDF downloads for ease of use.
Hobie Cat Rigging Guides
Hobie Bravo Rigging Guide
Hobie Wave Rigging Guide
Hobie Getaway Rigging Guide
Hobie 16 / Hobie 14 Rigging Guide
Hobie 17 Rigging Guide
Hobie 17 Sport Rigging Guide
Hobie 18 / 18SX Rigging Guide
Hobie Tandem Island Rigging Guide
Hobie Adventure Island Rigging Guide
RS Sailing Rigging Guides
RS Aero Rigging Guide ( Current 'Overdeck' Style )
RS Aero Rigging Guide ( Previous 'Underdeck' Style )
RS Feva Rigging Guide
RS Tera Rigging Guide
RS Zest Rigging Guide
RS Quest Rigging Guide
RS Toura Rigging Guide
RS Quba Rigging Guide
RS Neo Rigging Guide
RS Vision Rigging Guide
RS Venture Rigging Guide
RS Venture Connect Rigging Guide
RS 21 Rigging Guide
RS Cat 14 Rigging Guide
RS Cat 16 Rigging Guide
RS 200 Rigging Guide
RS 400 Rigging Guide
RS 500 Rigging Guide
RS 800 Rigging Guide
Optimist Rigging Guides
Mclaughlin Owner's Manual
Opti Sailors Hull Booklet
Guide to Optimist Spars
Instructions for School Spars
Laser Performance Rigging Guides
C420 Rigging Guide
Bahia Rigging Guide
Laser Rigging Guide
Pico Rigging Guide
Stratos Rigging Guide
Sunfish Rigging Guide
Vago Rigging Guide
Zuma Rigging Guide
Bug Rigging Guide
Miscellaneous Rigging Guides
Tasar Rigging Guide
29er Rigging Guide
Weta Rigging Guide
Subscribe To Our Newsletter
Sign up for our newsletter to receive exclusive discounts, new product announcements, and upcoming sales.

Beginner’s Guide: How To Rig A Sailboat – Step By Step Tutorial
Alex Morgan
Rigging a sailboat is a crucial process that ensures the proper setup and functioning of a sailboat’s various components. Understanding the process and components involved in rigging is essential for any sailor or boat enthusiast. In this article, we will provide a comprehensive guide on how to rig a sailboat.
Introduction to Rigging a Sailboat
Rigging a sailboat refers to the process of setting up the components that enable the sailboat to navigate through the water using wind power. This includes assembling and positioning various parts such as the mast, boom, standing rigging, running rigging, and sails.
Understanding the Components of a Sailboat Rigging
Before diving into the rigging process, it is important to have a good understanding of the key components involved. These components include:
The mast is the tall vertical spar that provides vertical support to the sails and holds them in place.
The boom is the horizontal spar that runs along the bottom edge of the sail and helps control the shape and position of the sail.
- Standing Rigging:
Standing rigging consists of the wires and cables that support and stabilize the mast, keeping it upright.
- Running Rigging:
Running rigging refers to the lines and ropes used to control the sails, such as halyards, sheets, and control lines.
Preparing to Rig a Sailboat
Before rigging a sailboat, there are a few important steps to take. These include:
- Checking the Weather Conditions:
It is crucial to assess the weather conditions before rigging a sailboat. Unfavorable weather, such as high winds or storms, can make rigging unsafe.
- Gathering the Necessary Tools and Equipment:
Make sure to have all the necessary tools and equipment readily available before starting the rigging process. This may include wrenches, hammers, tape, and other common tools.
- Inspecting the Rigging Components:
In the upcoming sections of this article, we will provide a step-by-step guide on how to rig a sailboat, as well as important safety considerations and tips to keep in mind. By following these guidelines, you will be able to rig your sailboat correctly and safely, allowing for a smooth and enjoyable sailing experience.
Key takeaway:
- Rigging a sailboat maximizes efficiency: Proper rigging allows for optimized sailing performance, ensuring the boat moves smoothly through the water.
- Understanding sailboat rigging components: Familiarity with the various parts of a sailboat rigging, such as the mast, boom, and standing and running riggings, is essential for effective rigging setup.
- Importance of safety in sailboat rigging: Ensuring safety is crucial during the rigging process, including wearing a personal flotation device, securing loose ends and lines, and being mindful of overhead power lines.
Get ready to set sail and dive into the fascinating world of sailboat rigging! We’ll embark on a journey to understand the various components that make up a sailboat’s rigging. From the majestic mast to the nimble boom , and the intricate standing rigging to the dynamic running rigging , we’ll explore the crucial elements that ensure smooth sailing. Not forgetting the magnificent sail, which catches the wind and propels us forward. So grab your sea legs and let’s uncover the secrets of sailboat rigging together.
Understanding the mast is crucial when rigging a sailboat. Here are the key components and steps to consider:
1. The mast supports the sails and rigging of the sailboat. It is made of aluminum or carbon fiber .
2. Before stepping the mast , ensure that the area is clear and the boat is stable. Have all necessary tools and equipment ready.
3. Inspect the mast for damage or wear. Check for corrosion , loose fittings , and cracks . Address any issues before proceeding.
4. To step the mast , carefully lift it into an upright position and insert the base into the mast step on the deck of the sailboat.
5. Secure the mast using the appropriate rigging and fasteners . Attach the standing rigging , such as shrouds and stays , to the mast and the boat’s hull .
Fact: The mast of a sailboat is designed to withstand wind resistance and the tension of the rigging for stability and safe sailing.
The boom is an essential part of sailboat rigging. It is a horizontal spar that stretches from the mast to the aft of the boat. Constructed with durable yet lightweight materials like aluminum or carbon fiber, the boom provides crucial support and has control over the shape and position of the sail. It is connected to the mast through a boom gooseneck , allowing it to pivot. One end of the boom is attached to the mainsail, while the other end is equipped with a boom vang or kicker, which manages the tension and angle of the boom. When the sail is raised, the boom is also lifted and positioned horizontally by using the topping lift or lazy jacks.
An incident serves as a warning that emphasizes the significance of properly securing the boom. In strong winds, an improperly fastened boom swung across the deck, resulting in damage to the boat and creating a safety hazard. This incident highlights the importance of correctly installing and securely fastening all rigging components, including the boom, to prevent accidents and damage.
3. Standing Rigging
When rigging a sailboat, the standing rigging plays a vital role in providing stability and support to the mast . It consists of several key components, including the mast itself, along with the shrouds , forestay , backstay , and intermediate shrouds .
The mast, a vertical pole , acts as the primary support structure for the sails and the standing rigging. Connected to the top of the mast are the shrouds , which are cables or wires that extend to the sides of the boat, providing essential lateral support .
The forestay is another vital piece of the standing rigging. It is a cable or wire that runs from the top of the mast to the bow of the boat, ensuring forward support . Similarly, the backstay , also a cable or wire, runs from the mast’s top to the stern of the boat, providing important backward support .
To further enhance the rig’s stability , intermediate shrouds are installed. These additional cables or wires are positioned between the main shrouds, as well as the forestay or backstay. They offer extra support , strengthening the standing rigging system.
Regular inspections of the standing rigging are essential to detect any signs of wear, such as fraying or corrosion . It is crucial to ensure that all connections within the rig are tight and secure, to uphold its integrity. Should any issues be identified, immediate attention must be given to prevent accidents or damage to the boat. Prioritizing safety is of utmost importance when rigging a sailboat, thereby necessitating proper maintenance of the standing rigging. This ensures a safe and enjoyable sailing experience.
Note: <p> tags have been kept intact.
4. Running Rigging
Running Rigging
When rigging a sailboat, the running rigging is essential for controlling the sails and adjusting their position. It is important to consider several aspects when dealing with the running rigging.
1. Choose the right rope: The running rigging typically consists of ropes with varying properties such as strength, stretch, and durability. Weather conditions and sailboat size should be considered when selecting the appropriate rope.
2. Inspect and maintain the running rigging: Regularly check for signs of wear, fraying, or damage. To ensure safety and efficiency, replace worn-out ropes.
3. Learn essential knot tying techniques: Having knowledge of knots like the bowline, cleat hitch, and reef knot is crucial for securing the running rigging and adjusting sails.
4. Understand different controls: The running rigging includes controls such as halyards, sheets, and control lines. Familiarize yourself with their functions and proper usage to effectively control sail position and tension.
5. Practice proper sail trimming: Adjusting the tension of the running rigging significantly affects sailboat performance. Mastering sail trimming techniques will help optimize sail shape and maximize speed.
By considering these factors and mastering running rigging techniques, you can enhance your sailing experience and ensure the safe operation of your sailboat.
The sail is the central component of sailboat rigging as it effectively harnesses the power of the wind to propel the boat.
When considering the sail, there are several key aspects to keep in mind:
– Material: Sails are typically constructed from durable and lightweight materials such as Dacron or polyester. These materials provide strength and resistance to various weather conditions.
– Shape: The shape of the sail plays a critical role in its overall performance. A well-shaped sail should have a smooth and aerodynamic profile, which allows for maximum efficiency in capturing wind power.
– Size: The size of the sail is determined by its sail area, which is measured in square feet or square meters. Larger sails have the ability to generate more power, but they require greater skill and experience to handle effectively.
– Reefing: Reefing is the process of reducing the sail’s size to adapt to strong winds. Sails equipped with reefing points allow sailors to decrease the sail area, providing better control in challenging weather conditions.
– Types: There are various types of sails, each specifically designed for different purposes. Common sail types include mainsails, jibs, genoas, spinnakers, and storm sails. Each type possesses its own unique characteristics and is utilized under specific wind conditions.
Understanding the sail and its characteristics is vital for sailors, as it directly influences the boat’s speed, maneuverability, and overall safety on the water.
Getting ready to rig a sailboat requires careful preparation and attention to detail. In this section, we’ll dive into the essential steps you need to take before setting sail. From checking the weather conditions to gathering the necessary tools and equipment, and inspecting the rigging components, we’ll ensure that you’re fully equipped to navigate the open waters with confidence. So, let’s get started on our journey to successfully rigging a sailboat!
1. Checking the Weather Conditions
Checking the weather conditions is crucial before rigging a sailboat for a safe and enjoyable sailing experience. Monitoring the wind speed is important in order to assess the ideal sailing conditions . By checking the wind speed forecast , you can determine if the wind is strong or light . Strong winds can make sailboat control difficult, while very light winds can result in slow progress.
Another important factor to consider is the wind direction . Assessing the wind direction is crucial for route planning and sail adjustment. Favorable wind direction helps propel the sailboat efficiently, making your sailing experience more enjoyable.
In addition to wind speed and direction, it is also important to consider weather patterns . Keep an eye out for impending storms or heavy rain. It is best to avoid sailing in severe weather conditions that may pose a safety risk. Safety should always be a top priority when venturing out on a sailboat.
Another aspect to consider is visibility . Ensure good visibility by checking for fog, haze, or any other conditions that may hinder navigation. Clear visibility is important for being aware of other boats and potential obstacles that may come your way.
Be aware of the local conditions . Take into account factors such as sea breezes, coastal influences, or tidal currents. These local factors greatly affect sailboat performance and safety. By considering all of these elements, you can have a successful and enjoyable sailing experience.
Here’s a true story to emphasize the importance of checking the weather conditions. One sunny afternoon, a group of friends decided to go sailing. Before heading out, they took the time to check the weather conditions. They noticed that the wind speed was expected to be around 10 knots, which was perfect for their sailboat. The wind direction was coming from the northwest, allowing for a pleasant upwind journey. With clear visibility and no approaching storms, they set out confidently, enjoying a smooth and exhilarating sail. This positive experience was made possible by their careful attention to checking the weather conditions beforehand.
2. Gathering the Necessary Tools and Equipment
To efficiently gather all of the necessary tools and equipment for rigging a sailboat, follow these simple steps:
- First and foremost, carefully inspect your toolbox to ensure that you have all of the basic tools such as wrenches, screwdrivers, and pliers.
- Make sure to check if you have a tape measure or ruler available as they are essential for precise measurements of ropes or cables.
- Don’t forget to include a sharp knife or rope cutter in your arsenal as they will come in handy for cutting ropes or cables to the desired lengths.
- Gather all the required rigging hardware including shackles, pulleys, cleats, and turnbuckles.
- It is always prudent to check for spare ropes or cables in case replacements are needed during the rigging process.
- If needed, consider having a sailing knife or marlinspike tool for splicing ropes or cables.
- For rigging a larger sailboat, it is crucial to have a mast crane or hoist to assist with stepping the mast.
- Ensure that you have a ladder or some other means of reaching higher parts of the sailboat, such as the top of the mast.
Once, during the preparation of rigging my sailboat, I had a moment of realization when I discovered that I had forgotten to bring a screwdriver . This unfortunate predicament occurred while I was in a remote location with no nearby stores. Being resourceful, I improvised by utilizing a multipurpose tool with a small knife blade, which served as a makeshift screwdriver. Although it was not the ideal solution, it allowed me to accomplish the task. Since that incident, I have learned the importance of double-checking my toolbox before commencing any rigging endeavor. This practice ensures that I have all of the necessary tools and equipment, preventing any unexpected surprises along the way.
3. Inspecting the Rigging Components
Inspecting the rigging components is essential for rigging a sailboat safely. Here is a step-by-step guide on inspecting the rigging components:
1. Visually inspect the mast, boom, and standing rigging for damage, such as corrosion, cracks, or loose fittings.
2. Check the tension of the standing rigging using a tension gauge. It should be within the recommended range from the manufacturer.
3. Examine the turnbuckles, clevis pins, and shackles for wear or deformation. Replace any damaged or worn-out hardware.
4. Inspect the running rigging, including halyards and sheets, for fraying, signs of wear, or weak spots. Replace any worn-out lines.
5. Check the sail for tears, wear, or missing hardware such as grommets or luff tape.
6. Pay attention to the connections between the standing rigging and the mast. Ensure secure connections without any loose or missing cotter pins or rigging screws.
7. Inspect all fittings, such as mast steps, spreader brackets, and tangs, to ensure they are securely fastened and in good condition.
8. Conduct a sea trial to assess the rigging’s performance and make necessary adjustments.
Regularly inspecting the rigging components is crucial for maintaining the sailboat’s rigging system’s integrity, ensuring safe sailing conditions, and preventing accidents or failures at sea.
Once, I went sailing on a friend’s boat without inspecting the rigging components beforehand. While at sea, a sudden gust of wind caused one of the shrouds to snap. Fortunately, no one was hurt, but we had to cut the sail loose and carefully return to the marina. This incident taught me the importance of inspecting the rigging components before sailing to avoid unforeseen dangers.
Step-by-Step Guide on How to Rig a Sailboat
Get ready to set sail with our step-by-step guide on rigging a sailboat ! We’ll take you through the process from start to finish, covering everything from stepping the mast to setting up the running rigging . Learn the essential techniques and tips for each sub-section, including attaching the standing rigging and installing the boom and sails . Whether you’re a seasoned sailor or a beginner, this guide will have you ready to navigate the open waters with confidence .
1. Stepping the Mast
To step the mast of a sailboat, follow these steps:
1. Prepare the mast: Position the mast near the base of the boat.
2. Attach the base plate: Securely fasten the base plate to the designated area on the boat.
3. Insert the mast step: Lower the mast step into the base plate and align it with the holes or slots.
4. Secure the mast step: Use fastening screws or bolts to fix the mast step in place.
5. Raise the mast: Lift the mast upright with the help of one or more crew members.
6. Align the mast: Adjust the mast so that it is straight and aligned with the boat’s centerline.
7. Attach the shrouds: Connect the shrouds to the upper section of the mast, ensuring proper tension.
8. Secure the forestay: Attach the forestay to the bow of the boat, ensuring it is securely fastened.
9. Final adjustments: Check the tension of the shrouds and forestay, making any necessary rigging adjustments.
Following these steps ensures that the mast is properly stepped and securely in place, allowing for a safe and efficient rigging process. Always prioritize safety precautions and follow manufacturer guidelines for your specific sailboat model.
2. Attaching the Standing Rigging
To attach the standing rigging on a sailboat, commence by preparing the essential tools and equipment, including wire cutters, crimping tools, and turnbuckles.
Next, carefully inspect the standing rigging components for any indications of wear or damage.
After inspection, fasten the bottom ends of the shrouds and stays to the chainplates on the deck.
Then, securely affix the top ends of the shrouds and stays to the mast using adjustable turnbuckles .
To ensure proper tension, adjust the turnbuckles accordingly until the mast is upright and centered.
Utilize a tension gauge to measure the tension in the standing rigging, aiming for around 15-20% of the breaking strength of the rigging wire.
Double-check all connections and fittings to verify their security and proper tightness.
It is crucial to regularly inspect the standing rigging for any signs of wear or fatigue and make any necessary adjustments or replacements.
By diligently following these steps, you can effectively attach the standing rigging on your sailboat, ensuring its stability and safety while on the water.
3. Installing the Boom and Sails
To successfully complete the installation of the boom and sails on a sailboat, follow these steps:
1. Begin by securely attaching the boom to the mast. Slide it into the gooseneck fitting and ensure it is firmly fastened using a boom vang or another appropriate mechanism.
2. Next, attach the main sail to the boom. Slide the luff of the sail into the mast track and securely fix it in place using sail slides or cars.
3. Connect the mainsheet to the boom. One end should be attached to the boom while the other end is connected to a block or cleat on the boat.
4. Proceed to attach the jib or genoa. Make sure to securely attach the hanks or furler line to the forestay to ensure stability.
5. Connect the jib sheets. One end of each jib sheet should be attached to the clew of the jib or genoa, while the other end is connected to a block or winch on the boat.
6. Before setting sail, it is essential to thoroughly inspect all lines and connections. Ensure that they are properly tensioned and that all connections are securely fastened.
During my own experience of installing the boom and sails on my sailboat, I unexpectedly encountered a strong gust of wind. As a result, the boom began swinging uncontrollably, requiring me to quickly secure it to prevent any damage. This particular incident served as a vital reminder of the significance of properly attaching and securing the boom, as well as the importance of being prepared for unforeseen weather conditions while rigging a sailboat.
4. Setting Up the Running Rigging
Setting up the running rigging on a sailboat involves several important steps. First, attach the halyard securely to the head of the sail. Then, connect the sheets to the clew of the sail. If necessary, make sure to secure the reefing lines . Attach the outhaul line to the clew of the sail and connect the downhaul line to the tack of the sail. It is crucial to ensure that all lines are properly cleated and organized. Take a moment to double-check the tension and alignment of each line. If you are using a roller furling system, carefully wrap the line around the furling drum and securely fasten it. Perform a thorough visual inspection of the running rigging to check for any signs of wear or damage. Properly setting up the running rigging is essential for safe and efficient sailing. It allows for precise control of the sail’s position and shape, ultimately optimizing the boat’s performance on the water.
Safety Considerations and Tips
When it comes to rigging a sailboat, safety should always be our top priority. In this section, we’ll explore essential safety considerations and share some valuable tips to ensure smooth sailing. From the importance of wearing a personal flotation device to securing loose ends and lines, and being cautious around overhead power lines, we’ll equip you with the knowledge and awareness needed for a safe and enjoyable sailing experience. So, let’s set sail and dive into the world of safety on the water!
1. Always Wear a Personal Flotation Device
When rigging a sailboat, it is crucial to prioritize safety and always wear a personal flotation device ( PFD ). Follow these steps to properly use a PFD:
- Select the appropriate Coast Guard-approved PFD that fits your size and weight.
- Put on the PFD correctly by placing your arms through the armholes and securing all the straps for a snug fit .
- Adjust the PFD for comfort , ensuring it is neither too tight nor too loose, allowing freedom of movement and adequate buoyancy .
- Regularly inspect the PFD for any signs of wear or damage, such as tears or broken straps, and replace any damaged PFDs immediately .
- Always wear your PFD when on or near the water, even if you are a strong swimmer .
By always wearing a personal flotation device and following these steps, you will ensure your safety and reduce the risk of accidents while rigging a sailboat. Remember, prioritize safety when enjoying water activities.
2. Secure Loose Ends and Lines
Inspect lines and ropes for frayed or damaged areas. Secure loose ends and lines with knots or appropriate cleats or clamps. Ensure all lines are properly tensioned to prevent loosening during sailing. Double-check all connections and attachments for security. Use additional safety measures like extra knots or stopper knots to prevent line slippage.
To ensure a safe sailing experience , it is crucial to secure loose ends and lines properly . Neglecting this important step can lead to accidents or damage to the sailboat. By inspecting, securing, and tensioning lines , you can have peace of mind knowing that everything is in place. Replace or repair any compromised lines or ropes promptly. Securing loose ends and lines allows for worry-free sailing trips .
3. Be Mindful of Overhead Power Lines
When rigging a sailboat, it is crucial to be mindful of overhead power lines for safety. It is important to survey the area for power lines before rigging the sailboat. Maintain a safe distance of at least 10 feet from power lines. It is crucial to avoid hoisting tall masts or long antenna systems near power lines to prevent contact. Lower the mast and tall structures when passing under a power line to minimize the risk of contact. It is also essential to be cautious in areas where power lines run over the water and steer clear to prevent accidents.
A true story emphasizes the importance of being mindful of overhead power lines. In this case, a group of sailors disregarded safety precautions and their sailboat’s mast made contact with a low-hanging power line, resulting in a dangerous electrical shock. Fortunately, no serious injuries occurred, but it serves as a stark reminder of the need to be aware of power lines while rigging a sailboat.
Some Facts About How To Rig A Sailboat:
- ✅ Small sailboat rigging projects can improve sailing performance and save money. (Source: stingysailor.com)
- ✅ Rigging guides are available for small sailboats, providing instructions and tips for rigging. (Source: westcoastsailing.net)
- ✅ Running rigging includes lines used to control and trim the sails, such as halyards and sheets. (Source: sailingellidah.com)
- ✅ Hardware used in sailboat rigging includes winches, blocks, and furling systems. (Source: sailingellidah.com)
- ✅ A step-by-step guide can help beginners rig a small sailboat for sailing. (Source: tripsavvy.com)
Frequently Asked Questions
1. how do i rig a small sailboat.
To rig a small sailboat, follow these steps: – Install or check the rudder, ensuring it is firmly attached. – Attach or check the tiller, the long steering arm mounted to the rudder. – Attach the jib halyard by connecting the halyard shackle to the head of the sail and the grommet in the tack to the bottom of the forestay. – Hank on the jib by attaching the hanks of the sail to the forestay one at a time. – Run the jib sheets by tying or shackling them to the clew of the sail and running them back to the cockpit. – Attach the mainsail by spreading it out and attaching the halyard shackle to the head of the sail. – Secure the tack, clew, and foot of the mainsail to the boom using various lines and mechanisms. – Insert the mainsail slugs into the mast groove, gradually raising the mainsail as the slugs are inserted. – Cleat the main halyard and lower the centerboard into the water. – Raise the jib by pulling down on the jib halyard and cleating it on the other side of the mast. – Tighten the mainsheet and one jibsheet to adjust the sails and start moving forward.
2. What are the different types of sailboat rigs?
Sailboat rigs can be classified into three main types: – Sloop rig: This rig has a single mast with a mainsail and a headsail, typically a jib or genoa. – Cutter rig: This rig has two headsails, a smaller jib or staysail closer to the mast, and a larger headsail, usually a genoa, forward of it, alongside a mainsail. – Ketch rig: This rig has two masts, with the main mast taller than the mizzen mast. It usually has a mainsail, headsail, and a mizzen sail. Each rig has distinct characteristics and is suitable for different sailing conditions and preferences.
3. What are the essential parts of a sailboat?
The essential parts of a sailboat include: – Mast: The tall vertical spar that supports the sails. – Boom: The horizontal spar connected to the mast, which extends outward and supports the foot of the mainsail. – Rudder: The underwater appendage that steers the boat. – Centerboard or keel: A retractable or fixed fin-like structure that provides stability and prevents sideways drift. – Sails: The fabric structures that capture the wind’s energy to propel the boat. – Running rigging: The lines or ropes used to control the sails and sailing equipment. – Standing rigging: The wires and cables that support the mast and reinforce the spars. These are the basic components necessary for the functioning of a sailboat.
4. What is a spinnaker halyard?
A spinnaker halyard is a line used to hoist and control a spinnaker sail. The spinnaker is a large, lightweight sail that is used for downwind sailing or reaching in moderate to strong winds. The halyard attaches to the head of the spinnaker and is used to raise it to the top of the mast. Once hoisted, the spinnaker halyard can be adjusted to control the tension and shape of the sail.
5. Why is it important to maintain and replace worn running rigging?
It is important to maintain and replace worn running rigging for several reasons: – Safety: Worn or damaged rigging can compromise the integrity and stability of the boat, posing a safety risk to both crew and vessel. – Performance: Worn rigging can affect the efficiency and performance of the sails, diminishing the boat’s speed and maneuverability. – Reliability: Aging or worn rigging is more prone to failure, which can lead to unexpected problems and breakdowns. Regular inspection and replacement of worn running rigging is essential to ensure the safe and efficient operation of a sailboat.
6. Where can I find sailboat rigging books or guides?
There are several sources where you can find sailboat rigging books or guides: – Online: Websites such as West Coast Sailing and Stingy Sailor offer downloadable rigging guides for different sailboat models. – Bookstores: Many bookstores carry a wide selection of boating and sailing books, including those specifically focused on sailboat rigging. – Sailing schools and clubs: Local sailing schools or yacht clubs often have resources available for learning about sailboat rigging. – Manufacturers: Some sailboat manufacturers, like Hobie Cat and RS Sailing, provide rigging guides for their specific sailboat models. Consulting these resources can provide valuable information and instructions for rigging your sailboat properly.
About the author

Leave a Reply Cancel reply
Your email address will not be published. Required fields are marked *
Save my name, email, and website in this browser for the next time I comment.
Latest posts

The history of sailing – from ancient times to modern adventures
History of Sailing Sailing is a time-honored tradition that has evolved over millennia, from its humble beginnings as a means of transportation to a beloved modern-day recreational activity. The history of sailing is a fascinating journey that spans cultures and centuries, rich in innovation and adventure. In this article, we’ll explore the remarkable evolution of…

Sailing Solo: Adventures and Challenges of Single-Handed Sailing
Solo Sailing Sailing has always been a pursuit of freedom, adventure, and self-discovery. While sailing with a crew is a fantastic experience, there’s a unique allure to sailing solo – just you, the wind, and the open sea. Single-handed sailing, as it’s often called, is a journey of self-reliance, resilience, and the ultimate test of…

Sustainable Sailing: Eco-Friendly Practices on the boat
Eco Friendly Sailing Sailing is an exhilarating and timeless way to explore the beauty of the open water, but it’s important to remember that our oceans and environment need our protection. Sustainable sailing, which involves eco-friendly practices and mindful decision-making, allows sailors to enjoy their adventures while minimizing their impact on the environment. In this…
Home > Resources > Rig Specification Diagram For Sailboats: Mainsail & Headsail
Rig Specification Diagram For Sailboats: Mainsail & Headsail
30 December 2020
Ask Precision Sails , Design , Featuring - Partners , Headsail , Mainsail , Measurements , Sails , Technical Tags: Furling , Headsail , Mainsail , Precision Sails , rig , Sails , Specifications , Specs
Sailboat Rig Specs: Precision Sails Defined
The above infographic shows how Precision Sails label sailboat rig specifications. Continue reading below to see definitions and basic how-to tips on how to measure them below. Rig specs are important for designing a sail suited for your applications and boat. When you decide to get a custom sail from Precision, in most cases, you will be taking your own boats measurements. So it’s important to know about rig specs!
One thing we tell sailors here at precision is “The effort you put into measuring really does translate into the quality of sail you get” If quality measurements are given to designers, it allows them to create an excellent performing sail. It’s essential that good information is passed on to the designers when they create your sail.
The more information you can give to us, the better. One detail we strive to get right with sailors is the sailboats measurements. Taking your own sail boats measurements is an imperative part of creating a custom sail.
Photographs are also a handy tool. They let our designers understand your rigs better and can make suggestions and improvements.
Sometimes sailors think sails are like Lego, or the marine equivalent of a Honda Civic car part, where you can just swap out sails like its nothing. But this isn’t further from the truth. Sailboats are handmade. There can be many differences from one model to the next. Your boat might not be fresh out of the boatyard. It might be 36 or more years old, all this time equates to the boat changing, modifications being made, new parts being installed, break in periods, different maintenance intervals. There are a whole slew of reasons why your boat’s rig specs could be, and probably are, different from the next. This is the main reason we are so thorough with our measurement forms and design process.
Mainsail Rig Specs
P – Maximum Mainsail Hoist Length (Maximum luff): On the main halyard, hoist a measuring tape measure until it stops without jamming the halyard into the shiv. Measure straight down along the mast to the top of the boom at the tack. Disconnect Mainsail from Halyard. Be sure the boom is in the normal sailing position.
E – Maximum Foot Length: Measure from the aft face of the mast to the shackle of the outhaul. Make sure the outhaul is pulled back to it’s tightest position. When you get a maximum foot length we are not actually going to design the sail exactly to that length but rather a couple inches shorter. This allows you to adjust your outhull and not have your adjustments pushed against the shiv at the end of the boom, as well as changing tension in the sail.
Backstay Measurement: This measurement serves as a guide so we know how far the leech of your sail can be pushed without it overlapping the backstay. Sometimes you want this for certain performance reasons, but most cruisers do not want it to overlap, because it results in less wear.
Headsail Rig Specs
I – Foretriangle Height: Measure from the top of the halyard to the side deck on the forward side of the mast.
J – Foretriangle Base: Measure along deck from the forestay to the Forward face of mast. The J measurement is just a secondary check to make sure nothing has been changed over the years and there’s no surprises.
1. First Hank: Measure from tack to the first hank position on headstay wire above turnbuckle.
2. Maximum Luff Measurement: Measure from top of halyard to the bearing point of tack fitting
3. Waterline to Forestay: At the bow, measure the vertical distance from the waterline up to the intersection of the deck and forestay.
4. Waterline to Base: At the front of the mast, measure the vertical distance from the waterline up to the deck.
5. Headstay to Forward Track: Measure from tack attachment on deck to the forward edge of the headsail track you will be sheeting to.
Furling Head Sails
Headsail rig dimensions change slightly with a furling unit. The following videos do a good job of displaying the process of taking the measurements.
Furling drum height: Measure from the deck to the location of the tack attachment point on your furling drum. Measure the pennant separately.
After you get us your measurements. We will start customizing the design of your sail. There will be a consultation during the design process. We get you involved with this process because there are several things you can adjust for your sail – how far do you want the clew off the deck, where do you want the clew to sit and any thing else you might think of.
Put the knowledge you just gained into good use and take some good measurements! If you’re in need of a sail request a quote!
precisionsails
Related Posts

Full Battens vs Partial Battens vs 2 Full plus 2 Partial Battens
Full Battens VS Partial Battens At
Precision Sails we are asked every day during our customer quote consultation “Should I choose Full Battens or Partial Battens for my new mainsail?” Whether you are cruising or racing you will need to examine the pros and cons of adding full battens to your main sail.Positive Aspects of Full […]

Memories of Sail Repairs, Replacement Sails and FINALLY New Sails
I have had a Tanzer 26 for over 20 years now. The vessel, without much imagination I call The Boat, has served me well and without complaint through yearly cruises on Lake Ontario with my three kids and day sailing with the wife. Did I mention that my wife is a good sport but a definitive lover of a good.

My Need for Cruising Speed Demands a Great Suit of Sails
My Need for Cruising Speed Demands a Great Suit of SailsI like to sail fast mostly in the heavy winds that Lake Ontario throws.
" * " indicates required fields
Call Us: (253) 851-2126 Mon-Fri 9-5 Pacific Time

Sailboat Rigging
Assembling the rigging of our boats has been made as basic and efficient as possible. Below you can find a video tutorial of how to rig our sloop-style sailboats. These instructions pertain to all of our sloop rigged boat models, including the 17′ Jersey Skiff , 15′ Lobster Boat , 14′ Whitehall and 12′ Point Defiance , as well as the 10′ Navigator and 9.5′ Captain’s Gig when equipped with their High Performance Option that adds the jib and bowsprit. Our cat-rigged boats including the standard 10′ Navigator , 9.5′ Captain’s Gig , and 8′ Nisqually sailboats also follow these same instructions, but since they have only a mainsail you simply skip the steps pertaining to the jib.
For our balanced lug rigged skiffs ( 16′ Melonseed , 17′ Salish Voyager , and 12′ Scamp , see rigging Instructions HERE .
Written instructions are below. The sequence corresponds to the video above, and we’ve added time markers so you can find the visual reference for each step.
Newest Posts
- Lobster Boat Redesign — Update #2
- Mailbag: Family Diving from a 14′ Whitehall
- New Year, New Digs!
- Save the Date: Seattle Boat Show Feb 2-10, 2024
- Wild Places: Sleeping Aboard the Salish Voyager
- Beach Dolly (1)
- Best of GHBoats (5)
- Customer Questions (8)
- Customization (1)
- Galleries (4)
- Maintenance and Repairs (3)
- Announcements (13)
- Boat Shows (12)
- Just for Fun (17)
- Mailbag (43)
- Newsletters (25)
- Ocean Rowing (13)
- Press Reviews (10)
- Now Hiring (1)
- Woodwork (3)
- Captain's Gig (2)
- Jersey Skiff (4)
- Lobster Boat (4)
- Melonseed (6)
- Navigator (4)
- Nisqually (2)
- Point Defiance (7)
- Salish Voyager (17)
- Swampscott Dory (1)
- Whitehall (6)
- Sea Stories (12)
- Site Guide (4)
- Uncategorized (1)
Blog Archives
Site search.
Learn How to Sail a Small Sailboat – 1. The Parts of the Boat
- Snowboarding
- Scuba Diving & Snorkeling
Typical Small Sailboat
The Hunter 140 shown here is a typical centerboard sailboat used for learning how to sail and for sailing in protected waters. It can hold two adults or three children. It is easily rigged and sailed. We will use this boat throughout this Learn to Sail - Full Course.
Shown here is the boat as it is typically left on a dock or mooring, with sails and rudder removed.
If you know very little about sailing, you might want to learn some basic terms referring to the boat and sailing technique before starting this course.
The mast and boom are usually left in place on the boat. The forestay holds up the mast from the bow of the boat, and a single shroud on each side of the boat holds the mast side to side. The shrouds are mounted back of the mast, so they also keep the mast from falling forward. The stay and shrouds are made of flexible wire that can be disconnected to trailer or store the boat.
On most large sailboats, there are multiple shrouds to support the mast, along with a back stay support to the stern. Otherwise, this boat is representative of the basic standing rigging of a sloop, the most common type of modern sailboat.
The Mast Step
Here’s a close-up view of the bottom of the mast atop the boat. The stainless steel mounting piece affixed to the boat is called the mast step. In this boat model, a pin emerging from the mast on both sides simply fits into a slot in the mast step. The mast is lightweight and easily raised by hand.
Once the mast is stepped, it is held securely in place by the shrouds and forestay, as shown in the previous photo.
On most small sailboats, the rudder is mounted on the stern of the hull, as shown here. The rudder is a long, thin blade hanging vertically from a simple set of hinges (which varies somewhat among different boats). The rudder pivots on a vertical axis, swinging side to side, which turns the boat when it is moving through the water. (We’ll describe steering in Part 3 of this course.)
The rudder may be stored on the boat or removed, like the sails, after sailing. Here, the rudder is being reinstalled. On this model the rudder has a kick-up feature, which allows it to swing up if the boat strikes bottom.
The rudder is turned side to side by the tiller, the long metal arm seen here extending from the top of the rudder about 3 feet into the cockpit. On many boats the tiller is made of wood.
Note the black handle on top of the metal tiller arm. Called a tiller extension, this device mounts near the end of the tiller and can be moved far out to the side of the boat or forward. The extension is needed because when sailing close to the wind, sailors may need to move their body weight far out to the side (called “hiking out”) in order to keep the boat balanced. We’ll see this in Part 3 of this course.)
Most large sailboats use a wheel apparatus to turn the rudder, because the forces on the boat’s rudder can be so much larger that it would be difficult to steer with a tiller.
Boom Gooseneck
The boom attaches to the mast with a fitting called a gooseneck. The gooseneck allows the boom to swing far out to both sides as well as to pivot up and down.
This photo also shows the vertical slot in the mast used to hold the mainsail's front edge (the "luff") to the mast (as you’ll see in Part 2 of this course). The sail “slugs,” fittings on the sail's luff, slide up the mast in this slot.
A similar slot can be seen in the top of the boom, to hold the foot of the sail.
The L-shaped metal pin at the forward end of the boom holds the forward bottom corner of the mainsail, called the tack.
Note the two lines (never called “rope” on a boat!) running up the mast. These are the halyards, described in the next page.
The Halyards
Halyards are the lines that pull the sails up the mast. A typical small sloop like this sailboat has two sails, the mainsail and jib, and thus has two halyards – one to pull up the top corner ("head") of each sail. (We’ll see this is Part 2 of this course.)
At the end of a halyard is a fitting, called a shackle, that attaches the sail to the line. The line then runs up to a block (pulley) at the masthead, and comes back down alongside the mast as you see here. Pulling down on this end of the halyard hoists the sail up.
When the sail is up, the halyard is tied off tight to the mast cleat using a cleat hitch, as shown here.
Halyards are part of the boat’s running rigging. "Running rigging" refers to all the lines that control the sails or other rigging, which can be moved or adjusted while sailing - unlike the fixed rigging, the usually metal, fixed parts of the rig (mast, boom, stays, shrouds).
Mainsheet Block and Tackle
Another key part of a boat’s running rigging is the mainsheet. This line runs between the boom and a fixed point in the cockpit (as shown here) or cabin top. As the line is let out, the boom and mainsail can swing farther out from the boat’s centerline. As described in Part 3 of this course, moving the sails in or out, called trimming the sails, is necessary for sailing at different angles to the wind.
Even in a small sailboat the force of the wind in the mainsail can be considerable. The use of a block and tackle in the mainsheet provides a mechanical advantage so that the mainsail can be managed by one person, with one hand, while sailing.
On most larger sailboats, the mainsheet mounts from the boom to a traveler rather than to a fixed point. The traveler can move the attachment point side to side for better sail shape.
Finally, notice the cam cleat where the mainsheet exits the block and tackle. This cleat holds the mainsheet in place after being adjusted.
Jibsheet and Cleat
When the jib sail is put on the forestay (“bent on”), a sheet is run from its aft corner (the “clew”) on each side of the mast back to the cockpit. The jib sheets allow the sailor to trim the jib, as described in Part 3 of this course.
Each jib sheet is led back through a cam cleat, as shown here, which holds the line in place. The jaws of the cam cleat allow the line to be pulled back but not slip forward. To release the jib sheet, the sailor jerks the line up and out of the jaws (into the open space below the top red piece shown).
The Centerboard
The final part we’ll look at in this boat introduction is the centerboard. You can’t actually see most of the centerboard, however, because it is in the water below the boat. This photo shows only its top edge protruding from the centerboard trunk down the middle of the cockpit.
The centerboard is a long, thin blade mounted at one end on a pivot point. When its control line is let out, the centerboard swings down into the water – usually about 3 feet down on a boat of this size. The thin board slices cleanly through the water as the boat moves forward, but its large flat side provides resistance to prevent the wind from blowing the boat sideways. In Part 3 of this course we’ll discuss how the centerboard is used while sailing.
Note the centerboard control line running back on the right side of the centerboard trunk. The cleat that holds the line and keeps it from moving forward is called a clam cleat because of its shape. With no moving parts, this cleat holds a line squeezed into it. It is not as secure as the cam cleat for the mainsheet and jibsheets, but the force on the centerboard line is much less.
This completes our introduction of the basic parts of a small sailboat.
- How to Gybe a Sailboat
- How to Raise the Mainsail
- Simple Reefing System for Sailors
- How to Rig a Preventer Line
- How to Tack a Sailboat
- How to Use a Mainsheet Traveler
- Using a Sailboat Boom Vang in Sailing
- How to Heave To a Sailboat
- How to Use a Topping Lift
- Control Your Tiller Without a Tiller-Tamer
- The Sunfish: A Perfect Lake or Urban Sailboat
- How to Use Roller Furling
- Choosing a Centerboard or Fixed Keel Sailboat
- How to Tow a Dinghy Behind a Sailboat
- How to Use a Sailboat's Outhaul
- When to Adjust Sailboat Sails for Stronger Winds
- Forums New posts Unanswered threads Register Top Posts Email
- What's new New posts New Posts (legacy) Latest activity New media
- Media New media New comments
- Boat Info Downloads Weekly Quiz Topic FAQ 10000boatnames.com
- Classifieds Sell Your Boat Used Gear for Sale
- Parts General Marine Parts Hunter Beneteau Catalina MacGregor Oday
- Help Terms of Use Monday Mail Subscribe Monday Mail Unsubscribe
Sail Rigging Diagrams?
- Thread starter Pkeller
- Start date Aug 21, 2020
- Hunter Owner Forums
- Smaller Boats
Hello, I recently purchased a 1993 Hunter 23.5 sailboat. The boom and sail was stored in the boat so I had to put those up myself, I attached the boom to the mast using the bracket and pin found on the mast. I then took the fixed line attached to the top of the mast and ran it through the center roller at the far end of the boom and tied it back upon itself (the manual was not very clear on how this was to be attached). I attached the top of the sail via a pin through a u bolt at the end of the halyard, raised the sail inserting the pins into the track in the mast. After this I dropped the sail and tied the bottom of the sail to the line coming out of the boom, pulled it and fed the pin and bottom of the sail into the track on the boom. This leaves me with the tack I believe it's called having no attachment point...how is this affixed on the boat? The manual is no help on this and I've spent hours looking for videos or resources online. I tried looking at other boats in the marina but they seem to have clips where the mast and boom meet that I don't. Am I missing pieces? Does anyone have pictures they could share? I can post some pictures of what I've done tomorrow in the event it helps rectify any error I have made. Thanks in advance for any help, truly appreciated!

Will definitely post up relevant pictures when I go back down tomorrow, wish I had the foresight to snap a few earlier.
Crazy Dave Condon
Have you looked at manual under boat info?

So your problem is the lack of a tack fitting on the boom? It attaches somehow. Tack fittings are usually part of the boom. Maybe welded on. There isn't two dog ears on the front topside of the boom? If there is there should be holes on either side that can accept a clevis pin which goes through the sail tack cringle in the middle. The holes don't have to be the same size and one may be threaded. I don't think the fitting would be on the mast - at least I don't think I've ever seen that. I have seen almost any manor of attachment on different boats including bolts. There isn't one way. Sometimes the clevis pins are custom and if they go overboard the owner has to innovate. We'll look forward to the pics.
It looks like your boat may use a shackle like the one at the head of the sail
In looking at the diagrams I am thinking my boom should be using the lower hole on the mast, which would reduce stress and perhaps I am missing a pin or shackle which would hold the tack to the hole I am currently using to hold the boom? Not sure if the boom has a deep enough gap to allow this configuration, will have to test tomorrow. If that ends up being the solution then I am still wondering if anyone knows the proper way for the boom topping lift to be affixed to the other end of the boom....the rope contraption I inherited cannot be right but I have no idea what it should look like. So badly wish there was a similar boat nearby that I could look at the rigging

Sail sfbay's diagram pretty much gives you all you need. 1. There are usually 2 holes in the headboard(that's the plate at the top of the sail where you afix the halyard.)One hole for the halyard connection, the other for the topmost slider/slug. There's enough room to add another slide, you can attach it with a couple wraps of cord, or maybe even find a metal or plastic shackle that'll fit. I'd just tie it on rather than spend a lot of time fitting the shackle. 2. Regarding the mainsail's forward boom connection there are usually two cringles (holes with grommets) pretty close together, the lower one is for the attachment to the boom fitting. Since I don't see a ramshead(that's what they call the hook style attachment) no big deal. Again, you can go find a single or twin hook and a fastener, or a big clevis pin.... but if it were me... I'd just tie it on the same way you'll do with the mast slider.. you can even use more of the same line.. just wrap it around 3 or 4 times and tie a slip knot. Go sailing. Okay, the upper cringle, if you have one, is for the cunningham. I leave it to you to research that... but a cunningham is a very useful sail adjustment tool. Instead of using the halyard to control tension on the main, the cunningham takes it over.. tensioning downward rather than up with the halyard. There will be a 3rd cringle a couple feet higher, that will be at matching height with a cringle on the leech. This is your 1st reef point. Many boats will only have 2nd, even 3rd set of reef points... if yours does.... that's cool...butl you'll learn about that later... if not... no worries. 3. This brings us to your boom end set up. If you examine sf bay's illustration.. there are three sheaves, you'll see one for the outhaul's control line. one for the leech reef point, and one for the "adjustable" topping lift. This set up is pretty handy. What you'll need to do is get rid of that swollen rag of line you have now, and get some 1/4" line long enough to connect the static line topping lift, down through the block at the end then all the way forward where the outhaul emerges. Usually there's some kind of built in cleat at the front end, but it might be more convenient to route the line aft to a simple cleat mounted on the coach roof so you can control it from the cockpit. Again, closely inspect the diagram. Others will be happy to explain the function of the topping lift. Seems like you've figured out the outhaul, that is a super important sail adjustment, it usually has some purchase configuration hidden inside, so make sure it works. Finally. the reefing line should be set up per the diagram. It will exit the front of the boom as noted before. You'll have one line for the leech (back) and one for the luff (front). To set up the mast end you'll want to extend a line from one side of the mast , up through the reef cringle, then back down to fastening point on the other side of the mast ... a simple horn cleat will work fine... this will give you 2:1 purchase to get the luff nice and tight when you reef. Look for a small eye strap a foot or so below the boom on the side of the mast... the cleat would be on the opposite side. Okay, that's my two cents. Good luck, have fun.
Thanks, I will take a look when I head down today and see what I can do. Admittedly I had assumed that my rigging would be set up on the boat and I could simply take notes so this has been a journey...previous owner I was told basically used as a motorboat.
Yeah, a long shackle or a lashing. It looks like there was a long shackle there from the scratches on the gooseneck. Another way to locate the tack is to raise the sail all the way up in light wind. Where does the tack cringle land? Chances are the sail was built custom so where the tack is, is where it's supposed to be. Regarding your topping lift, I was wondering why it is so short. I think it's short so that the boom can be lifted over your Bimini. To sail with the bimini up the boom has to be over it. Maybe that'll work with sail shape maybe not. Usually you would want to sail with the topping life SLACK and let the leach of the sail determine the height of the boom. So whatever arrangement you make to attach the topping lift to the boom, it has to be adjustable. Maybe you can put a small block on one side of the boom and run a line from that eye, through the block and into a cleat - probably a small jam cleat with an eye to retain the line. You'll have a dangling line to deal with when the boom is in up position. On my Hunter 356 the topping lift wasn't fixed. It went through a sheave at the top of the mast and down to a cleat on the outside of the mast. You could adjust it there. I think it was internal so you would need an exit box. That would likely be above your head so you can give it a good yank. That's a winter project because you would likely need to drop the mast. Hoist the main and take it out in light air. I'd be interested in how that boom/bimini relationship goes. Maybe it looks like more of a problem in the picture than it is.
Thank you, yes I am fairly certain the bimini will have to be down while sailing, looks to be an 'at anchor's type as it would not only interfere from a height standpoint with the boom but also with how far forward it extends: beyond the ropes that tie down from the boom to keep it from swinging.

The stock method of attaching the topping lift (same as on my H23) by routing it through the boom up to and through the forward sheave and the jam cleat below the sheave has a disadvantage - when you remove the boom you have to pull the line out of the boom, and then re-thread it before you replace the boom. There is an improvement noted somewhere (it may be in the H23 section) that improves this. You can attach a thin line or stainless wire to the masthead fitting used for the topping lift that ends about 3 ft above the boom end when it is horizontal. Use a thimble or knot such as a bowline to attach a small swivel block to the lower end of this topping lift. Run a low stretch line (approx 1/4 inch diam) by tying one end to the thin "bar" behind the sheaves at the aft end of the boom (or use a small shackle), running it up to and through the swivel block, back down to the sheave for the topping lift (port side sheave according to the diagram), through the boom and out the forward sheave. You still have to go forward to adjust the topping lift (but no need to install new hardware on the boom), plus it gives you 2 to 1 mechanical advantage. The topping lift itself can stay attached to the masthead. You untie or unshackle the working line from the "bar" and pull it out of the swivel block to remove the boom, but leave it threaded inside the boom; no need to re-thread it through the boom. I used an electrical fishing wire to initially get that line through the boom. The 23.5 probably does not have any internal blocks in the boom to get in the way; at least, the 23 does not.
isaksp00 said: The stock method of attaching the topping lift (same as on my H23) by routing it through the boom up to and through the forward sheave and the jam cleat below the sheave has a disadvantage - when you remove the boom you have to pull the line out of the boom, and then re-thread it before you replace the boom. There is an improvement noted somewhere (it may be in the H23 section) that improves this. You can attach a thin line or stainless wire to the masthead fitting used for the topping lift that ends about 3 ft above the boom end when it is horizontal. Use a thimble or knot such as a bowline to attach a small swivel block to the lower end of this topping lift. Run a low stretch line (approx 1/4 inch diam) by tying one end to the thin "bar" behind the sheaves at the aft end of the boom (or use a small shackle), running it up to and through the swivel block, back down to the sheave for the topping lift (port side sheave according to the diagram), through the boom and out the forward sheave. You still have to go forward to adjust the topping lift (but no need to install new hardware on the boom), plus it gives you 2 to 1 mechanical advantage. The topping lift itself can stay attached to the masthead. You untie or unshackle the working line from the "bar" and pull it out of the swivel block to remove the boom, but leave it threaded inside the boom; no need to re-thread it through the boom. I used an electrical fishing wire to initially get that line through the boom. The 23.5 probably does not have any internal blocks in the boom to get in the way; at least, the 23 does not. Click to expand
You could use a turning block (or a swivel block attached to the mast tabernacle if it has holes), but then you'd need a way to cleat the line or use a rope clutch on the cabin roof somewhere near the aft end (and you don't need or want a heavy line, so a clutch may not work), so it was accessible from the cockpit. I only adjust my topping lift twice per outing. Once to slack it some once the sail is up, and once to tighten it before lowering the sail. It isn't hat big of a deal to go forward twice, to me.
twistedskipper
To the original poster, You may already have sorted out your gooseneck, but in case you could still use some photos, I did finally get some of the gooseneck on my Hunter 26, which appears to be very similar, though not identical, to yours. In my photos, the mainsail happened to be reefed, so you can see how the tack is shackled as well as how the reef point is hooked. Not all reef points are set up with a loop like this one is, a cringle (grommet) is more typical. One thing I noticed in your original photo is that the gooseneck bracket riveted to your mast appears to be in two pieces, with the swivel captive between them. Mine is one piece and the swivel pin is removable. In your case, it looks like you would have to remove either the upper or lower part of the mast bracket if for any reason you needed to remove the swivel. Those rivets aren't too hard to drill out and install. It also looks to me in your photo like either that swivel or the holes in the bracket might be worn, the swivel seems to have sagged in towards the mast on its bottom pin. Might want to take close look at that to confirm if it fits as designed and keep an eye on it (marked up photo attached).
Attachments

Thanks all, really appreciate all the insight! Struggling to get the new rams head hook I bought fully into the hole it belongs in as it gets stuck sideways and there doesn't appear to be enough room to rotate it all the way thru, however I am working on it bit by bit. I've used the imperfect setup I have to sail with my main so I build some experience before summer is over, waiting for a rainy day to make a trip out to west marine for a few parts to make some of the great improvements suggested earlier. At least for now I picked up a new line and re-tied the topping lift off to the boom without the rats nest hanging there; I struggled to feed the line through the boom forward, need a wire or something to feed it with as the rope can only be fed so far by itself before there isn't enough line tension to push it further forward, but it has worked temporarily.
I've used a plumbers snake or a length of plasticized 1X19 wire to fish lines through the boom. I learned two things in physics class: 1) F=MA and 2) You can't push a rope.
Or get a cheap electricians fish tape at a place like Harbor Freight
- This site uses cookies to help personalise content, tailor your experience and to keep you logged in if you register. By continuing to use this site, you are consenting to our use of cookies. Accept Learn more…
No products in the cart.
Sailing Ellidah is supported by our readers. Buying through our links may earn us an affiliate commission at no extra cost to you.
The Standing Rigging On A Sailboat Explained
The standing rigging on a sailboat is a system of stainless steel wires that holds the mast upright and supports the spars.
In this guide, I’ll explain the basics of a sailboat’s hardware and rigging, how it works, and why it is a fundamental and vital part of the vessel. We’ll look at the different parts of the rig, where they are located, and their function.
We will also peek at a couple of different types of rigs and their variations to determine their differences. In the end, I will explain some additional terms and answer some practical questions I often get asked.
But first off, it is essential to understand what standing rigging is and its purpose on a sailboat.
The purpose of the standing rigging
Like I said in the beginning, the standing rigging on a sailboat is a system of stainless steel wires that holds the mast upright and supports the spars. When sailing, the rig helps transfer wind forces from the sails to the boat’s structure. This is critical for maintaining the stability and performance of the vessel.
The rig can also consist of other materials, such as synthetic lines or steel rods, yet its purpose is the same. But more on that later.
Since the rig supports the mast, you’ll need to ensure that it is always in appropriate condition before taking your boat out to sea. Let me give you an example from a recent experience.
Dismasting horrors
I had a company inspect the entire rig on my sailboat while preparing for an Atlantic crossing. The rigger didn’t find any issues, but I decided to replace the rig anyway because of its unknown age. I wanted to do the job myself so I could learn how it is done correctly.
Not long after, we left Gibraltar and sailed through rough weather for eight days before arriving in Las Palmas. We were safe and sound and didn’t experience any issues. Unfortunately, several other boats arriving before us had suffered rig failures. They lost their masts and sails—a sorrowful sight but also a reminder of how vital the rigging is on a sailboat.
The most common types of rigging on a sailboat
The most commonly used rig type on modern sailing boats is the fore-and-aft Bermuda Sloop rig with one mast and just one headsail. Closely follows the Cutter rig and the Ketch rig. They all have a relatively simple rigging layout. Still, there are several variations and differences in how they are set up.
A sloop has a single mast, and the Ketch has one main mast and an additional shorter mizzen mast further aft. A Cutter rig is similar to the Bermuda Sloop with an additional cutter forestay, allowing it to fly two overlapping headsails.
You can learn more about the differences and the different types of sails they use in this guide. For now, we’ll focus on the Bermuda rig.
The difference between standing rigging and running rigging
Sometimes things can get confusing as some of our nautical terms are used for multiple items depending on the context. Let me clarify just briefly:
The rig or rigging on a sailboat is a common term for two parts:
- The standing rigging consists of wires supporting the mast on a sailboat and reinforcing the spars from the force of the sails when sailing.
- The running rigging consists of the halyards, sheets, and lines we use to hoist, lower, operate, and control the sails on a sailboat.
Check out my guide on running rigging here !
The difference between a fractional and a masthead rig
A Bermuda rig is split into two groups. The Masthead rig and the Fractional rig.
The Masthead rig has a forestay running from the bow to the top of the mast, and the spreaders point 90 degrees to the sides. A boat with a masthead rig typically carries a bigger overlapping headsail ( Genoa) and a smaller mainsail. Very typical on the Sloop, Ketch, and Cutter rigs.
A Fractional rig has forestays running from the bow to 1/4 – 1/8 from the top of the mast, and the spreaders are swept backward. A boat with a fractional rig also has the mast farther forward than a masthead rig, a bigger mainsail, and a smaller headsail, usually a Jib. Very typical on more performance-oriented sailboats.
There are exceptions in regards to the type of headsail, though. Many performance cruisers use a Genoa instead of a Jib , making the difference smaller.
Some people also fit an inner forestay, or a babystay, to allow flying a smaller staysail.
Explaining the parts and hardware of the standing rigging
The rigging on a sailing vessel relies on stays and shrouds in addition to many hardware parts to secure the mast properly. And we also have nautical terms for each of them. Since a system relies on every aspect of it to be in equally good condition, we want to familiarize ourselves with each part and understand its function.
Forestay and Backstay
The forestay is a wire that runs from the bow to the top of the mast. Some boats, like the Cutter rig, can have several additional inner forestays in different configurations.
The backstay is the wire that runs from the back of the boat to the top of the mast. Backstays have a tensioner, often hydraulic, to increase the tension when sailing upwind. Some rigs, like the Cutter, have running backstays and sometimes checkstays or runners, to support the rig.
The primary purpose of the forestay and backstay is to prevent the mast from moving fore and aft. The tensioner on the backstay also allows us to trim and tune the rig to get a better shape of the sails.
The shrouds are the wires or lines used on modern sailboats and yachts to support the mast from sideways motion.
There are usually four shrouds on each side of the vessel. They are connected to the side of the mast and run down to turnbuckles attached through toggles to the chainplates bolted on the deck.
- Cap shrouds run from the top of the mast to the deck, passing through the tips of the upper spreaders.
- Intermediate shrouds run from the lower part of the mast to the deck, passing through the lower set of spreaders.
- Lower shrouds are connected to the mast under the first spreader and run down to the deck – one fore and one aft on each side of the boat.
This configuration is called continuous rigging. We won’t go into the discontinuous rigging used on bigger boats in this guide, but if you are interested, you can read more about it here .
Shroud materials
Shrouds are usually made of 1 x 19 stainless steel wire. These wires are strong and relatively easy to install but are prone to stretch and corrosion to a certain degree. Another option is using stainless steel rods.
Rod rigging
Rod rigging has a stretch coefficient lower than wire but is more expensive and can be intricate to install. Alternatively, synthetic rigging is becoming more popular as it weighs less than wire and rods.
Synthetic rigging
Fibers like Dyneema and other aramids are lightweight and provide ultra-high tensile strength. However, they are expensive and much more vulnerable to chafing and UV damage than other options. In my opinion, they are best suited for racing and regatta-oriented sailboats.
Wire rigging
I recommend sticking to the classic 316-graded stainless steel wire rigging for cruising sailboats. It is also the most reasonable of the options. If you find yourself in trouble far from home, you are more likely to find replacement wire than another complex rigging type.
Relevant terms on sailboat rigging and hardware
The spreaders are the fins or wings that space the shrouds away from the mast. Most sailboats have at least one set, but some also have two or three. Once a vessel has more than three pairs of spreaders, we are probably talking about a big sailing yacht.
A turnbuckle is the fitting that connects the shrouds to the toggle and chainplate on the deck. These are adjustable, allowing you to tension the rig.
A chainplate is a metal plate bolted to a strong point on the deck or side of the hull. It is usually reinforced with a backing plate underneath to withstand the tension from the shrouds.
The term mast head should be distinct from the term masthead rigging. Out of context, the mast head is the top of the mast.
A toggle is a hardware fitting to connect the turnbuckles on the shrouds and the chainplate.
How tight should the standing rigging be?
It is essential to periodically check the tension of the standing rigging and make adjustments to ensure it is appropriately set. If the rig is too loose, it allows the mast to sway excessively, making the boat perform poorly.
You also risk applying a snatch load during a tack or a gybe which can damage the rig. On the other hand, if the standing rigging is too tight, it can strain the rig and the hull and lead to structural failure.
The standing rigging should be tightened enough to prevent the mast from bending sideways under any point of sail. If you can move the mast by pulling the cap shrouds by hand, the rigging is too loose and should be tensioned. Once the cap shrouds are tightened, follow up with the intermediates and finish with the lower shrouds. It is critical to tension the rig evenly on both sides.
The next you want to do is to take the boat out for a trip. Ensure that the mast isn’t bending over to the leeward side when you are sailing. A little movement in the leeward shrouds is normal, but they shouldn’t swing around. If the mast bends to the leeward side under load, the windward shrouds need to be tightened. Check the shrouds while sailing on both starboard and port tack.
Once the mast is in a column at any point of sail, your rigging should be tight and ready for action.
If you feel uncomfortable adjusting your rig, get a professional rigger to inspect and reset it.
How often should the standing rigging be replaced on a sailboat?
I asked the rigger who produced my new rig for Ellidah about how long I could expect my new rig to last, and he replied with the following:
The standing rigging should be replaced after 10 – 15 years, depending on how hard and often the boat has sailed. If it is well maintained and the vessel has sailed conservatively, it will probably last more than 20 years. However, corrosion or cracked strands indicate that the rig or parts are due for replacement regardless of age.
If you plan on doing extended offshore sailing and don’t know the age of your rig, I recommend replacing it even if it looks fine. This can be done without removing the mast from the boat while it is still in the water.
How much does it cost to replace the standing rigging?
The cost of replacing the standing rigging will vary greatly depending on the size of your boat and the location you get the job done. For my 41 feet sloop, I did most of the installation myself and paid approximately $4700 for the entire rig replacement.
Can Dyneema be used for standing rigging?
Dyneema is a durable synthetic fiber that can be used for standing rigging. Its low weight, and high tensile strength makes it especially popular amongst racers. Many cruisers also carry Dyneema onboard as spare parts for failing rigging.
How long does dyneema standing rigging last?
Dyneema rigging can outlast wire rigging if it doesn’t chafe on anything sharp. There are reports of Dyneema rigging lasting as long as 15 years, but manufacturers like Colligo claim their PVC shrink-wrapped lines should last 8 to 10 years. You can read more here .
Final words
Congratulations! By now, you should have a much better understanding of standing rigging on a sailboat. We’ve covered its purpose and its importance for performance and safety. While many types of rigs and variations exist, the hardware and concepts are often similar. Now it’s time to put your newfound knowledge into practice and set sail!
Or, if you’re not ready just yet, I recommend heading over to my following guide to learn more about running rigging on a sailboat.
Sharing is caring!
Skipper, Electrician and ROV Pilot
Robin is the founder and owner of Sailing Ellidah and has been living on his sailboat since 2019. He is currently on a journey to sail around the world and is passionate about writing his story and helpful content to inspire others who share his interest in sailing.
Very well written. Common sense layout with just enough photos and sketches. I enjoyed reading this article.
Thank you for the kind words.
Leave a Reply Cancel reply
Your email address will not be published. Required fields are marked *
Mainsheet Rigging Diagram: A Comprehensive Guide
by Emma Sullivan | Aug 9, 2023 | Sailboat Maintenance
==Short answer mainsheet rigging diagram:== The mainsheet rigging diagram is a visual representation that outlines the setup and configuration of the mainsheet system on a sailboat. It typically includes details such as the location of blocks, cleats, and other hardware, as well as the path that the mainsheet follows. This diagram helps sailors understand and follow correct rigging procedures for optimal sail handling and control.
Understanding the Basics: A Step-by-Step Guide to Mainsheet Rigging Diagram
Welcome to our blog section where we dive into the nitty-gritty details of mainsheet rigging diagrams. If you’re new to sailing or just starting to familiarize yourself with this important aspect of boat handling, this step-by-step guide will provide you with all the necessary information in a professional yet witty and clever manner.
First things first, let’s understand the basics . A mainsheet rigging diagram is essentially a visual representation of how different components come together to control the tension and angle of your mainsail. It acts as your roadmap for properly setting up and adjusting your mainsheet system, ensuring optimal performance on the water .
Now, let’s break it down step by step:
Step 1: Identify the Components A good rigging diagram will clearly identify all the key components involved in your mainsheet setup. This includes the mainsheet itself, blocks, cleats, traveler car (if applicable), boom vang (if present), and any other relevant hardware. Understanding each component beforehand is essential for comprehending how they interact with one another.
Step 2: Determine Attachment Points Next, refer to your rigging diagram to find out where each component needs to be attached on your boat. The diagram will typically display specific locations such as boom attachment point, traveler car track position, or mast base attachment. Proper attachment ensures that everything is in its place, allowing for smooth operation during sailing maneuvers.
Step 3: Follow Line Pathways Lines play a crucial role in main control systems; therefore it is vital to follow their designated pathways as shown in the rigging diagram. These pathways illustrate how the lines route through blocks, fairleads or around various sheaves on both ends (boom and deck). Pay attention to any twists or crosses indicated on the diagram – avoiding these can prevent line jams when under load.
Step 4: Tackle Block Configuration Understanding block configurations outlined in your rigging diagram helps you achieve the right mechanical advantage. It may feature single, double, or even triple blocks, and understanding their set-up assists in distributing the load appropriately. Additionally, some diagrams might incorporate purchase systems using various line lengths to further enhance control.
Step 5: Adjust Tensions and Angles Lastly, your rigging diagram will provide information on how to adjust tensions and angles for different sailing conditions. It can include tips on optimal mainsheet tension for upwind versus downwind sailing or advice on adjusting boom height using a vang. This knowledge enables you to fine-tune your sail trim and maximize performance throughout your voyage .
So there you have it – a comprehensive step-by-step guide to mainsheet rigging diagrams! Following these instructions will ensure that you have a solid grasp of how all the components fit together, how lines should be routed, and how to make necessary adjustments when sailing.
Remember, while the topic might seem technical at first glance, we believe injecting some wit and cleverness into the explanation can make learning more enjoyable. So embrace this guide as your key to mastering mainsheet rigging diagrams with style!
How to Properly Set Up a Mainsheet Rigging Diagram: A Comprehensive Overview
Mastering the art of sailing involves not only skillful navigation but also a deep understanding of the recommended rigging diagram for your mainsheet. The mainsheet, which is responsible for controlling the position of the mainsail, plays a crucial role in dictating the overall performance and maneuverability of your sailboat. In this comprehensive guide, we will unravel the intricacies of setting up a mainsheet rigging diagram flawlessly. So grab your favorite maritime beverage and let’s dive right in!
The first step in establishing an impeccable mainsheet rigging diagram is selecting the appropriate equipment. Your choice of hardware will strongly influence how efficiently you are able to adjust and control the tension on your mainsail. Opt for high-quality blocks, preferably ball bearing ones, as they reduce friction and allow for smooth sheeting. Remember that investing in quality hardware now will save you from headaches later on when battling against strong winds or trying to make precise adjustments on gusty days.
Now that we have our top-notch equipment ready, let’s move on to positioning our blocks effectively along with all necessary lines (sheet) involved in this setup. It’s essential to ensure that there are no unnecessary twists or tangles in any part of the system as they drag down performance while causing unneeded frustration.
Begin by attaching one end of your sheet to a fixed point near the stern side of your boat . This point should be appropriately positioned for easy reach from your desired helm location—a smart sailor always plans ahead! Make sure the sheet runs freely through each block without any abrasion points or sharp corners that could snag it during rapid movements—smooth sailing is what we aim for here.
Next, work your way towards those strategic locations where blocks need affixing – typically at multiple points along either side deck or cabin roof – depending on the size and design of your vessel. These attachment points should be selected judiciously, considering factors such as angle, load distribution, and accessibility. Securing these blocks with reinforced backing plates or similar reinforcements will provide extra support, particularly in conditions that warrant additional strength.
Now let’s talk about the main sheeting technique—the final piece of the puzzle that brings your mainsheet rigging diagram to life! When properly executed, this technique allows you to gain full control over the position of your mainsail effortlessly. The most common approach is a 2:1 purchase system, offering mechanical advantage while maintaining manageable loads on your hands.
To achieve this setup, start by taking a free-running end from one of the blocks along the cabin roof or side deck and lead it around the backside of the mast towards an adjacent block located on the opposite side. Once there, thread it through this second block (which forms an inverted “V” shape with its counterpart) and bring it back towards you—forming what appears to be a rather fancy pulley system!
By doing so, you essentially create two segments of line – each running under different sides of your boom – that can be tied together using a simple knot or shackle hitch. This clever arrangement doubles up your pulling power without needing Popeye-like forearms to control sail tensions effectively—a truly elegant solution!
It’s worth mentioning that personal preferences might affect how you choose to set up your mainsheet rigging diagram. Some sailors opt for alternative systems like a 3:1 or even 4:1 purchase configuration for added convenience in rougher weather conditions or on behemoth-sized boats with correspondingly larger sails .
However, regardless of the sophisticated upgrades one may consider down the line, understanding and mastering the fundamentals we’ve discussed is vital before venturing into more complex setups. Take time to observe how everything interacts as you adjust sail trim and experiment with different adjustments both at sea and dockside – knowledge always grows best through hands-on experience.
In conclusion, setting up a mainsheet rigging diagram properly is a skill that every serious sailor should possess. By investing in top-quality equipment, positioning blocks effectively, and mastering proven sheeting techniques, you’ll gain complete control over your mainsail’s positioning—a game-changer when it comes to developing superb sailing skills. So go ahead, grab that sketchpad, and embark on the journey of designing the perfect mainsheet rigging diagram for your beloved vessel!
Frequently Asked Questions about Mainsheet Rigging Diagrams Answered
If you’re a sailing enthusiast or a boat owner, chances are you’ve heard about mainsheet rigging diagrams. These diagrams play an important role in understanding and setting up the mainsheet system on your sailboat. In this blog post, we will answer some of the frequently asked questions about mainsheet rigging diagrams, providing you with a detailed and professional explanation.
Q: What is a mainsheet rigging diagram? A: A mainsheet rigging diagram is a visual representation of how the components of your boat’s mainsheet system are connected and configured. It demonstrates how the various lines, blocks, travelers, and other hardware come together to create an efficient and functional setup for controlling the mainsail.
Q: Why are mainsheet rigging diagrams important? A: Mainsheet rigging diagrams serve as invaluable references for both beginners and experienced sailors . They help ensure that all components of the mainsheet system are correctly installed and properly functioning, promoting safety while maximizing sailing performance. Additionally, these diagrams make it easier to troubleshoot any issues that may arise during sailing.
Q: How do I read a mainsheet rigging diagram? A: Reading a mainsheet rigging diagram involves understanding the various symbols, lines, and labels used to represent different elements of the rigging system. Typically found in manuals or manufacturer guides, these diagrams often feature labeled arrows indicating line direction or block rotation. Familiarizing yourself with common symbols such as circles for blocks or triangles for shackles will greatly aid your comprehension.
Q: Can I customize my boat’s main sheeting arrangement using these diagrams? A: Absolutely! Mainsheet rigging diagrams not only provide guidance on standard setups but also give you options for customization based on your specific requirements or preferences. Whether it’s adjusting block placements, choosing different types of hardware, or modifying line configurations – these diagrams offer a starting point for personalizing your mainsheet setup to enhance performance and comfort.
Q: Are there any general tips for rigging the main sheet correctly? A: While specifics may vary depending on your boat’s design and rigging system, there are a few general tips to keep in mind when rigging the mainsheet. Firstly, ensure that all lines run freely through blocks or travelers without unnecessary friction or interference. Secondly, choose appropriate line sizes and materials, considering factors like load capacity and ease of handling. Lastly, regularly inspect and maintain your fittings, lines, and hardware to prevent failures or accidents.
Q: Where can I find a mainsheet rigging diagram for my boat? A: You can typically find mainsheet rigging diagrams in your boat’s owner’s manual or manufacturer’s guide. These resources are often available online from the manufacturers’ websites as downloadable PDFs. If you’re unable to find a diagram specific to your boat model, numerous sailing forums and communities share knowledge and useful resources where fellow sailors post their own diagrams.
In conclusion, mainsheet rigging diagrams hold significant importance in the sailing world. These comprehensive visual representations assist boaters in setting up their mainsail systems correctly while allowing room for customization. Reading these diagrams is crucial for ensuring safety onboard and optimizing sailing performance. So take advantage of this essential resource to make the most out of your sailing adventures !
Exploring the Benefits of Using a Mainsheet Rigging Diagram in Sailing
Title: Unraveling the Advantages of Utilizing a Mainsheet Rigging Diagram in the Art of Sailing
Introduction: Sailing, an age-old practice that seamlessly combines art and science, continues to captivate enthusiasts and novices alike. The precision and elegance involved in navigating the waters harnesses various elements, one of which is the mainsheet rigging diagram. Regardless of your sailing expertise, understanding the benefits of employing a mainsheet rigging diagram can greatly enhance your experience on the open sea. In this blog post, we will delve into the intricate world of sailing, unraveling why utilizing a mainsheet rigging diagram is both indispensable and enlightening.
1. Setting Sail for Success: Navigating through intricate maneuvers and controlling sail trim requires meticulous attention to detail. By utilizing a mainsheet rigging diagram, sailors gain access to a comprehensive visual representation that outlines every element involved in adjusting the main sheet. This invaluable tool acts as a roadmap, guiding sailors towards achieving their desired sail settings with precision and accuracy.
2. Enhanced Maneuverability: A well-configured mainsheet rigging diagram equips sailors with enhanced maneuverability capabilities by illustrating various configurations under different wind conditions – from light breezes to strong gusts. Through carefully planned adjustments outlined in the diagram, sailors can respond swiftly to changing conditions and optimize performance while maneuvering effortlessly through tight turns or executing challenging maneuvers.
3. Simplified Coordination: Collaboration between crew members is crucial during sailing expeditions, especially when it comes to handling the mainsail efficiently. Thanks to a well-drawn mainsheet rigging diagram, team coordination becomes simplified as everyone is referencing the same guidebook for execution and communication purposes. The clear depiction of specific lines or attachments ensures seamless coordination between crew members, eliminating confusion and promoting efficiency when making necessary adjustments.
4. Improve Safety Measures: Sailing inherently involves exposure to potentially adverse weather conditions at times. By utilizing a mainsheet rigging diagram, sailors gain an added layer of safety as the diagram acts as a preemptive measure against accidental mishaps. The diagram clearly outlines how various elements interact, thus allowing sailors to identify and resolve potential issues before they escalate into potentially dangerous situations .
5. Empowering Learning Experience: For beginners or even seasoned sailors seeking to enhance their skills, a mainsheet rigging diagram serves as an invaluable educational tool. Examining and understanding the intricate details of sail trim adjustments and the associated variables helps broaden one’s understanding of the principles governing maneuvering on water. Absorbing this knowledge through interactive exploration of the diagram sharpens sailing intuition and enables informed decision-making while on the sea.
Conclusion: Embracing the benefits offered by a mainsheet rigging diagram in sailing is undoubtedly a wise choice for any seafarer aiming to elevate their performance, coordination, safety measures, and overall navigational prowess. This comprehensive visual representation uniquely combines artistry with ingenuity to simplify complex maneuvers effectively. Whether you are an experienced sailor or embark on your maiden voyage, it is crucial to recognize that employing this visual aid will enhance your experience on the open waters significantly – ensuring smooth sailing every step of the way!
Mastering the Art of Mainsheet Rigging: Essential Tips and Tricks
Rigging your mainsheet is an essential skill for any sailor , whether you’re a seasoned pro or just starting out. The mainsheet is one of the most crucial control lines on your sailboat , responsible for trimming and shaping your sail’s angle to the wind. Getting it right can make all the difference in your sailing performance, and that’s why we’re here to share some invaluable tips and tricks to help you master mainsheet rigging like a true professional.
1. Understanding the Basics: First things first, let’s get familiar with the basics of mainsheet rigging. The mainsheet typically runs from a block on the boom through multiple blocks on deck before ending at a cleat or winch. This setup allows you to adjust tension and trim, affecting both boat speed and steering response.
2. Finding the Sweet Spot: The optimal position for your mainsheet block attachment points is essential for efficient sail control. Experiment with different positions until you find what feels comfortable and allows for easy adjustments while maintaining a proper angle between boom and cockpit.
3. Choosing the Right Materials: Investing in high-quality mainsheet lines can significantly enhance your sailing experience . Look for durable materials that offer low stretch, such as Dyneema or Spectra fibers, which provide superior strength without sacrificing flexibility.
4. Length Matters: It’s crucial to choose an appropriate length for your mainsheet line based on your boat’s dimensions and sailing conditions. Too short, and you won’t have enough leverage; too long, and handling becomes cumbersome. Find that sweet spot where ease of use meets efficiency.
5. Tidy Organization: Keep your mainsheet system tidy by using organizers or fairleads along your boat’s cabin top or cockpit coaming. These small guides redirect the sheet smoothly around corners or obstacles while reducing frictional losses, ensuring fluid adjustments even under heavy load.
6. Friction-Free Fittings: When setting up your mainsheet rigging, pay attention to areas where friction may occur. Consider using ball-bearing swivel blocks or low-friction rings to reduce resistance, allowing for smoother and more precise adjustments.
7. Controlling Boom Vang: The boom vang plays a crucial role in mainsail control, helping to maintain proper sail shape and control leech tension. Ensure your vang is properly rigged, adjusted, and easily accessible from the cockpit, allowing for quick modifications as wind conditions change.
8. Maintenance Matters: Just like any other equipment on your sailboat , regular maintenance is crucial for optimal performance. Inspect your mainsheet regularly for wear and tear, replace any worn-out components promptly, and keep everything clean and well-lubricated to ensure smooth operation.
9. Perfecting Your Technique: Practice makes perfect when it comes to mainsheet rigging! Experiment with different trimming techniques such as sheeting in incrementally or jumping from one trim point to another during acceleration. With time and experience, you’ll develop a nuanced understanding of how best to optimize sail shape given varying wind strengths and angles.
10. Safety Comes First: Lastly, always prioritize safety while rigging your mainsheet system . Avoid standing directly in front of the boom when releasing tension rapidly or handling heavy loads. Consider wearing gloves when working with lines under high pressure to avoid rope burns or injury.
Remember that mastering the art of mainsheet rigging takes time and practice; there’s no substitute for hands-on experience out on the water. By following these essential tips and tricks, however, you’ll be well on your way toward honing this critical skillset – all while enjoying the thrill and satisfaction of improved sailing performance.
Troubleshooting Common Issues with Mainsheet Rigging Diagrams
Title: Decoding the Enigma: Troubleshooting Common Issues with Mainsheet Rigging Diagrams
Introduction: When it comes to sailing, understanding and mastering the art of mainsheet rigging is imperative for smooth sailing. However, even the most experienced sailors can find themselves scratching their heads in confusion when faced with intricate rigging diagrams . Fear not, dear sailors, for today we shall dive into the depths of main sheet rigging diagrams and uncover common issues that plague many navigators. So grab your compass and join us on this thrilling adventure !
1. Demystifying Complexity: Mainsheet rigging diagrams may oftentimes resemble a complex tapestry woven by mischievous water sprites. However, fear not! The key to cracking this enigmatic code lies in approaching them with patience and logic. Break down the diagram into smaller sections, identify each component diligently, and let your curiosity be your guide.
2. Tangled Lines: A Gordian Knot Situation One of the most common woes encountered while deciphering mainsheet rigging diagrams is dealing with tangled lines. It’s as if Medusa herself decided to pay a visit to our sailboat! To combat this issue, mentally trace each line’s path throughout the diagram while referring to its corresponding written description. By tackling one line at a time, you’ll transform the figurative knots into a smoothly flowing sea breeze.
3. Lost in Translation: Bridging the Gap Sometimes, despite our efforts to comprehend every detail within a rigging diagram , there remains a lingering sense of confusion—an invisible language barrier between words and symbols. In such situations, turn to online resources or sailing communities where fellow adventurers may have tackled similar hurdles before you. Exploring different interpretations and perspectives can often provide valuable insights that bridge this communication gap.
4. Attention All Hands! Beware of Amplified Scale: Beware! The scale provided in mainsheet rigging diagrams isn’t always a true representation of reality. Properly understanding the scale is crucial in ensuring accurate rigging . Utilize measuring tools, such as rulers or calipers, to determine precise measurements and adjust them accordingly on your own personal diagram or setup. Vigilance in this regard will prevent unexpected surprises during the rigging process.
5. Know Your Knots: Ensuring a Secure Rig Just as an anchor secures a ship against the fury of the sea, knots are essential for maintaining rigging integrity. When deciphering mainsheet rigging diagrams, pay close attention to the types of knots employed throughout the system. Familiarizing yourself with these specific knots ensures efficient knot tying and enhances overall safety while cruising through waters both smooth and turbulent.
Conclusion: Navigating through mainsheet rigging diagrams can feel like unwrapping a mysterious treasure map leading us to adventure-filled destinations on land uncharted. While they may initially seem daunting, approaching these diagrams with patience and good humor allows us to overcome any obstacles that cross our path. So brave sailors, let curiosity be your compass and tenacity your guiding star—oh captain! Set sail confidently into the world of mainsheet rigging diagrams and conquer any challenges that await!
Recent Posts
- Approaching a Mooring Buoy: Essential Tips for Safe Navigation
- Best Tiller Autopilot: Enhance Your Sailing Experience
- Nautical Navigator: Essential Tools and Techniques for Seamanship
- Sail Making Material: A Comprehensive Guide
- 2 Person Dinghy: The Ultimate Guide to Choosing the Perfect Boat
- Sailboat Gear and Equipment
- Sailboat Lifestyle
- Sailboat Maintenance
- Sailboat Racing
- Sailboat Tips and Tricks
- Sailboat Types
- Sailing Adventures
- Sailing Destinations
- Sailing Safety
- Sailing Techniques
Sail Rigs And Types - The Only Guide You Need

Last Updated by
Daniel Wade
June 15, 2022
A well-designed sailboat is a thing of pure beauty. Whether you're a proud owner of one, a guest on one, or a shore-side admirer, you'll fall in love with the gliding sails, the excitement of a race, and the eco-friendly nature of these sophisticated yet magnificent vessels. With good sails, great design, and regular maintenance, sails and rigs are an important part of a sailboat.
If you’re thinking about going sailing, one of the first things you have to understand is the variety of modern sail plans. Unlike old sailboats, modern sailboats don't need huge, overlapping headsails and multiple masts just to get moving. In the past, when sailboats were heavy, keels were long, the only way to get the boat moving was with a massive relative sail area. You needed as much square footage as you could just to get your sailboat moving. But with the invention of fiberglass hulls, aluminum or composite masts, high-tensile but low diameter lines and stats, and more efficient sails, sailboats no longer need to plan for such large sail plans.. Still, there are various rig styles, from the common sloop, to the comfortable cat-rig, to the dual masted ketch and schooner, there are various sail types and rigs to choose from. The most important thing is to know the different types of sails and rigs and how they can make your sailing even more enjoyable.
There are different types of sails and rigs. Most sailboats have one mainsail and one headsail. The mainsail is generally fore-and-aft rigged and is triangular shaped. Various conditions and courses require adjustments to the sails on the boats, and, other than the mainsail, most boats can switch out their secondary sail depending on various conditions.. Do you want to sail upwind or go downwind? You cannot hoist just any sail and use it. It's, therefore, of great importance to understand how and when to use each sail type.
In this in-depth article, we'll look at various sail types and rigs, and how to use them to make your sailing more enjoyable.
Table of contents
Different Sail Types
It is perhaps worth noting that a sailboat is only as good as its sails. The very heart of sailing comes in capturing the wind using artfully trimmed sails and turning that into motion. . Ask any good sailor and he'll tell you that knowing how and when to trim the sails efficiently will not only improve the overall performance of your boat but will elevate your sailing experience. In short, sails are the driving force of sailboats.
As such, it's only natural that you should know the different types of sails and how they work. Let's first highlight different sail types before going into the details.
- Jib - triangular staysail
- Spinnaker - huge balloon-shaped downwind sail for light airs
- Genoa - huge jib that overlaps the mainsail
- Gennaker - a combination of a spinnaker and genoa
- Code zero - reaching genoa for light air
- Windseeker - tall, narrow, high-clewed, and lightweight jib
- Drifter - versatile light air genoa made from particularly lightweight cloth
- Storm jib - a smaller jib meant for stormy conditions
- Trysail - This is a smaller front-and-aft sail for heavy weather
The mainsail is the principal sail on a boat. It's generally set aft of the mainmast. Working together with the jib, the mainsail is designed to create the lift that drives the sailboat windward. That being said, the mainsail is a very powerful component that must always be kept under control.
As the largest sail, and the geometric center of effort on the boat, the mainsail is tasked with capturing the bulk of the wind that's required to propel the sailboat. The foot, the term for the bottom of any sail, secures to the boom, which allows you to trim the sail to your heading. The luff, the leading edge of the sail, is attached to the mast. An idealized mainsail would be able to swing through trim range of 180°, the full semi-circle aft of the mast, though in reality, most larger boats don’t support this full range of motion, as a fully eased sail can occasionally be unstable in heavy breeze.
. As fully controlling the shape of the mainsail is crucial to sailing performance, there are many different basic mainsail configurations. For instance, you can get a full-batten mainsail, a regular mainsail with short battens, or a two-plus-two mainsail with two full-length battens. Hyper-high performance boats have even begun experimenting with winged sails which are essentially trimmable airplane wings! Moreover, there are numerous sail controls that change the shape by pulling at different points on the sail, boom, or mast. Reefing, for instance, allows you to shorten the sail vertically, reducing the amount of sail area when the boat is overpowered.
Features of a Mainsail
Several features will affect how a particular sail works and performs. Some features will, of course, affect the cost of the sail while others may affect its longevity. All in all, it's essential to decide the type of mainsail that's right for you and your sailing application.
Sail Battens, the Roach, and the Leech
The most difficult part of the sail to control, but also the most important, are the areas we refer to as the leech and the roach. The roach is the part of the sail that extends backwards past the shortest line between the clew, at the end of the boom, and the top of the mast. It makes up roughly the back third of the sail. The leech is the trailing edge of the sail, the backmost curve of the roach. Together, these two components control the flow of the air off the back of the sail, which greatly affects the overall sail performance. If the air stalls off the backside of the sail, you will find a great loss in performance. Many sail controls, including the boom vang, backstay, main halyard, and even the cunningham, to name a few, focus on keeping this curve perfect.
As for parts of the sail itself, battens control the overall horizontal shape of the sail. Battens are typically made from fiberglass or wood and are built into batten pockets. They're meant to offer support and tension to maintain the sail shape Depending on the sail technology you want to use, you may find that full battens, which extend from luff to leech, or short battens, just on the trailing edge, are the way to go. Fully battened sails tend to be more expensive, but also higher performance.
Fully Battened Mainsails
They're generally popular on racing multihulls as they give you a nice solid sail shape which is crucial at high speeds. In cruising sailboats , fully battened mainsails have a few benefits such as:
- They prevent the mainsail from ragging. This extends the life of the sail, and makes maneuvers and trimming easier for the crew.
- It provides shape and lift in light-air conditions where short-battened mainsails would collapse.
On the other hand, fully-battened mainsails are often heavier, made out of thicker material, and can chafe against the standing rigging with more force when sailing off the wind.
Short Battens
On the other hand, you can choose a mainsail design that relies mostly on short battens, towards the leech of the sail. This tends to work for lighter cloth sails, as the breeze, the headsail, and the rigging help to shape the sail simply by the tension of the rig and the flow of the wind. The battens on the leech help to preserve the shape of the sail in the crucial area where the air is flowing off the back of the sail, keeping you from stalling out the entire rig.
The only potential downside is that these short battens deal with a little bit of chafe and tension in their pockets, and the sail cloth around these areas ought to be reinforced. If your sails do not have sufficient reinforcement here, or you run into any issues related to batten chafe, a good sail maker should be able to help you extend the life of your sails for much less than the price of a new set.
How to Hoist the Mainsail
Here's how to hoist the mainsail, assuming that it relies on a slab reefing system and lazy jacks and doesn't have an in-mast or in-boom furling system.
- Maintain enough speed for steeragewhile heading up into the wind
- Slacken the mainsheet, boom vang, and cunningham
- Make sure that the lazy jacks do not catch the ends on the battens by pulling the lazy jacks forward.
- Ensure that the reefing runs are free to run and the proper reefs are set if necessary.
- Raise the halyard as far as you can depending on pre-set reefs.
- Tension the halyard to a point where a crease begins to form along the front edge
- Re-set the lazy jacks
- Trim the mainsail properly while heading off to your desired course
So what's Right for You?
Your mainsail will depend on how you like sailing your boat and what you expect in terms of convenience and performance. That being said, first consult the options that the boatbuilder or sailmakers suggest for your rig. When choosing among the various options, consider what you want from the sail, how you like to sail, and how much you're willing to spend on the mainsail.
The headsail is principally the front sail in a fore-and-aft rig. They're commonly triangular and are attached to or serve as the boat’s forestay. They include a jib and a genoa.
A jib is a triangular sail that is set ahead of the foremost sail. For large boats, the roto-furling jib has become a common and convenient way to rig and store the jib. Often working in shifts with spinnakers, jibs are the main type of headsails on modern sailboats. Jibs take advantage of Bournoulli’s Principle to break the incoming breeze for the mainsail, greatly increasing the speed and point of any boat. By breaking the incoming wind and channeling it through what we call the ‘slot,’ the horizontal gap between the leech of the jib and the luff of the mainsail, the jib drastically increases the efficiency of your mainsail. It additionally balances the helm on your rudder by pulling the bow down, as the mainsail tends to pull the stern down. .
The main aim of the jib is to increase the sail area for a given mast size. It improves the aerodynamics of the mainsails so that your sailboat can catch more wind and thereby sail faster, especially in light air
Using Jibs on Modern Sailboats
In the modern contexts, jib’s mainly serve increase the performance and overall stability of the mainsail. The jib can also reduce the turbulence of the mainsail on the leeward side.
On Traditional Vessels
Traditional vessels such as schooners have about three jibs. The topmast carried a jib topsail, the main foresail is called the jib, while the innermost jib is known as the staysail. The first two were employed almost exclusively by clipper ships.
How to Rig the Jibs
There are three basic ways to rig the jib.
Track Sheets - A relatively modern approach to the self-tacking jib, this entails placing all the trimming hardware on a sliding track forward of the mast. This means that on each tack, the hardware slides from one side of the boat to the other. This alleviates the need to switch sheets and preserves the trim angle on both sides, though it can be finnicky and introduce friction.
Sheet up the Mast - This is a very popular approach and for a good reason. Hoist the jib sheet up the mast high enough to ensure that there's the right tension through the tack. Whether internally or externally, the sheet returnsto the deck and then back to the cockpit just like the rest of the mast baselines. The fact the hardware doesn't move through the tacks is essential in reducing friction.
Sheet Forward - This method revolves around ensuring that the jib sheet stays under constant pressure so that it does not move through the blocks in the tacks. This is possible if the through-deck block is extremely close to the jib tack. Your only challenge will only be to return the sheet to the cockpit. This is, however, quite challenging and can cause significant friction.
Dual Sheeting - The traditional method, especially on smaller dinghies, though it is not self-tacking. This requires a two ended or two separate sheet system, where one sheet runs to a block on starboard, and the other to port. Whenever you tack or gybe, this means you have to switch which sheet is active and which is slack, which is ok for well crewed boats, but a potential issue on under-crewed boats.
Another important headsail, a genoa is essentially a large jib that usually overlaps the mainsail or extends past the mast, especially when viewed from the other side. In the past, a genoa was known as the overlapping jib and is technically used on twin-mast boats and single-mast sloops such as ketches and yawls. A genoa has a large surface area, which is integral in increasing the speed of the vessel both in moderate and light winds.
Genoas are generally characterized by the percentage they cover. In most cases, sail racing classes stipulate the limit of a genoa size. In other words, genoas are usually classified by coverage.
Top-quality genoa trim is of great importance, especially if the wind is forward of the beam. This is because the wind will first pass over the genoa before the mainsail. As such, a wrongly sheeted genoa can erroneously direct the wind over the mainsail,spelling doom to your sailing escapades. While you can perfectly adjust the shape of a genoa using the mast rake, halyard tension, sheet tension, genoa car positioning, and backstay tension, furling and unfurling a genoa can be very challenging, especially in higher winds.
That being said, here are the crucial steps to always keep in mind.
- Unload and ease the loaded genoa sheet by going to a broad reach
- Do not use the winch; just pull on the furling line
- Keep a very small amount of pressure or tension on the loaded genoa sheet
- Secure the furling line and tighten the genoa sheets
- Get on the proper point of sail
- Have the crew help you and release the lazy genoa sheets
- Maintain a small tension while easing out the furling line
- Pull-on a loaded genoa sheet
- Close or cleat off the rope clutch when the genoa is unfurled
- Trim the genoa
To this end, it's important to note that genoas are popular in some racing classes. This is because they only categorize genoas based on the fore-triangle area covered, which essentially allows a genoa to significantly increase the actual sail area. On the contrary, keep in mind that tacking a genoa is quite a bit harder than a jib, as the overlapping area can get tangled with the mast and shrouds. It's, therefore, important to make sure that the genoa is carefully tended, particularly when tacking.
Downwind Sails
Modern sailboats are a lot easier to maneuver thanks to the fore-and-aft rig. Unfortunately, when sailing downwind they catch less wind, and downwind sails are a great way of reducing this problem. They include the spinnaker and the gennaker.
A spinnaker will, without a doubt, increase your sailing enjoyment. But why are they often buried in the cabin of cruising boats? Well, the first few attempts to rig and set a spinnaker can be difficult without enough help and guidance. Provided a solid background, however, spinnakers are quite straightforward and easy to use and handle with teamwork and enough practice. More importantly, spinnakers can bring a light wind passage to life and can save your engine.
Spinnakers are purposely designed for sailing off the wind; they fill with wind and balloon out in front of your sailboat. Structured with a lightweight fabric such as nylon, the spinnaker is also known as a kite or chute, as they look like parachutes both in structure and appearance.
A perfectly designed spinnaker should have taut leading edges when filled. This mitigates the risk of lifting and collapsing. A spinnaker should have a smooth curve when filled and devoid of depressions and bubbles that might be caused by the inconsistent stretching of the fabric. The idea here is that anything other than a smooth curve may reduce the lift and thereby reduce performance.
Types of Spinnakers
There are two main types of spinnakers: symmetric spinnakers and asymmetric spinnakers.
Asymmetric Spinnakers
Flown from a spinnaker pole or bowsprit fitted to the bow of the boat, asymmetric spinnakers resemble large jibs and have been around since the 19th century. The concept of asymmetric spinnaker revolves around attaching the tack of the spinnaker at the bow and pulling it around during a gybe.
Asymmetric spinnakers have two sheets just like a jib., These sheets are attached at the clew and never interact directly with the spinnaker pole. This is because the other corner of the spinnaker is fixed to the bowsprit. The asymmetric spinnaker works when you pull in one sheet while releasing the other. This makes it a lot easier to gybe but is less suited to sailing directly downwind. There is the loophole of having the asymmetric spinnaker gybed to the side opposite of the boom, so that the boat is sailing ‘wing-on-wing,’ though this is a more advanced maneuver, generally reserved for certain conditions and tactical racing situations.
On the contrary, the asymmetric spinnaker is perfect for fast planing dinghies. This is because such vessels have speeds that generate apparent wind forward. Because asymmetrics, by nature, prefer to sail shallower downwind angles, this apparent wind at high speeds makes the boat think that it is sailing higher than it really is, allowing you to drive a little lower off the breeze than normal. . In essence, the asymmetric spinnaker is vital if you're looking for easy handling.
Symmetric Spinnakers
Symmetric spinnakers are a classic sail type that has been used for centuries for controlling boats by lines known as a guy and a sheet. The guy, which is a windward line, is attached to the tack of the sail and stabilized by a spinnaker pole. The sheet, which is the leeward line, is attached to the clew of the spinnaker and is essential in controlling the shape of the spinnaker sail.
When set correctly, the leading edges of the symmetric spinnaker should be almost parallel to the wind. This is to ensure that the airflow over the leading edge remains attached. Generally, the spinnaker pole should be at the right angles to the apparent wind and requires a lot of care when packing.
The main disadvantage of this rig is the need to gybe the spinnaker pole whenever you gybe the boat. This is a complicated maneuver, and is one of the most common places for spinnakers to rip or get twisted. If, however, you can master this maneuver, you can sail at almost any angle downwind!
How to Use Spinnaker Effectively
If you decide to include the spinnakers to your sailboat, the sailmaker will want to know the type of boat you have, what kind of sailing you do, and where you sail. As such, the spinnaker that you end up with should be an excellent and all-round sail and should perform effectively off the breeze
The type of boat and where you'll be sailing will hugely influence the weight of your spinnaker cloth. In most cases, cruising spinnakers should be very light, so if you've decided to buy a spinnaker, make sure that it's designed per the type of your sailboat and where you will be sailing. Again, you can choose to go for something lighter and easier to set if you'll be sailing alone or with kids who are too young to help.
Setting up Spinnakers
One of the main reasons why sailors distrust spinnakers is because they don't know how to set them up. That being said, a perfectly working spinnaker starts with how you set it up and this revolves around how you carefully pack it and properly hook it up. You can do this by running the luff tapes and ensuring that the sails are not twisted when packed into the bag. If you are using large spinnakers, the best thing to do is make sure that they're set in stops to prevent the spinnakers from filling up with air before you even hoist them fully.
But even with that, you cannot fully set the spinnaker while sailing upwind. Make sure to bear away and have your pole ready to go as you turn downwind. You should then bear away to a reach before hoisting. Just don't hoist the spinnakers from the bow as this can move the weight of the crew and equipment forward.
Used when sailing downwind, a gennaker is asymmetric sail somewhere between a genoa and a spinnaker. It sets itself apart because it gennaker is a free-flying asymmetric spinnaker but it is tacked to the bowsprit like the jib.
Let's put it into perspective. Even though the genoa is a great sail for racing and cruising, sailors realized that it was too small to be used in a race or for downwind sail and this is the main reason why the spinnaker was invented. While the spinnakers are large sails that can be used for downwind sail, they are quite difficult to handle especially if you're sailing shorthanded. As such, this is how a gennaker came to be: it gives you the best of both worlds.
Gennakers are stable and easy to fly and will add to your enjoyment and downwind performance.
The Shape of a Gennaker
As we've just noted, the gennaker is asymmetrical. It doesn't attach to the forestay like the genoa but has a permanent fitting from the mast to bow. It is rigged exactly like a spinnaker but its tack is fastened to the bowsprit. This is fundamentally an essential sail if you're looking for something to bridge the gap between a genoa and a spinnaker.
Setting a Gennaker
When cruising, the gennaker is set with the tack line from the bow, a halyard, and a sheet that's led to the aft quarter. Attach the tack to a furling unit and attach it to a fitting on the hull near the very front of the sailboat. You can then attach the halyard that will help in pulling it up to the top of the mast before attaching it to the clew. The halyard can then run back to the winches to make the controlling of the sail shape easier, just like when using the genoa sail.
In essence, a gennaker is a superb sail that will give you the maximum versatility of achieving the best of both a genoa and a spinnaker, especially when sailing downwind. This is particularly of great importance if you're cruising by autopilot or at night.
Light Air Sails
Even though downwind sails can be used as light air sails, not all light air sails can be used for downwind sailing. In other words, there's a level of difference between downwind sails and light air sails. Light air sails include code zero, windseeker, and drifter reacher.
A cross between an asymmetrical spinnaker and a genoa, a code zero is a highly modern sail type that's generally used when sailing close to the wind in light air. Although the initial idea of code zero was to make a larger genoa, it settled on a narrow and flat spinnaker while upholding the shape of a genoa.
Modern boats come with code zero sails that can be used as soon as the sailboat bears off close-hauled even a little bit. It has a nearly straight luff and is designed to be very flat for close reaching. This sail is designed to give your boat extra performance in light winds, especially in boats that do not have overlapping genoas. It also mitigates the problem of loss of power when you are reaching with a non-overlapping headsail. Really, it is closer to a light air jib that sacrifices a little angle for speed.
In many conditions, a code zero sail can go as high as a sailboat with just a jib. By hoisting a code zero, you'll initially have to foot off about 15 degrees to fill it and get the power that you require to heel and move the boat. The boat will not only speed up but will also allow you to put the bow up while also doing the same course as before you set the zero. In essence, code zero can be an efficient way of giving your boat about 30% more speed and this is exactly why it's a vital inventory item in racing sailboats.
When it comes to furling code zero, the best way to do it is through a top-down furling system as this will ensure that you never get a twist in the system.
Generally used when a full size and heavier sail doesn't stay stable or pressurized, a windseeker is a very light sail that's designed for drifting conditions. This is exactly why they're designed with a forgiving cloth to allow them to handle these challenging conditions.
The windseeker should be tacked at the headstay with two sheets on the clew. To help this sail fill in the doldrums, you can heel the boat to whatever the apparent leeward side is and let gravity help you maintain a good sail shape while reaching.The ideal angle of a windseeker should be about 60 degrees.
Though only used in very specific conditions, the windseeker is so good at this one job that it is worth the investment if you plan on a long cruise. Still, you can substitute most off the breeze sails for this in a pinch, with slightly less performance gain, likely with more sacrifices in angle to the breeze.
Drifter Reacher
Many cruising sailors often get intimidated by the idea of setting and trimming a drifter if it's attached to the rig at only three corners or if it's free-flying. But whether or not a drifter is appropriate for your boat will hugely depend on your boat's rig, as well as other specific details such as your crew's ability to furl and unfurl the drifter and, of course, your intended cruising grounds.
But even with that, the drifter remains a time-honored sail that's handy and very versatile. Unlike other light air sails, the drifter perfectly carries on all points of sails as it allows the boat to sail close-hauled and to tack. It is also very easy to control when it's set and struck. In simpler terms, a drifter is principally a genoa that's built of lightweight fabric such as nylon. Regardless of the material, the drifter is a superb sail if you want to sail off a lee shore without using the genoa.
Generally stronger than other regular sails, stormsails are designed to handle winds of over 45 knots and are great when sailing in stormy conditions. They include a storm jib and a trysail.
If you sail long and far enough, chances are you have or will soon be caught in stormy conditions. Under such conditions, storm jibs can be your insurance and you'll be better off if you have a storm jib that has the following features:
- Robustly constructed using heavyweight sailcloth
- Sized suitably for the boat
- Highly visible even in grey and white seas
That's not all; you should never go out there without a storm jib as this, together with the trysail, is the only sails that will be capable of weathering some of nature's most testing situations.
Storm jibs typically have high clews to give you the flexibility of sheet location. You can raise the sail with a spare halyard until its lead position is closed-hauled in the right position. In essence, storm jib is your insurance policy when out there sailing: you should always have it but always hope that you never have to use it.
Also known as a spencer, a trysail is a small, bright orange, veritably bullet-proof, and triangular sail that's designed to save the boat's mainsail from winds over 45 knots and works in the same way as a storm jib. It is designed to enable you to make progress to windward even in strong and stormy winds.
Trysails generally use the same mast track as the mainsail but you have to introduce the slides into the gate from the head of the trysail.
There are two main types of rigs: the fore-and-aft rig and the square rigg.
Fore-and-aft Rig
This is a sailing rig that chiefly has the sails set along the lines of the keel and not perpendicular to it. It can be divided into three categories: Bermuda rig, Gaff rig, and Lateen rig.
Bermuda Rig - Also known as a Marconi rig, this is the typical configuration of most modern sailboats. It has been used since the 17th century and remains one of the most efficient types of rigs. The rig revolves around setting a triangular sail aft of the mast with the head raised to the top of the mast. The luff should run down the mast and be attached to the entire length.
Gaff Rig - This is the most popular fore-and-aft rig on vessels such as the schooner and barquentine. It revolves around having the sail four-cornered and controlled at its peak. In other words, the head of the mainsail is guided by a gaff.
Lateen Rig - This is a triangular fore-and-aft rig whereby a triangular sail is configured on a long yard that's mounted at a given angle of the mast while running in a fore-and-aft direction. Lateen rig is commonly used in the Indian Ocean and the Mediterranean.
Square Rigged
This is a rig whereby the mainsails are arranged in a horizontal spar so that they're square or vertical to the mast and the keel of the boat. The square rig is highly efficient when sailing downwind and was once very popular with ocean-going sailboats.
Unquestionably, sailing is always pleasurable. Imagine turning off the engine of your boat, hoisting the sails, and filling them with air! This is, without a doubt, a priceless moment that will make your boat keel and jump forward!
But being propelled by the noiseless motion of the wind and against the mighty currents and pounding waves of the seas require that you know various sail types and how to use them not just in propelling your boat but also in ensuring that you enjoy sailing and stay safe. Sails are a gorgeous way of getting forward. They remain the main fascination of sailboats and sea cruising. If anything, sails and boats are inseparable and are your true friends when out there on the water. As such, getting to know different types of sails and how to use them properly is of great importance.
All in all, let's wish you calm seas, fine winds, and a sturdy mast!
Related Articles
I've personally had thousands of questions about sailing and sailboats over the years. As I learn and experience sailing, and the community, I share the answers that work and make sense to me, here on Life of Sailing.
by this author
Learn About Sailboats
Sailboat Parts
Most Recent

What Does "Sailing By The Lee" Mean?
October 3, 2023

The Best Sailing Schools And Programs: Reviews & Ratings
September 26, 2023
Important Legal Info
Lifeofsailing.com is a participant in the Amazon Services LLC Associates Program, an affiliate advertising program designed to provide a means for sites to earn advertising fees by advertising and linking to Amazon. This site also participates in other affiliate programs and is compensated for referring traffic and business to these companies.
Similar Posts

Affordable Sailboats You Can Build at Home
September 13, 2023

Best Small Sailboat Ornaments
September 12, 2023

Discover the Magic of Hydrofoil Sailboats
December 11, 2023
Popular Posts

Best Liveaboard Catamaran Sailboats
December 28, 2023

Can a Novice Sail Around the World?
Elizabeth O'Malley

4 Best Electric Outboard Motors

How Long Did It Take The Vikings To Sail To England?

10 Best Sailboat Brands (And Why)
December 20, 2023

7 Best Places To Liveaboard A Sailboat
Get the best sailing content.
Top Rated Posts
Lifeofsailing.com is a participant in the Amazon Services LLC Associates Program, an affiliate advertising program designed to provide a means for sites to earn advertising fees by advertising and linking to Amazon. This site also participates in other affiliate programs and is compensated for referring traffic and business to these companies. (866) 342-SAIL
© 2024 Life of Sailing Email: [email protected] Address: 11816 Inwood Rd #3024 Dallas, TX 75244 Disclaimer Privacy Policy
Currency: GBP
- Worldwide Delivery
Mooring Warps and Mooring Lines
- LIROS 3 Strand Polyester Mooring Warps
- LIROS Braided Dockline Mooring Warps
- LIROS Classic Mooring Warps
- LIROS Green Wave 3 Strand Mooring Warps
- LIROS Handy Elastic Mooring Warps
- LIROS Moorex12 Mooring Warps
- LIROS Octoplait Polyester Mooring Warps
- LIROS Polypropylene Floating Mooring Warps
- LIROS Super Yacht Mooring Polyester Docklines
- Marlow Blue Ocean Dockline
Mooring Accessories
- Mooring Cleats and Fairleads
- Mooring Compensators
- Mooring Shackles
- Mooring Swivels
Mooring Strops
- LIROS 3 Strand Nylon Mooring Strops
- LIROS Anchorplait Nylon Mooring Strops
- Small Boat and RIB Mooring Strops
Mooring Bridles
- V shape Mooring Bridles
- Y shape Mooring Bridles
Mooring Strops with chain centre section
- 3 Strand / Chain / 3 Strand
- Anchorplait / Chain / Anchorplait
Bonomi Mooring Cleats
- Majoni Fenders
- Polyform Norway Fenders
- Dock Fenders
- Fender Ropes and Accessories
- Ocean Inflatable Fenders
Mooring Buoys
Max power bow thrusters.
- Coastline Bow Thruster Accessories
50 metre / 100 metre Rates - Mooring
Mooring information.
- Mooring Warps Size Guide
- Mooring Lines - LIROS Recommended Diameters
- Mooring Rope Selection Guide
- Mooring Warp Length and Configuration Guide
- How to estimate the length of a single line Mooring Strop
- Mooring Ropes - Break Load Chart
- Mooring Compensator Advisory
- Rope Cockling Information
- Fender Size Guide
- Majoni Fender Guide
- Polyform Norway Fender Inflation Guide
Custom Build Instructions
- More Article and Guides >
Anchor Warps Spliced to Chain
- LIROS 3 Strand Nylon Spliced to Chain
- LIROS 3 Strand Polyester Spliced to Chain
- LIROS Anchorplait Nylon Spliced to Chain
- LIROS Octoplait Polyester Spliced to Chain
Anchor Warps
- Leaded Anchor Warp
- LIROS 3 Strand Nylon Anchor Warps
- LIROS 3 Strand Polyester Anchor Warps
- LIROS Anchorplait Nylon Anchor Warps
- LIROS Octoplait Polyester Anchor Warps
- Aluminium Anchors
- Galvanised Anchors
- Stainless Steel Anchors
Calibrated Anchor Chain
- Cromox G6 Stainless Steel Chain
- G4 Calibrated Stainless Steel Anchor Chain
- Lofrans Grade 40
- MF DAMS Grade 70
- MF Grade 40
- Titan Grade 43
Clearance Chain
Anchoring accessories.
- Anchor Connectors
- Anchor Trip Hooks and Rings
- Anchoring Shackles
- Bow Rollers and Fittings
- Chain and Anchor Stoppers
- Chain Links and Markers
50 / 100 metre Rates - Anchoring
Chain snubbers.
- Chain Hooks, Grabs and Grippers
- Chain Snubbing Bridles
- Chain Snubbing Strops
Drogue Warps and Bridles
- Lewmar Windlasses
- Lofrans Windlasses
- Maxwell Windlasses
- Quick Windlasses
Windlass Accessories
- Coastline Windlass Accessories
- Lewmar Windlass Accessories
- Lofrans Windlass Accessories
- Lofrans Windlass Replacement Parts
- Maxwell Windlass Accessories
- Quick Windlass Accessories
Anchoring Information
- How To Choose A Main Anchor
- Anchoring System Assessment
- Anchor Chain and Rope Size Guide
- The Jimmy Green Guide to the Best Anchor Ropes
- What Size Anchor Do I Need?
- Anchor Size Guides
- Anchor Rope Break Load and Chain Compatibility Chart
- How to Choose Your Anchor Chain
- How to Establish the Correct Anchor Chain Calibration?
- Calibrated Anchor Chain - General Information
- Calibrated Anchor Chain Quality Control
- Calibrated Chain - Break Load and Weight Guide
- Galvanising - Managing Performance and Endurance expectation
- Can Galvanised Steel be used with Stainless Steel?
- Windlass Selection Guide
- More Articles and Guides
Stainless Steel Wire Rigging and Wire Rope
- 1x19 Wire Rigging
- 7x19 Flexible Wire Rigging
- Compacted Strand Wire Rigging
- Insulated 1x19 Wire Backstays
Wire Rigging Fittings
- Swaged Terminals
- Swageless Terminals
- Turnbuckles / Rigging screws
- Turnbuckle Components
- Backstay Insulators
- Wire Terminals
Rigging Accessories
- Backing Plates
- Backstay Adjuster and Fittings
- Backstay Blocks
- Pins, Rings and Nuts
- Rigging Chafe Protection
Fibre Rigging
- DynIce Dux Fibre Rigging
- LIROS D-Pro Static Rigging
- LIROS D-Pro-XTR Fibre Rigging
- Marlow Excel D12 MAX 78 Rigging
- Marlow M-Rig Max Rigging
Fibre Rigging Fittings
- Bluewave Rope Terminals
- Colligo Marine Terminals
Dinghy Rigging
- Dinghy Rigging Fittings
- Fibre Dinghy Rigging
- Stainless Steel Dinghy Rigging
Wind Indicators
Guard wires, guardrails and guardrail webbing.
- Guard Rail Fittings
- Guard Rails in Fibre and Webbing
- Guard Wire Accessories
- Guard Wires
Furling Systems
- Anti-torsion Stays
- Headsail Reefing Furlers
- Straight Luff Furlers
- Top Down Furlers
Furling Accessories
- Continuous Furling Line Accessories
- Furling Line Accessories
50 / 100 metre Rates - Wire and Fibre
Standing rigging assistance.
- More Articles and Guides >
- Cruising Halyards
- Performance Halyards
- Dinghy Halyards
Rigging Shackles
- Bronze Snap Shackles
- Captive and Key Pin Shackles
- hamma™ Snap Shackles
- Selden Snap Shackles
- Soft Shackles
- Standard Snap Shackles
- Tylaska End Fittings
- Wichard Snap Shackles
Lashing, Lacing and Lanyards
- LIROS 3 Strand Lashing, Lacing and Lanyards
- LIROS Braided Lashing, Lacing and Lanyards
- Cruising Sheets
- Performance Sheets
- Dinghy Sheets
- Continuous Sheets
- Tapered Sheets
Running Rigging Accessories
- Anti-Chafe Rope Protection
- Barton Sail Handling
- Lazy Jack Sail Handling
- Rodkickers, Boomstruts
- Sail Handling Accessories
- Slab Reefing
Shock Cord and Fittings
Control lines.
- Cruising Control Lines
- Performance Control Lines
- Dinghy Control Lines
- Continuous Control Lines
Classic Ropes
- 50 / 100 metres - Classic
- Classic Control Lines
- Classic Docklines
- Classic Halyards
- Classic Sheets
- LIROS Classic 3 Strand Polyester
50 / 100 metre Rates - Running Rigging
- 50 / 100 metres - Cruising Ropes
- 50 / 100 metres - Dinghy Ropes
- 50 / 100 metres - Lashing and Lanyards
- 50 / 100 metres - Performance Ropes
- LIROS Ropes
- Marlow Ropes
Running Rigging Resources
- Running Rigging Rope Fibres and Construction Explained
- How to Select a Suitable Halyard Rope
- How to select Sheets and Guys
- Dyneema Rope - Cruising and Racing Comparison
- Dinghy Rope Selection Guide
- Rope Measurement Information
- Running Rigging - LIROS Recommended Line Diameters
- Running Rigging Break Load Comparison Chart
- Colour Coding for Running Rigging
- Selecting the right type of block, plain, roller or ball bearing
- Replacing your Furling Line
- Recycling Rope
- Running Rigging Glossary
Custom Build Instructions for Sheets, Halyards, Control Lines
Low friction rings, plain bearing blocks.
- Barton Blocks
- Harken Element Blocks
- Seasure 25mm Blocks
- Selden Yacht Blocks
Wooden Blocks
Ball bearing blocks.
- Barton Ball Bearing Blocks
- Harken Ball Bearing Blocks
- Holt Dynamic Blocks
- Selden Ball Bearing Blocks
Ratchet Blocks
- Harken Ratchet Blocks
- Selden Ratchet Blocks
Roller Bearing Blocks
- Harken Black Magic Blocks
- Selden Roller Bearing Blocks
Clutches and Organisers
- Barton Clutches and Organisers
- Lewmar Clutches
- Spinlock Clutches and Organisers
Genoa Car Systems
- Barton Genoa Sheeting
- Harken Genoa Systems
- Lewmar HTX Genoa Systems
Traveller Systems
- Barton Traveller Systems
- Harken Traveller Systems
Deck Fittings
- Bungs and Hatches
- Bushes and Fairleads
- Deck Eyes, Straps and Hooks
- Pad Eyes, U Bolts and Eye Bolts
Rudder and Transom Fittings
- Pintles and Gudgeons
- Tiller Extensions and Joints
Stanchion Blocks and Fairleads
Snatch blocks.
- Barton K Cam Cleats
- Harken Ball Bearing Cam Cleats
- Holt Cam Cleats
- Selden Cam Cleats
- Spinlock PXR Cleats
Block and Tackle Purchase Systems
- Barton Winches, Snubbers and Winchers
- Coastline Electric Winch Accessories
- Harken Winches, Handles and Accessories
- Karver Winches
- Lewmar Winches, Handles and Accessories
- Winch Servicing and Accessories
Deck Hardware Support
Blocks and Pulleys Selection Guide
- Barton High Load Eyes
- Dyneema Low Friction Rings Comparison
- Seldén Block Selection Guide
- Barton Track Selection Guide
- Barton Traveller Systems Selection Guide
- Harken Winch Selection Guide
- Karver Winch Comparison Chart
- Lewmar Winch Selection Guide - PDF
- Winch Servicing Guide
Sailing Flags
- Courtesy Flags
- Red Ensigns
- Blue Ensigns
- Flag Accessories
- Flag Staffs and Sockets
- Flag Making and Repair
- Signal Code Flags
- Galvanised Shackles
- Stainless Steel Shackles
- Titanium Shackles
- Webbing only
- Webbing Restraint Straps
- Webbing Sail Ties
- Webbing Soft Shackles
Hatches and Portlights
Sail care and repair.
- Sail Sewing
Maintenance
- Antifouling
- Fillers and Sealants
- Primers and Thinners
- PROtect Tape
Fixings and Fastenings
- Monel Rivets
- Screws, Bolts, Nuts and Washers
- U Bolts, Eye Bolts and Pad Eyes
Splicing Accessories
- Fids and Tools
- Knives and Scissors
General Chandlery
- Barrier Ropes
- Canvas Bags and Accessories
- Carabiners and Hooks
- Netting and Accessories
- Rope Ladders
Seago Boats and Tenders
Chandlery information, flag articles.
- Flag Size Guide
- Bending and Hoisting Methods for Sailing Flags
- Courtesy Flags Identification, Labelling and Stowage
- Courtesy Flag Map
- Flag Etiquette and Information
- Glossary of Flag Terms and Parts of a Flag
- Making and Repairing Flags
- Signal Code Message Definitions
Other Chandlery Articles
- Anchorplait Splicing Instructions
- Antifoul Coverage Information
- Hawk Wind Indicator Selection Guide
- Petersen Stainless - Upset Forging Information
- Speedy Stitcher Sewing Instructions
- Thimble Dimensions and Compatible Shackles
Jackstays and Jacklines
- Webbing Jackstays
- Stainless Steel Wire Jackstay Lifelines
- Fibre Jackstay Lifelines
- Jackstay and Lifeline Accessories
Safety Lines
Lifejackets.
- Children's Life Jackets
- Crewsaver Lifejackets
- Seago Lifejackets
- Spinlock Lifejackets
Buoyancy Aids
Life jackets accessories.
- Lifejacket Lights
- Lifejacket Rearming Kits
- Lifejacket Spray Hoods
Overboard Recovery
- Lifebuoy Accessories
- Purchase Systems
- Slings and Throwlines
Floating Rope
- LIROS Multifilament White Polypropylene
- LIROS Yellow Floating Safety Rope
- Danbuoy Accessories
- Jimmy Green Danbuoys
- Jonbuoy Danbuoys
- Seago Danbuoys
- Liferaft Accessories
- Seago Liferafts
Safety Accessories
- Fire Safety
- Grab Bag Contents
- Grab Bags and Polybottles
- Handheld VHF Radios
- Sea Anchors and Drogues
Safety Resources
- Guard Wires - Inspection and Replacement Guidance
- Guard Wire Stud Terminal Dimensions
- Webbing Jackstays Guidance
- Webbing Jackstays - Custom Build Instructions
- Danbuoy Selection Guide
- Danbuoy Instructions - 3 piece Telescopic - Offshore
- Liferaft Selection Guide
- Liferaft Servicing
- Man Overboard Equipment - World Sailing Compliance
- Marine Safety Information Links
- Safety Marine Equipment List for UK Pleasure Vessels
Sailing Clothing
- Sailing Jackets
- Sailing Trousers
- Thermal Layers
Leisure Wear
- Accessories
- Rain Jackets
- Sweatshirts
Sailing Footwear
- Dinghy Boots and Shoes
- Sailing Wellies
Leisure Footwear
- Walking Shoes
Sailing Accessories
- Sailing Bags and Holdalls
- Sailing Gloves
- Sailing Kneepads
Clothing Clearance
Clothing guide.
- What to wear Sailing
- Helly Hansen Mens Jacket and Pant Size Guide
- Helly Hansen Womens Sailing Jacket and Pant Size Guide
- Lazy Jacks Mens and Womens Size Charts
- Musto Men's and Women's Size Charts
- Old Guys Rule Size Guide
- Sailing Gloves Size Guides
- Weird Fish Clothing Size Charts
The Jimmy Green Clothing Store
Lower Fore St, Beer, East Devon, EX12 3EG
- Adria Bandiere
- Anchor Marine
- Anchor Right
- August Race
- Barton Marine
- Blue Performance
- Brierley Lifting
- Brook International
- Brookes & Adams
- Captain Currey
- Chaineries Limousines
- Coastline Technology
- Colligo Marine
- Cyclops Marine
- Douglas Marine
- Ecoworks Marine
- Exposure OLAS
- Fire Safety Stick
- Fortress Marine Anchors
- Hawk Marine Products
- Helly Hansen
- International
- Jimmy Green Marine
- Maillon Rapide
- Mantus Marine
- Marling Leek
- Meridian Zero
- MF Catenificio
- Ocean Fenders
- Ocean Safety
- Old Guys Rule
- Petersen Stainless
- Polyform Norway
- PSP Marine Tape
- Sidermarine
- Stewart Manufacturing Inc
- Team McLube
- Technical Marine Supplies
- Titan Marine (CMP)
- Ultramarine
- Waterline Design
- William Hackett
Clearance August Race Boat Cleaning Kit £26.00
Clearance LIROS Racer Dyneema £55.08
Clearance Folding Stock Anchor £123.25
Clearance LIROS Herkules £0.00
Clearance Barton Size 0 Ball Bearing Blocks - 5mm £10.13
Clearance Marlow Blue Ocean® Doublebraid £18.48
Mooring Clearance
Anchoring clearance, standing rigging clearance, running rigging clearance, deck hardware clearance, chandlery clearance, safety clearance.
Sailing Blocks are used for various purposes onboard a yacht or sailboat.
Here is a guide to the different types available and the various uses for sailing blocks.
The term Block (also known as a pulley) refers to a manufactured part incorporating a wheel and an axle, which allows the wheel to rotate.
The wheel has a groove, and the rope or wire sits in the groove. The wheel may also be called a drum but is commonly called a sheave.
The axle is also known as the pin, bush or bearing.
The pulley or block is used to lift or lower heavy objects and facilitate a rope or wire's smooth change in direction.
Onboard a yacht or boat, the pulleys have specific names depending on the task. Blocks have many uses, from simply hoisting flags to managing heavy sails.
Over centuries, new technological developments have advanced the design of sailing blocks to become faster, smoother, stronger, and more dynamic in their specific use, depending on the task.
The main types of blocks are as follows:
Rachet Blocks
The main characteristics of each type of block are explained below.
The plain bearing block, the mainstay of the running rigging on a cruising yacht, is developed from the traditional dead eye, which has no moving parts and originated as a piece of hardwood, e.g. lignum vitae, with carefully grooved holes. Things have gone full circle with the advent of the modern-day low-friction ring equivalent.

Plain bearing means that the sheave rotates directly on a simple central axle, i.e. the transverse pin between the cheeks of the block. The sheave (pulley wheel) may have a load-bearing bush, also known as a bushing or sleeve bearing. The aim of adding a bush is to reduce friction and resultant wear. The bush that bears the load originates from the term Plain Bearing.

Plain bearing block features:
- No ball bearings, no roller bearings!
- Simple construction with only one moving part, the least possible to construct a serviceable pulley.
- Low maintenance
- The sheave rotates directly on a simple axle pin, which may have a load-bearing bush - sheaves have a groove designed to accept rope or wire sympathetically and are machined from nylon, aluminium alloy, brass or similar materials.
- Cost effective - reasonably priced compared with ball bearing or roller bearing blocks.
- Excellent for high static loads
- Excellent all round, multi-purpose functionality
- Excellent working life – no bearings to be crushed or fall out
Blocks with rolling elements are an engineering development of the plain bearing block.
Ball Bearing Blocks are ideal for running rigging applications where the line needs to run fast through the system and where the line needs constant adjustment under load, e.g. racing sheets - "release, pump, tension, release, pump, tension".
Blocks with bearings will run faster under light load and cope much better with fine-tuning adjustment under extreme load.
Ball Bearings in blocks are designed to rotate freely and can be identified by the fantastic whizzing sound they make when spun by hand under no load.
Ball Bearings are a set of multiple, relatively small diameter, spherical balls encapsulated in a ball 'race or cage' between the sheave and the rotating axle.
The inner and outer ball race holds the balls captive and allows them to roll so freely that they are as close as possible to frictionless.
The hardened, round surfaces of the spherical balls can handle both radial and thrust loads.
The minimal contact surface area between the small spherical balls is the reason for their negligible resistance to movement.
However, because the load-bearing surface is also low, ball bearings are susceptible to distortion when subjected to heavy force.
The picture shows a Harken ball bearing block, a ball bearing and a Selden ball bearing block.

Ball bearing block features:
- Virtually frictionless sheave rotation for free-running lines
- Outstanding response under dynamic loads
- Ultimate performance and functionality for racing
- Suitable for rapid release and continual tuning
- Excellent durability with Delrin/Torlon ball bearings
Roller Bearing Blocks are the 'Rolls Royce' premium choice for high load-bearing capability and low resistance under dynamic load. Go for roller bearings if you want exceptional performance for Racing, Regatta or Performance Cruising, especially for applications where it may be necessary to release or adjust a control line under extreme tension. Prompt, safe and efficient manoeuvers can be more easily achieved if the control line can be fine-tuned or released under pressure, e.g. your running backstay/vang/kicker purchase, main sheet or spinnaker halyard.
Roller Bearings are a succession of small diameter tubes or cylinders fitted into a roller 'race or cage' between the sheave and the axle. Roller bearings have more surface area contact than ball bearings. The increased surface area increases the load capacity and distributes it more evenly so that roller-bearing blocks generally have a much higher resistance to distortion under load than ball-bearing blocks. Roller bearings run less freely than ball bearings but have exceptionally low friction.
The picture shows a roller bearing on a sheave, an exploded diagram of a Harken roller bearing block, and another roller bearing design.

Roller bearing block features:
- Ultimate dynamic load capacity
- Premium Choice for severe conditions
- Excellent effectiveness under extreme static loads
- Outstanding response under acute dynamic loads
- Ultimate all-round, multi-purpose, high-performance functionality for Regatta sailing
- Excellent durability with Torlon roller bearings
Ratchet Blocks are ball-bearing blocks with an extra built-in braking mechanism.
The sheave is designed to grip the line and allow the brake to take the load. The braking feature is a ratchet system which stops the sheave from rotating.
The sheave design on a ratchet block differs from the smooth, rounded finish on a standard plain or roller-bearing block. Ratchet sheaves are typically designed with eight-sided facets (they look a little bit like shallow gypsy wheel pockets). These facets (flat angled surfaces) grip the line when the ratchet is working under load.
The ratchet works like a socket wrench or the internal workings of a sheet winch. There are ratchet pawls which drop into teeth as the sheave rotates. This is what makes the distinctive clicking noise. When rotation is ceased, the ratchet pawl engages the aligned tooth and holds a share of the load, using the friction created between the rope and the faceted sheave.
Ratchet blocks make it easier for your crew to haul in, manually hold and adjust lines, which would otherwise be impossible to physically manage under load. They also allow lines cleated under extreme tension to be eased without jumping out and ripping through your hands as soon as the jammer is released.
On dinghies, dayboats and small yachts, ratchet blocks counteract the need for jamming cleats on jib, spinnaker and mainsheets. However, a jammer may still be necessary to free your hands, for, e.g. adjusting control lines or giving your fingers a much-needed rest! On larger yachts, they offer extra control for trimming the spinnaker on a winch.
Ratchet Blocks are available in two distinct variations:
- Manual Ratchet Blocks feature a switch for on/off engagement - When the ratchet is on, the sheave will only operate in one direction to pull the line in. The ratchet mechanism that takes the load prevents any rotation in the other direction, which means that when the line is eased, it will have to run around a static crenellated sheave.
- Automatic Ratchet Blocks are fitted with an automatic tension sensing mechanism, which engages at a pre-set load and automatically releases when the line is eased. The roller bearings run freely in both directions under low loads and automatically engage as the pressure increases. Shifting between heavy and light loads is intuitive and seamless.

Ratchet blocks are, in effect, a miniature version of a winch without a winch handle (also known as a snubber), which can perform a similar function within the limits presented by a much smaller surface area due to the narrower diameter.
Some class rules outlaw any mechanical advantage for pulling in the sheets, which prevent the use of winches, e.g. Beer Luggers, where there is a great onus on ratchet blocks and snubbers to enable the crew to haul in, hold and control a loose-footed mainsail of around 300 square feet by hand. Ratchet blocks require less effort to control the sail than a normal free-running block.

Ratchet blocks are generally suitable for sheets on boats up to and including 6-metre sports boats and on larger boats in tandem with a winch with some caveats (these are not exhaustive):
- Mainsheet systems must be attached to the boom in multiple spots near the stern end (away from the gooseneck) to reduce/spread the load.
- Spinnaker sheets require a winch back-up option if the breeze gets up.
- Jibs and Genoas generally don’t need ratchets. The shorter sheet lengths mean the sail can usually be secured in a cleat or around a winch before it becomes fully loaded
- Ratchet blocks can be mounted in series so that spinnaker sheets on, e.g. Sports Boats like the Melges and J24s, can be hand trimmed in all conditions. The holding power can be fine-tuned by engaging/disengaging the ratchets to match the breeze strength.
Line Diameter and Specification – Important Factors:

Select the correct diameter line for the block because only a correctly matched diameter line will grip effectively in the flat facets on the sheave.
Select the appropriate rope finish - ropes with a smooth, hard feel will not hold as effectively as those with a more supple, pliable construction.
Select a line that will withstand the massive wear and tear increase caused by continuous adjustment on the faceted sheave. This means a regatta performance line is normally required, preferably with Dyneema or Technora blended with polypropylene (lighter weight) or polyester (heavy duty).
Snatch Blocks are an extremely useful addition to the rigging spares inventory on any sailing yacht because they can quickly and efficiently provide a temporary solution to various line routing issues.
- Jimmy Green offers various options from leading block manufacturers: Holt, Allen, Lewmar, Harken and Wichard.
What is a Snatch Block? A snatch block is a single sheave pulley where one of the side cheeks/straps opens to allow a rope to be inserted, without the rigmarole of reeving the line through the entire system. The opening function is achieved in varying designs by different manufacturers, but the purpose remains the same, e.g.
- Holt, Allen, Lewmar and Wichard - hinged head located on the sheave pin
- Harken and Wichard - soft attachment, removable on one side
Soft blocks perform a similar function to snatch blocks - made from a horseshoe shape fairlead - effectively an open-ended low friction ring - with a Dyneema loop which can be attached and detached.
Snatch Block Facts, Features and Plus Factors:
- The extra design and manufacturing process makes snatch blocks much more expensive than standard design blocks.
- The opening design allows a rope to be inserted without any reeving required - especially helpful if the line is long and it passes through multiple leads and clutches.
- Open the block, insert the line, close the block securely and attach the head of the block to your intended strongpoint.
- Quick and effective solution for changing sheet or control line leads.
- Excellent as temporary or spinnaker sheet-turning blocks.
- Can also be easily employed to create a 2:1 purchase, doubling the pulling power.
Visit our Deck Hardware category to explore the range of blocks available.
How To Rig, Set Up & Hoist a Spinnaker: Full Guide
It's a beautiful, sunny day. You're sailing upwind, and all around you colorful spinnakers fill and flutter as boats sail the other way. Wouldn't it be nice to break that sail out of the bag for the ride back down wind?
How do you rig, set up and hoist a spinnaker?
- Prepare the kite by finding the corner and making sure the sail isn't twisted
- Run your spinnaker sheets and guys before attaching to tack and clew
- Attach the halyard to the head, make sure it is outside the headstay
- Set the pole by putting the sheets and guys in the pole's jaws
- Hoist the pole
- Hoist the spinnaker
It seems daunting, but the principles of setting a symmetrical spinnaker are the same whether you're on a 420 dinghy or a fifty foot racer. You may have a few more lines, but the general process is: prep the spinnaker, connect the lines to the sail, hoist the pole on the windward side, then hoist and trim the sail.
There's a little more to it (of course), and each step has a few things to get right. But we've got you covered.

On this page:
Spinnaker basics, steps to set it, setting problems, the bear-away set, asymmetrical differences.
Spinnaker come in two types: symmetrical and asymmetrical. The symmetry refers to the length of the sides of the sails. An asymmetrical spinnaker has a tack and a distinct leech . A symmetrical spinnaker has both sides the same length and requires a pole to position. The tack and leech of a symmetrical sail depends on which side the pole is on - the pole side is the tack. Symmetrical sails aresailed deeper downwind with the poles, whereas asymmetrical spinnakers are better at reaching and sailing at higher angles, and are simpler to set and handle.
In this article, we'll focus mainly on symmetrical spinnakers.
Spinnaker Controls and Lines
A spinnaker connects the boat with a halyard at the head of the sail to hoist it, a sheet on the leeward side, and a guy on the windward side. While the guy is a pole control, some boats use dedicated sheets and guys, while some use a single line that switches function between sheet and guy as the sail jibes from side to side. In either case, the guy connects to the sail, not the pole, and runs through the jaws of the pole. The sheet is used to trim the sail as we adjust the pole with the guy.
When the sail is set, the lines not under load are the lazy guy or sheet. The sheet on the windward side and the guy on the leeward side will be the lazy sheet and lazy guy . Not all boats use separate sheets and guys, so there may not be a lazy guy/sheet.
Pole Controls
The spinnaker guy is used to control the position of the pole, and the angle of attack of the sail to the wind. Trim to keep the pole at a right angle to the wind. Most poles have a pole topping lift and a downhaul (also called a foreguy ). On the mast, there will be a pole car or ring with an attachment point which sets the inboard height of the pole. The topping lift and foreguy keep the pole in a level position, perpendicular to the water, and can be adjusted to match the car position. The pole is trimmed lower in lighter air, though a detailed spinnaker trimming guide is outside the scope of this post.
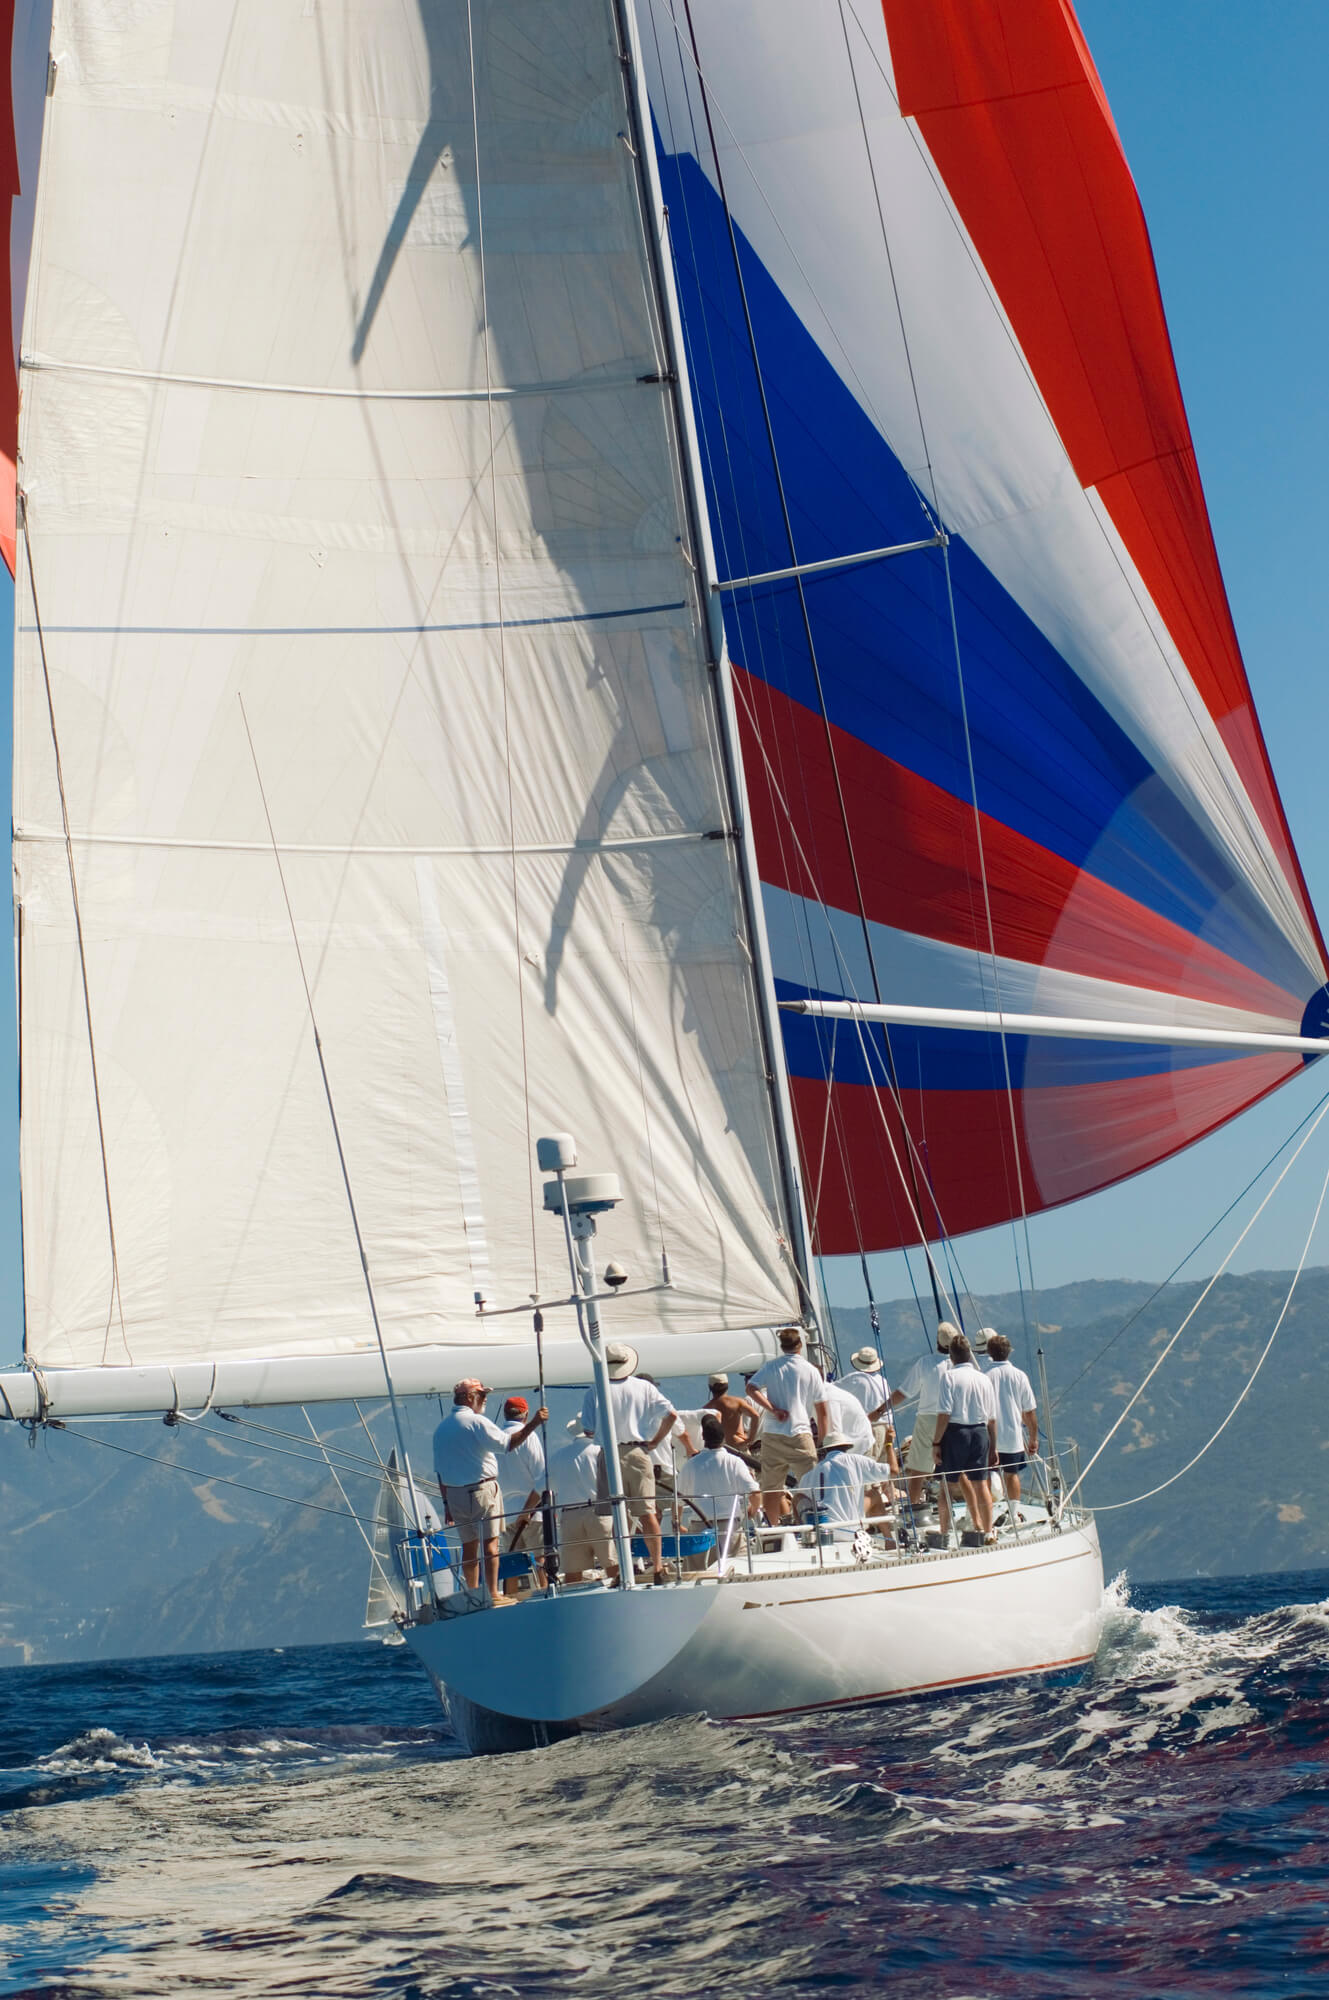
For simplicity, we'll assume you’re out for a simple sail, not racing. The jib is down, and you're ready to turn the boat down wind. Racers do things a little differently, but you will need to master a basic bareheaded set before you get too fancy.
Step 1 - Prepping the Kite
("kite" or "chute" are common nicknames for a spinnaker)
To launch a spinnaker from a bag without twists, someone needs to run the tapes when the spinnaker is packed. Find the head of the sail, run it between your fingers down one edge of the sail (or the tape , referring to the thicker reinforcement on the edge), making sure there are no twists or loops. Continue until you reach the next corner. If you find any twists or loops, work then out. Leave that corner outside the bag, then start again at the head and run the other tape. Leave the head and two clews out. This step can be done at the dock before leaving, or any time, as long as someone knows it has been properly packed . Do not assume.
You can bring the spinnaker bag up on deck for this, or leave it in the v-berth if there is a hatch suitable for pulling it through. This is more common when racing.
Step 2 - Plugging in the Spinnaker
Spinnaker sheets and guys should be run before connecting to the spinnaker. Most sheets and guys go through a fairlead or turning block at the stern of the boat before running forward to the spinnaker.
When you run the lines, take care they are free and outside of all lifelines, jib sheets and other obstructions before connecting to them to the tack and clew of the sail. Take the halyard and connect it to the head, making sure it is outside the headstay and any pole control lines or other entanglements.
Step 3 - Setting the Pole
If the pole isn’t normally stored on the mast, one end will need to connected. Attach the topping lift and down haul, and put the sheets and guys in the jaws now.
Whether the jaws go up or down is a personal preference, and some boats work better than others in different positions. Some argue that spinnaker forces pull up, so that jaws-down holds them from flying out when it's opened. Others maintain it's easier and more natural to slap a non-loaded sheet and guy into a jaws-up pole, with gravity to hold it there. This is a question of comfort and experience.
Hoist the pole to the proper height for the breeze.
Step 4 - Hoist!
When the boat is turned off the wind to the angle you want to sail, you are ready to hoist the sail.
With the pole set forward, hoist the sail up quickly with the halyard, then trim the sail and pole once it is at full hoist.
- You won't be able to trim the pole until the spinnaker is mostly up, but move it back when you can. It will help it fill and stay under control.
- To get the sail up more quickly, you can have someone at the mast to "bump" the halyard by pulling it at the mast while some else takes up the slack.
- If launching from a bag, attach the bag to the boat or you might launch it into the air with the sail. Most bags have Velcro straps or clips on them for connecting to lifelines or other boat hardware.
There are a few problems to watch for when setting. Twists, hourglasses, and forestay wraps are the most common, and can even happen with a properly packed spinnaker with no twists, though that is the most common cause of hour-glassing and wraps.
Avoid pulling too hard or panicking when these things happen, it just wraps things tighter. You can worked twists out if you stop the hoist and pull down from the center of the foot and the clew. If it's too bad, lower the sail, untwist it, rerun tapes, and re-pack the sail.
When racing, it's slow to run "bare headed" without a jib. Racers will do a "bear-away" set, which is like the set described above, except on a few points. It's easier and faster, but it takes more people and a little preparation since a quick set is the goal.
- The jib is left up, so the spinnaker halyard runs outside the jib when the spinnaker is connected.
- The spinnaker can be hoisted earlier as the jib will blanket it.
- The pole can be trimmed back when the sail is out and filling.
- The jib is "blown" - quickly released and gathered on the deck for the down wind leg.
Since there is no pole, an asymmetrical spinnaker is far easier to rig, set, and hoist. There are only two sheets, and no pole controls.
- Most boats will have a short pole on the bow for attaching the tack. There may be an adjustable tack line to set the tack height for different conditions. The pole may also have adjustments.
- The lazy sheet should run around the outside headstay.
- Many asymmetrical spinnakers have a dousing sock or turtle , which makes launching easier. The sail is hoisted inside this cover, then the sock pulled down to let the sail fill.
- Some asymmetrical spinnakers can be rigged on a detachable, lightweight furler.
- Asymmetrical spinnakers can not sail as deep down wind as a symmetrical sail with a pole. However, they can be carried at higher angles of reaching and can make up for the lack of down wind capability with more reaching speed.
You stated for symmetrical spinnaker that the pole is kept “perpendicular to the water - wrong - it should be perpendicular to the wind
Bill Wheary
The pole is kept perpendicular to the MAST to that the luff of the spinnaker is as far as possible from the mast and luff of the main.
Although the pole is usually set as close to perpendicular to the wind, in most cases the pole is adjusted so as to position the the CORD between the spinnaker tack and clew perpendicular to the wind.
Leave a comment
Own your first boat within a year on any budget.
A sailboat doesn't have to be expensive if you know what you're doing. If you want to learn how to make your sailing dream reality within a year, leave your email and I'll send you free updates . I don't like spam - I will only send helpful content.
Ready to Own Your First Boat?
Just tell us the best email address to send your tips to:
By Product Categories
Small Boat Blocks
Big Boat Blocks
Complementary Hardware
Travelers & Genoa Leads
Mainsail Handling
Headsail Handling
Mooring Solutions
Spare Parts
Accessories
Harken Canvas
Fly Soft-Attach Blocks
Carbo Air Blocks
Small Boat Classic
Flip-Flop Small Boat
GP Catamaran Ceramic Mainsheet Systems
Protexit™ Exit Blocks
Through-Deck
Wire High-Strength
Dinghy Vang
Small Boat Deck Organizers
Midrange Classic
Midrange Deck Organizers
Zircon Blocks
Element Blocks
Black Magic Air Blocks
Cruising ESP Blocks
Megayacht Blocks
Stainless Steel Blocks
Black Magic Air Runners
FlatWinder Powered Blocks
Mastbase Blocks
Over-the-Top
Crossover Blocks
Big Boat Deck Organizers
Cam Cleats & Kits
Cam Cleat Accessories
Cam Cleat Bases
Stand-Up Bases
Deck Organizers
Spinnaker Pole Cars
Soft Attachments
Fixed Padeyes
Removable Padeyes
Bolt-Down Fairleads
Grand Prix Jib Leads
Halyard Tensioners
Tiller Extensions
Peter's Desk Drawer
Dinghy Jib Leads
Crossbow Pivoting Self-Tacking Jib Traveler
13 mm Micro
22 mm Small Boat
27 mm Midrange
32 mm Big Boat
Windward Sheeting
42 mm Mini-Maxi
T-Track Genoa Lead
Access Rail System
13 mm AA Battcar System
22 mm A Battcar System
27 mm B Battcar System
32 mm C Battcar System
18 mm Switch Battcar System
26 mm Switch Battcar System
26 mm Trysail Switch
32 mm Switch Battcar System
32 mm Trysail Switch
40 mm Switch Battcar System
40 mm Trysail Switch System
Furling Mainsail Outhaul Systems
Single Line Reefing
Harken Vang-Master
Carbo Racing Foil
Small Boat Furling
Small Boat Underdeck
Reflex Furling
MKIV Jib Reefing & Furling
MKIV Underdeck Jib Reefing & Furling
Furling Accessories
Powered Furling
MKIV Ocean Furling
SnubbAir (Not a Winch)
Grand Prix Winches
Air Winches
Circuit Breakers
Analog Switches
Digital System Switch
Aluminum, Chrome & Bronze Winch Handles
Carbo OneTouch Locking Winch Handle
Service Kits
CLR Mooring Winches
Electric Captive Reel Winches
Hydraulic Captive Reel Winches
UniPower Radial
Single-Acting Integral Backstay Adjuster
Single-Acting Cylinders
Locking Cylinders
Double-Pull Cylinders
Grand Prix Cylinders
Hydraulic Cylinder Rod End Blocks
Hydraulic Cylinder End Fittings
Control Valves
Control Manifolds
Control Panels
Compact Control Panel
Rotary Pumps
Hydraulic Pump Handles
Power Systems
Repair Kits
Ball Bearings
Block Spare Parts
Traveler Cars
Furling Spare Parts
Winch Spare Parts
Winch Service Kits
Blockheads Gear
Promo & Gifts
Marine Grip
harkengear.com
Jeep/Truck tops
Garage storage
One-design Covers
Boat accessories
Canvas bags
By Type of Sailing
Dinghy / One-Design
Offshore Racing
Coastal / Day Cruising
Bluewater Cruising
Megayachts / Custom
Service Guide
Tech/Service
deck layouts
Data Sheets (SDS)
How to choose
System diagrams
Calculators
Reeving diagrams
Traveler Purchase Selection Guide
How to Choose
Testimonials
Hoister Videos
Request a Quote
Request Samples
Fabric details
Cover Styles
Canvas Videos
Contract Services
Materials and Components
Our Equipment
Contract Cut-and-Sew Project Spotlight
- Harken at the front
- Safety & Rescue
Support / Selection tools

Backstay Adjuster Systems
Backstay adjusters allow racers and cruisers to adjust and control mast rake and headstay tension. Adjusting the backstay shapes the main to optimize upwind and downwind performance. On racer/cruisers, tightening the backstay increases headstay tension for upwind sailing, while loosening the backstay offwind reduces weather helm. When selecting blocks or systems for backstays, make certain blocks match or exceed the wire or line breaking strength. Typical Boat Length: Small Boat: 22' - 28' (6.7 - 8.5 m) Midrange: 29' - 34' (8.8 - 10.4 m) Big Boat: 35' - 42' (10.7 - 12.8 m)

Boom Vang Systems
The vang allows vertical adjustment of the boom, and is an extremely important tool to shape the main for speed. Tension the vang to tighten the leech, flatten the sail and bend the mast. Cruisers use the vang to keep the boom from rising when sailing downwind and abraiding the main.
Typical boat length: Small Boat: 22' - 28' (6.7 - 8.5 m) Midrange: 29' - 34' (8.8 - 10.4 m) Big Boat: 35' - 42' (10.7 - 12.8 m)

Cunningham Systems
The cunningham controls the fore and aft position of draft in the mainsail or genoa and works together with the traveler, mainsheet, outhaul and vang to optimize sail shape and increase boatspeed. Cunningham controls lead to the crew to encourage adjustment as wind speed changes.
Typical Boat Length: Small Boat: 22' - 28' (6.7 - 8.5 m) Midrange: 29' - 34' (8.8 - 10.4 m) Big Boat: 35' - 42' (10.7 - 12.8 m)

Genoa Lead Car Systems
Genoa lead cars allow sailors to change the sheeting angle of the genoa so the sail has a more efficient shape. Not only for racers, people with furling genoas need adjustable leads when genoas are partially furled. Cars are available in both T-track and ball bearing configurations.

Mainsail Reefing Systems
Mainsail reefing systems must operate effciently to reduce sail under adverse conditions and provide proper sail shape when reefed. These systems are a must for both racers and cruisers.

Mainsheet 2-Speed Systems
These dual purpose systems offer sailors the option of either speed or power. They are used for mainsheets on small to medium-sized offshore boats where power is required for effective heavy-air trimming upwind, but speed is crucial for off-wind trimming and mark roundings.

Mainsheet Systems
Mainsheets are simple hardware systems, but are among the most important as they are in almost constant use.

Mastbase and Cabintop Blocks
Mastbase and cabintop blocks allow crew to raise, lower and trim sails from the cockpit. A variety of specialized blocks have evolved for routing lines aft.

Outhaul Systems
The outhaul controls and shapes the mainsail. Ease the outhaul to increase draft and power up the sail. Tighten the outhaul to flatten the sail and reduce drag and heel in heavy air.

Self-Tacking Jib and Staysail Systems
Self-tacking jibs and staysails are popular on boats of all sizes because tacking is nearly automatic, with no need to haul in or release a sheet. They work well with furling systems and with jib booms. Calculate loadings for traveler cars and blocks using the following Genoa System Loading Calculator.

Spinnaker Pole Handling and Halyards
Both racers and cruisers benefit from adjustable spinnaker pole cars. Racers use adjustable cars to square the spinnaker pole’s inboard end to the horizon and help with dip pole jibing. Cruisers use the car to level the whisker pole when sailing downwind wing-and-wing and to store the pole against the mast when not in use.

Traveler Systems
Traveler controls must be powerful enough to move the car easily under load and lead to a position where crew can conveniently operate them. Smaller boats usually position controls so the helmsman can make adjustments. Larger boats position controls for the mainsheet trimmer.
Standard Boat Length: * Small Boat: 22' - 28' (6.7 - 8.5 m) Midrange: 29' - 34' (8.8 - 10.4 m) Big Boat: 35' - 42' (10.7 - 12.8 m)
*Refer to Ordering Travelers Chart for in-depth specifications by boat type.

Spinnaker Systems
A well-designed system makes all the difference when setting, flying and jibing the spinnaker. Trimming involves three adjustments: raising or lowering the pole, moving the outboard end of the pole forward or aft, and pulling in or easing the sheet.
Product Categories
- United States
- New Zealand
- United Kingdom
IMAGES
VIDEO
COMMENTS
Rigging a small sailboat isn't rocket science and it doesn't have to cost thousands of dollars. All the projects in this ebook use time-proven methods and materials to give you maximum sailing bang for your hard-earned buck. Besides learning how to install each upgrade, you'll learn how it works and why it can help you become a better sailor.
The hull is what most people would consider 'the boat'. It's the part that provides buoyancy and carries everything else: sails, masts, rigging, and so on. Without the hull, there would be no boat. The hull can be divided into different parts: deck, keel, cabin, waterline, bilge, bow, stern, rudder, and many more.
A nother common rig used in small sailboats is the LATEEN RIG illustrated in Fig. 2-5. This rig uses a single mast, somewhat short, and usually unsupported with wires, onto which is attached two poles. A triangular shaped sail is then attached to these two poles, but not to the mast.
First, spread out the sail and identify each of its corners. The "head" is the top of the sail, where the triangle is the most narrow. Attach the jib halyard shackle to this corner, making sure the shackle is closed and secure. Then follow the front edge of the sail (called the "luff") down to the next corner.
Fit the bailer cap into the hole of the plug so that the plug stopper faces upward (Figure 8). Fold the rubber plug over the cap to close (Figure 9). 3. Locate the bailer housing and o-ring (Figure 10). Place the o-ring over the neck of the bailer and push it down completely (Figure 11).
Rigging guides and helpful info for rigging and turning your sailboat from the experts at West Coast Sailing. Free Shipping Over $99* - 366 Day Returns - Dedicated Customer Support ... Check out these Rigging Guides with photos and tips for rigging a variety of small sailboats. Available as PDF downloads for ease of use. Hobie Cat Rigging ...
PLEASE NOTE: THIS VIDEO HAS BEEN UPDATED WITH ENHANCED GRAPHICS AND IMPROVED SOUND. CHECK IT OUT HERE https://youtu.be/tRgWtPaCQQcA beginners guide to sailbo...
The two-masted rigs are: Lugger - two masts (mizzen), with lugsail (a cross between gaff rig and lateen rig) on both masts. Yawl - two masts (mizzen), fore-and-aft rigged on both masts. Main mast is much taller than mizzen. Mizzen without a mainsail. Ketch - two masts (mizzen), fore-and-aft rigged on both masts.
RIGGING MANUAL 1. Glossary/Useful Boat Terminology 2. Parts of the Fusion 3. Sail Numbers & Rating Yardstick for Racing 4. Rigging the Mast and Cunningham 5. Raising the Mast 6. Fitting the Boom 7. Rigging the Mainsheet 8. Rigging and Fitting the Vang 9. Rigging and Raising the Jib 10. Cockpit Drain Bung 11. Fitting the Rudder 12. Fitting the ...
To step the mast of a sailboat, follow these steps: 1. Prepare the mast: Position the mast near the base of the boat. 2. Attach the base plate: Securely fasten the base plate to the designated area on the boat. 3. Insert the mast step: Lower the mast step into the base plate and align it with the holes or slots. 4.
In part 3 of our series on sailboat parts, we dive into two types of rigging: standing rigging and running rigging. I use a 3D model and some diagrams to giv...
Headsail Rig Specs. I - Foretriangle Height: Measure from the top of the halyard to the side deck on the forward side of the mast. J - Foretriangle Base: Measure along deck from the forestay to the Forward face of mast. The J measurement is just a secondary check to make sure nothing has been changed over the years and there's no surprises.
Sailboat rigging diagram Lines. Lines are a type of rope with a smooth surface that works well on winches found on sailboats. They come in various styles and sizes and have different stretch capabilities. Dyneema and other synthetic fibers have ultra-high tensile strength and low stretch. These high-performance lines last a long time, and I ...
1) Assemble the mast (video time 0:40) Slide the bottom section of the mast into the top section. Make sure the joint is clean! 2) Attach the lines (1:25) Attach lines and the wind vane to mast. The shrouds hook in one on each side, the jib halyard (if applicable) in the front. 3) Step the mast (2:45)
A typical small sloop like this sailboat has two sails, the mainsail and jib, and thus has two halyards - one to pull up the top corner ("head") of each sail. (We'll see this is Part 2 of this course.) At the end of a halyard is a fitting, called a shackle, that attaches the sail to the line.
Cast Aluminum Toggle is 23/32" (18.5mm) wide with 10mm hole for horizontal pin, and features center hole for use with Z-1188RH double Reef Hook. Toggle (with lugs) measures (maximum) 2 7/8" (73mm) vertical x 2 3/4" (68mm) horizontal. Used with Mast Sections through Z320 with Z160 and Z204 Booms.
The difference between standing rigging and running rigging. Sometimes things can get confusing as some of our nautical terms are used for multiple items depending on the context. Let me clarify just briefly: The rig or rigging on a sailboat is a common term for two parts:. The standing rigging consists of wires supporting the mast on a sailboat and reinforcing the spars from the force of the ...
Bermuda Sloop: the most common rig. Most modern small and mid-sized sailboats have a Bermuda sloop configuration. The sloop is one-masted and has two sails, which are front-and-aft rigged. This type of rig is also called a Marconi Rig. The Bermuda rig uses a triangular sail, with just one side of the sail attached to the mast.
The mainsheet rigging diagram is a visual representation that outlines the setup and configuration of the mainsheet system on a sailboat. It typically includes details such as the location of blocks, cleats, and other hardware, as well as the path that the mainsheet follows. This diagram helps sailors understand and follow correct rigging ...
Bermuda Rig - Also known as a Marconi rig, this is the typical configuration of most modern sailboats. It has been used since the 17th century and remains one of the most efficient types of rigs. The rig revolves around setting a triangular sail aft of the mast with the head raised to the top of the mast.
The axle is also known as the pin, bush or bearing. The pulley or block is used to lift or lower heavy objects and facilitate a rope or wire's smooth change in direction. Onboard a yacht or boat, the pulleys have specific names depending on the task. Blocks have many uses, from simply hoisting flags to managing heavy sails.
Prepare the kite by finding the corner and making sure the sail isn't twisted. Run your spinnaker sheets and guys before attaching to tack and clew. Attach the halyard to the head, make sure it is outside the headstay. Set the pole by putting the sheets and guys in the pole's jaws. Hoist the pole. Hoist the spinnaker.
A well-designed system makes all the difference when setting, flying and jibing the spinnaker. Trimming involves three adjustments: raising or lowering the pole, moving the outboard end of the pole forward or aft, and pulling in or easing the sheet. Typical Boat Length: Small Boat: 22' - 28' (6.7 - 8.5 m)