Hinged Mast Bases
Hinged mast bases are designed for deck stepped masts to be used to help in the stepping process using a gin pole or on smaller masts, by hand. They are not designed to be used as tabernacle bases for temporarily lowering a mast to pass under a bridge or obstruction. For that use, we can custom make tabernacle bases that, along with mast and rigging modifications and using the boom as a gin pole, can make "on the fly" lowering possible.
We produce several sizes of hinge plates. The size is defined by the flat area of the plate that is available to mount the mast step or plug and mast section. The sizes follow:
HMB E27 5" X 3.5" Punched flanges 5 holes each side. HMB SC27 6.75" X 4.25" No flanges. HMB M30 6.5" X 4" Punched flanges 5 holes each side. HMB 8055 8.0" X 5.5" Punched flanges 5 holes each side.
As you can see, the largest hinge plate has a flat area of 8" x 5.5". This will usually accommodate extrusion up to 8" x 5.5" and that is what we consider the largest section that can be safely stepped with a hinge plate. Larger sizes can use a custom tabernacle. The top plate of all of the tabernacles have fastener holes predrilled and countersunk. The base plates of all but the HMB E27 are left undrilled so that the existing bolt pattern in the deck can be match drilled. The holes will also have to be counter sunk. There are several methods of attaching the mast extrusion to the top plate. If the existing mast step casting is in good condition and with enough inherent strength to do the job, it can be attached to the top plate by machine screws , either with nuts or tapped into the step casting. The mast would be then attached to the mast step by drilling and tapping through the mast wall.
The second method is to make a plug out of thick aluminum (min. 3/4") that fits into the mast reasonably tightly. Small masts can use thick (3/4" +) Delrin or UHMW or similar plastic. The plug can then be attached to the top plate and the mast using the same method as with a casting. It is best to drill and tap all attachments since it usually works best to install the plug in the mast extrusion first and then attach it to the top plate.
With all methods of attachment , it is strongly recommended that thin plastic is installed between the mast , mast step or plug and the stainless steel top plate to inhibit galvanic corrosion. This is especially important if the boat is sailed in salt water. We can supply this material, optionally.
The base plate should be mounted on a flat on the boat deck that is at least as large as the base plate. It is important that the base plate is fully supported. Hard epoxy filler can be used if the buildup is not thicker than about 1/4". Thicker buildups should be done using fiberglass and resin laminations. G10 can also be shaped and glued to the deck with epoxy . The base plates are preferably bolted through the deck although long screws or lags can be used if the deck has sufficient thickness. Short screws or screws used in holes that are not close fitting and free from rot should not be used. Many manufacturers used plywood under the mast steps and through the years water may have penetrated the wood causing rot. This should be checked and repaired. The screws must grip very well if they are to be used instead of bolts. Use silicone sealer under the deck plate to seal the fasteners.
After the mast is stepped, the two hinge plates should be in full contact with the alignment pin fully engaged with the top plate. If this is not the case, the mast step under the bottom ss plate should be leveled. The alternative is to trim an angle in the butt of the mast extrusion. Many mast butts are not cut at 90 degrees in order to compensate for deck angle. If this is the case on your mast, this angle should be maintained and the plug or casting should be attached at that angle. In other words, if the mast is sitting down properly on the step before the hinging process is started, do not trim the base of the mast at a different angle. If you build up the boat under the step, be sure not to change the angle. If you do, the mast may need to be trimmed to accommodate the new mast/step angle.
There are a number of methods of raising the mast with a hinge base. Some use A frames, others step by hand and I like to use a gin pole set up. I believe that the gin pole method is the safest and fastest method to step a mast. The method employs a dedicated gin pole (some people use their spinnaker pole) which attaches to the mast and has a couple of lines that go from the deck to its tip, athwartships to support it side to side. A dead ended halyard goes over the tip of the gin pole an attaches to either a block and tackle attached to the bow or to the trailer winch in the case of a trailer boat. The mast needs a sideways support line from each side of the boat go keep it from falling sideways during the lift. These support lines or wires should attach to the boat at about the same vertical height as the hinge pin so that their lengths remain the same over most of the lift.
To lift the mast, usually the upper shrouds are not attached since they do not have enough range to go through the arc of the lift. The backstay should be attached and the aft lowers (if the boat has them) should be attached along with the gin pole guides lines and mast lifting wires. The halyard that is over the gin pole is tensioned, after clearing all bystanders from the fall zone of the mast, and the lift begins by cranking the trailer winch or pulling on the block and tackle. The mast will come up and it is important to clear all of the shrouds as it does. Never should anyone stand or sit in the fall zone of the mast. As the mast reaches its full up postion, the upper shrouds and forward lowers can be attached and tightened, and the headstay attached and tightened. When the mast is up and the wires tensioned, the lifting gear can be removed.
Safety tips:
- NEVER, NEVER, NEVER allow anyone to be in the fall zone of the mast when raising the mast.
- All parts of the raising gear should be first class, fully rated hardware. No cheap hardware store clips or other parts that can bend or break. Rated screw shackles are the best to use. Galvanized is fine and less expensive than stainless. No snap hooks, use rated snapshackles or rated locking carabineers if quick release is desired.
- Extreme care should always be used. Go slowly and stop if something does not seem right. Watch the rigging as the mast is raised to be sure that nothing has snagged or that turnbuckles are leading properly.
- Inspect all of the raising gear before attempting to step the mast. Inspect all connections before lifting.
- Never try to catch the mast if it starts to fall. It may seem counterintuitive to say this, but the natural reaction is to try to catch the mast. Stay out of the fall zone when lifting.
- Attempting to step the mast in high winds or on the water when the boat is rolling due to wave action is not safe.
No one set up will work with all boats. I have outlined a method that has worked on a number of boats that I have set up. It allows for the operator to be at the bow of the boat, in the safest spot. There are other methods that use the boom for a gin pole and lift the mast from the bow. The boom must be fixed in position and not on a sliding gooseneck. This method works well and is the preferred method when a tabernacle step is used for "on the fly" mast lowering for bridges. The tabernacle system uses a custom designed mast base and requires that the bottom of the mast be modified . The standing rigging has to be modified as well so that the rigging can remain attached and relatively tight as the mast is lowered. Again, the hinge base is not designed for this type of mast lowering. The hinged mast base can, however, be reversed with the hinge forward so that the mast can be raised from the bow using the boom as a gin pole. This is not for lowering the mast on the go, but for mast stepping under controlled conditions.
This article is for informational purposes only. Ballenger Spar Systems, Inc. will not be held liable for the use or misuse of the information in this article. This article is not to be reproduced or used in any way without prior consent.

- My Cart: ( 0 )
- US Base-Cup
- Base Accessories
- Board Building Parts
- RDG Carbon Booms
- Pro1 Carbon Booms
- Pro1 Alloy Booms
- RDG Alloy Booms
- Sport Booms
- Boom Parts & Accessories
- Car Rack Pads
- Clothing, Hats, & Accessories
- US Base Cup Standard Diameter
- US Base Cup Reduced Diameter
- Euro Pin Style Standard Diameter
- Euro Pin Style Reduced Diameter
- Extension Accessories
- Harness Lines
- Accessories
- Tools & Pulleys
- Board & Fin Bags
- Repair Products
- Power Glide Sails & Rigs
- Shift Sails & Rigs
- Junior Glide Rigs
- Complete Packages
- Foil Accessories
- Takuma Demos & Seconds
- SUP Accessories
- How To: Booms
- How To: Extensions
- How To: Harness Lines
- How To Videos
- Find A Dealer
- Shipping & Returns

Mast Base Parts & Hardware

- Find a Dealer
- Customer Service
- Privacy Policy
Newsletter signup
Stay connected.
Copyright © 2024 Chinook Sailing Products • Shopify Theme by Underground • Powered by Shopify

Mast Collar Pin MC-PIN-1

Mast Plate MS-1

Mast Plate MS-2

Mast Plate MS-3

Mast Plate MS-4

Mast Plate MS-5

Mast Plate MS-6

Mast Step MS-7
Rigging - Turnbuckles , Toggles , Wire & Rod Components, Norseman Cones & Fittings.
Furling Systems - Systems and replacement parts from a variety of Manufacturers.
Traveller Systems - Adjustable Track Systems for Mainsheet and other applications.
Sailboat Hardware - Rope Clutches, Blocks, Track & Fittings, Winches, etc.
Custom Parts - Custom items, or those out of production or otherwise unavailable.
Consultation - Special projects, research, or information not detailed on-site.
Copyright 1996 - 2024, Rig-Rite, Inc. Disclaimer Web Site maintained by The WATER Group
To place an order please proceed to our ordering information page .
Free Shipping Over $99* - 366 Day Returns - Dedicated Customer Support
- Call Us +1-503-285-5536
- Sign in & Register
- Recently Viewed
- One Design Parts
- Hull & Deck Fittings
Opti Mast Step Base (Plate Only)
- Create New Wish List
Write a Review
")
Frequently Bought Together:
")
Description
The Opti mast step base plate is mounted to the boat and seats the mast step cup.
- Stainless steel construction
- Has scale which enables the sailor to see the precise positioning of the mast step cup so that the mast rake can be repeated
Product Reviews
Shipping & returns.
Delivery Info: Enjoy Free Standard Shipping on most orders* to the Continental United States over $99. Our Standard Shipping method utilizes USPS, UPS, and FedEx to send packages near and far. Oversize/Freight shipping (where applicable), Expedited Shipping (where available), and rates to other destinations will be calculated at checkout.
See our Shipping Page for more information (and exceptions).
Returns Info: Your 100% satisfaction is our goal - we want you to love your sailing gear, but if something doesn't work out, we accept returns on most new, unused items*. Returns can be made within 366 days (1 year + 1 day) of your original order date. Exceptions include (and are not limited to) cut line, Rig Shop products, special order items, numbered sailors, and items used or worn sailing.
See our Returns Page for more information.
Related Products
")
Opti Mast Step (Round Cup)
")
Opti Mast Step Cup (Slide Only)

Opti Mast Step Nut
Subscribe to our newsletter.
Sign up for our newsletter to receive exclusive discounts, new product announcements, and upcoming sales.
- New Sailboats
- Sailboats 21-30ft
- Sailboats 31-35ft
- Sailboats 36-40ft
- Sailboats Over 40ft
- Sailboats Under 21feet
- used_sailboats
- Apps and Computer Programs
- Communications
- Fishfinders
- Handheld Electronics
- Plotters MFDS Rradar
- Wind, Speed & Depth Instruments
- Anchoring Mooring
- Running Rigging
- Sails Canvas
- Standing Rigging
- Diesel Engines
- Off Grid Energy
- Cleaning Waxing
- DIY Projects
- Repair, Tools & Materials
- Spare Parts
- Tools & Gadgets
- Cabin Comfort
- Ventilation
- Footwear Apparel
- Foul Weather Gear
- Mailport & PS Advisor
- Inside Practical Sailor Blog
- Activate My Web Access
- Reset Password
- Pay My Bill
- Customer Service

- Free Newsletter
- Give a Gift
How to Sell Your Boat

Cal 2-46: A Venerable Lapworth Design Brought Up to Date

Rhumb Lines: Show Highlights from Annapolis

Open Transom Pros and Cons

Leaping Into Lithium

The Importance of Sea State in Weather Planning

Do-it-yourself Electrical System Survey and Inspection

Install a Standalone Sounder Without Drilling

Rethinking MOB Prevention

Top-notch Wind Indicators

The Everlasting Multihull Trampoline

In Search of the Snag-free Clew

What’s Involved in Setting Up a Lithium Battery System?

Reducing Engine Room Noise

Breaking Point: What Can Go Wrong With Your Yanmar?

Mildew-resistant Caulks for Boats

Can We Trust Plastic Boat Parts?

Repairing Molded Plastics

Mailport: Marine plywood, fuel additives, through bolt options, winch handle holders

The Day Sailor’s First-Aid Kit

Choosing and Securing Seat Cushions

Cockpit Drains on Race Boats

Rhumb Lines: Livin’ the Wharf Rat Life

Safer Sailing: Add Leg Loops to Your Harness

Resurrecting Slippery Boat Shoes

Tricks and Tips to Forming Do-it-yourself Rigging Terminals

Marine Toilet Maintenance Tips

Learning to Live with Plastic Boat Bits

The Ultimate Guide to Caring for Clear Plastic
- Sails, Rigging & Deck Gear
Revive Your Mast Like a Pro
Each spar section has unique signs of trouble to look for during inspection..

Unobtainium is the metal at the top of every Naval Architect’s wish list. It’s a perfect marine material; light, strong, stiff yet flexible—it’s as inert as gold, but costs only pennies per pound. Sadly, like the search for El Dorado, this metal quest remains more alchemy than chemistry.
For now, aluminum, especially the alloy 6061-T6, is the solid performer. It singlehandedly upstaged spruce as the mast material of choice, and for decades it’s done its job admirably. The alloy isn’t perfect, but by understanding its vulnerabilities, and mitigating those negative characteristics, the functional lifespan of an aluminum spar can be measured in decades not years.
Yes, carbon fiber spars are in many ways the next step forward. But for those intent on being cost effective and not in the hunt for a few tenths of a knot increase in boat speed, aluminum remains the cost effective alternative. In a future issue we’ll focus on carbon’s influence on spars, hulls, rigging, and sails.
Most metal masts are made from long, cylindrical billets of aluminum alloy. Each tube section is created using a powerful ram to force a heated billet (400-500 C) through a set of dies that squeeze and shape the billet into the cross section and wall thickness of a specific spar. Lots of lubricating release agent and 15,000 tons of ram pressure are used to reshape the malleable aluminum.
Billet residue is captured and recycled, while the tube shape undergoes quenching as it moves off on the runout table. The next stop in the line involves a process that draws (pulls) and straightens the tube section.

Once fully cooled, it goes through a T6 heat tempering process that elevates tensile strength from 35,000 to 45,000 psi. Lastly, spars can be anodized, painted, powder coated, or left uncoated. Some masts are extruded in half sections and machine-welded together lengthwise.
There are other aluminum alloys that are better suited to welded hull construction or used for metal casting purposes, but 6061-T6, containing small amounts of silicon, magnesium, and other trace elements, delivers the strength, stiffness and lightness that’s vital when it comes to making spars.
The “T6” alloy is weldable, but doing so anneals and weakens the area that’s welded. This is one of the reasons why, when splicing two sections together, a doubler is added internally that overlaps the junction. Excess heat buildup during the plug welding process that joins the sections is kept to a minimum. Some manufacturers mechanically fasten the junction using machine screws or heavy duty pop rivets.
Unfortunately, aluminum isn’t quite the sequel to tomorrow’s Unobtainium . Aluminum, like steel alloys, show a proclivity to oxidize. But in the case of most steel alloys, oxidation is an ongoing process that only reaches completion when the object in question has become an unrecognizable pile of rust.

Bare aluminum, on the other hand, reveals a very different oxidation curve. A shiny new piece of aluminum develops a speckled, gray, oxidized coating that actually becomes a protective layer, preventing further oxidation. Ironically, this means that the ugliest looking mast in the marina, that non-anodized, unpainted one with the aesthetic appeal of dirty socks, is about as well protected from further deterioration as the spar on the gold-plater with the automotive finish. This is the reason why most commercial mariners restrain from painting the deck and topsides of their aluminum workboats.
The root cause of this aesthetic injustice is the way moisture, especially salt water, finds every microscopic void or coating imperfection and causes aluminum to oxidize around voids and spread beneath the paint layer. By the time blisters appear and paint begins to flake, the sub surface is covered with aluminum oxide and starting to pit.
There are several ways to tame the effect of chloride-rich seawater. But when it comes to a failing painted surface, thorough prep work is essential. Modern epoxy primers help hold corrosion at bay, and single and two-part urethane coatings seal the surface. Hard-anodized or powder coated spars are even better protected, but cost more and are more complicated to refinish when they finally fail.
GALVANIC CORROSION
Galvanic corrosion is aluminum’s second major nemesis, and it stems from an electrical interaction rather than oxidation. Metals are rated on a galvanic corrosion scale that places less reactive (more noble) metals at one end and more reactive (less noble) ones at the other end.
Platinum, beryllium and magnesium lean against one of the bookends of this scale. Magnesium, a plentiful element, is strong and light, 35 percent lighter than aluminum, but way too reactive in the marine environment. Platinum and gold sit at the opposite bookend of reactivity and are so inert that all other metals become anodic in their presence. The metals that lie in between these are relatively ranked according to their behavior in an electrolyte such as seawater.
When it comes to marine applications, there aren’t many platinum thru hulls, but silicon bronze is a pretty good compromise between cost and corrosion resistance. It’s rank on the galvanic scale is toward the more noble end and it behaves as a cathode to less noble metals like zinc, brass, and aluminum, which become anodes in the proximity of more noble metals.
Unfortunately, when dissimilar metals are in direct contact, all it takes is a little rain or morning dew to set up a temporary galvanic cell. Salt spray finds all the nooks and crannies on a sailboat and as the water evaporates it leaves behind crystalized sodium chloride (NaCl). Each raindrop, wave splash or drop of dew rehydrates the electrolyte. And as every galvanic cell demonstrates, wherever two or more dissimilar metals are immersed, a current flows and the less noble material (anode) corrodes causing electrons to flow toward the more noble metal (cathode). The net result is pitting and eventual destruction of the anode.
This prolonged, double-barrel assault on an aluminum spar is most noticeable in areas where dissimilar metals make contact.
There’s an old superstition about putting a couple of silver or copper coins under the mast step, just before stepping the spar. It may have been a good luck charm in the days of iron men and wooden masts. But today, placing a copper penny or silver eagle in a wet mast step completes a highly reactive galvanic cell and creates a corrosion experiment of the first order. The right answer is to do everything possible to separate dissimilar metals. Putting a Delrin strip or dielectric PTFE tape between the hardware and the mast wall really helps.
When installing larger stainless steel hardware on a mast, it’s easy to cut out a gasket from a sheet of 30 mil thick Teflon. Also be sure to use Tef-Gel or a similar dialecrtic grease or sealant on all screw threads.
MAST INSPECTION
Once the mast has been unstepped, positioned horizontally on horses and the headsail furling gear removed, it’s time to take a close look in all the nooks and crannies where things can go wrong. I prefer a bottom up approach and group the mast into four related subsets: base, column, spreaders, and masthead. If the mast is going to be painted, postpone this DIY inspection until all the rigging and hardware has been removed. In either case, scrutinize the spar, hardware and rigging attachment points, especially where high loads are focused.
It helps to have a good magnifying glass, a pick, knife and small scraper on hand to expose and inspect oxidized areas. Place a piece of contrasting color masking tape on each point of concern as you progress toward the masthead. Once the inspection is complete, use a digital camera or smartphone to document the more serious issues. These snapshots provide a record of the location and extent of all corrosion, deep pitting and any cracks emanating from fasteners or hardware. Also record all dents or other impact damage and any sign of ongoing abrasion. Serious damage can be caused by misled wire running rigging and the cycle loading wear linked to variations in tension. Naturally, all standing and running rigging should be thoroughly inspected at this time— a topic of a future article.
AT THE BASE
Keel-stepped masts aboard many cruisers and racers are hidden below the cabin sole and reside in a wet, corrosion prone, bilge ambiance. And it’s another reason why, when a mast is unstepped, the entire support structure, step and the heel fitting deserve a close look. Check for signs of corrosion and make sure the hardware that fastens the heel fitting to the grid or other transverse and fore-and-aft support is in good shape. This structure supports compression loads and also must respond to changes in backstay tension and side loading, not to mention the shock loads of a beat to windward in heavy seas. This is also the time to do what I call spar-oscopy. Take a compact LED flashlight and tape it to the end of a long, thin PVC tube or bamboo fishing pole that will be used to look at the mast interior.
This jury-rigged light on a pole, allows you see signs of internal corrosion and gives you a chance to locate abrasion points where halyards have been misled or are rubbing on hardware. A narrow spot beam will illuminate much of the inner wall of the mast, and if the running rigging has been replaced with thin messengers and the spreader “dog bones” (cross connecting supports) have been removed, you will have a clear sight line up the spar. This is a good time to sort out any halyard overlaps.
Riggers also look for an ailment called “elephant foot.” It’s a descriptive name for the partial crumpling of the spar near the base of the mast, It’s caused by over-compression and/or a wall section that is too thin. This wrinkling is usually just above the mast step, and it indicates a condition just shy of complete failure. It can be linked to prolonged ponding to windward with excessive backstay tension and overpressuring mast jacks. In some cases a new section can be spliced into the spar. By if it’s an older mast and other significant signs of deterioration are present, it may be time to opt for a new spar. Don’t bet the farm on an “it hasn’t failed yet” assumption; hire a skilled rigger to advise on the tough calls.
At first glance, the mechanical challenge linked to stripping hardware from a mast seems rather simple. All you need are a couple of screwdrivers and you’re ready to go. Unfortunately, the gods of galvanic corrosion have placed another obstacle in the sailor’s way.
The threads of those stainless steel screws attaching hardware to base plates or to the mast wall itself have become so corroded they are likely to be screwdriver-proof. Part of the blame goes to original hardware installers, who gave little attention to coating threads with an anti-seize compound and the effect it would have on future maintenance.

So after some years or decades, when it’s time to see what lies underneath the hardware, my first step is to clean all oxidation, paint and grime away from the screw slots and make sure that the chosen screwdriver fills the entire slot. A snug fit is the goal. Then, if a good counter clockwise twist fails to elicit any rotation, it’s time to add a wrench to the screw driver and deploy a good deal more torque.
If this also fails to loosen the bugger, I go to plan B before I ruin the screw slot. Step one is to use a pick to scrape away oxidation around the screw head perimeter. The next step is to douse the area with a penetrant such as PB Blaster, CRC’s Ultra Screwloose, Knocker Loose Plus, Gasoila Free-All or a similar product (see Inside Practical Sailor blog post, “More Boat Tips: Unsticking Stuck Nuts and Bolts”).
Before once again applying torque to the problem, I spend some time using a drift pin and a small ball-peen hammer to tap each chemically soaked fastener. Afterwards I add more penetrant around each screw head. Instead of immediately reverting to a brute force approach, which more often than not leads to a broken fastener or a damaged screw slot, I let the penetrant do its thing and return the next day with my portable impact driver and assortment of screw driver bits. The small Makita impact tool applies a pulsing torque. Combined with a little penetrant and a lot of patience, I’ve found this tool to be very effective on stubborn fasteners. Screw diameters of ¼ inch or less are not hard to snap so use pulsing torque is far better than more leverage and brute force.
If the screw slot is damaged it’s time to switch gears and be ready to drill out the head of the screw and pull the hardware off the remaining stud. A stud remover fitted to a socket wrench works better than vise grips when it comes to backing out a headless screw. But it requires a half-inch or more of the screw stem to be exposed.
The secret to drilling off the damaged head of a screw involves the use of a drill bit made for stainless steel. Place it in the chuck of a low-speed drill that delivers ample torque at slow speeds. Those using a dull bit and a high-speed drill are likely to work-harden the stainless steel screw head, making it even harder to drill. Applying cutting oil that both cools and lubricates a bit will make drilling more effective.
ALONG THE COLUMN
A sailboat mast is like a long electrical fuse: one bad spot and the show is over. Critical failures are usually linked to standing rigging failures and can occur at toggle or tang attachment points, on the spar itself or at spreader tips and roots. Upper shroud tang fittings, near the masthead, need a close look. Check clevis pin holes for elongation and Tball or stem ball cups for deformation.
Sight along the open spans of the spar, where no hardware is attached. It should be free of abrasion marks and signs of halyard shackle damage. It’s surprising how many painstakingly applied paint jobs are ruined by halyard slating cause by poorly set halyards. During this part of the inspection also check exit sheaves, winch bases/pads, mast steps, the bow light, radar bracket and other attached hardware.
The gooseneck fitting and boom vang points of attachment are highstress areas and prone to developing stress cracks. Just below this union, forces converge at the mast partners, the reinforced area where a keelstepped spar passes through the deck. Check here for stress-related damage as well as corrosion issues. If you find signs of extensive pitting or stress cracks, a cosmetic repair can be more harm than help. Have a local rigger with a good reputation take a close look at what you have uncovered.
The mainsail mast track should be straight and the slugs, slides or cars that run in or on them should slide freely. Take an extra slide or car and hand test the track, identifying any points where friction increases. Problems are often caused by burred or dented metal, oxidation in an internal track or misalignment at track joints. Most of these issues are easy to resolve while the spar is horizontal and access is optimized. In-mast or in-boom furling systems each have an inspection and maintenance routine outlined by the manufacturer. Maintaining optimum reliability revolves around following these guidelines. Care should be taken to avoid keeping paint and primer from hampering track function.
Search for causes of abrasion, eliminate the dings and dents from halyard shackles by solving lead problems. And be on the lookout for hairline cracks emanating from fasteners on the leading edge of the mast. Modern spar design accounts for backstay tensioning that induces bend in the mast to adust headsail shape. This bending results in an intentional tension increase on the spar’s leading edge, adding new stress to a column already in compression. Small cracks emanating from fasteners on the leading edge of the mast can be enlarged as the mast is intentionally bowed.
Every sailor who’s painted anything on their boat has plenty of tips to share. But when it comes to useful insider advice, pay more attention to the pros who have learned what works over many years. The good news is that although paint brand allegiance may vary, generic mast prep and painting techniques have a high degree of correlation.
When it comes to the first step in the prep process, every expert sings the same refrain. Remove the hardware if possible, especially if there’s any sign of blistering or paint failure around the edges. If there’s no sign of any corrosion at all, and the fasteners are likely to snap rather than release, carefully prep and tape around the hardware.
Sand, wire brush or sand/soda blast all areas where corrosion has pitted or left the surface covered with white aluminum oxide. Take a close look at the heel of the mast and the mast step itself. Both need to be free of corrosion and not damaged by metal loss or physical damage. The same goes for the area where spreaders, stays and shrouds attach. The masthead fitting also deserves close scrutiny. Inspect the aluminum around where the sheave axle(s) attach. A corroded aluminum masthead truck, with deterioration around the support for headstay or backstay toggles, can spell disaster. This corrosion inspection is a good time to catch pending problems.
In most cases, OEM painted spars hold up quite well, especially those that have been carefully prepped, epoxyprimed and LPU top coated. Eventually, weathering causes the gloss to disappear, but the paint retains excellent adhesive quality. If you’re facing such a challenge and there’s little or no sign of physical damage or corrosion around hardware, there’s nothing wrong with simply renewing the top coat.

In such cases, begin with a wash and/ dewax cleanup, sand with 220/320, remove dust, tape off hardware, solvent wipe and apply of two coats of the same (or similar type) topcoat, scuff-sand between coats.
However, if there are dings, scrapes or areas where corrosion has damaged the coating or areas where paint adhesion is failing, a decision must be made between spot repairs and complete mast redo. The latter involves removal of most or all of the hardware and stripping off every bit of the old paint. A spot repair approach is much less labor intensive, but if corrosion is rampant, spot repairing can be counterproductive.
During the prep process it’s essential to clean and degrease the surface before doing any sanding or other abrasive work. I prefer to use the solvent/cleaner of the paint manufacturer I’ve chosen. Clean cotton rags work best, and by meticulously wet wiping the surface you eliminate contaminants that can be forced into the substrate during sanding.
In the case of a repair and recoat effort, once the corrosion and flaking paint have been removed, feather in the adjacent painted mast surface with 60- 80 grit paper to achieve a toothy grip for the epoxy primer that follows. When doing a spot repair, this taper zone becomes an important test of one’s ability to feather an edge and hide the old to new paint junction. Seamless blending of the primer sets the stage for a successful, smooth transition spot repair. If, as you sand the boundary, the old paint continues to flake rather than allow you to feather the edge, It time to switch gears and consider removing all the paint.
An important step in painting aluminum is to get an epoxy primer on a freshly sanded and clean surface as soon as possible. When painting an entire spar, It helps if you can set up a way to hang the mast at waist level so it can be rotated in order to access all surfaces efficiently.

PRODUCT UPDATE
Interlux recommends doing the degrease wipe down with their 202 Solvent Wash prior to sanding. Then prime the spar using their InterProtect 2000E/2001E, thinned 15-20% with their brush or spray reducer. It’s a user friendly epoxy primer and easy to sand. Two coats makes the 60-80 grit sanding marks disappear. Both single-part Bright Sides and two part Perfection deliver a smooth glossy finish. The former is easier to apply and the latter is more durable and long lived.
Pettit offers a complete lineup of aluminum paint and prep products. Their approach kicks off with a solvent clean and a medium grit emery cloth sanding. When the residue has been removed, a thin coat of #6455 Primer should be applied. Two hours later, EZ Prime #6149 is applied and when it’s cured and sanded with 220 (repeat if necessary). Finish with two coats of Easypoxy.
Awl Grip recommends an initial cleaning with their surface cleaner T340 followed by a vigorous Scotchbrite scrubbing with Deoxidine and a thorough rinse to remove all residue. When dry prime with 30-Y-94 and within 3-6 hours, without sanding, apply 545 epoxy primer. Sand 220/320 and top coat with Awl Craft 2000.
If the spar was previously anodized precede the above with a 10-minute wash using a 33% solution of natrium hydroxide. Don’t let the solution dry on the spar. Immediately water-rinse and follow the prime and paint process above.
Spreader junctions are like a dangerous highway intersection, a point where competing forces interact and where there are no traffic lights to tame the flow. Rigging tension on the windward side of a sailboat cause compression loads to increase in the windward spreader(s) and decrease in the leeward spreader(s). Discontinuous standing rigging optimizes wire/rod diameter in each panel section, but it also complicates spreader tip hardware. All too often, spreader boots or a well-meaning taping effort, ends up looking like a response to an ankle injury. Even worse it creates a moisture-holding corrosion bath that enhances galvanic corrosion and oxidation. The goal is to avoid going overboard with padding and tape and making sure that water will not collect around spreader tip hardware.
Spreader bases are another realm of serious concern due to cycle loading, multidirectional forces and dissimilar metal contact. Swept back spreaders, especially those that eliminate the need for a backstay, cope with even greater loads. So when the rig is un-stepped, check how the spreader attachment was engineered. Was a doubler added to the mast wall and/ or were cutouts installed and hardware added to connect spreader pairs? In either case, corrosion in key load path areas can greatly decrease the spar’s ability to cope with the fluctuating loads. It’s no surprise that masts often break just above a set of spreaders.
AT THE MASTHEAD
Once launched, it’s hard to see what’s going on at the masthead. This means that when the spar is down it’s time to get a really close look at the mast truck and its associated fittings. Begin by disconnecting the standing rigging and checking the geometry of every hole that supports a clevis pin. The rule of thumb is: round is good, elliptical is bad. This goes for the tangs that connect upper shrouds to the spar as well as the holes in a welded aluminum masthead fitting. The loss of an upper shroud while beating to windward usually brings down the mast, so extra attention in this area is time well spent.
Carbon spar manufacturing mimics the engineering pioneered in the aerospace industry. They have become an essential component In the most competitive ranks of sailboat racing and caught on with cruising sailors who own lighter, more performance oriented sailboats.
Most spars are built on metal mandrels by carefully aligning layers of prepreg unidirectional and multi-axial carbon fiber from masthead to heel. Intermittently, a debulking process is used to squeeze the layers together, and after the laminate schedule has been carefully aligned, it’s placed in an autoclave. Here the epoxy prepreg in the carbon material becomes viscous and cures under controlled heat and air pressure. These materials are expensive, the labor is time-consuming and the quality control must be rigorous.

One of the major advantages of carbon mast building is the ability to engineer the layup to coincide with the load paths and stresses in the structure. Finite element analysis has helped identify how and where forces are transferred through the tube section. Weight is saved by only adding material where it is needed.
A cruising boat designer may opt for extra reinforcement that increases the safety factor by raising the breaking point of the material. Racing sailors have validated the performance uptick associated with carbon spars. Carbon/epoxy laminates do not suffer from corrosion but they are anything but immune to UV light. It’s one of the reasons a white primer and LPU topcoat is the sensible finish.
Minor impact damage and abrasion from poorly led running rigging is fairly straight forward to repair. But damage linked to sailing loads that cause major cracks in the laminate or interlayer delamination is another story altogether. In these cases, the spar builder or a composites shop engineer has some tough decisions to make. The big challenge is when a high-tech laminate bundle fails it’s very difficult to scarf in a new section that will handle all the loads in a manner that’s equivalent to, let alone, better than new. Some insurance companies put restrictions or higher premiums on coverage of carbon masts.

RELATED ARTICLES MORE FROM AUTHOR
Leave a reply cancel reply.
Log in to leave a comment
Latest Videos

Island Packet 370: What You Should Know | Boat Review

How To Make Starlink Better On Your Boat | Interview

Catalina 380: What You Should Know | Boat Review
- Privacy Policy
- Do Not Sell My Personal Information
- Online Account Activation
- Privacy Manager
- {{>productsMenu}} Products
- {{>trendsMenu}} News & Trends
- Catalogs >
- Seldén Mast AB >
- Mast bases & Deck rings
- News & Trends
- Exhibitions
Mast bases & Deck rings 15 Pages

Catalog excerpts

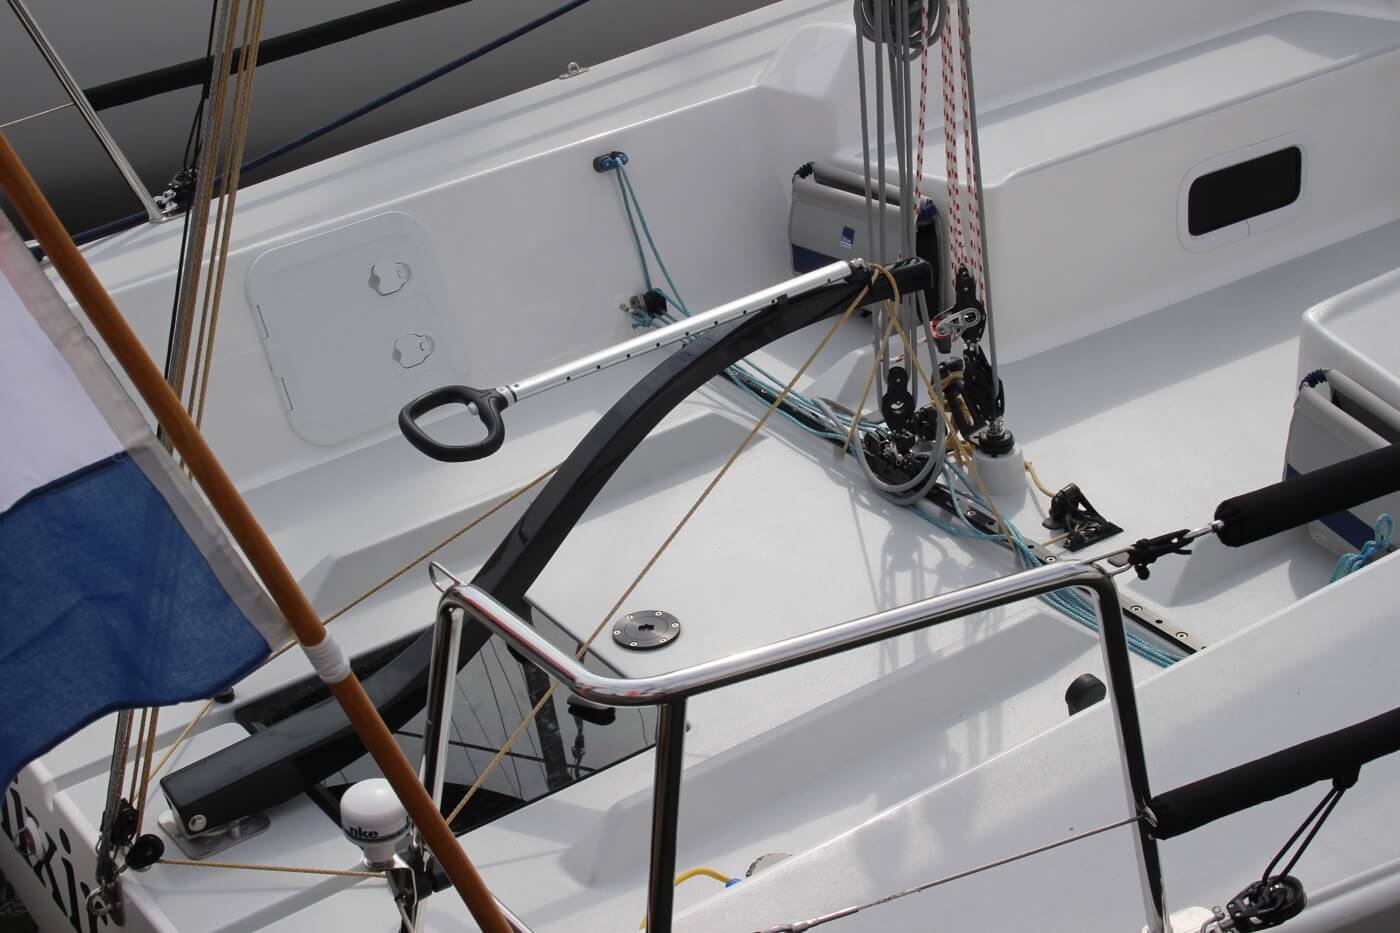
Keel-stepped and deck-stepped masts, C-sections and F-sections The T-base and deck ring systems are made to fit both Seldén’s conventional mast sections and their matching furling sections. They are also made to create deck order among halyards. The blocks are fastened to the T-base or deck ring with a removable stainless steel shaft, which makes it easy to rearra ge the blocks. The deck ring n incorporates a state-of-the-art mast wedging system. Eyes for halyard stowage T-base for deck-stepped masts with integrated block fastenings. Just remove stainless steel shaft to fit up to eight blocks. A two-piece shaft is available for narrow deck layouts.

Keel-stepped masts, C-sections and F-sections The deck ring system for keel-stepped masts has a multipurpose design. The forward composite wedge with rubber chocking is removed while bringing the mast through the deck ring. When refitted and tightened it slides down/aft and secures the mast. The tie rod has four fixed settings, each with plenty of leeway for adjustment. The T-base for keel-stepped masts can be adjusted longitudinally (fore-and-aft) with the mast still in place. Just ease off the rigging and turn the adjusting screw of the T-base until the required prebend and rake are...

Deck ring with moulded mast coat. Tie rods with four fixed settings – plenty of leeway for adjustment. Mast coats (moulded), C-sections and F-sections Mast section Hose clips, Art. No. Upper Lower Replacement coats, Can be fitted with the mast stepped. Section Repl. coat Repl. coat Tie-rod Tie-rod fittings

Mast jack system A mast jack from Seldén ensures that you always retain the right rig tension for racing. It also lets you relieve the load on the rig and boat when you are in port. The mast jack system consists of a hydraulic cylinder located inside the mast. The cylinder piston moves down vertically through the heel of the mast to a steel plate in the boat’s T-base, thereby lifting the mast and increasing the tension. In order to make it easier to jack up the mast, the system includes a two-stage pump that switches to its lower gear as the pressure increases. When the mast reaches its...

Hose garage inside the mast Tie rod prevents the deck from lifting when using the mast jack Tie rod kit, includes conversion parts for standard deck ring Mast extrusion Technical specifications Mast extrusion Mast Mast jack cylinder fitted extr. on mast heel and 2-metre hose with quick coupling Alu(male) minium Accessories Hose garage, including pop rivets Mast extr. Locking bolts for shims (D65/300) Locking bolts for shims (D63/400) Pump with manometer Locking bolts for shims (D80/400) 1/4" hydraulic hose, 2 metres, with couplings Quick coupling (male) T-base with shims and U-bolts for...

Deck-stepped masts, C-sections and F-sections T-base Mast section Rail (stainless) for attaching block, (dim., mm) Block stand-up stainless spring T-base with integrated block attachment Block stand-up, stainless. Art. No. 308-017. T-base, including Separate halyard attachment + block axle for integrated axle blocks*, (dim., mm) 166- 272 Separate Locking screw Block 2-piece for stand-up block axle block axle rubber Cable hose Block stand-up, rubber. Art. No. small 319-512. Art. No. medium 319-669. Art. No. large 319-680.

Convex underside of heel plug – distri butes compression load evenly on the mast section. Small protrusion on top side of heel plug – acts as spacer for cable conduit. Allows cables to run freely. Cable hose prevents moisture from entering the cabin. T-base, Art. No. 510-136-01. Cables can be led through the cable hose and further down in the compression post. They may also exit straight through the heel plug for deck connections. Plugged T-base with built-in block fittings. Cables exit through mast heel for deck connections.

Mast heels for P-sections, E-sections, D-sections and R-sections Mast heel for hinging, Art. No. 502-113. Mast heel for T-base, Art. No. 502-048. Mast heel for T-base, Art. No. 502-110. Mast heel for U-base or T-base, Art. No. 502-089. Heel plugs Serie Mast section Keel-stepped mast heel Heel plug for deck-stepped for U-base for T-base H and keel-stepped Art. No. Art. No. masts, Art. No. T H = Height of heel, mm T = Height of T-base, mm

Deck-stepped heels, P-sections, E-sections, D-sections and R-sections The integrated sheaves for these traditional Seldén heels are easy to replace. H T H = Height of heel, mm T = Height of T-base, mm G1 = G2 = M = TL = S = SL = Deck-stepped heels, Genoa 1 halyard Genoa 2 halyard Main halyard Topping lift Spinnaker halyard Spinnaker lift Remarks Rail: Art. No. 508-161 Wire/rope splices in exits 2 and 5. Use max. 8 mm rope or shorten wire part 1.0 m. Wire/rope splices in exits 3 and 4, see remark above. Wire/rope splices in exits 2 and 3, see remark above.

Deck-stepped heels, Design/mast section Replacement sheaves for heels, Deck-stepped heels, Design/mast section Replacement sheaves for heels, Rail, large masts Mast section

Deck ring system for keel-stepped conventional masts, E-sections and D-sections Internal seal Lead block Mast coat When the mast is keel-stepped, it is important to secure the deck to the mast, especially when the halyards are led via turning blocks attached to the deck ring. Otherwise, the lifting force of the halyards could lift the deck. Seldén traditional deck ring incorporates a “tie-rod system” to eliminate this lifting action. Rubber wedges are used to fix the mast in the deck ring. Rails and halyard eyes are available as extras. Hose clip Support fitting (certain sections only)...

Wedgings, mast coats, clips Mast coat M ast Deck ring Wedging Art. No. Upper circum- Upper section size Art. No. ference, mm seal E 122 deck ring size

Deck ring system for keel-stepped furling masts, R-sections The deck ring system for keel-stepped furling masts has the same design as the conventional deck ring system. It incorporates the same features, including chocking system, internal sealing, and a tie-rod system to eliminate the lifting action of the halyards. Deck rings Mast Art. No. Art. No. Art. No. section No extra function incl. rail* Rail** (dim., mm) Art. No. Two tie-rod rigging screws incl. backing plates. * U-bolt (M8 x 53 mm) + nuts for halyard, Art. No. 508-023-02 1-4 can be fitted. ** Must not be used for...
All Seldén Mast AB catalogs and brochures

7 Pages

4 Pages

12 Pages

3 Pages

8 Pages

11 Pages

9 Pages

114 Pages

2 Pages

6 Pages

194 Pages

1 Pages

52 Pages

72 Pages

28 Pages

16 Pages

Archived catalogs

200 Pages

19 Pages
Related Searches
- Seldén sailboat block
- Seldén single block
- Nautical light
- Boat navigation light
- Seldén ball bearing block
- Seldén block with swivel
- Seldén plain bearing block
- Seldén cheek block
- Nautical shackle
- Seldén block with becket
- Seldén block with ball bearing
- Green navigation light
- Snap shackle
- Seldén turnbuckle
- Standing rigging terminal
- Shackle for sailboats
- Lashing block
- Seldén sailboat turnbuckle
- Manufacturer account
- Buyer account
- Our services
- Newsletter subscription
- AboutVirtualExpo Group
Sailboat Parts Explained: Illustrated Guide (with Diagrams)
When you first get into sailing, there are a lot of sailboat parts to learn. Scouting for a good guide to all the parts, I couldn't find any, so I wrote one myself.
Below, I'll go over each different sailboat part. And I mean each and every one of them. I'll walk you through them one by one, and explain each part's function. I've also made sure to add good illustrations and clear diagrams.
This article is a great reference for beginners and experienced sailors alike. It's a great starting point, but also a great reference manual. Let's kick off with a quick general overview of the different sailboat parts.
General Overview
The different segments
You can divide up a sailboat in four general segments. These segments are arbitrary (I made them up) but it will help us to understand the parts more quickly. Some are super straightforward and some have a bit more ninja names.
Something like that. You can see the different segments highlighted in this diagram below:

The hull is what most people would consider 'the boat'. It's the part that provides buoyancy and carries everything else: sails, masts, rigging, and so on. Without the hull, there would be no boat. The hull can be divided into different parts: deck, keel, cabin, waterline, bilge, bow, stern, rudder, and many more.
I'll show you those specific parts later on. First, let's move on to the mast.

Sailboats Explained
The mast is the long, standing pole holding the sails. It is typically placed just off-center of a sailboat (a little bit to the front) and gives the sailboat its characteristic shape. The mast is crucial for any sailboat: without a mast, any sailboat would become just a regular boat.
I think this segment speaks mostly for itself. Most modern sailboats you see will have two sails up, but they can carry a variety of other specialty sails. And there are all kinds of sail plans out there, which determine the amount and shape of sails that are used.
The Rigging
This is probably the most complex category of all of them.
Rigging is the means with which the sails are attached to the mast. The rigging consists of all kinds of lines, cables, spars, and hardware. It's the segment with the most different parts.
The most important parts
If you learn anything from this article, here are the most important parts of any sailboat. You will find all of these parts in some shape or form on almost any sailboat.

Okay, we now have a good starting point and a good basic understanding of the different sailboat parts. It's time for the good stuff. We're going to dive into each segment in detail.
Below, I'll go over them one by one, pointing out its different parts on a diagram, listing them with a brief explanation, and showing you examples as well.
After reading this article, you'll recognize every single sailboat part and know them by name. And if you forget one, you're free to look it up in this guide.

On this page:
The hull is the heart of the boat. It's what carries everything: the mast, the sails, the rigging, the passengers. The hull is what provides the sailboat with its buoyancy, allowing it to stay afloat.
Sailboats mostly use displacement hulls, which is a shape that displaces water when moving through it. They are generally very round and use buoyancy to support its own weight. These two characteristics make sure it is a smooth ride.
There are different hull shapes that work and handle differently. If you want to learn more about them, here's the Illustrated Guide to Boat Hull Types (with 11 Examples ). But for now, all we need to know is that the hull is the rounded, floating part of any sailboat.
Instead of simply calling the different sides of a hull front, back, left and right , we use different names in sailing. Let's take a look at them.

The bow is the front part of the hull. It's simply the nautical word for 'front'. It's the pointy bit that cuts through the water. The shape of the bow determines partially how the boat handles.
The stern is the back part of the hull. It's simply the nautical word for 'back'. The shape of the stern partially determines the stability and speed of the boat. With motorboats, the stern lies deep inside the water, and the hull is flatter aft. Aft also means back. This allows it to plane, increasing the hull speed. For sailboats, stability is much more important, so the hull is rounded throughout, increasing its buoyancy and hydrodynamic properties.
The transom is the backplate of the boat's hull. It's the most aft (rear) part of the boat.
Port is the left side of a sailboat.
Starboard is the right side of a sailboat
The bilges are the part where the bottom and the sides of the hull meet. On sailboats, these are typically very round, which helps with hydrodynamics. On powerboats, they tend to have an angle.
The waterline is the point where the boat's hull meets the water. Generally, boat owners paint the waterline and use antifouling paint below it, to protect it from marine growth.
The deck is the top part of the boat's hull. In a way, it's the cap of the boat, and it holds the deck hardware and rigging.
Displacement hulls are very round and smooth, which makes them very efficient and comfortable. But it also makes them very easy to capsize: think of a canoe, for example.
The keel is a large fin that offsets the tendency to capsize by providing counterbalance. Typically, the keel carries ballast in the tip, creating a counterweight to the wind's force on the sails.
The rudder is the horizontal plate at the back of the boat that is used to steer by setting a course and maintaining it. It is connected to the helm or tiller.
Tiller or Helm
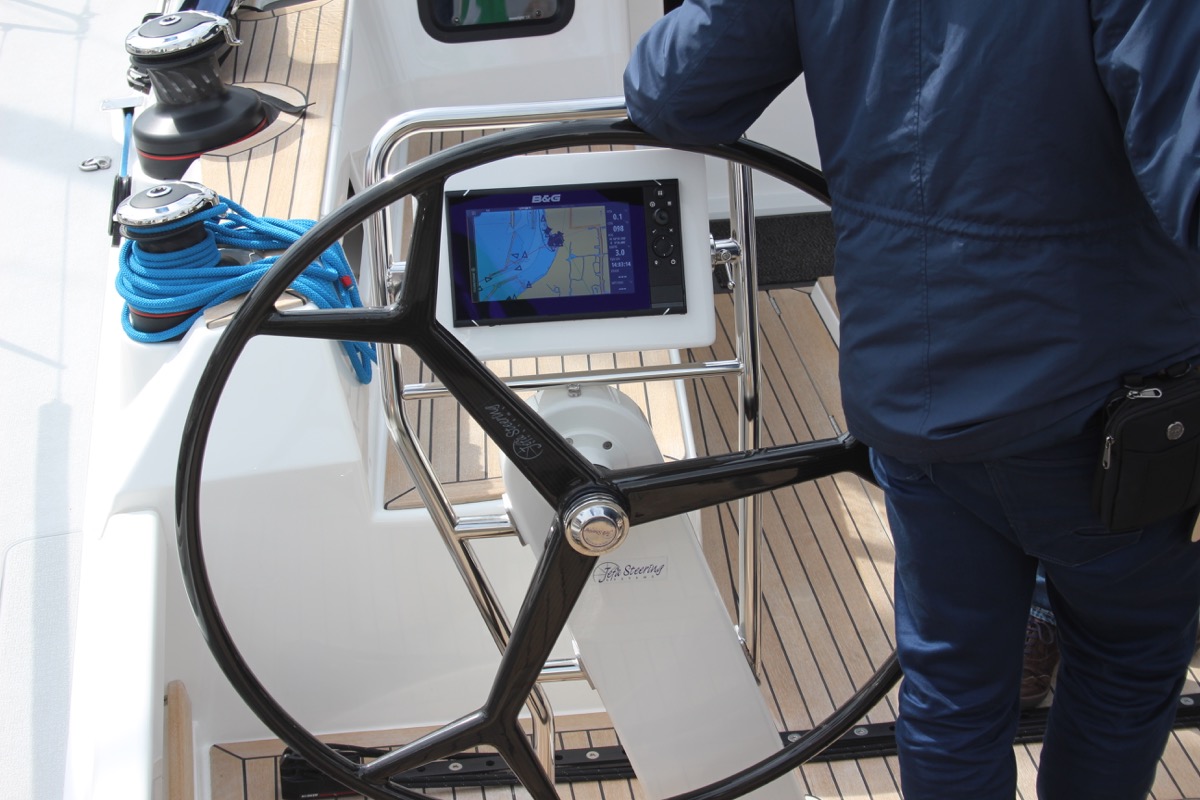
- The helm is simply the nautical term for the wheel.
- The tiller is simply the nautical term for the steering stick.
The tiller or helm is attached to the rudder and is used to steer the boat. Most smaller sailboats (below 30') have a tiller, most larger sailboats use a helm. Large ocean-going vessels tend to have two helms.
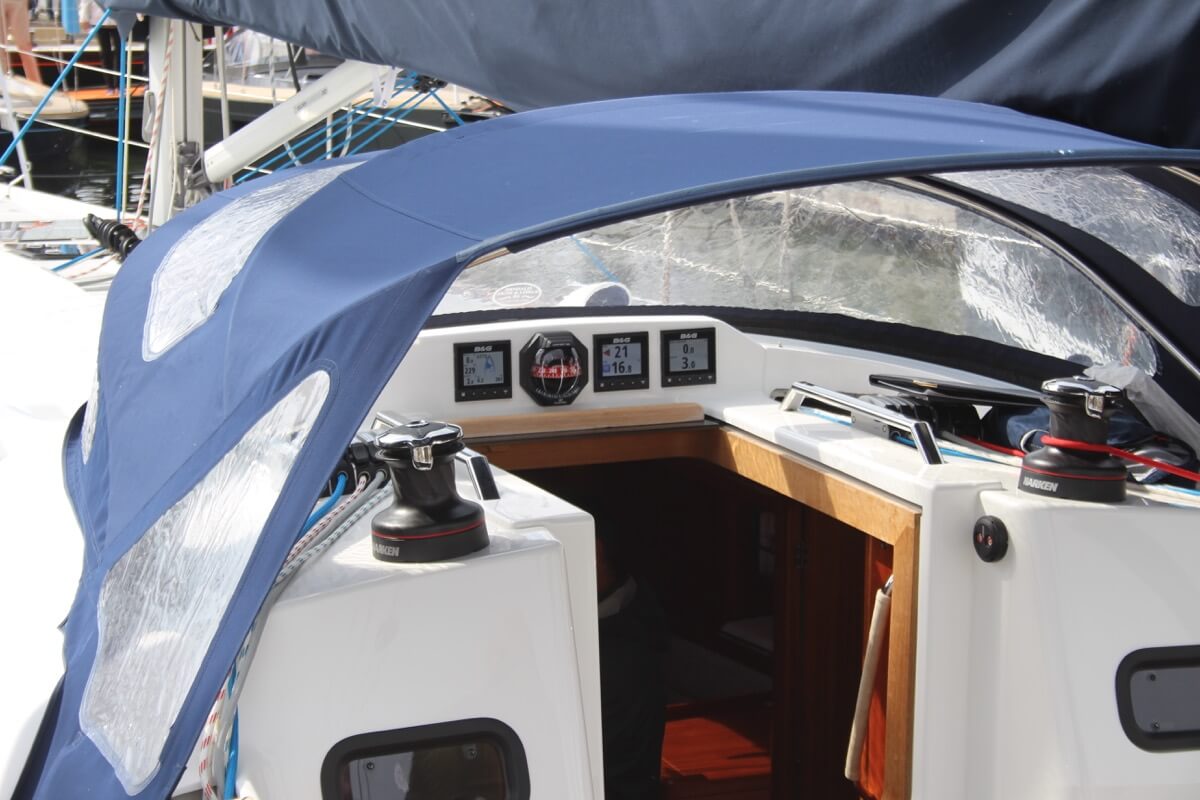
The cockpit is the recessed part in the deck where the helmsman sits or stands. It tends to have some benches. It houses the outside navigation and systems interfaces, like the compass, chartplotter, and so on. It also houses the mainsheet traveler and winches for the jib. Most boats are set up so that the entire vessel can be operated from the cockpit (hence the name). More on those different parts later.
Most larger boats have some sort of roofed part, which is called the cabin. The cabin is used as a shelter, and on cruising sailboats you'll find the galley for cooking, a bed, bath room, and so on.
The mast is the pole on a sailboat that holds the sails. Sailboats can have one or multiple masts, depending on the mast configuration. Most sailboats have only one or two masts. Three masts or more is less common.
The boom is the horizontal pole on the mast, that holds the mainsail in place.
The sails seem simple, but actually consist of many moving parts. The parts I list below work for most modern sailboats - I mean 90% of them. However, there are all sorts of specialty sails that are not included here, to keep things concise.

The mainsail is the largest sail on the largest mast. Most sailboats use a sloop rigging (just one mast with one bermuda mainsail). In that case, the main is easy to recognize. With other rig types, it gets more difficult, since there can be multiple tall masts and large sails.
If you want to take a look at the different sail plans and rig types that are out there, I suggest reading my previous guide on how to recognize any sailboat here (opens in new tab).
Sail sides:
- Leech - Leech is the name for the back side of the sail, running from the top to the bottom.
- Luff - Luff is the name for the front side of the sail, running from the top to the bottom.
- Foot - Foot is the name for the lower side of the sail, where it meets the boom.
Sail corners:
- Clew - The clew is the lower aft (back) corner of the mainsail, where the leech is connected to the foot. The clew is attached to the boom.
- Tack - The tack is the lower front corner of the mainsail
- Head - The head is the top corner of the mainsail
Battens are horizontal sail reinforcers that flatten and stiffen the sail.
Telltales are small strings that show you whether your sail trim is correct. You'll find telltales on both your jib and mainsail.
The jib is the standard sized headsail on a Bermuda Sloop rig (which is the sail plan most modern sailboats use).
As I mentioned: there are all kinds, types, and shapes of sails. For an overview of the most common sail types, check out my Guide on Sail Types here (with photos).
The rigging is what is used to attach your sails and mast to your boat. Rigging, in other words, mostly consists of all kinds of lines. Lines are just another word for ropes. Come to think of it, sailors really find all kinds of ways to complicate the word rope ...
Two types of rigging
There are two types of rigging: running and standing rigging. The difference between the two is very simple.
- The running rigging is the rigging on a sailboat that's used to operate the sails. For example, the halyard, which is used to lower and heave the mainsail.
- The standing rigging is the rigging that is used to support the mast and sail plan.
Standing Rigging

Here are the different parts that belong to the standing rigging:
- Forestay or Headstay - Line or cable that supports the mast and is attached to the bow of the boat. This is often a steel cable.
- Backstay - Line or cable that supports the mast and is attached to the stern of the boat. This is often a steel cable.
- Sidestay or Shroud - Line or cable that supports the mast from the sides of the boat. Most sailboats use at least two sidestays (one on each side).
- Spreader - The sidestays are spaced to steer clear from the mast using spreaders.
Running Rigging: different words for rope
Ropes play a big part in sailing, and especially in control over the sails. In sailboat jargon, we call ropes 'lines'. But there are some lines with a specific function that have a different name. I think this makes it easier to communicate with your crew: you don't have to define which line you mean. Instead, you simply shout 'mainsheet!'. Yeah, that works.
Running rigging consists of the lines, sheets, and hardware that are used to control, raise, lower, shape and manipulate the sails on a sailboat. Rigging varies for different rig types, but since most sailboats are use a sloop rig, nearly all sailboats use the following running rigging:

- Halyards -'Halyard' is simply the nautical name for lines or ropes that are used to raise and lower the mainsail. The halyard is attached to the top of the mainsail sheet, or the gaffer, which is a top spar that attaches to the mainsail. You'll find halyards on both the mainsail and jib.
- Sheets - 'Sheet' is simply the nautical term for lines or ropes that are used to set the angle of the sail.
- Mainsheet - The line, or sheet, that is used to set the angle of the mainsail. The mainsheet is attached to the Mainsheet traveler. More on that under hardware.
- Jib Sheet - The jib mostly comes with two sheets: one on each side of the mast. This prevents you from having to loosen your sheet, throwing it around the other side of the mast, and tightening it. The jib sheets are often controlled using winches (more on that under hardware).
- Cleats are small on-deck hooks that can be used to tie down sheets and lines after trimming them.
- Reefing lines - Lines that run through the mainsail, used to put a reef in the main.
- The Boom Topping Lift is a line that is attached to the aft (back) end of the boom and runs to the top of the mast. It supports the boom whenever you take down the mainsail.
- The Boom Vang is a line that places downward tension on the boom.
There are some more tensioning lines, but I'll leave them for now. I could probably do an entire guide on the different sheets on a sailboat. Who knows, perhaps I'll write it.
This is a new segment, that I didn't mention before. It's a bit of an odd duck, so I threw all sorts of stuff into this category. But they are just as important as all the other parts. Your hardware consists of cleats, winches, traveler and so on. If you don't know what all of this means, no worries: neither did I. Below, you'll find a complete overview of the different parts.
Deck Hardware

Just a brief mention of the different deck hardware parts:
- Pulpits are fenced platforms on the sailboat's stern and bow, which is why they are called the bow pulpit and stern pulpit here. They typically have a solid steel framing for safety.
- Stanchons are the standing poles supporting the lifeline , which combined for a sort of fencing around the sailboat's deck. On most sailboats, steel and steel cables are used for the stanchons and lifelines.
Mainsheet Traveler
The mainsheet traveler is a rail in the cockpit that is used to control the mainsheet. It helps to lock the mainsheet in place, fixing the mainsails angle to the wind.
If you're interested in learning more about how to use the mainsheet traveler, Matej has written a great list of tips for using your mainsheet traveler the right way . It's a good starting point for beginners.
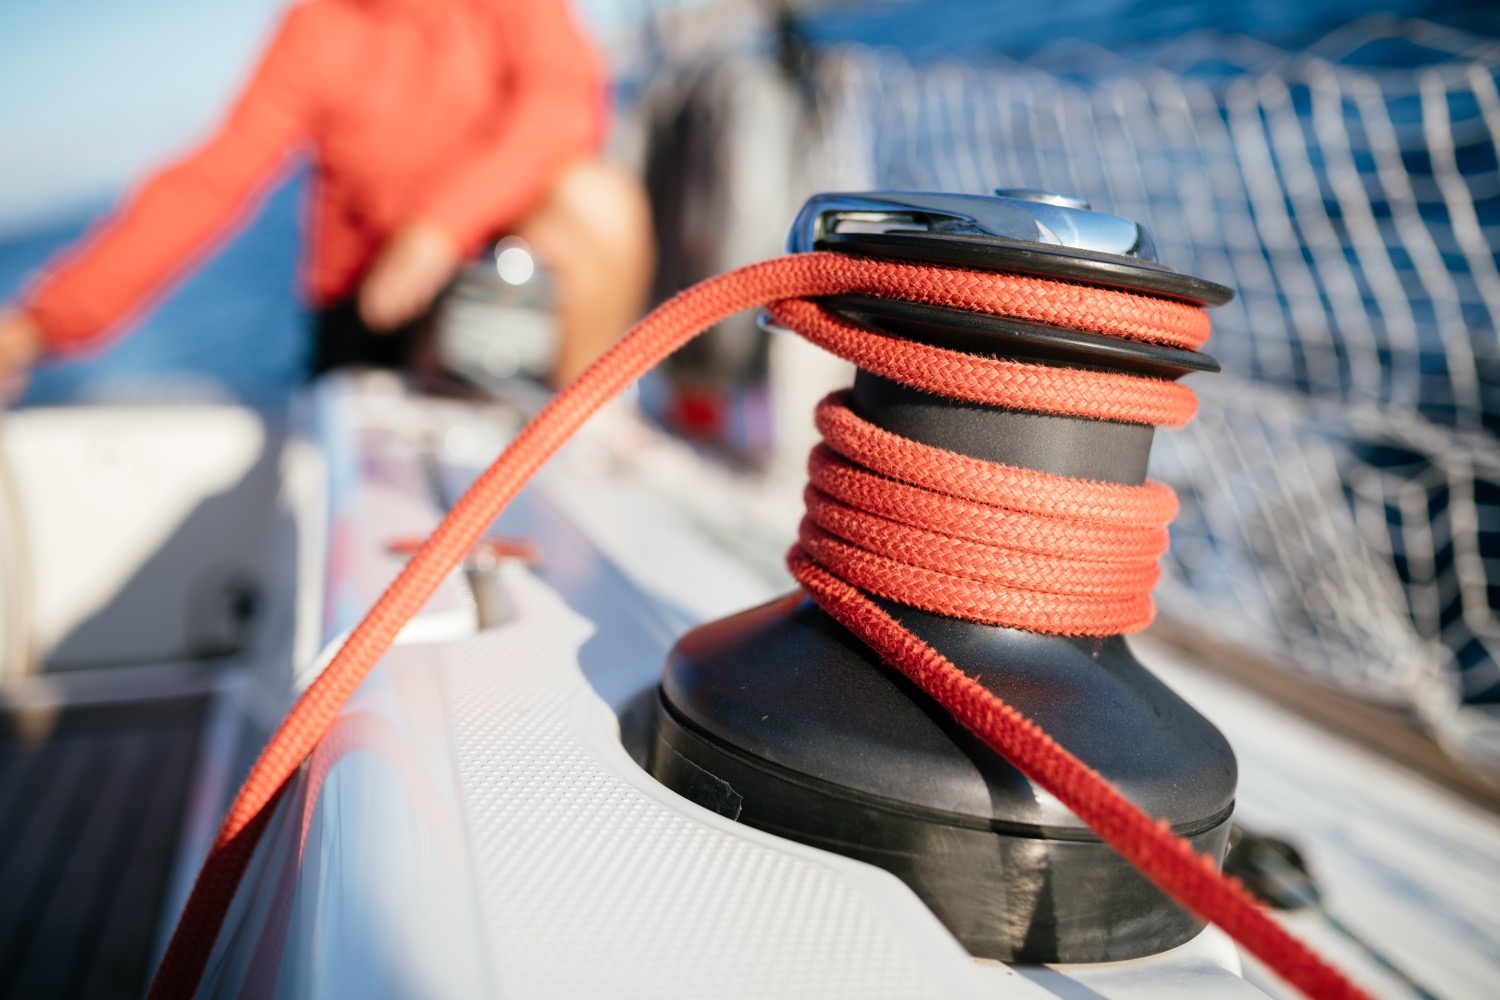
Winches are mechanical or electronic spools that are used to easily trim lines and sheets. Most sailboats use winches to control the jib sheets. Modern large sailing yachts use electronic winches for nearly all lines. This makes it incredibly easy to trim your lines.
You'll find the compass typically in the cockpit. It's the most old-skool navigation tool out there, but I'm convinced it's also one of the most reliable. In any way, it definitely is the most solid backup navigator you can get for the money.
Want to learn how to use a compass quickly and reliably? It's easy. Just read my step-by-step beginner guide on How To Use a Compass (opens in new tab .
Chartplotter
Most sailboats nowadays use, besides a compass and a map, a chartplotter. Chartplotters are GPS devices that show a map and a course. It's very similar to your normal car navigation.
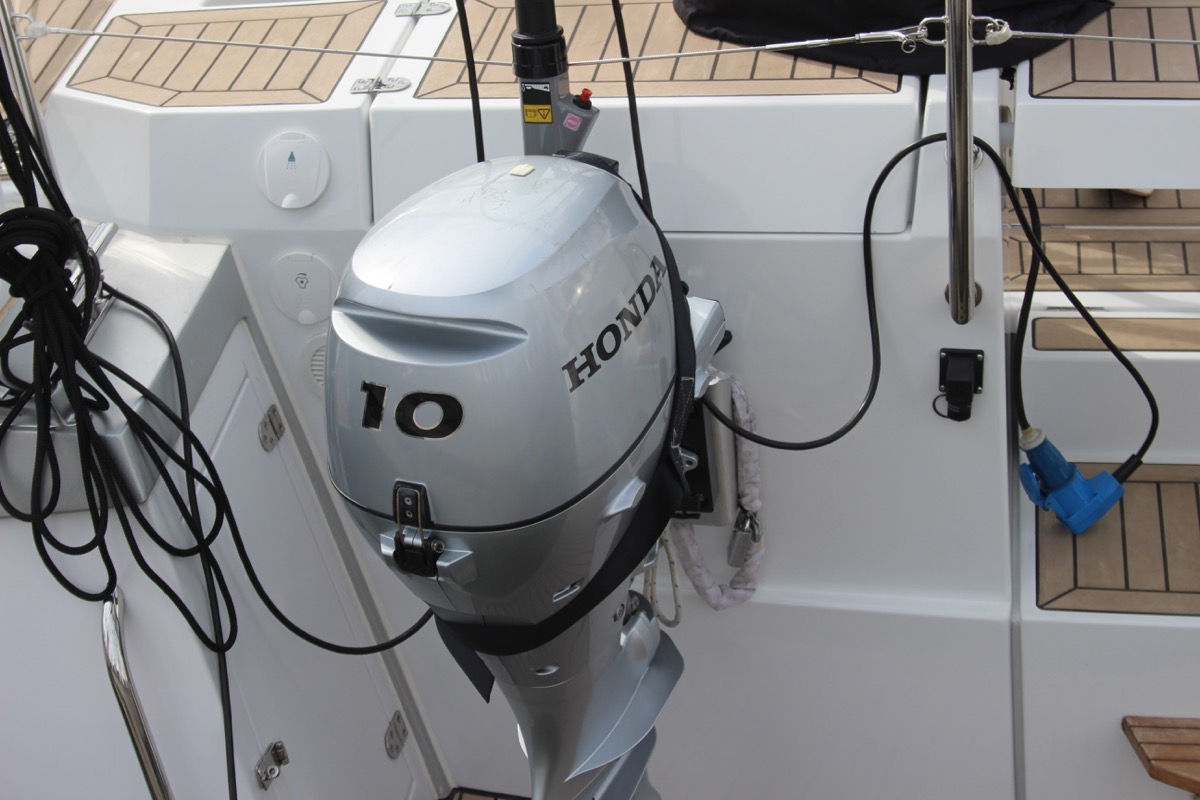
Outboard motor
Most sailboats have some sort of motor to help out when there's just the slightest breeze. These engines aren't very big or powerful, and most sailboats up to 32' use an outboard motor. You'll find these at the back of the boat.
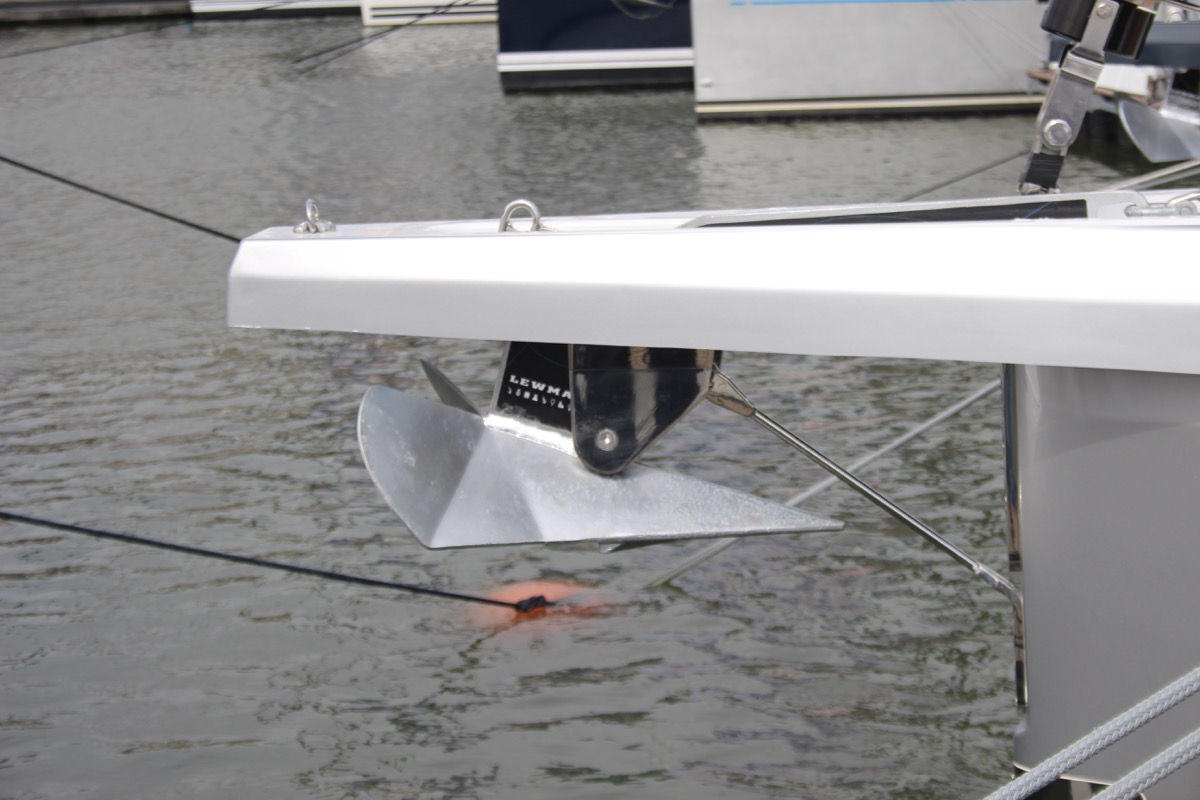
Most sailboats carry 1 - 3 anchors: one bow anchor (the main one) and two stern anchors. The last two are optional and are mostly used by bluewater cruisers.
I hope this was helpful, and that you've gained a good understanding of the different parts involved in sailing. I wanted to write a good walk-through instead of overwhelming you with lists and lists of nautical terms. I hope I've succeeded. If so, I appreciate any comments and tips below.
I've tried to be as comprehensive as possible, without getting into the real nitty gritty. That would make for a gigantic article. However, if you feel I've left something out that really should be in here, please let me know in the comments below, so I can update the article.
I own a small 20 foot yacht called a Red witch made locally back in the 70s here in Western Australia i found your article great and enjoyed reading it i know it will be a great help for me in my future leaning to sail regards John.
David Gardner
İ think this is a good explanation of the difference between a ”rope” and a ”line”:
Rope is unemployed cordage. In other words, when it is in a coil and has not been assigned a job, it is just a rope.
On the other hand, when you prepare a rope for a specific task, it becomes employed and is a line. The line is labeled by the job it performs; for example, anchor line, dock line, fender line, etc.
Hey Mr. Buckles
I am taking on new crew to race with me on my Flying Scot (19ft dingy). I find your Sailboat Parts Explained to be clear and concise. I believe it will help my new crew learn the language that we use on the boat quickly without being overwhelmed.
PS: my grandparents were from Friesland and emigrated to America.
Thank you Shawn for the well written, clear and easy to digest introductory article. Just after reading this first article I feel excited and ready to set sails and go!! LOL!! Cheers! Daniel.
steve Balog
well done, chap
Great intro. However, the overview diagram misidentifies the cockpit location. The cockpit is located aft of the helm. Your diagram points to a location to the fore of the helm.
William Thompson-Ambrose
An excellent introduction to the basic anatomy and function of the sailboat. Anyone who wants to start sailing should consider the above article before stepping aboard! Thank-you
James Huskisson
Thanks for you efforts mate. We’ve all got to start somewhere. Thanks for sharing. Hoping to my first yacht. 25ft Holland. Would love to cross the Bass Strait one day to Tasmania. 👌 Cheers mate
Alan Alexander Percy
thankyou ijust aquired my first sailboat at 66yrs of age its down at pelican point a beautifull place in virginia usa my sailboat is a redwing 30 if you are ever in the area i wouldnt mind your guidance and superior knowledge of how to sail but iam sure your fantastic article will help my sailboat is wings 30 ft
Thanks for quick refresher course. Having sailed in California for 20+ years I now live in Spain where I have to take a spanish exam for a sailboat license. Problem is, it’s only in spanish. So a lot to learn for an old guy like me.
Very comprehensive, thank you
Your article really brought all the pieces together for me today. I have been adventuring my first sailing voyage for 2 months from the Carolinas and am now in Eleuthera waiting on weather to make the Exumas!!! Great job and thanks
Helen Ballard
I’ve at last found something of an adventure to have in sailing, so I’m starting at the basics, I have done a little sailing but need more despite being over 60 life in the old dog etc, thanks for your information 😊
Barbara Scott
I don’t have a sailboat, neither do l plan to literally take to the waters. But for mental exercise, l have decided to take to sailing in my Bermuda sloop, learning what it takes to become a good sailor and run a tight ship, even if it’s just imaginary. Thank you for helping me on my journey to countless adventures and misadventures, just to keep it out of the doldrums! (I’m a 69 year old African American female who have rediscovered why l enjoyed reading The Adventures of Robert Louis Stevenson as well as his captivating description of sea, wind, sailboat,and sailor).
Great article and very good information source for a beginner like me. But I didn’t find out what I had hoped to, which is, what are all those noisy bits of kit on top of the mast? I know the one with the arrow is a weather vane, but the rest? Many thanks, Jay.
Louis Cohen
The main halyard is attached to the head of the mainsail, not the to the mainsheet. In the USA, we say gaff, not gaffer. The gaff often has its own halyard separate from the main halyard.
Other than that it’s a nice article with good diagrams.
A Girl Who Has an Open Sail Dream
Wow! That was a lot of great detail! Thank you, this is going to help me a lot on my project!
Hi, good info, do u know a book that explains all the systems on a candc 27,
Emma Delaney
As a hobbyist, I was hesitant to invest in expensive CAD software, but CADHOBBY IntelliCAD has proven to be a cost-effective alternative that delivers the same quality and performance.
https://www.cadhobby.com/
Leave a comment
You may also like, guide to understanding sail rig types (with pictures).
There are a lot of different sail rig types and it can be difficult to remember what's what. So I've come up with a system. Let me explain it in this article.

The Ultimate Guide to Sail Types and Rigs (with Pictures)

The Illustrated Guide To Boat Hull Types (11 Examples)

How To Live On a Boat For Free: How I'd Do It

How To Live on a Sailboat: Consider These 5 Things
Own your first boat within a year on any budget.
A sailboat doesn't have to be expensive if you know what you're doing. If you want to learn how to make your sailing dream reality within a year, leave your email and I'll send you free updates . I don't like spam - I will only send helpful content.
Ready to Own Your First Boat?
Just tell us the best email address to send your tips to:

- Optiparts Optimist Spars
- Optiparts Masts
- Optiparts Mast Steps & Collars
Optiparts Mast Step Base (Plate Only)
Write a review.
")
- Create New Wish List
- Description
Sailboat Mast Base Repair
One of the first repairs I knew I would need to make to this Albin Vega was the significant amount of corrosion at the base of the mast. Over the last few weeks I was able to drop the mast, make that repair (among others) and then re-raise the mast, all in my slip using basic materials.
Before getting into that though, some news. My Albin Vega is now for sale, go here for details . I’ll explain further in a subsequent post, but I will say now that my circumnavigation is still happening.
So onto the repair. In order to lower the mast I used an A-Frame and tackle to first lift and then lower it. The materials:
- 4 x 10′ long 2×4’s
- 5 x 1/2″ lag bolts w/ nuts and washers
- Short piece of 1/4″ angle aluminum at the apex to attach tackle
- Line at the base of the legs to attach them to the stanchion bases to avoid sliding
- Line/rope which is used as stays for the A-frame, attaching to the aft/fore most cleats. My A-frame used 4 stays total

The procedure has been outlined a few times elsewhere, basically build an A-frame that extends at least ~2 feet above the spreaders (more is better) and use tackle (I used the mainsheet) to do the hoisting. I will quickly note some things I learned:
- Taller is better for the A-Frame
- Low-stretch rope used for A-Frame stays will add much peace of mind
- Using the mainsheet works, but is sketchy (more substantial tackle would add a lot of psychological comfort)
- Use tape to secure the lower shrouds in a vertical position on the chainplates to insure they don’t kink while raising
Now onto the repair itself. This is what my mast base looked like before being repaired:

Yikes! This is caused by galvanic corrosion, two dissimilar metals not playing well with one another. The mast step arrangement was also ugly:

Also yikes-worthy! Getting started, I removed that plug you see in the center. Easier said than done, to say the least. But after a day of wrestling, I did manage to get it out. This is what I was left with:

It became evident that at some point, someone put a lot of effort into reinforcing the mast step. They actually did a very good job below decks reinforcing the step. An SS plate mounted aft and aluminum angle fore, sandwiched between them is the wood bulkhead. The aluminum had slots cut into it, allowing it to be formed to the curvature of the cabin top. Ten bolts mate the three pieces. Additional wood supports then help transfer all that load down to the cabin sole. Here is what that looks like inside facing forward:

Whoever designed this did so in a way that would displace the force of the mast onto the aluminum angle, SS plate and bulkhead, which would then distribute that load across the bulkhead and down to the sole. I didn’t like the plug arrangement, but I did like the concept as a whole. So I decided to retain the features I liked and modify the ones I didn’t. Inside that gaping hole looked like this:

What I did to replace it would be better understood if I just show you. The tube I used is 3″ 6065 aluminum, 1/8″ thick:

Using the cut section of mast for the measurement, I made a spacer by encapsulating G10 in fiberglass. I gave it a large footprint to insure a widely distributed load.

I’m very pleased with the end result. Though it was a more drawn out process than some would have taken on, I don’t foresee the base being an issue again with this fix. It also looks much better than what it started as.
The most difficult and, let me be clear, very sketchy part of the operation was having the mast suspended in the air, being held up by tiny 3/16″ SS pins that seemed sure to break at any moment. Dropping and raising the mast in the slip is very doable, but heed my aforementioned advice, particularly the height of the A-Frame and stretchiness of the rope used for the stays.
Christmas in Jamaica
The old switcheroo - buying a hallberg-rassy 33.

Jacob is an incompetent sailor that expends 83% of his energy attempting not to embarrass himself. He intends to sail around the world on his 33-foot sailboat. Following years of training, Jacob has become adept at repairing things he has broken.
Related Posts

La Paz Boatyard Price Comparison

Refreshing the brightwork

The old switcheroo – Buying a Hallberg-Rassy 33

Circumnavigation by Sailboat

Hi J. I came to know of this through Cruising Forum. Well done, well crafted and well sorted through internet advice. I’m in Sydney Oz’tralia and I would be pleased to be in touch and have you stay local as you journey. Please personal message me. Fare weather and foul, best wishes. A

Thanks A! I’ll be in touch when I get nearer to Oz, feel free to send me a message anytime.
Hello J. You are most welcome in Sydney. I know this end of the Pacific. If you put chipboard into a mast base the I suggest you acknowledge with honor or correct me with facts and actual. If not, then your early reputation will be world wide announced, before you even set voyage. Not my voyage situation. Please don’t leave a maintenance death trap as you choose another vessel. Doubtfully, A.
As mentioned – it is not chip board, it is fiberglass.

Jacob, I too read about your V27 (being for sale) on ‘Cruisers Forum’, and found my self wanting to look at your web page. I think you did a very detailed mast step refit on this boat and your repair appears as seaworthy as any I have seen on any boat over the years. Lastly, you remind me of myself 40 years ago, full of interest in Life and what’s around the next bend! Never stop exploring or being willing to tackle something you’ve never done before. Now I know I’ll be logging on here to view all of your other travel logs and enjoy your creative photography as well. Don’t forget to join ‘Cruisers Forum’ as I’m sure more folks over there will come around to enjoying your travels as well! Bon Voyage! Pat
Thanks Pat! Great hearing of third party approval. Although I’ve been working on land vehicles my whole life, this boat stuff is fairly new to me…so it’s comforting that my methods meet the standards of the informed community.
It’s funny you say that [I remind you of you], as the man who sold me the new boat at such an incredible price said the same thing. Out of curiosity, how do you find life on your end of the spectrum, are you still excited and compelled to push boundaries?
You can find me over at CF, username “AmericanVagrant”. I lurk quite a bit, but am pretty selective about the conversations I join (both because they’re divisive and because I can’t proclaim to have a vast, infallible knowledge about something I’ve only been doing for a relatively short amount of time).
At any rate, hope you can find some entertainment in my journey. Be sure to stay in touch – Jacob

I want your boat, but cannot have it. Spouse doe not like her, particularly after I told her one had even done the NW passage. It is tough to be both old and stupid, but I have managed. Enjoy you venture/adventures! Best to do them before becoming youthless, but I still believe it is possible.

To prevent corrosion of mast again, could you not have used aluminum at base? Since job is done, perhaps you can use super hard rubber pad used to hold heavy compressors etc.?
Alternatively, or perhaps in addition too, you could inject base of mast, say to one foot high, with expandable polyurethane insulation. In this way condensation happening inside mast will not reach base of mast where the two different metal are close. I believe galvanic corrosion will still happened in mast if there is a continuous water film touching both metals.
Polyurethane foam is relatively easy to break up if you ever need to, to run new wiring, for example.
Instead of polyurethane foam you could add inside base of mast small plastic beads or a powdered plastic.
Leave a Reply Cancel reply
More stories, anchoring on catalina island.


Organizers & Mast Base Plates

You are using an outdated browser. Please upgrade your browser to improve your experience.
- MacGregor Boat Parts
- Tattoo Boat Parts
- Venture Boat Parts
- MacGregor and Venture Trailer Parts

- Forums New posts Unanswered threads Register Top Posts Email
- What's new New posts New Posts (legacy) Latest activity New media
- Media New media New comments
- Boat Info Downloads Weekly Quiz Topic FAQ 10000boatnames.com
- Classifieds Sell Your Boat Used Gear for Sale
- Parts General Marine Parts Hunter Beneteau Catalina MacGregor Oday
- Help Terms of Use Monday Mail Subscribe Monday Mail Unsubscribe
O’day 222 Mast Base Plate
- Thread starter anyhony
- Start date Sep 13, 2020
- Tags 1984 222 oday sail boat
- Forums for All Owners
- Ask All Sailors
Hello everyone, Just managed to damage the loop at the mast foot hinge. The base plate at the boat is fine. However, the section at the bottom of the mast snapped both hinges loops. I found the part number apparently is Z-145SF-10/245 but I cannot find that part anywhere does anyone have any idea where to find such part? Is for a 1986 O’day 222 Also, I think the mast should continue to work as it should since most of the baseplate still intact and the all the lines are fine any thoughts on that ? I appreciate any feedback I’m fairly new to sailing and this is my first boat. Thanks for reading. regards, Monty
Attachments

Try d & r marine..... Rudy may have it or will have an idea where to get it. Good luck!
Crazy Dave Condon
Z? Z Spar maybe but now Us Spars. Could be Keyon-Isomat but contact Rig Rite Dwyer mast?

That’s a Z Spar base, same one my 1988 192 has. Contact US Spars for a replacement. I think you may need to replace the base and the step on the boat because the step for that particular mast extrusion was changed. I can’t remember exactly though.

Call the guys here at SBO. They have found weird parts for me before.
Crazy Dave Condon said: Z? Z Spar maybe but now Us Spars. Could be Keyon-Isomat but contact Rig Rite Dwyer mast? dave: not exactly sure. that’s something I’ll have to check next time I’ll stop at the boat yard. I’ll definitely look for that. I did contact rig rite and they do have a replacement part. With their option I will need to swap the mast base plate. That’s a solution but if I find the replacement 1-1 I rather take that route. Thanks for your help Click to expand
rgranger said: Call the guys here at SBO. They have found weird parts for me before. Click to expand
@anyhony Z Spar years ago built the masts for Hunter. They purchased Kenyon Isomat and moved to Charlotte with only four people to build masts which was a fiasco leaving the country. They re-emerged as U S Spars back in the same plant in Florida. SBO now owned by a friend of mine can get the parts for your mast. Was unaware there is a z Spar mast on your boat. O day went out of business in 1989. As a former dealer I knew the major manufacturers.
- This site uses cookies to help personalise content, tailor your experience and to keep you logged in if you register. By continuing to use this site, you are consenting to our use of cookies. Accept Learn more…
IMAGES
VIDEO
COMMENTS
Jib Strap. SKU: 27099 | Item ID: R/L 319. Please Call For Availability. 1-43 results of 43. Equip yourself with sailboat mast steps and hardware from Fisheries Supply. Shop products from top brands like Schaefer, Sea-Dog, Colligo, Ronstan, and more.
Mast Step Base Plate Adapter - 11" x 7": K-11305: Mast Step Base Plate Adapter converts standard mast step for use with external adjustment screws, on keel-stepped rigs. Fastens with (4) 3/8" FH screws in internal adjustment slots of 4873 mast step, K-10942. Allows for precise positioning without un-stepping the mast.
Buy online Mast Base Sailboat Blocks at Vela Sailing Supply, your online sailing store for the best brands like Harken, Lewmar, Ronstan, Selden, Schaefer and more. ... Bow Fittings & Shroud Plates; Cams & Cleats; Catches, Latches & Hinges; Drain Sockets & Bungs; Fairleads; Hatch Covers; Pad-pulley; Thru-Deck Bushes; U Bolts; Deck Organizers ...
Halyard Organizer Plate is designed to fit under the K-1374 Mast Hinge Assembly, using the same deck bolts.New-style formed SS Plate has a total of fourteen (14) 1/2" holes on 4 sides for attaching halyard turning blocks, boom vang, and halyard shackles.Base is 7 1/2" long x 4" wide and mounts with (4) 5/16" bolts on 4 1/4" x 2 3/4" hole centers.
We produce several sizes of hinge plates. The size is defined by the flat area of the plate that is available to mount the mast step or plug and mast section. The sizes follow: HMB E27 5" X 3.5" Punched flanges 5 holes each side. HMB SC27 6.75" X 4.25" No flanges. HMB M30 6.5" X 4" Punched flanges 5 holes each side.
Mechanical Universal Joint. $24.70. Two-Bolt "Quick Release" Plate. $39.00. Safety Strap (Rubber & Tendon Joint) $5.23. Base Cup Kit. $25.00. 8mm X 30mm Socket Head Bolt.
Mast Collar Pin MC-PIN-1 $ 13.20 Add to cart; Mast Plate MS-1 $ 41.80 Add to cart; Mast Plate MS-2 $ 41.80 Add to cart; Mast Plate MS-3 $ 41.80 Add to cart; Mast Plate MS-4 $ 55.00 Add to cart; Mast Plate MS-5 $ 71.50 Add to cart; Mast Plate MS-6 $ 19.80 Add to cart; Mast Step MS-7 $ 38.50 Add to cart
Since 1961, RIG-RITE has engineered, manufactured and distributed Spars, Rigging and Hardware Systems for Sailboats. RIG-RITE stocks the largest variety of related Systems and Hardware available anywhere, Specializing in original replacement parts for Systems on yachts built the world over. Spars - Masts, Booms, Spreaders, Spinnaker Poles ...
We stock four sizes of stainless steel mast step plates for deck-stepped masts. All measurements are just inside the bends, and are the maximum size mast step that step plate will hold. Description. Price. Small Mast Step Plate (3 1/2" x 5") Most 20-24 ft. boats. $ 69.00. Medium Mast Step Plate (4 1/4" x 6 3/4") Most 24-26 ft. boats.
Mast step base is mounted to boat and seats the mast step cup to complete the mast step. Free Shipping Over $99* - 366 Day Returns - Dedicated Customer Support. Menu. Search. ... Opti Mast Step Base (Plate Only) Rating * Name Review Subject * Comments * $59.00. $50.15. You save $8.85 ...
Published: April 24, 2022. 0. The crew at the Yacht Rigger of Salt Creek Marina in St. Petersburg, Florida prepares to re-step a newly rigged mast. Unobtainium is the metal at the top of every Naval Architect's wish list. It's a perfect marine material; light, strong, stiff yet flexible—it's as inert as gold, but costs only pennies per ...
The cylinder piston moves down vertically through the heel of the mast to a steel plate in the boat's T-base, thereby lifting the mast and increasing the tension. In order to make it easier to jack up the mast, the system includes a two-stage pump that switches to its lower gear as the pressure increases. When the mast reaches its...
The mast is the long, standing pole holding the sails. It is typically placed just off-center of a sailboat (a little bit to the front) and gives the sailboat its characteristic shape. The mast is crucial for any sailboat: without a mast, any sailboat would become just a regular boat. The Sails. I think this segment speaks mostly for itself.
Replacing mast base plate on 1995 Hunter 26? Dang, I broke the hinge (flange) off at the bottom-mast plate through which you place the pin that attaches the mast to the plate on the deck (you might call this plate on the deck a tabernacle, but it is just really a plate with two flanges sticking up that have holes to match the hole in the mast ...
Buy Optiparts EX1206 Mast Step Base (Plate Only), sailing gear, sailboat parts, sails and running rigging at Vela Sailing Supply. Technical support, customer service and product information. Vela and sailing supplies. ... Optiparts Mast step base plate only. Can be used with the pin style and cup style slider. View EX1200 or EX1202 for image as ...
In order to lower the mast I used an A-Frame and tackle to first lift and then lower it. The materials: 4 x 10′ long 2×4's. 5 x 1/2″ lag bolts w/ nuts and washers. Short piece of 1/4″ angle aluminum at the apex to attach tackle. Line at the base of the legs to attach them to the stanchion bases to avoid sliding.
Categories > Sailboat Equipment > Organizers & Mast Base Plates Organizers & Mast Base Plates Sub-Categories. Mast Base Plates; Organizers: Harken; Organizers: Schaefer; Organizers: Spinlock; Parts/Accessories: Organizers; Winch Feeders; Product Search. Your Shopping Cart. Total: $0.00 CA
Stepping the mast on the deck eliminates leaking at the partners. Some consider it a safety issue - with less potential for damage to the deck or interior if the mast breaks. Pulling the mast sideways. On our J/35, the mast is stepped belowdecks and must be supported and sealed at the partners. The best way to do this with any mast is by ...
MAST STEP, HALYARD ORGANIZER PLATE. This stainless plate goes under the existing mast deck plate on all MacGregor and Venture boats except the 26M and Daggerboard versions of the 26 Classic, for those boats use part # 3433-1M4. On late model 26 Classic boats, all 26X models and any boat that has had the mast deck plate updated to the newer 26X ...
Oday 222 Navy Yard. Sep 13, 2020. #1. Hello everyone, Just managed to damage the loop at the mast foot hinge. The base plate at the boat is fine. However, the section at the bottom of the mast snapped both hinges loops. I found the part number apparently is Z-145SF-10/245 but I cannot find that part anywhere does anyone have any idea where to ...