Great choice! Your favorites are temporarily saved for this session. Sign in to save them permanently, access them on any device, and receive relevant alerts.
- Sailboat Guide
Lightning is a 18 ′ 11 ″ / 5.8 m monohull sailboat designed by Sparkman & Stephens and built by Nickels Boat Works, Inc., Skaneateles Boat & Canoe Co., Helms - Jack A. Helms Co., Siddons & Sindle, Lippincott Boat Works, J.J. Taylor and Sons Ltd., Lockley Newport Boats, Eichenlaub Boat Co., Mobjack Manufacturing Corp., Clark Boat Company, Allen Boat Co., and Loftland Sail-craft Inc. starting in 1938.


Rig and Sails
Auxilary power, accomodations, calculations.
The theoretical maximum speed that a displacement hull can move efficiently through the water is determined by it's waterline length and displacement. It may be unable to reach this speed if the boat is underpowered or heavily loaded, though it may exceed this speed given enough power. Read more.
Classic hull speed formula:
Hull Speed = 1.34 x √LWL
Max Speed/Length ratio = 8.26 ÷ Displacement/Length ratio .311 Hull Speed = Max Speed/Length ratio x √LWL
Sail Area / Displacement Ratio
A measure of the power of the sails relative to the weight of the boat. The higher the number, the higher the performance, but the harder the boat will be to handle. This ratio is a "non-dimensional" value that facilitates comparisons between boats of different types and sizes. Read more.
SA/D = SA ÷ (D ÷ 64) 2/3
- SA : Sail area in square feet, derived by adding the mainsail area to 100% of the foretriangle area (the lateral area above the deck between the mast and the forestay).
- D : Displacement in pounds.
Ballast / Displacement Ratio
A measure of the stability of a boat's hull that suggests how well a monohull will stand up to its sails. The ballast displacement ratio indicates how much of the weight of a boat is placed for maximum stability against capsizing and is an indicator of stiffness and resistance to capsize.
Ballast / Displacement * 100
Displacement / Length Ratio
A measure of the weight of the boat relative to it's length at the waterline. The higher a boat’s D/L ratio, the more easily it will carry a load and the more comfortable its motion will be. The lower a boat's ratio is, the less power it takes to drive the boat to its nominal hull speed or beyond. Read more.
D/L = (D ÷ 2240) ÷ (0.01 x LWL)³
- D: Displacement of the boat in pounds.
- LWL: Waterline length in feet
Comfort Ratio
This ratio assess how quickly and abruptly a boat’s hull reacts to waves in a significant seaway, these being the elements of a boat’s motion most likely to cause seasickness. Read more.
Comfort ratio = D ÷ (.65 x (.7 LWL + .3 LOA) x Beam 1.33 )
- D: Displacement of the boat in pounds
- LOA: Length overall in feet
- Beam: Width of boat at the widest point in feet
Capsize Screening Formula
This formula attempts to indicate whether a given boat might be too wide and light to readily right itself after being overturned in extreme conditions. Read more.
CSV = Beam ÷ ³√(D / 64)
One of the most popular one-design classes in the US since the 1940’s. But fleets also exist in other parts of the world. Although originally designed for wood planked construction, nearly all boats since the early 1960’s have been built of fiberglass. Ballast above is max weight of centerboard.
Embed this page on your own website by copying and pasting this code.
- About Sailboat Guide
©2024 Sea Time Tech, LLC
This site is protected by reCAPTCHA and the Google Privacy Policy and Terms of Service apply.
International Lightning Class Association
Class contact information.
Click below
Class Email
Class Website
One-Design Class Type: Dinghy
Was this boat built to be sailed by youth or adults? Both
Approximately how many class members do you have? 1600
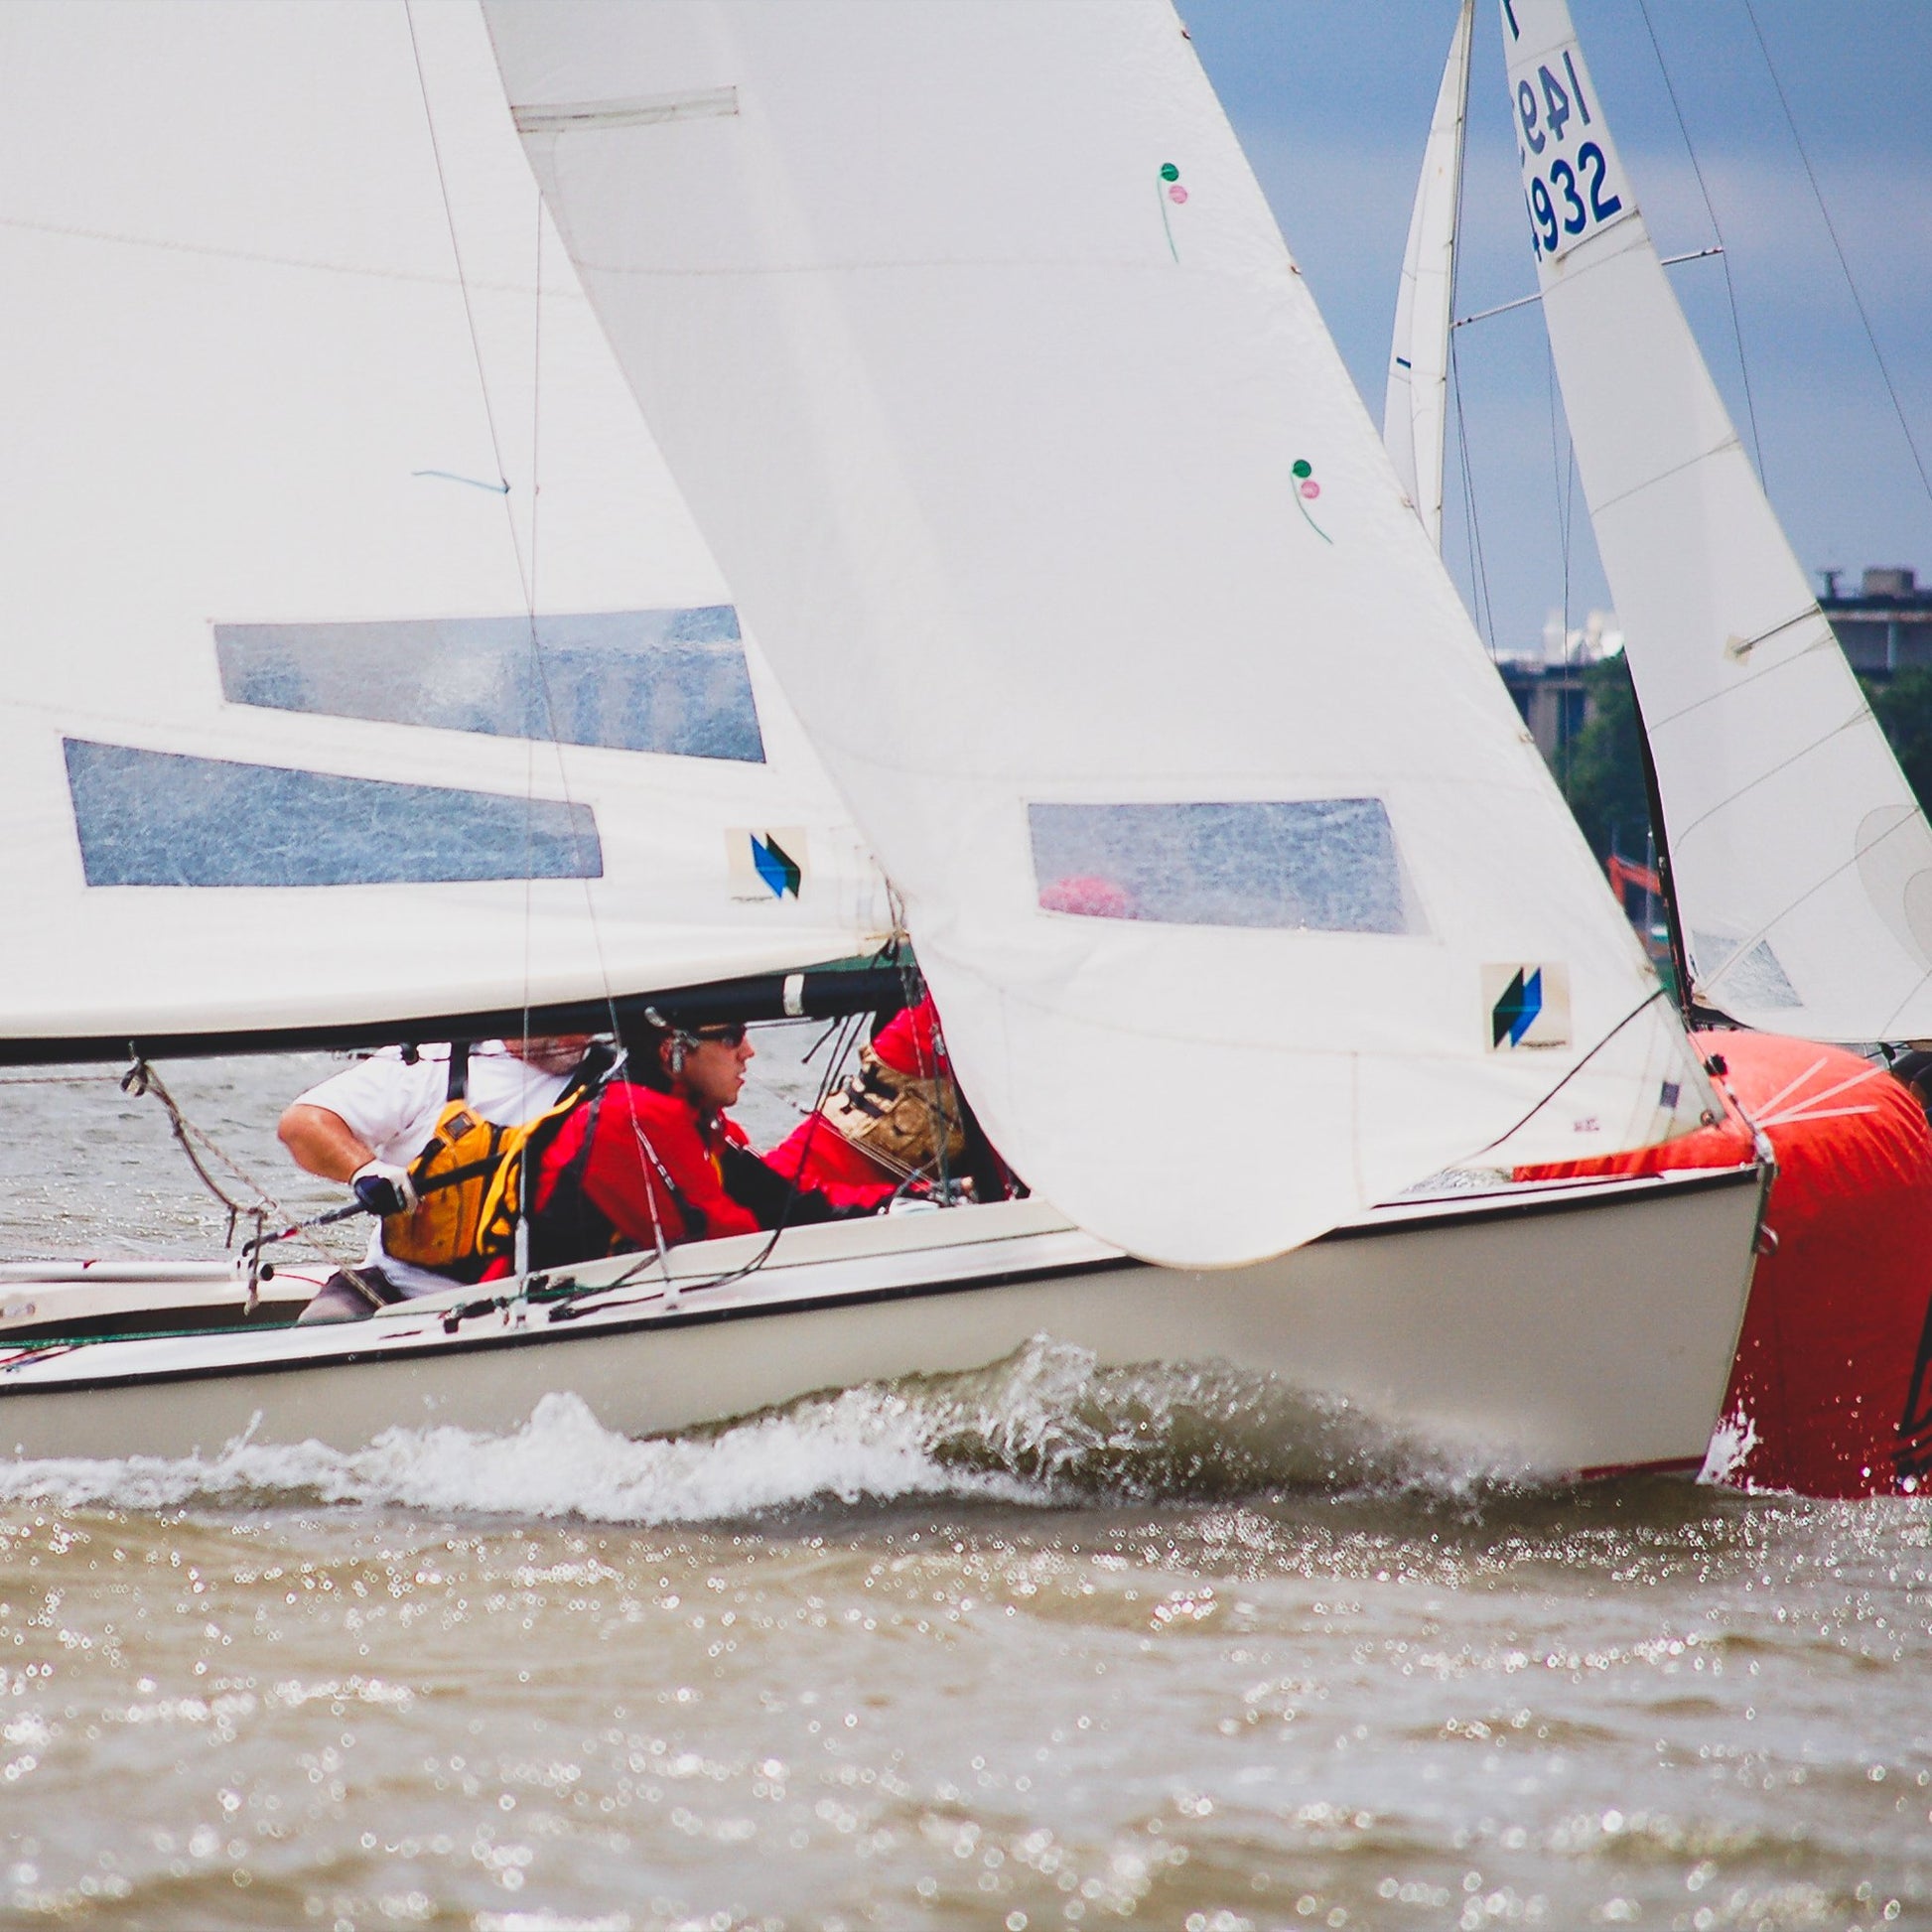
Photo Credit:Douglas Wake

Photo Credit: Art Petrosemolo

About International Lightning Class Association
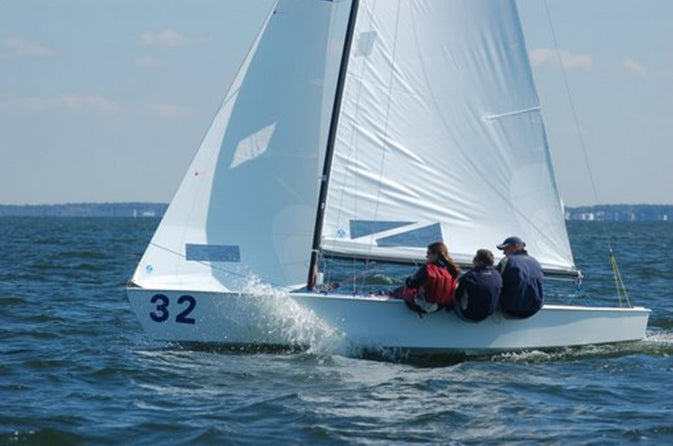
The Lightning truly excels as an affordable racing boat. The rig is simple but offers sophisticated sail shape controls. The hull features a unique hard chine design that combines the stability that provides sail-carrying power, with flat bottom sections that promote planing. At 700 pounds all up, the trailerable centerboard sloop is tough enough to avoid frequent breakdowns, but light enough to plane wildly on the reaches. Membership is diverse with sailors aged 8 to 80+. Many families sail together at top events and it is common to see females make up at least 40% of competitors.
The Lightning is sailed in more than thirteen countries and in the Pan American Games. A World, Master World and Youth World Championships are held every two years. North American, South American and European Championships are held each year as are innumerable regional and District championships. Major regattas attract some of the finest sailors in the world, but you find Class members friendly and the sailmakers’ complete tuning guides helpful at getting you up to speed in a hurry.
The International Lightning Class Association is one of the oldest and best organized class associations in sailboat racing. Its primary purpose is to serve its membership, preserve the integrity of the Lightning and provide high-quality competitive events. In addition, the Lightning Class publishes monthly e-blasts and a quarterly newsletter Flashes with up-to-date regatta news, boat brokerage and ideas on how to get the most out of your Lightning. The professionally managed association and dedicated volunteers are always on hand to assist both current and potential members.
If you’re looking for a boat you can be proud to sail, one that offers dinghy handling with the performance of a sport boat, a refined design that’s free of fads, complete with the technology of today for both racing and day sailing – look at the Lightning.
Boats Produced: 15630+
Class boat builder(s):
Allen Boat Company, Buffalo, NY: https://www.allenboatco.com/
WindRider International: https://www.windrider.com/
Approximately how many boats are in the USA/North America? 11,000+
Where is your One-Design class typically sailed in the USA? List regions of the country:
East of the Mississippi, Mid-West, Texas, Denver, San Diego, Pacific Northwest Click Here for Fleet Finder Map: https://www.lightningclass.org/content.aspx?page_id=451&club_id=93488
Does this class have a spinnaker or gennaker? Yes
How many people sail as a crew including the helm? 3
Ideal combined weight of range of crew: 490
Boat Designed in 1938
Length (feet/inches): 19’0″
Beam: 6’6″
Weight of rigged boat without sails: 700 lbs
Draft: (board down): 4’11”, (board up): 5″
Mast Height: 26’2″
Back to One-Design Central
Copyright ©2018-2024 United States Sailing Association. All rights reserved. US Sailing is a 501(c)3 organization. Website designed & developed by Design Principles, Inc. -->
- AROUND THE SAILING WORLD
- BOAT OF THE YEAR
- Email Newsletters
- Best Marine Electronics & Technology
- America’s Cup
- St. Petersburg
- Caribbean Championship
- Boating Safety
One-Design Showcase
About the DN Iceboat
The Lightning offers a combination of performance and stability that eludes most one-designs. The Lightning’s hard chine and 130 lb centerboard give her the stability and power of a small keel boat going to weather in strong winds and allow her to carry a very large spinnaker for breathtaking off wind rides. The Lightning’s rig is simple, but offers sophisticated sail shape controls.
Our 19-foot trailerable centerboard sloop has evolved into one of the most popular and competitive one-design racing classes in the world. Awarded ISAF International Class status, the Lightning is sailed in more than 13 countries and in the Pan American Games, and the class provides a professionally-managed association that is among the largest in all of one-design sailing.
If you’re looking for a boat you can be proud to sail, one that offers dinghy handling with the performance of a sportboat, a refined design that’s free of fads, complete with the technology of today for both racing and daysailing – Get The Best Of Both Worlds. Get into a Lightning.
Class Information:
Class Contact: Laura Jeffers, Executive Secretary
Class Contact Email: [email protected]
Class Contact Phone: 727-942-7969
Class Website: lightningclass.org
Social Media: Facebook | Twitter | Instagram | Youtube
Class Specs
LOA: 19 ft.
Beam: 6 ft. 6 in.
Draft: 4 ft. 11 in.
Weight: 700 lbs.
Spark Plugs: The A Class’s Emmanuel Cerf
At the Helly Hansen NOOD Regatta St. Petersburg, the mover and shaker of the A Class catamaran fleet builds his world championship field of dreams.
Snowbirds Descend Upon the Helly Hansen NOOD Regatta St. Petersburg
Tampa Bay locals have it good year-round, but it’s more fun when winter’s escapees come to play.
The Lightning Rod
The boat builder goes beyond family legacy in the Lightning Class, he’s bringing fresh energy to this vintage fleet.
Inside the Class: Lightning
On the morning of the final race, we sat down with a Lightning class legend and the fleet’s next generation to see what they could learn from each other.
- Digital Edition
- Customer Service
- Privacy Policy
- Terms of Use
- Cruising World
- Florida Travel + Life
- Sailing World
- Salt Water Sportsman
- Sport Fishing
- Wakeboarding
Many products featured on this site were editorially chosen. Sailing World may receive financial compensation for products purchased through this site.
Copyright © 2024 Sailing World. A Bonnier LLC Company . All rights reserved. Reproduction in whole or in part without permission is prohibited.
The Lightning is a 19.0ft fractional sloop designed by Sparkman & Stephens and built in wood or fiberglass by Clark Boat Company since 1938.
15550 units have been built..
The Lightning is an ultralight sailboat which is a very high performer. It is reasonably stable / stiff and has a low righting capability if capsized. It is best suited as a racing boat.

Lightning for sale elsewhere on the web:
Main features
Login or register to personnalize this screen.
You will be able to pin external links of your choice.

See how Sailboatlab works in video

We help you build your own hydraulic steering system - Lecomble & Schmitt
Accommodations
Builder data, other photos.

Modal Title
The content of your modal.
Personalize your sailboat data sheet
Welcome to our store
Item added to your cart
Nickels Boat Works
Couldn't load pickup availability
Lightning Details
The International Lightning Class is a 1938 Sparkman and Stephens design. This active racing class has grown to nearly 15,000 boats. The quality, performance and speed of the Nickels Lightnings are proving themselves for hundreds of current owners including North American and World Championship skippers. Why not join them with the confidence that you are buying the best there is?
The Nickels Lighting features a new hull and deck. The hull design maximizes down wind speed while preserving upwind performance, while the new rolled deck affords greater comfort when hiking in addition to our optimization of control line location. The new deck also provides for increased interior room for crew and skipper. We have also included a new location for fine tuning of the backstay. This new deck is stiffer insuring durability and strength.
Fully rigged w/ stainless steel centerboard: $24,995
A new Nickels custom race equipped Lightning includes:
- Lightning Class Number—royalty and measurement certificate (from the class)
- One color hull—one color deck New style rubrail white or black
- Harken Equipment— Carbo blocks now standard
- Mainsheet swivel with hexaratchet Jib sheet—Custom NBW jib car
- Spinnaker guy and sheet Ratchamatic Jib uphaul—6 to 1
- Twing lines with guy hooks Jib cloth—2 to 1
- All block Boomvang 22 to 1 Backstay—8 to 1
- NBW mast all lines internal Cunningham—4 to 1
- Mainsheet bridle—Winward sheeting type, pull down
- Centerboard hoist—10 to 1
- Dual side controls—for backstay, mainsheet bridle, boomvang & cunningham with color coded lines.
- 360 degree swivel cleat—on centerboard hoist 2 Hinged transom bailers
- 3 padded hiking straps (your choice of color)
- Large storage compartments in both cross seats
- Lifting bridle
- Nickels aluminum mast, boom, spinnaker pole and tiller with extension
Color Options: White is standard but for modest charge we customize for your color and striping
Rigging Options: There are numerous options. Give us your specifications and we will customize a price proposal for you.
Sails: Sails by North, Quantum and Vermont Sailing Partners. Current prices less 10% with new boat purchase. Covers are available from all manufacturers on request.
Also Available: Trailer - $1895 Spare Tire - $90.00 Aft Kick Stand - $35.50 (installed) Spare Tire Bracket - $37.50 (installed) 4 Stanchions - $449.00
Subscribe to our emails
Be the first to know about new collections and exclusive offers.
- Choosing a selection results in a full page refresh.
- Opens in a new window.
By Product Categories
Small Boat Blocks
Big Boat Blocks
Complementary Hardware
Travelers & Genoa Leads
Mainsail Handling
Headsail Handling
Mooring Solutions
Spare Parts
Accessories
Harken Canvas
Fly Soft-Attach Blocks
Carbo Air Blocks
Small Boat Classic
Flip-Flop Small Boat
GP Catamaran Ceramic Mainsheet Systems
Protexit™ Exit Blocks
Through-Deck
Wire High-Strength
Dinghy Vang
Small Boat Deck Organizers
Midrange Classic
Midrange Deck Organizers
Zircon Blocks
Element Blocks
Black Magic Air Blocks
Cruising ESP Blocks
Megayacht Blocks
Stainless Steel Blocks
Black Magic Air Runners
FlatWinder Powered Blocks
Mastbase Blocks
Over-the-Top
Crossover Blocks
Big Boat Deck Organizers
Cam Cleats & Kits
Cam Cleat Accessories
Cam Cleat Bases
Stand-Up Bases
Deck Organizers
Spinnaker Pole Cars
Soft Attachments
Fixed Padeyes
Removable Padeyes
Bolt-Down Fairleads
Grand Prix Jib Leads
Halyard Tensioners
Tiller Extensions
Peter's Desk Drawer
Dinghy Jib Leads
Crossbow Pivoting Self-Tacking Jib Traveler
13 mm Micro
22 mm Small Boat
27 mm Midrange
32 mm Big Boat
Windward Sheeting
42 mm Mini-Maxi
T-Track Genoa Lead
Access Rail System
13 mm AA Battcar System
22 mm A Battcar System
27 mm B Battcar System
32 mm C Battcar System
18 mm Switch Battcar System
26 mm Switch Battcar System
26 mm Trysail Switch
32 mm Switch Battcar System
32 mm Trysail Switch
40 mm Switch Battcar System
40 mm Trysail Switch System
Furling Mainsail Outhaul Systems
Single Line Reefing
Harken Vang-Master
Carbo Racing Foil
Small Boat Furling
Small Boat Underdeck
Reflex Furling
MKIV Jib Reefing & Furling
MKIV Underdeck Jib Reefing & Furling
Furling Accessories
Powered Furling
MKIV Ocean Furling
SnubbAir (Not a Winch)
Grand Prix Winches
Air Winches
Circuit Breakers
Analog Switches
Digital System Switch
Aluminum, Chrome & Bronze Winch Handles
Carbo OneTouch Locking Winch Handle
Service Kits
CLR Mooring Winches
Electric Captive Reel Winches
Hydraulic Captive Reel Winches
UniPower Radial
Single-Acting Integral Backstay Adjuster
Single-Acting Cylinders
Locking Cylinders
Double-Pull Cylinders
Grand Prix Cylinders
Hydraulic Cylinder Rod End Blocks
Hydraulic Cylinder End Fittings
Control Valves
Control Manifolds
Control Panels
Compact Control Panel
Rotary Pumps
Hydraulic Pump Handles
Power Systems
Repair Kits
Ball Bearings
Block Spare Parts
Traveler Cars
Furling Spare Parts
Winch Spare Parts
Winch Service Kits
Promo & Gifts
Marine Grip
harkengear.com
Jeep/Truck tops
Garage storage
One-design Covers
Boat accessories
Canvas bags
By Type of Sailing
Dinghy / One-Design
Offshore Racing
Coastal / Day Cruising
Bluewater Cruising
Megayachts / Custom
Service Guide
Tech/Service
deck layouts
Data Sheets (SDS)
How to choose
System diagrams
Calculators
Reeving diagrams
Traveler Purchase Selection Guide
How to Choose
Testimonials
Hoister Videos
Request a Quote
Request Samples
Fabric details
Cover Styles
Canvas Videos
Contract Services
Materials and Components
Our Equipment
Contract Cut-and-Sew Project Spotlight
- Harken at the front
- Safety & Rescue
Support / One-design deck layouts
Lightning Deck Layout

Adjustable Ball Bearing Lead Car
Upgrading to an adjustable lead car system allows you to change your lead under sail without having to tack to unload the car. The Micro CB traveler cars are very small and lightweight, but strong—perfect for the Lightning.

Belowdeck Vang System
This split boom vang lets you easily adjust the vang from both sides while hiking. The 24:1 purchase uses lightweight Carbo blocks for the power needed to control sail shape without adding weight to the boat. The cascading system uses small high-tech line to help keep everything clean above deck.

If you would like to link to or reprint this article please contact [email protected]
Class History
With over 15,000 boats,the Lightning has 60 years of tradition behind it. This competitive 19-foot trailerable centerboarder is one of the most competitive one-design classes today. But whether you're interested in serious racing or just want to go for a ride, the Lightning gives you what you're looking for. Some great sailors have been 'struck by Lightning': Ted Turner, Dennis Conner, Ken Read, Bill Shore, and Greg Fisher to name a few.
Links International Lightning Class McLube™ Harken Canvas
Boat Specifications
Length: 19 ft (5.8 m) Beam: 6 ft 6 in (2 m) Displacement: 700 lb (318 kg) Sail Area (main & jib): 177 sq ft (16.4 sq m) Spinnaker: 300 sq ft (28 sq m)

Related products

29mm Block — Swivel, Becket

44mm Through-Deck Dinghy Block

13mm Low-Beam Track — .6 m

29mm Cheek Block

29mm Clew Block

29mm Double Block — Swivel

29mm Triple Block — Swivel

40mm Traveler Block

57mm Ratchamatic® Block — Swivel

29mm Double Upright Lead Bullet Block

13mm Car — Pivoting Shackle

Standard Cam-Matic® Cleat - 150

Standard Cam Base — Swivel

Standard X-Treme Angle Fairlead

25mm Wire Block — Shackle
Product categories.
- United States
- New Zealand
- United Kingdom
Log in or Sign up
You are using an out of date browser. It may not display this or other websites correctly. You should upgrade or use an alternative browser .
Lightning Sailboat 19' build
Discussion in ' Boat Design ' started by FirstLight , Aug 21, 2012 .
FirstLight Junior Member
Have always loves this classic design from the board of Sparkman and Stevens. There's a small fleet here in our area. For a winter project I want to build one. There are several sets of offsets with the fast design that I've brought into Rhino. I'm trying to determine what the strongest\lightest build technique would be (no foam) for a one off lightning. Cold molding would seem the answer however the hard chine doesn't seem to fit the process as well. Then there is the frame method the Gougeon boys outline in their big blue bible. Any thoughts or ideas?? Cheers..
gonzo Senior Member
Balsa planks core composite should be the lightest and stiffest. That design was made for carvel construction and has very easy lines.
DCockey Senior Member
FirstLight said: ↑ Have always loves this classic design from the board of Sparkman and Stevens. There's a small fleet here in our area. For a winter project I want to build one. There are several sets of offsets with the fast design that I've brought into Rhino. I'm trying to determine what the strongest\lightest build technique would be (no foam) for a one off lightning. Cold molding would seem the answer however the hard chine doesn't seem to fit the process as well. Then there is the frame method the Gougeon boys outline in their big blue bible. Any thoughts or ideas?? Cheers.. Click to expand...
Petros Senior Member
I would recommend sticking with the rules, if you do not, not only will you not be allowed to sail in the races, it will not have much resale value when you are done with it. It appears there is no advantage to a lightweight build since rules require a 700 lb hull anyway. You might consider finding a used one and refurbish it, it will cost less and get you on the water faster.
tunnels Previous Member
Are you into compatition or just playing about ?? Like has been said buy a second hand boat and refurbish it like new do a 100% strip of all and everything and scrape the paint off and respray etc etc But if the boat has a balsa cored hull you can bet 100% that it will be wet and heavy so theres you chance to do a rebuild rather than start from scratch !! To SAVE IN WEIGHT if you do a rebuild use balsa and what ever glass and then infuse it !!! will never be able to make it any lighter than that , use paints and not gelcoats Pick you glass carefully !!woven glass materials are thicker and so used more resin , differant cloths for differant uses ,also the type of glass ask and choose wisely , use epoxy resin and make sure you speak to the chemist if possible and get the strongest with a little flex . (Not all resins are born equal ). save weight every where possible . there could be raised eyebrows of you under weight but han always screw a lead block ti the middle to bring it to the minimum weight and as the boat gets older get it re weighed and change the lead block ! You not breaking the rules just bending them a little !! But, what do i know !
sonosail SONOSAIL
Lightning class plans About 20 years ago the Lightning class created a new set of plans/rules for plywood contruction. I think one boat boat was built using the WEST system. rb
philSweet Senior Member
They are wonderful boats but you should be aware that some of the top small boat builders in the country have built these things. Expectations for a wooden hulled Lightning will be very high among class members, and not just among the elite racers. The woodies used to have a very slight rules advantage over the glass boats and most of the national champs went with woodies. There is a ballast allowance of twenty pounds on the centerline. Any extra has to be distributed elsewhere. If I recall, the object of the game is to come in exactly twenty pounds light at 680 in measurement trim and then max out the centerline ballast allowance. So basically, you assemble your rig, lines, hardware kit,CB, and rudder and weigh that. Then build the whole thing with temp fasteners and carefully weigh it again. Then take it all apart and put it together permanently after any adjustments allowing for glue and paint and fairing putty. Am I dreaming or were the old hulls all double diagonal planked on the bottom. I used to sail on one until I was five. I soloed it on the Chesapeake. My parents were more than a little annoyed I took the boat out. But all I remember was the fun I had and Mr Keck coming out and asking me to please return to the dock. Then he motored back to the dock and let me sail her in. Mr Keck gets lots of points for letting me do that and not towing me in. I've sailed on them once or twice since then. Keep all of your reciepts and document the build as you go and ask lots of questions of the association members.
sonosail said: ↑ About 20 years ago the Lightning class created a new set of plans/rules for plywood contruction. I think one boat boat was built using the WEST system. rb Click to expand...

- Advertisement:
Old Boat.. Guys.. Great information!!! After looking through the options and debating building from scratch I opted against it. You guys made some good points. Thank you so much. A few weeks back I picked up a 1970's Lightning for $100. I figured I would see if it was worth rebuilding to have some fun with it. I posted a new link since I am down to the outer skin in one section. I am probably crazy for giving this a shot but if all goes bad I'll have about $300 invested and that's all. And if the hull goes away I have a brand new mast, new boom, new spinnaker, good set of practice sails and about $500 in Harken hardware, a trailer in great shape and a SST centerboard. I figured I'd try removing the foam core in one area and stiffening to see what I get. Here is the link. Once again. Any and all information greatly appreciated!!! Here is the link: http://www.boatdesign.net/forums/boat-design/help-repairing-19-lightning-sailboat-44433.html
HELP! Repairing 19' Lightning Sailboat
Lightning Avoidance
Lightning arrester
Older fiberglass Lightning Class Running Rigging
Lightning bottom shape
"Lightning" solar electric sail hybrid concept
Navigating Through Keel Challenges: Seeking Wisdom on Sailboat Redesign
Reversable sailboat?
Reshaping keel of microcup sailboat
42 foot steel round bilge sailboat scantlings
- No, create an account now.
- Yes, my password is:
- Forgot your password?

× You are using an outdated browser. Please upgrade your browser to improve your experience.
We Ship Worldwide! | FREE SHIPPING! for US Continental orders over $99. Click for details.

Shopping Cart
Your cart is currently empty..
FREE SHIPPING! for US Continental orders over $99 click for details
Lightning Sailboat Parts & Equipment

Lightning Travel / Deck Cover

Lightning Mooring Cover
Lightning Mast Bag

Lightning Rudder Cover

Lightning Hiking Strap
")
MAURIPRO Sails
Lightning training jib (cross cut), mps-1260-ods-jt1.
")
Lightning Training Mainsail (Cross Cut)
Mps-1260-ods-mt1.
")
Offshore Spars
Lightning spinnaker pole - carbon (uni-directional heavy duty), ofs-cpole-lightning-s-n-d.
")
Lightning Spinnaker Pole - Carbon (Woven Twill Light Weight)
Ofs-cpole-lightning-t-n-d.

Block - Carbo 29mm Single - Fixed Head

Block - Carbo 29mm Single - Cheek

Block - Carbo 40mm Single - Fixed Head

Cam Cleat Standard - X-Treme Angle Fairlead

Block - Carbo 29mm Single - Swivel / Becket

Block - Carbo 29mm Double - Linked by Clew

13 mm Low-Beam Micro Track - 0.6 m
Har2707600mm.

Cam Cleat - Cam-Matic

Block - Wire High Strength 25mm - Wire

Block - Carbo 40mm Double - Traveler

Block - Classic Bullet 29mm Double - Upright

Block - Carbo 29mm Double - Swivel

Block - Classic Bullet Dinghy 44mm Single - Through-Deck

13mm Micro CB Tracks - Low Beam - 1.0 m

Block - Carbo 29mm Triple - Swivel
Class description.
The Lightning, a 19-foot trailerable centerboard sloop, designed by Sparkman & Stephens as an affordable family day sailor and racing boat. She has evolved into one of the most popular and competitive one-design racing classes in the world. The Lightning's rig is simple, but offers sophisticated sail shape controls. The hull features a unique hard chine design that combines the stability that provides sail-carrying power, with flat bottom sections that promote planing. There's room in the cockpit for two couples or a family to daysail. The Lightning is easy to launch and light enough to trailer with ease. In the event of a capsize, she can be righted and sailed dry by her crew. Get "The Best of Both Worlds.
Class Specs
Copyright © 2024 mauripro sailing llc..
- Print This Page
- Text Size
- Scroll To Top

Lightning Class Supporters
Yachting Monthly
- Digital edition

Sailing in lightning: how to keep your yacht safe
- In partnership with Katy Stickland
- July 22, 2022
How much of a concern is a lightning strike to a yacht and what can we do about it? Nigel Calder looks at what makes a full ‘belt and braces’ lightning protection system

Storm clouds gather at Cowes, but what lightning protection system, if any, does your boat have for anchoring or sailing in lightning? Credit: Patrick Eden/Alamy Stock Photo
Most sailors worry about sailing in lightning to some extent, writes Nigel Calder .
After all, going around with a tall metal pole on a flat sea when storm clouds threaten doesn’t seem like the best idea to most of us.
In reality, thunder storms need plenty of energy, driven by the sun, and are much less frequent in northern Europe than in the tropics.
However, high currents passing through resistive conductors generate heat.
Small diameter conductors melt; wooden masts explode; and air gaps that are bridged by an arc start fires.

Sailing in lightning: Lightning is 10 times more likely over land than sea, as the land heats up more than water, providing the stronger convection currents needed to create a charge. Credit: BAE Inc/Alamy Stock Photo
On boats, radio antennas may be vaporised, and metal thru-hulls blown out of the hull, or the surrounding fiberglass melted, with areas of gelcoat blown off.
Wherever you sail, lightning needs to be taken seriously.
Understanding how lightning works, will help you evaluate the risks and make an informed decision about the level of protection you want on your boat and what precautions to take.
Most lightning is what’s called negative lightning, between the lower levels of clouds and the earth. Intermittent pre-discharges occur, ionising the air.
Whereas air is normally a poor electrical conductor, ionised air is an excellent conductor.
These pre-discharges (stepped leaders) are countered by a so-called attachment spark (streamer), which emanates from pointed objects (towers, masts, or lightning rods) that stand out from their surroundings due to their height.

Summer is the season for lightning storms in the UK. Here, one finds early at Instow, Devon. Credit: Terry Matthews/Alamy Stock Photo
This process continues until an attachment spark connects with a stepped leader, creating a lightning channel of ionised air molecules from the cloud to ground.
The main discharge, typically a series of discharges, now takes place through the lightning channel.
Negative lightning bolts are 1 to 2km (0.6 to 1.2 miles) long and have an average current of 20,000A.
Positive lightning bolts are much rarer and they can have currents of up to 300,000A.
Preventing damage when sailing in lightning
A lightning protection system (LPS) is designed to divert lightning energy to ground (in this case the sea), in such a way that no damage occurs to the boat or to people.
Ideally, this also includes protecting a boat’s electrical and electronic systems, but marine electronics are sensitive and this level of protection is hard to achieve.
Lightning protection systems have two key components: First, a mechanism to provide a path with as little resistance as possible that conducts a lightning strike to the water.
This is established with a substantial conductor from an air-terminal to the water.

Components of an external and internal lightning protection system. Credit: Maxine Heath
This part of the LPS is sometimes called external lightning protection.
Second, a mechanism to prevent the development of high voltages on, and voltage differences between, conductive objects on the boat.
This is achieved by connecting all major metal objects on and below deck to the water by an equipotential bonding system.
Without this bonding system high enough voltage differences can arise on a boat to develop dangerous side flashes.
The bonding system can be thought of as internal lightning protection.
Rolling ball concept
Lightning standards, which apply ashore and afloat, define five lightning protection ‘classes’, ranging from Class V (no protection) to Class I.
There are two core parameters: the maximum current the system must be able to withstand, which determines the sizing of various components in the system, and the arrangement and number of the air terminals, aka lightning rods.
Let’s look at the arrangement of the air terminals first. It is best explained by the rolling ball concept.
A lightning strike is initiated by the stepped leaders and attachment sparks connecting to form the lightning channel.
The distance between the stepped leader and the attachment sparks is known as the breakdown distance or striking distance.
If we imagine a ball with a radius equal to the striking distance, and we roll this ball around an object to be protected, the upper points of contact define the possible lightning impact points that need to be protected by air terminals.

Lightning protection theories and classifications rely on a ‘rolling ball’ concept to define requirements, areas of risk and protected areas. Credit: Maxine Heath
The air terminal will theoretically provide a zone of protection from the point at which the terminal connects with the circumference of the rolling ball down to the point at which that circumference touches the water.
The shorter the striking distance, the less the radius of the rolling ball and the smaller the area within the protection zone defined by the circumference of the rolling ball.
The smaller the protection zone, the more air terminals we need. So, we use the shortest striking distance to determine the minimum number and location of air terminals.
Class I protection assumes a rolling ball radius of 20m; Class II assumes a rolling ball radius of 30m.
Continues below…

Lightning: why we were struck
A personal investigation into how and why a catamaran was hit by lightning

‘Lightning destroyed the boat’s electronics’
Paul Tinley recounts a truly shocking lightning experience aboard his Beneteau 393 Blue Mistress and the subsequent insurance claim

Expert advice: boating emergency
A boating emergency is the sort of thing that everyone taking to the water should be prepared for even if,…

How batteries can explode – and how to avoid it
Marine electrical expert Nigel Calder explains why boat batteries emit hydrogen and how to minimise the dangers
Boat building standards are based on a striking distance/rolling ball radius of 30m (Class II).
For masts up to 30m above the waterline, the circumference of the ball from the point at which it contacts the top of the mast down to the water will define the zone of protection.
For masts higher than 30m above the waterline, the ball will contact the mast at 30m and this will define the limit of the zone of protection.
If Class I protection is wanted, the radius of the ball is reduced to 20m, which significantly reduces the zone of protection and, on many larger recreational boats, may theoretically necessitate more than one air terminal.
Protection classes
With most single-masted monohull yachts, an air terminal at the top of the mast is sufficient to protect the entire boat to Class I standards.
The circumference of the rolling ball from the tip of the mast down to the surface of the water does not intercept any part of the hull or rig.
However, someone standing on the fore or aft deck might have the upper part of their body contact the rolling ball, which tells us this is no place to be in a lightning storm.
Some boats have relatively high equipment or platforms over and behind the cockpit.

Protection classes to protect your boat while anchored or sailing in lightning
These fittings and structures may or may not be outside the circumference of the rolling ball.
Once again, this tells us to avoid contact with these structures during a lightning storm.
Ketch, yawl, and schooner rigged boats generally require air terminals on all masts, except when the mizzen is significantly shorter than the main mast.
The external LPS
The external LPS consists of the air terminal, a down conductor, and an earthing system – a lightning grounding terminal.
The down conductor is also known as a primary lightning protection conductor.
All components must be sized to carry the highest lightning peak current corresponding to the protection class chosen.
In particular, the material and cross-sectional area of the air terminal and down conductor must be such that the lightning current does not cause excessive heating.
The air terminal needs to extend a minimum of 150mm above the mast to which it is attached.

A graph depicting NASA’s record of yearly global lightning events. The Congo once recorded more than 450 strikes per km2
It can be a minimum 10mm diameter copper rod, or 13mm diameter aluminum solid rod.
It should have a rounded, rather than a pointed, top end.
VHF antennas are commonly destroyed in a lightning strike.
If an antenna is hit and is not protected by a lightning arrestor at its base, the lightning may enter the boat via the antenna’s coax cable.
A lightning arrestor is inserted in the line between the coax cable and the base of the antenna.
It has a substantial connection to the boat’s grounding system, which, on an aluminum mast, is created by its connection to the mast.
In normal circumstances, the lightning arrestor is nonconductive to ground.
When hit by very high voltages it shorts to ground, in theory causing a lightning strike to bypass the coax – although the effectiveness of such devices is a matter of some dispute.
Down conductors
A down conductor is the electrically conductive connection between an air terminal and the grounding terminal.
For many years, this conductor was required to have a resistance no more than that of a 16mm² copper conductor, but following further research, the down conductor is now required to have a resistance not greater than that of a 20mm² copper conductor.
For Class I protection, 25mm² is needed. This is to minimise heating effects.
Let’s say instead we use a copper conductor with a cross-sectional area of 16mm² and it is hit by a lightning strike with a peak current corresponding to Protection Class IV.

Sailing in lightning: This catamaran relies upon cabling to ground from the shrouds but stainless steel wire is not a good enough conductor. Credit: Wietze van der Laan
The conductor will experience a temperature increase of 56°C. A 16mm² conductor made of stainless steel (for example, rigging ) will reach well over 1,000°C and melt or evaporate.
Shrouds and stays on sailboats should be connected into a LPS only to prevent side flashes.
The cross-sectional area of the metal in aluminum masts on even small sailboats is such that it provides a low enough resistance path to be the down conductor.
Whether deck- or keel-mounted, the mast will require a low resistance path, equivalent to a 25mm² copper conductor, from the base of the mast to the grounding terminal.
Grounding terminal
Metal hulled boats can use the hull as the grounding terminal. All other boats need an adequate mass of underwater metal.
In salt water this needs a minimum area of 0.1m². In fresh water, European standards call for the grounding terminal to be up to 0.25m².
A grounding terminal must be submerged under all operating conditions.
An external lead or iron keel on monohull sailing boats can serve as a grounding terminal.

This owner of this Florida-based yacht decided to keep the keel out of the equation when is came to a grounding plate. High electrical currents don’t like sharp corners, so a grounding plate directly beneath the mast makes for an easier route to ground. Credit: Malcolm Morgan
In the absence of a keel , the cumulative surface area of various underwater components – propellers, metal thru-hulls, rudders – is often more than sufficient to meet the area requirements for a grounding terminal.
However, these can only be considered adequate if they are situated below the air terminal and down conductor and individually have the requisite surface area.
Metal through-hulls do not meet this requirement.
If underwater hardware, such as a keel, is adequate to be used as the grounding terminal, the interconnecting conductor is part of the primary down conductor system and needs to be sized accordingly at 25mm².
Propellers and radio ground plates
Regardless of its size, a propeller is not suitable as a grounding terminal for two reasons.
First, it is very difficult to make the necessary low-resistance electrical connection to the propeller shaft, and second, the primary conductor now runs horizontally through the boat.
The risk of side flashes within the boat, and through the hull to the water is increased.

Sailing in lightning: GRP hull, fairing filler and iron keel will have carried different voltages during the strike – hence this damage
An engine should never be included in the main (primary) conducting path to a grounding terminal.
On modern engines, sensitive electronic controls will be destroyed in a lightning strike, and on all engines, oil in bearings and between gears will create resistance and therefore considerable heat which is likely to result in internal damage.
However, as it is a large conductive object, the engine should be connected to the internal lightning protection system.
Internal lightning protection
On its way to ground, lightning causes considerable voltage differences in adjacent objects – up to hundreds of thousands of volts.
This applies to boats with a functioning external lightning protection system but without internal protection.
Although the lightning has been given a path to ground along which it will cause as little damage as possible, dangerous voltages can be generated elsewhere, resulting in arcing and side flashes, threatening the boat and crew, and destroying electronic equipment.
We prevent these damaging voltage differences from arising by connecting all substantial metal objects on the boat to a common grounding point.

One of the holy grails of marine photography – a direct lightning strike on a yacht’s mast. Credit: Apex
The grounding terminal is also wired to the common grounding point.
By tying all these circuits and objects together we hold them at a common voltage, preventing the build-up of voltage differences between them.
All conductive surfaces that might be touched at the same time, such as a backstay and a steering wheel, need to be held to the same voltage.
If the voltages are the same, there will be no arcing and no side flashes.
The bonding conductors in this internal LPS need to be stranded copper with a minimum size of 16mm².
Note that there can be bonding of the same object for corrosion prevention, lightning protection, and sometimes DC grounding.
We do not need three separate conductors.
Electronic Device Protection
With lightning protection systems, we need to distinguish electric circuit and people protection from device protection.
Even with an internal LPS, high induced voltages may occur on ungrounded conductors (such as DC positive) which will destroy any attached electronics.
A mechanism is needed to short high transient voltages to ground.
This is done with surge protection devices (SPD), also known as transient voltage surge suppressors (TVSS) or lightning arrestors.

Marine-specific SPDs are few in number and domestic models are not suitable for boats
In normal circumstances these devices are non-conductive, but if a specified voltage – the clamping voltage – is exceeded they divert the spike to ground.
There are levels of protection defined in various standards depending on the voltages and currents that can be handled, the speed with which this occurs, and other factors.
This is a highly technical subject for which it is advisable to seek professional support.
Most SPDs are designed for AC circuits.
When it comes to DC circuits there are far fewer choices available to boat owners although there are an increasing number for solar installations that may be appropriate.
There is no such thing as a lightning-proof boat, only a lightning-protected boat, and for this there needs to be a properly installed LPS.

Nigel Calder is a lifelong sailor and author of Boatowner’s Mechanical and Electrical Manual. He is involved in setting standards for leisure boats in the USA
Even so, in a major strike the forces involved are so colossal that no practical measures can be guaranteed to protect sensitive electronic equipment.
For this, protection can be provided with specialised surge protection devices (SPDs).
The chances of a direct lightning strike on a yacht are very small, and the further we are north or south of the equator, the smaller this chance becomes.
It’s likely your chances of receiving a direct lightning strike are very much higher on a golf course than at sea.
‘Bottle brush’-type lightning dissipators are claimed by sellers to make a boat invisible to lightning by bleeding off static electrical charge as it builds up.
The theory rests upon the concept that charged electrons from the surface of the earth can be made to congregate on a metal point, where the physical constraints caused by the geometry of the point will result in electrons being pushed off into the surrounding atmosphere via a ‘lightning dissipator’ that has not just one point, but many points.
It is worth noting that the concept has met with a storm of derision from many leading academics who have argued that the magnitude of the charge that can be dissipated by such a device is insignificant compared to that of both a cloud and individual lightning strikes.
It seems that the viable choices for lightning protection remain the LPS detailed above, your boatbuilder’s chosen system (if any), or taking one’s chances with nothing and the (reasonable) confidence that it’s possible to sail many times round the world with no protection and suffer no direct strikes.
Whichever way you go, it pays to stay off the golf course!
Enjoyed reading Sailing in lightning: how to keep your yacht safe?
A subscription to Yachting Monthly magazine costs around 40% less than the cover price .
Print and digital editions are available through Magazines Direct – where you can also find the latest deals .
YM is packed with information to help you get the most from your time on the water.
- Take your seamanship to the next level with tips, advice and skills from our experts
- Impartial in-depth reviews of the latest yachts and equipment
- Cruising guides to help you reach those dream destinations
Follow us on Facebook , Twitter and Instagram.

The Worldwide Leader in Sailmaking
- Sail Care & Repair
- Sailing Gear
- Sail Finder
- Custom Sails
- One Design Sails
- Flying Sails
- New Sail Quote
- 3Di Technology
- Helix Technology
- Sail Design
- NPL RENEW Sustainable Sailcloth
- Sailcloth & Material Guide
- Polo Shirts
- Sweaters & Cardigans
- Sweatshirts & Hoodies
- Accessories
- Mid & Baselayers
- Luggage & Accessories
- Spring Summer '24
- Sailor Jackets
- Sailor Jacket
- Sustainability
- North Sails Blog
- Icon Sailor Jacket
- Our Locations
- North SUP Boards
- North Foils
- North Kiteboarding
- North Windsurfing
SAIL FINDER
SAILING GEAR
COLLECTIONS & COLLAB
COLLECTIONS
WE ARE NORTH SAILS
ACTION SPORTS
Popular Search Terms
Collections
Sorry, no results for ""
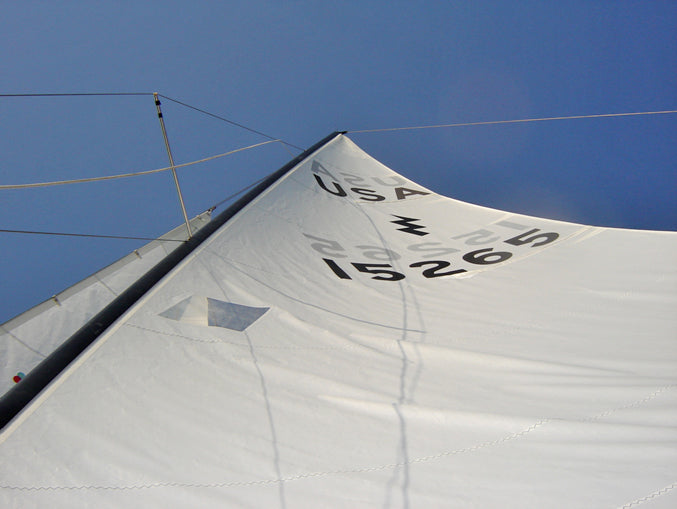
Lightning Tuning Guide
Proper boat speed depends mostly on constant and consistent adjustments to your rig and sails. The following measurements are those we have found to be the fastest settings for your new North Sails. We have included information on both the tuning of the M-5 and the Fisher design sails. The M-5 is a more backstay sensitive sail, which sails fastest when the blocks and the lower shrouds are adjusted corresponding to the change in conditions. The Fisher mainsail responds best to mainsheet tension with less emphasis on adjustment to the backstay, the blocks and the lower shrouds. Both tuning techniques have proven to be very fast and we’re confident that through following the basic numbers we offer in this tuning guide you’ll find top speed in all conditions. However, as always, your North Lightning team is anxious to help you any way we can. Feel free to call or e-mail us anytime! Good luck and good sailing! In our new tuning guide we have divided the Fisher and the M-5 tuning procedures. You will notice after we describe marking your headstay, placing the butt of your mast and setting the length of your headstay, that the M-5 Tuning System is listed step by step followed by the Fisher Tuning System . Note that the techniques used in setting both systems are quite different. Please check it over carefully! All of your North Lightning representatives are comfortable with the tuning for both techniques. Should you have any questions about either style, we urge you to call us. We are always happy to help you.
THE STEPS IN TUNING
The tools necessary for properly tuning your boat are a 50 foot tape measure, a small Loos tension gauge (the Model A pictured right or the newer PT-1) and a permanent marker.

While the newer PT-1 black spring- loaded Loos gauge is very consistent and works great for checking the shroud tension on your uppers and lowers, we have not yet been able to use it successfully for the tuning process for the tuning for the
M-5 Tuning System
It is important to be able to “zero” the forestay in order to set the proper lower tensions for the various conditions. However, with the Fisher Tuning System either gauge will work fine.
MARK YOUR HEADSTAY
Lay the forestay along the front of the mast and mark where it is even with the top of the mast band at the gooseneck. This can be accomplished with the mast on the ground or stepped with the uppers attached.

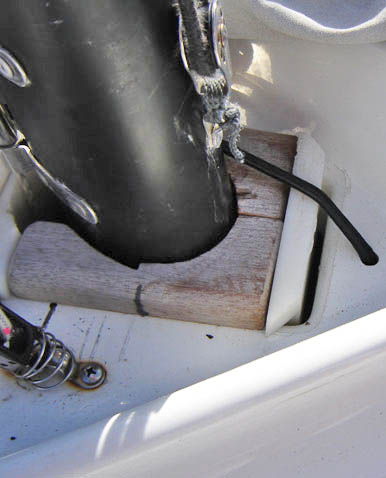
MAST STEP POSITION
For the M-5 Tuning System we suggest placing the butt of the mast at maximum forward ( the aft edge of the butt of the mast should be 21 5/8” forward of the center of the centerboard pin). For the Fisher Tuning System and for Allen boats we suggest placing the butt at maximum forward. For the Nickels Boats (both the newer (after 15200) and older) we suggest moving the butt aft one hole in the channel. For any boat having difficulty developing the proper prebend (or with the upper shrouds further aft (such as the Carson or Lippincott) we suggest moving the butt of the mast aft as much as 3/8” to 5/8”. For the Carson and Lippincott hulls the butt measurement should be only 20 1/4” forward of the pin.
ADJUST THE HEAD-STAY LENGTH
Hook up your headstay and measure from your mark that was determined in Step 1 of the tuning guide to the intersection of the stem and the deck.
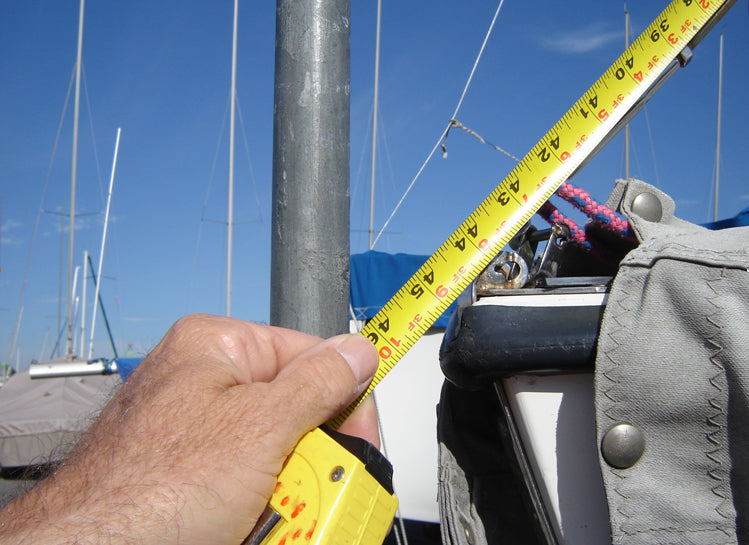
Measure from the top of the mark on your forestay to the joint of the bow and your deck to set your forestay length.
THE M-5 TUNING SYSTEM
Initial set-up.
“0” datum point
- Attach the lower shrouds to the aft chainplates and tighten them until they are just barely hand tight. Check that the mast is still straight laterally by sighting up the back of the mast. This adjustment to the lower shrouds is just initial tuning and will be adjusted later once the blocks are placed at the partners.
M-5 LIGHT AIR SET UP (0 - 6 MPH)
- Place your mast blocks behind your mast until the forward edge of the mast is 1 1/4” forward of your “0” datum point for the Nickels and 1 1/2” for the Allen.
- Pull your backstay until the forestay just registers “0” (using the Model A Loos tension gauge).
- Adjust your lower shrouds equally until they are “0” on the Model A Loos gauge. (If you are sailing in wavy conditions where there is more chop than the wind should warrant, we suggest tensioning your lowers up to 5 or 6 for increased power.)
- With the backstay set as in step B, mark your backstay where it exits the deck at the transom. Ease the backstay tension off until this mark is 5” above the deck on the Nickels or 7” on the Allen. Mark this position. Use this mark (5” for the Nickels, 7” for the Allen) for your very light wind backstay setting when the mast is pre- blocked forward as in Step 1.
Without the proper backstay tension in light winds the mast will lean much too far forward and there will be too much headstay sag. An overabundance of jib luff sag will result in the jib leech hitting the spreader and the shroud no matter how it is trimmed. The backstay is just tensioned to remove enough sag to keep the jib leech off the spreader and the shroud when the upper batten is angling just at the end of the spreader.
M-5 MEDIUM WIND SET UP (7-15 MPH)
- Block your mast forward of the “0” datum point 1” for the Nickels and 1” for the Allen.
- Tension your backstay until the forestay just barely registers “0” with the Model A tension gauge.
- Set your lower shrouds equally at 10 for the Nickels and 18 for the Allen.
M-5 HEAVY WIND SET UP (16 + MPH)
- Block the mast 3/4” forward of the “0” datum point.
- Pull your backstay until the forestay just registers “0”.
- Set your lower shrouds equally at “14”.
- Use lots of backstay when you’re sailing to keep the boat flat!
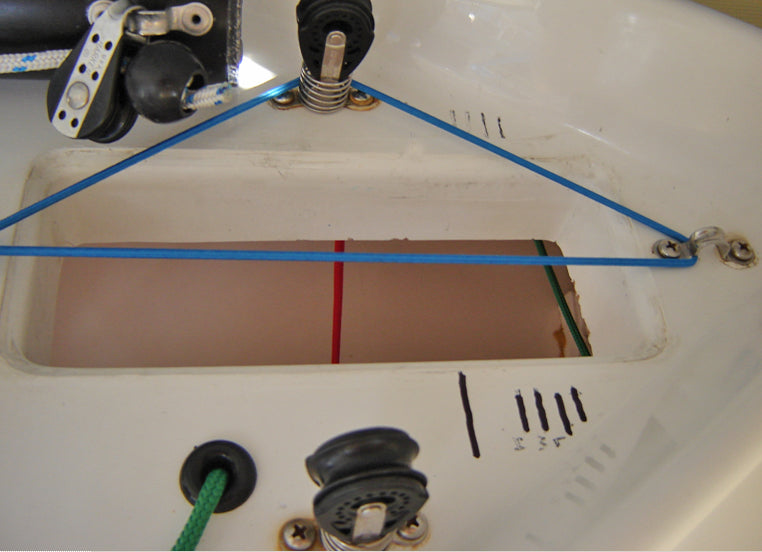
Mark your deck for your 0 datum point, light, medium and heavy wind mast block settings with the M-5 tuning system.
THE FISHER TUNING SYSTEM
Important!!
Usually a 1/2” block will be in place in front of the mast with the Fisher tuning with the New Allen and New Nickels boats.
- Without applying tension on the tape measure ( as described above) record the measurement at the transom. Now grab the backstay and pull until the slop in the forestay is just barely eliminated (not when the Loos gauge reads “O”). The change in your rake from the backstay pulled on to the backstay relaxed should be 3” to 4”. If this measurement is more than 4”, pull a small block from behind the mast and retention the lowers to 250-300 pounds (as described above). If the “rake change number” is less than 3”, place another small block behind the mast and ease the lowers off until they read the proper tension. This will allow the entire mast to tilt (rake) slightly farther forward.
- Re-check your lower shroud tension side to side by sighting up the back of the mast to be sure the mast is perfectly straight laterally. Loosen and tighten the opposing sides until the mast is straight from the deck to the hounds, always maintaining the proper lower tension and prebend.
Once on the water double check your lateral straightness once again when sailing upwind in an 8 - 0 m.p.h. breeze.
In breeze above 10-12mph the upper sections of the mast above the spreader will fall off slightly sag to leeward. This is normal.
CONGRATULATIONS! You have completed all the tuning with the Fisher setup. You will never need to adjust your lower shrouds or blocks until you take your mast down. When re stepping simply place everything back where you had it last!
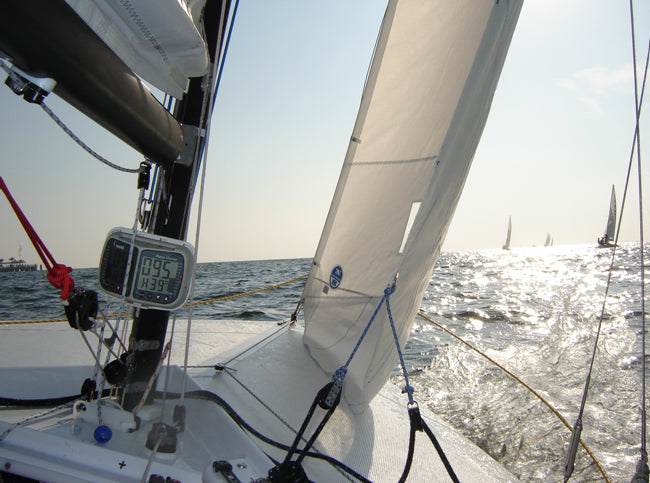
JIB HALYARD TENSION
Generally set your jib halyard tension so that the jib luff wire ( in the front of the jib) is just equal tension wise with the forestay when sailing upwind (There should be no sag in between the snaps.).
Fisher Tuning System
In all conditions set the jib halyard tension so that the luff wire is just slightly tighter than the forestay in all conditions. The forestay will actually show a slight “snake” between the snaps. From light to heavy winds this will mean an adjustment of nearly 2 1/2”. In very heavy winds jib halyard stretch will make it difficult to set the halyard tighter than the forestay. More tension on the halyard will be necessary.
JIB CLOTH TENSION
For both ( jf-2 and 5-a+).
In light winds the cloth tension will be set loose enough that there may be slight wrinkles along the luff. As the breeze increases, increase the cloth tension until all the wrinkles are barely removed in heavy wind. In very heavy winds pull the jib cloth tension a little tighter than just barely removing the wrinkles in order to flatten the sail and help open up the upper batten.
In breeze, set your jib cloth tensionso the luff is smooth.
Lashing at the Head of the Jib
Each North jib has the luff wire attached to the head of the jib with a light line lashing which allows the height of the jib to be adjusted on the luff wire. Depending on the type of tack fitting on your boat, you may want to adjust this lashing to raise or lower the jib to sit on the deck properly. If the skirt of the jib is not laying on the deck approximately 1 1/2” to 2” (or the jib tack is higher than 3 1/2” off the deck) you may want to loosen the lashing and allow the jib to slide down closer to the deck. Be sure to tie well, or even tape, the lashing when done to prevent the lashing from coming untied.
Don’t be afraid to adjust your jib head lashing so there is nearly 2” of jib skirt laying on the deck when sailing upwind.
JIB LEAD POSITION
Your North jibs are marked with a trim line near the clew drawn from the clew grommet toward the body of the sail. Your lead should be positioned so that the sheet is a direct extension of this trim line. This is more effective than a measurement from the stem to the lead position because of the variances in jib lead fittings and placement, rake, and jib wire height off the deck. Generally you should set the lead in this direct extension position unless the boat is overpowered when the lead may be moved aft as much as 2”.
Set your jib lead in most conditions so the sheet is an extension of the trim line drawn on the clew
JIB SHEET TENSION
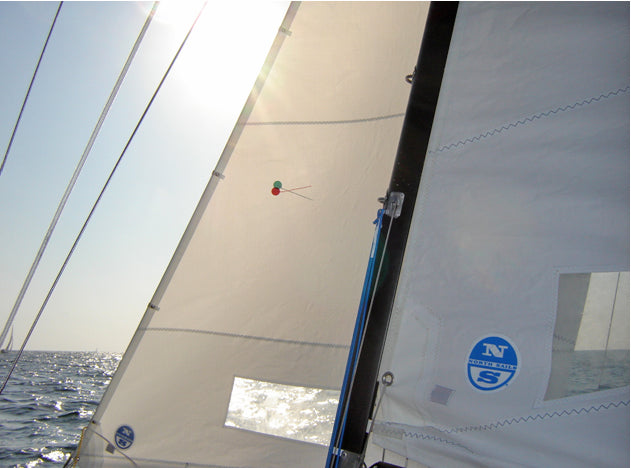
Normal jib sheet trim for 8 - 12 m.p.h. and flat water for the 5-A+ and the Fisher jibs would be 2” - 3” inside the spreader tip. In winds below 8 m.p.h. or when trying to accelerate, leaving a tack, etc., the sheet will be progressively eased out until the top batten is angled even out past the end of the spreader for both jibs. In extremely light winds it is advantageous to actually hold the clew of the jib up so the upper batten angles 1” outboard of the tip of spreader. In heavy winds above 15, it may be necessary to ease the jib sheet to the point where the batten might be angled 1” or more past the end of the spreader. Some sailors, and especially those sailing the 5A+ jib, have had success trimming the sheet much harder. However, with any jib, in any condition, the best final check on jib sheet trim is that the jib leech telltale is flowing all the time. To aid in setting up the trim for your North jibs, we suggest placing rings of tape on your spreaders 1” and 2 1/2 “ in from the tips of the spreaders.
Mark your spreader for easier jib trim, BUT check that the telltale on the leech at the top batten is always streaming.
MAINSAIL TRIM
Mainsail outhaul.
Your North mainsail is constructed with a shelf foot. Judge the outhaul tension at the center of the boom . The seam which attaches the shelf foot to the sail, the bottom seam in the sail) gets closer to the boom when the outhaul is tensioned or further away from the boom when the outhaul is eased. At maximum outhaul tension this seam will lay next to the boom and the shelf foot is closed up. This is proper trim for heavy winds when the boat is overpowered. In light winds the center of this seam should be 1” to 2” from the boom. We do not feel it is advantageous to loosen the outhaul more than this when sailing upwind. Downwind loosen the outhaul to allow the shelf foot to open completely. This should place the clew of the main nearly 3” in from band at the end of the boom.
Use the shelf foot seam as a guide for outhaul tension.
CUNNINGHAM TENSION
In light winds the Fisher mainsail performs best with the Cunningham completely slack. There should be nearly 8” wrinkles perpendicular to the luff from head to tack. On the M-5, the cunningham will be tensioned so that wrinkles are only evident below the spreader window.
In medium winds the Cunningham should be tensioned on both mains so that wrinkles should be evident just in the bottom of the mainsail below the spreader window. In heavy winds, it is beneficial to pull in the Cunningham fairly aggressively. At the same time that the backstay is applied to de-power the main, the Cunningham should be pulled on to maintain the proper draft position.
Too much backstay tension will create over bend wrinkles above the spreader window. Ease the backstay until they just disappear.
The backstay controls mast bend and headstay sag. Pulling it harder flattens both the main and the jib. It also changes the main leech tension and the angle of upper batten of the main. In very light winds when the mast is blocked forward and pre-bent (see mast blocking) tension the backstay slightly to keep the headstay from sagging ( and bouncing) too much. In heavy air more backstay is necessary to flatten the main. If you pull the backstay too hard, the main will invert as evidenced by large diagonal wrinkles running from the upper area of the main above the spreaders down towards the clew.
In medium to heavy winds, some inversion wrinkles below the spreader window are normal and actually desirable as they indicate that maximum mast bend has been achieved.
Ideally, over bend wrinkles will fall just below the spreader window and halfway back on the boom when proper prebend and mast bend is achieved.
As a basic guide, for the mainsail to take shape and the upper batten to be trimmed parallel to the boom (see mainsheet trim), the backstay should be applied to just barely remove the slop. Once all three crew are on the high side and beginning to hike, the backstay should be tensioned much more tightly. As the boat hits waves or sails into lulls, be sure to ease the backstay to power the rig back up. It is also important to remember that as you pull on more backstay you must also pull on a proportion-ate amount of both jib cloth and main Cunningham. These three controls working in harmony are the best way to keep your sails performing at their designed best shape.
THE MAIN BRIDLE TRAVELER
The bridle is considered a “rough” adjustment for setting the balance of your helm. The bridle is normally centered for light to medium winds, but as the boat starts to heel and becomes overpowered, and therefore develops more helm, the bridle should be eased to leeward. Do not ease the bridle to leeward until the outhaul is fully tensioned and moderate tension has been applied to the backstay. If you have a bridle that is adjustable in height, it is advantageous to raise the bridle for light winds so when the main is sheeted properly (upper batten parallel to the boom), the top of the bridle block should be fairly close to the block on the end of the boom. In medium winds above 6-8 mph, the bridle should be approximately 11” to 12” above the deck; in heavy winds, the bridle should only be 9” above the deck. If your bridle is not adjustable, set it at 11” off the deck. The goal in setting the bridle is to position the boom within 2-3” of center line in light winds while still maintaining the proper upper batten parallel to the boom position described below. Often, it pays to moderately depower with the backstay, outhaul and Cunningham before easing the bridle.

MAINSHEET TENSION
The general rule is to trim the mainsheet to maintain the top batten parallel to the boom. This is viewed by sighting directly underneath the boom up towards the upper batten. When power is necessary in light or choppy conditions or just after a tack it is important that the mainsheet is eased so that the upper batten is angled outboard (10 - 15°) from parallel to the boom.
Once up to speed, re-trim the main to upper batten parallel. In heavy winds, when maximum backstay tension is applied and the main is fairly flat, the upper batten will angle slightly outboard in relation to the boom. In drifting conditions where the weight of the boom will hook the upper batten, ease the mainsheet until the upper batten is parallel to the center line of the boat. The boom will be positioned well to leeward of center line, as much as 18”. Be sure to recheck the top batten position whenever the backstay and Cunningham are adjusted. Consider the mainsheet your throttle. It definitely helps to keep the mainsheet in hand and play it to keep the boat moving. When it starts to feel slow ease the sheet and when it feels fast try trimming in tighter to increase pointing ability. In other words, as long as it feels good, pull! When it feels ugly, ease it out. Upwind in heavy air or very puffy conditions with Fisher Main, the boom vang is tensioned so the mainsheet can be played like a traveler. Tension the vang in these conditions so the upper batten is angled outboard 10°. With this proper necessary tension the boom may actually show a bit of bend. Play your mainsheet to keep the boat flat and the helm balanced! Be sure to ease your vang as you round the weather mark! With the M-5 Main, most of the main control is accomplished with careful balance between the mainsheet and traveler. However some sailors have had success tensioning the vang just to point where the boom will not raise up when the main sheet is eased. With any “style” of mainsheet trimming you choose to sail with upwind it is imperative that in puffs the boat remain flat, stable and the helm balanced. Quick and deliberate adjustments to the mainsheet, vang, backstay and traveler are important. Adjust quickly but re-trim just as quickly after sailing through the puff and the boat is back under control and balanced.
Ease the main so the upper batten is angled out slightly past parallel to the boom when power or acceleration is needed.
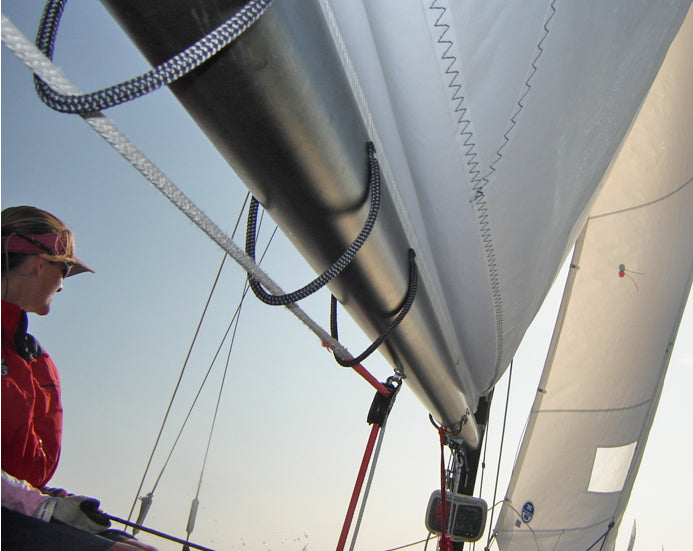
BOOM VANG TENSION DOWNWIND
The boom vang is used downwind to maintain the upper batten nearly parallel to the boom. Be conscious of not over- tensioning the vang, especially in light winds, as it can greatly slow the Lightning when sailing downwind. In puffs while reaching, when the boat becomes overpowered, try dumping the vang (completely eased) to keep the end of the boom from hitting the water and also allow the top of the main to luff, dumping extra power.
THE SPINNAKER

Trimming your North spinnaker is fairly easy as long as you follow a few guidelines. Always attempt to fly your spinnaker so there is nearly 6” of curl in luff. This is important so the spinnaker is not over trimmed and does not choke the slot between the spinnaker and the main. We suggest flying your spinnaker with the halyard eased approximately 6” off the mast to open the slot up high. Keep your clews even at all times through adjustment to your pole topping lift. When your leeward clew is hidden behind the main and you cannot see it, keep the center seam of the spinnaker parallel to the mast. In puffy conditions, especially in lighter winds, constant adjustment of the pole height along with the sheet and guy is important. Keep the pole nearly perpendicular to the wind.
The sun is one of your sail’s greatest enemies. Care should be taken to not leave an uncovered sail directly in UV light for long periods. Spinnakers are most susceptible to UV damage. However, your sail’s greatest enemy is prolonged luffing. Putting your sails up before you are ready to leave the dock and allowing them to flog unnecessarily, literally wastes valuable hours and days of the competitive life of your sails. Even before the start on a breezy day, try to spend as little time as possible with the jib up and luffing to save wear and tear. The jib especially takes a beating when luffing as it slams back and forth against the mast. This breaks down the resin in the weave of the cloth. When finished using your sails, even after just a couple races or in-between races, we strongly suggest talking the time to roll up your sail parallel to the battens (it is never necessary to remove the battens). Be careful not to set anything heavy that can crush a sail or to lash the main too tight on to the boom. Be sure to roll the sail parallel to the battens to avoid putting a permanent twist in your special tapered fiberglass battens. Fold your spinnaker to keep it smooth before storing. When sailing in saltwater, be sure to wash all your sails off completely with fresh water and dry completely before storing them. Check all your sails, especially at the front and back of batten pockets and around grommets for signs of wear. Check your spinnaker for tears, so they don’t get bigger and create big problems in the future. If Dacron sail tape is not available, duct tape will work just fine!
FEATURED STORIES
27 February
GITANA TEAM WINS INAUGURAL ARKEA ULTIM CHALLENGE
Npl renew faq, introducing npl renew, a sustainable sailcloth for cruising.
- Refresh page
IMAGES
VIDEO
COMMENTS
LIGHTNING is a popular one-design class of centerboard dinghies designed by Sparkman & Stephens and built by various builders. Find out the hull type, rigging type, LOA, beam, displacement, ballast, draft, construction, first built, and more sailboat data for LIGHTNING.
The Lightning is an American sailing dinghy that was designed by Olin Stephens of Sparkman & Stephens, as a one-design racer and first built in 1938.. An accepted World Sailing class, the boat is one of the most popular one-design sailing classes in the United States and is also raced in several other countries.. The design was developed into a smaller boat, as a trainer for the Lightning, the ...
The Lightning, a 19-foot trailerable centerboard sloop, was originally designed by Sparkman & Stephens as an affordable family day-sailor and racing boat. ... was originally designed by Sparkman & Stephens as an affordable family day-sailor and racing boat. She has evolved into one of the most popular ... Constitution ILCA By-Laws Rule 42 ...
Lightning is a 18 ′ 11 ″ / 5.8 m monohull sailboat designed by Sparkman & Stephens and built by Nickels Boat Works, Inc., Skaneateles Boat & Canoe Co., Helms - Jack A. Helms Co., Siddons & Sindle, Lippincott Boat Works, J.J. Taylor and Sons Ltd., Lockley Newport Boats, Eichenlaub Boat Co., Mobjack Manufacturing Corp., Clark Boat Company, Allen Boat Co., and Loftland Sail-craft Inc ...
Lightning, a nineteen-foot trailerable centerboard sloop, was originally designed by Sparkman & Stephens as an affordable family day-sailor and racing boat. She has evolved into one of the most popular and competitive one-design racing classes in the world. Awarded ISAF International Class status, the Lightning is sailed in more than thirteen ...
The boat can be sailed dry. It can however turtle. If this occurs, external help will be needed. Don't buy a Lightning if you don't EVER want to go swimming or get wet, but don't be afraid of a capsize either, particularly in a post 1985 boat. Other details the first time buyer should know about include saltwater.
The International Lightning Class Association is one of the oldest and best organized class associations in sailboat racing. Its primary purpose is to serve its membership, preserve the integrity of the Lightning and provide high-quality competitive events. In addition, the Lightning Class publishes monthly e-blasts and a quarterly newsletter ...
Why Buy a Lightning. The Ultimate One-Design Sailboat. Sean Fidler - USA 14969. The Lightning combines a perfect balance of sail / tuning adjustments with boat / crew size. At only 700 lbs., Lightnings are light enough to trailer and launch easily. They are also small enough to be sailed easily with 3 people.
The Lightning's hard chine and 130 lb centerboard give her the stability and power of a small keel boat going to weather in strong winds and allow her to carry a very large spinnaker for ...
The Lightning is a 19.0ft fractional sloop designed by Sparkman & Stephens and built in wood or fiberglass by Clark Boat Company since 1938. 15550 units have been built. The Lightning is an ultralight sailboat which is a very high performer. It is reasonably stable / stiff and has a low righting capability if capsized.
Lightning Details The International Lightning Class is a 1938 Sparkman and Stephens design. ... Give us your specifications and we will customize a price proposal for you. Sails: Sails by North, Quantum and Vermont Sailing Partners. Current prices less 10% with new boat purchase. Covers are available from all manufacturers on request. Also ...
Some great sailors have been 'struck by Lightning': Ted Turner, Dennis Conner, Ken Read, Bill Shore, and Greg Fisher to name a few. Links International Lightning Class ... Boat Specifications. Length: 19 ft (5.8 m) Beam: 6 ft 6 in (2 m) Displacement: 700 lb (318 kg) Sail Area (main & jib): 177 sq ft (16.4 sq m) Spinnaker: 300 sq ft (28 sq m ...
Lightning Sailboat 19' build. Discussion in 'Boat Design' started by FirstLight, Aug 21, 2012. Joined: Sep 2007 Posts: 78 ... However, the boat will comply under these Specifications as a wood boat. 22.Weight of the hull and rigging shall not be less than 317.5179 kg (700 lbs.). The boat shall be weighed with spars, standing rigging, halyards ...
Sailboat Specifications Definitions Hull Type: Centerboard Dinghy: Rigging Type: Cat (unstayed) LOA: 12.07 ft / 3.68 m ... Lightning 368 Class Association: Download Boat Record: Notes. John Claridge began building the boat in 2009. These became the Mk2. A Mk3 version was introduced in 2018.
Established by boat owners to promote good sailing, racing and camaraderie, Fleets are located worldwide. They compose the bottom level of the International Lightning Class Association; local Fleets are the substance of a District, and Districts make up the ILCA. Fleet facilities run the gamut. Some possess only a dock and launching ramp on a ...
Restoration of Skaneateles Lightning #167. The Lightning sailboat was designed by the Naval Architectural firm of Sparkman & Stephens in response to a request from John and George Barnes, owners of Skaneateles Boats, Inc. The Barnes brothers were interested in building a one-design sailboat which could be used both for racing as well as family ...
Shop a full range of Lighting sailboat Parts and Equipment at MAURIPRO Sailing Store. Includes technical support, low prices and free shipping on orders over $99. ... Lightning Sailboat Parts & Equipment . ... Class Specs. Criteria: Imperial: Metric: Beam (ft/m) 6.5: 2: LOA (ft/m) 19: 5.8: Main & Jib Sail Area (ft2/m2) 177: 16.4: Spinnaker (ft2 ...
1528 Big Bass Dr Tarpon Springs, FL 34689 Phone: 727-942-7969 Skype: ilcaoffice
In salt water this needs a minimum area of 0.1m². In fresh water, European standards call for the grounding terminal to be up to 0.25m². A grounding terminal must be submerged under all operating conditions. An external lead or iron keel on monohull sailing boats can serve as a grounding terminal.
35.5' Endeavour E35 Presently on the hard for winter storage at Morgans Marina, New Jersey Asking $35,000
Owned, raced and sailed on Lake Mohawk since 2016. Includes 2 sets of sails and trailer. As anyone who is looking for a Lightning knows, this is a real racing machine! Price. $4,500. Built. 1970. Location. Sparta, NJ.
Complete Sail Plan Data for the Lightning Sail Data. Sailrite offers free rig and sail dimensions with featured products and canvas kits that fit the boat. ... Sailboat Data ; Lightning Sail Data ; Lightning Sail Data. Pinit. SKU: X-SD-6802 . Quantity discounts available . Quantity Price; Quantity -+ Add to Cart . Details.
M-5 LIGHT AIR SET UP (0 - 6 MPH) Place your mast blocks behind your mast until the forward edge of the mast is 1 1/4" forward of your "0" datum point for the Nickels and 1 1/2" for the Allen. Pull your backstay until the forestay just registers "0" (using the Model A Loos tension gauge).