

The $tingy Sailor
Diy trailerable sailboat restoration and improvement without throwing your budget overboard.

Refinish Your Swing Keel for Best Performance – Part 4: Sealing and Painting
This post is the continuation of Refinish your swing keel for best performance – Part 3: Fairing . I will describe: building a fiberglass reinforced guard on the leading edge, applying the final waterproofing coats of epoxy, bonding centering spacers on the upper end, priming with a barrier coat of epoxy paint, and applying ablative bottom paint last.
Before I get started, a bit of legal housekeeping. This post contains affiliate links. That means I receive a small commission if you make a purchase using these links. You can purchase the products anywhere you like, of course. For a complete explanation of why I’m telling you this and how you can support this blog without paying more, please read my full disclosure .
Put on your armor
Before applying the top coats of paint to the newly faired keel, I made a fiberglass guard on its leading edge for extra protection. I’ve sailed a little too close to shore a couple of times and bumped the keel on rocks. If I ever do that again, I don’t want it to gouge through the fairing and down to the metal and start a rust problem all over again.
A couple of layers of fiberglass cloth is cheap insurance.

Over that, I laid a third strip over the joint between the two previous strips, but this strip I extended up over the curve at the pin end to give protection when floating the boat on and off the trailer. That area is not likely to hit anything more dangerous than a keel roller or a guide but who knows, I might want to beach the boat someday and I don’t want to have to worry about damaging the keel.

To seal and protect
Then came the last two coats of epoxy to smooth over the tape edges and to seal the fairing filler. First, I hoisted the keel and laid it back on its side on the trailer.
For the first coat, rather than apply the epoxy unthickened with a brush like at the beginning, I thickened it to a creamy consistency with West System 406 Filler Colloidal Silica and spread it on with a 4″ steel putty knife, which left a flat, smooth surface. Immediately, I tipped the epoxy with a chip brush to smooth out any ridges left by the putty knife.
After that cured, I applied the last coat of unthickened epoxy. I mixed 7 pumps each of resin and hardener for each coat per side for a total of 28 pumps.

To prepare for painting, I wet sanded the entire keel with 120 grit sandpaper.
Shimmying inside the keel trunk
The last step before painting was to add centering spacers to the sides of the pin end of the keel. These help to keep the keel centered in the trunk. They also lend the structural strength of the keel trunk to the top of the keel to keep it perpendicular to the hull and to keep it from rocking sideways on the pin and hangers, which accelerates wear.

Instead of buying the overpriced kit from a certain online Catalina parts retailer, I cut my own spacers out of fiberglass scrap I had on hand. The spacers should be about 4″ x 6″ x 1/4″. The goal is to make the head of the keel a zero clearance slip fit inside the keel trunk. The exact thickness of the spacers depends on the finished thickness of the keel head and the width of the keel trunk. In my case, the width is 2-1/16″ just below the keel lock bolt. Measure the trunk at the place where the spacers will be, not at the bottom or top of the trunk. The trunk tapers from top to bottom so that it would release easily from the mold when the hull was made.
Be sure to locate the spacers where they won’t interfere with the keel lock bolt, which is centered 15″ from the pivot pin center.
I bonded the spacers to the keel with epoxy. If you choose to buy the kit instead, the installation instructions place the spacers lower on the keel than shown in the picture above. I chose to place mine there to take advantage of the greater stiffness of the trunk near its top corner. The keel must be off the boat to reach that location, so if you add the spacers with the keel still on the boat, use the lower location instead.
Barrier coat and ablative paint
With a properly shaped and sealed keel, the next step was to paint it. I first applied four coats of primer using a two part Interlux Interprotect 2000E quart kit as a moisture barrier and to ensure good adhesion of the ablative paint. About one quarter of the kit (6 ounces of part A and 2 ounces of part B) is enough for one coat. In my case, I also painted the inside of the keel trunk at the same time and this amount was barely adequate. If you don’t also paint the trunk, this amount should be plenty for a thicker coat.

After mixing and letting the primer rest for 20 minutes according to the instructions, it went on smoothly using an inexpensive 4″ trim roller frame and foam rollers. The rollers are the perfect size for painting the keel and trunk but the primer slowly dissolves the adhesive that holds the roller parts together, so don’t take too much time applying the primer or it will be difficult to keep the roller on the frame.

The primer dries fast so I rolled the primer on about one foot of the keel at a time and tipped it with a chip brush before proceeding with the next section. I also alternated directions with each coat for even coverage and a smooth finish.
After the primer had cured, I applied the ablative bottom paint. This step went relatively fast. Interlux VC 17m Extra dries very fast and can be overcoated in 10 minutes. Since I sail primarily in fresh water, I applied two coats per the instructions with the same foam rollers as I used for the primer. After the first coat on the keel and trunk, I started over and applied the second coat immediately.

As shiny as a new penny
We were only able to cruise for a couple of days after the bottom paint was applied to the hull and before we parked Summer Dance for the winter. The hull was still a dark copper color, so the keel matched closely after it was installed. It took much longer than expected before they both turned dark blue from being in the water.
With the keel completely refinished, the final step of the project and the end of this series continues in Refinish your swing keel for best performance – Part 5: Installing . In that post, I describe: ensuring a strong and tight fit of the keel hangers with the hull, installing plastic washers to keep the keel centered between the hangers, how to install the hanger bolts tight but not overly tight, and replacing the keel cable and cable hose. The last post also includes a master materials list.
Would you like to know when I publish more posts like this? Enter your email address below to subscribe to this blog and receive notifications of new posts by email. You will also receive occasional newsletters with exclusive info and deals only for subscribers and the password to the Downloads page. It’s free and you can unsubscribe at any time but almost nobody does!
Subscribe to Blog via Email
Enter your email address to subscribe to this blog and receive notifications of new posts by email.
Email Address:
Share this:
8 thoughts on “ refinish your swing keel for best performance – part 4: sealing and painting ”.
Definite keel envy going on here. That is a thing of beauty. I’m so glad I’m a procrastinator and now have this guide to follow.
I feel like I need more info on the keel shim. If its not put in the right place there can be play which is not good. If the shim applies too much pressure on the trunk, that’s bad too. Why isn’t there more info on how to do this? Am I over thinking this? I want to add one… but I want to make sure when I do, it works.
There isn’t more info because shims weren’t installed at the factory, they’re not widely used by swing keel boat owners, and the originator of the idea doesn’t share much info but would prefer you purchase their overpriced kit instead. So long as you bond it to the keel head as far away from the pin as possible without interfering with the lock bolt and you make it a close but not tight fit in the keel trunk, it should do the job. It’s not a critical part of the system but helps a little.
Really interested in your series, but it looks like Parts 2 and 3 are MIA. Could you provide a link? THANKS!
I fixed the links. You can also see all the keel articles here: Projects – Keel .
Thanks for letting me know! $tingy
Awesome. Thanks!
What zincs and keel zinc location? I am in Florida and the boat is in the warmer year round.
Most C-22 owners drill and tap the keel to attach a round zinc in the location of the small round hole about a foot from the bottom end of the keel in this picture. https://thisoldsailboat.files.wordpress.com/2014/11/dscn1954.jpg I’m not a fan of that method because its nearly impossible to permanently seal that hole from salt water intrusion and rust like shown in other pictures in this post series. But since I sail in fresh water, I haven’t added a zinc to my keel and rust isn’t a problem for me. But if I were to do so, I’d first try a remote zinc installation electrically bonded to the keel instead.
Sorry I can’t be more help, $tingy
Leave a comment Cancel reply
This site uses Akismet to reduce spam. Learn how your comment data is processed .
- Already have a WordPress.com account? Log in now.
- Subscribe Subscribed
- Copy shortlink
- Report this content
- View post in Reader
- Manage subscriptions
- Collapse this bar
Free Shipping On All Orders!
- Epoxy Resins
- Polyester Resin
- Urethane Resins
- Epoxy Project Supplies
- Antifouling Paints
- Topside Paints
- Thinners & Solvents
- Paint Supplies
- Wood Oils & Finishes
- Wood Finishing Supplies
- Cleaning & Polishing
- Accessories
Table Top Epoxy
Clear High Performance Epoxy Kits
5:1 Traditional Epoxy Resin Kits
- Thinners & Solvents
Wet Edge Topside Paint
Premium Marine Topside Primer
Spartan Multi-Season Antifouling Paint
- Wood Finishes
- Wood Oils & Finishes
Gleam Marine Spar Varnish
Lust Rapid Recoat Marine Spar Varnish
Halcyon Water-Based Marine Varnish
TotalBuff Rubbing Compound
TotalShine Finishing Compound
White Knight Fiberglass Stain Remover
- TotalBoat Gear

FlexFit Fitted Mesh Back Baseball Cap

Men’s Long Sleeve T-Shirt Hoodie
Women’s Long Sleeve T-Shirt Hoodie
FREE SHIPPING with a minimum puchase of $1,200.00 You are $10.00 away from your free shipping!
Shipping, taxes, and dicount codes calculated at checkout.
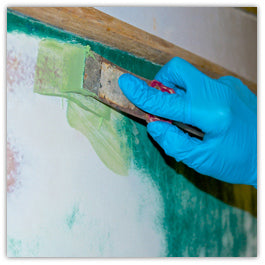
Fairing a surface removes the highs and lows so the surface is level. It can mean filling holes and low areas, reshaping voids, or grinding down bumps so they blend in with the surrounding surface, appearing level, or "fair" to the eye, to the touch, or to the fairing batten.
The material for filling or shaping is called a fairing compound or fairing putty, which contains some type of resin—either epoxy, polyester, or vinyl ester. For convenience, there are premixed fairing putties, or you can make your own.
There are a lot of reasons to fair a surface while building or repairing a boat. Examples include:
- Making the entire hull surface fair during construction, especially for wooden boats
- Fairing large areas of a hull surface misshapen due to, for example, bowing out at the bulkheads as a result of years of hull stresses
- Fairing small gouges and dents on wood, fiberglass, aluminum, or steel hulls before applying primer and painting
- Fairing gelcoat imperfections above the waterline
- Filling in holes after grinding down gelcoat blisters below the waterline before finishing with an epoxy barrier coat and antifouling bottom paint
- Fairing a hull surface prior to wet layup with fiberglass to ensure an even surface because fiberglass is difficult to sand
- Fairing a small area of fiberglass cloth that didn’t quite get filled in by the epoxy overcoats after wet layup and before priming and finishing
- Reshaping and fairing damaged underwater appendages such as the rudder and keel for added speed
- Filling holes after removing hardware
- Fairing an entire hull before a paint job
Choosing a Fairing Compound
- What’s in a Fairing Compound?
- Types of Resins Used in Fairing Compounds
- Types of Fairing Compounds: Premixed or Make Your Own
Supplies for Fairing
Steps for fairing.
- 1. Surface Prep
- 2. Mixing the Fairing Compound
- 3. Applying the Fairing Compound
- 4. Sanding and Wiping
Using TotalBoat TotalFair to Repair Crazing
Fairing is more than just fixing dings and dents for cosmetic reasons. It entails everything from filling surface scratches in gelcoat, seamlessly repairing osmosis blisters on a hull, reshaping the leading edge of a keel, making a hull repair disappear, or smoothing the hull to get the fastest underwater profile.
A fairing compound contains resin—either epoxy, polyester, or vinyl ester, and each resin is designed for different purposes. Before deciding on a fairing compound, think about whether the faired area is above or below the waterline, and how you plan to finish the faired surface. Will you be finishing with primer, barrier coat, topcoat, or gelcoat? The answers to these questions determine the type of resin required in the fairing compound.
The key to successful fairing is to use a fairing compound that contains the appropriate resin and thickening agents to do the job properly. The fairing compound needs to bond to the substrate being faired, and the finishing material (such as primer, paint, or gelcoat) needs to bond to the faired surface.
What’s in a Fairing Compound?
Fairing compounds or putties typically contain the following:
- A resin such as epoxy, polyester, or vinyl ester
- A hardener (for epoxy) or catalyst (for polyester/vinyl ester) for activating the resin and ensuring that it eventually cures to a hard, plastic material. Always use the exact amounts of hardener or catalyst specified by the manufacturer, or the resin will not cure properly.
- A low-density filler such as fumed silica (epoxy) or chopped fiber (fiberglass strands) (polyester/vinyl ester) for thickening the putty so it won’t run or sag
- An additive (such as glass microballoons) that makes the compound easier to sand after curing, since the resin and thickening agent alone result in a cured substance which is very hard to sand smooth
Types of Resins Used in Fairing Compounds
Whether to use a fairing compound containing epoxy, polyester, or vinyl ester resin depends mainly on:
- The material to be used to finish the faired area
- Whether the fairing is being done for cosmetic or structural reasons
- Whether the faired area is above or below the waterline
Use the following table to determine which type of fairing compound is best for your fairing needs.
| Fairing Compound Resin Type | |||
| Fairing Uses | Localized and overall fairing above and below the waterline on wood, fiberglass, and metal when finishing with primer/paint | Filling dings, dents, and gouges or for overall fairing above the waterline on fiberglass when finishing with gelcoat, or when primed and painted | Filling dings, dents, and gouges or for overall fairing above and below the waterline on fiberglass when finishing with gelcoat, or when primed and painted |
| Advantages | Compared to polyester/vinyl ester resins: ● Better adhesion ● Superior strength and stiffness ● Increased resistance to water penetration (osmosis) ● Less degradation of strength and stiffness if osmosis occurs ● Better resistance to fatigue and micro-cracking (crazing) ● Less shrinkage ● Best secondary, or post-cure, bond strength | Can be overcoated with epoxy primer | Vinyl ester has less shrinkage and cracking compared to polyester fairing compound |
| Disadvantages | Epoxy resin is more expensive than polyester or vinyl ester resin | Polyester has more shrinkage and less secondary (post-cure) bond strength than vinyl ester |
Types of Fairing Compounds: Premixed or Make Your Own
Fairing putties either come "premixed" with the resin and thickener already mixed and you just mix in the hardener or catalyst when you get ready to use the compound. Or you can use the "recipe method" to mix your own fairing compound using separate resin, hardener/catalyst, filler, and additive. Always follow the manufacturer’s safety instructions and wear appropriate personal protection when working with all resins, fillers, and additives.
Epoxy Fairing CompoundsThe Recipe Method: With this method, you take separate ingredients and mix them together to the desired consistency (think peanut butter). Ingredients include epoxy resin , hardener, a thickener (colloidal silica) to thicken and prevent sagging, and microballoons to make the putty easier to sand after curing, which might take a day or more. It’s very important to always mix the epoxy resin and the hardener first before mixing in additives. Also, you want to work quickly as the curing reaction, and, therefore, the working time, starts once the resin and hardener are mixed.
TotalBoat TotalFair . It has a yellow resin paste (part A) that already has the fillers blended in, and a blue hardener paste (part B). Mix them 1 part resin to 1 part hardener by volume until the putty turns a solid green with no swirls, and apply. Its simple 1:1 mix ratio and obvious color change make it much easier to use than other pre-mixed epoxy fairing putties.
With epoxy fairing compounds, the recipe method is good if you’re already using a liquid epoxy resin system for other projects. It’s also good if you’re finishing wood bright and don’t want the fairing putty to show. If this is the case, you would use your liquid epoxy resin, a clear hardener, and a filler that matches the wood to thicken the mixed epoxy. An example of a filler would be to use the dust from the particular wood being used, such as mahogany. Wood flour is a thickening agent, but the color of it does not match all woods, and it is typically used for fillets.
Otherwise, the pre-mixed method has the following advantages over the recipe method:
- Fillers are pre-mixed in the resin, saving you time and guesswork.
- A simple mix ratio makes it easier to get the perfect consistency every time.
- It cures much faster and is ready to sand in a couple of hours.
- The cured color stands out on the surface, making it easy to sand.
The Recipe Method: This method involves mixing together separate polyester resin containing wax and catalyst (MEKP or methyl ethyl ketone peroxide), a thickener such as (colloidal silica) to thicken and prevent sagging, and microballoons to make the putty easier to sand after curing. The resin and catalyst are mixed thoroughly first, then the filler and microballoons are added and mixed to the desired consistency (think peanut butter).
The Pre-Mixed Method : The faster, easier, cheaper way to fill dents and small gouges is to use a pre-packaged filling/fairing compound. These products typically contain a thickened polyester or vinyl ester resin compound and separate hardener. They provide easy instructions for mixing resin and hardener in precise amounts.
Some of the supplies you’ll need depend on what type of resin you’re using and whether you’re fairing a small area or a large area, such as a hull. The list below begins with general supplies for fairing, and concludes with optional equipment depending on your particular repair.
- Heavy, abrasive tools such as an angle grinder or a Dremel rotary tool with right angle attachment for grinding out and beveling the edges of cracks, or for grinding down gelcoat blisters
- Clean tongue depressors or a putty knife to dispense resin and hardener
- Plastic spreaders or a putty knife for mixing and spreading the fairing compound
- Personal protection for grinding, sanding, mixing, and application – a NIOSH-approved respirator, with organic vapor cartridges (for grinding/sanding fiberglass or gelcoat), an N95 respirator with vent valve or without (for grinding/sanding wood), eye protection, a hooded paint suit , and gloves
- Sandpaper – From 60 to 180 grit for surface prep; 220-320 grit for sanding fairing compound
- A long, flexible sanding block, or fairing board makes it easier to sand large areas effectively. It bends to the shape of the surface, but is long enough and flexible enough to bridge the low areas and knock down any high spots. To make your own fairing board : For a surface that’s more curved, use ¼" plywood; less curved, ½" plywood will do. The width of the board should be 3". The length should be a multiple of 11" to make the best use of sheets of sandpaper that are 7½" x 11". To make the board easier to control, bond a hand-grip at each end.
- Sanding blocks – For sanding smaller areas. Choose from a variety of commercially available hard and soft sanding blocks for different purposes when sanding by hand. For example, a soft sanding block aids in sanding curves and contours; a hard sanding block is best for sanding straight surfaces.
- Masking tape – For protecting areas immediately surrounding the area to be faired, if necessary, while sanding. Use a high-quality masking tape that removes cleanly. For taping curved surfaces, use a flexible tape .
- Clean, lint-free wiping rags and denatured alcohol or acetone for cleaning the surface to remove dust, dirt, grease, and oil after sanding
- Optional sanding items – Random-orbit sander (dustless, if possible) to expedite sanding large areas during surface prep, large diameter sanding disks and a vacuum cleaner to remove all sanding residue
- Optional if using a recipe method fairing compound made with epoxy resin/hardener and fillers , peel ply is a special fabric that doesn’t bond to epoxy, releases easily, and leaves a smooth-textured surface. Use peel ply to prevent amine blush, which must be removed before applying additional coats of recipe method epoxy fairing compound or a coat of primer.
- Optional if using an epoxy resin recipe fairing compound and finishing the faired wood surface naturally (bright) : Sanding dust from the type of wood you’re using to make a fairing putty that matches the wood. As with any thickening agent, the epoxy and hardener are mixed first, then the wood dust is added and mixed thoroughly.
- Optional if using a recipe method fairing compound made with polyester resin/MEKP catalyst and fillers : If your polyester resin is a "laminating" resin (no wax), you need to add wax
- Optional if fairing is to repair gelcoat blisters below the waterline : Epoxy barrier coat
- Optional if fairing a hull or large area : Plaster’s hawk or hand board to hold a large volume of fairing putty. If the hull or other surface is very unfair, a notched applicator is ideal for applying putty instead of a flat plastic spreader. Also, for leveling the fairing compound after it’s applied, you’ll need a plastic fairing batten.
- Optional if applying fairing compound to a metal surface : Need to apply an etching primer first so the fairing compound can bond properly
1. Surface Prep
Attention to surface prep ensures the fairing compound will adhere to the surface and stay in place once it’s cured.
Clean If the surface isn’t clean, sanding will grind dirt, wax, and other contaminants deeper into the substrate, compromising the effectiveness of the fairing compound, and subsequent primers and topcoats. Clean the surface with a solvent, such as acetone or denatured alcohol, using clean rags and the two-rag wipe on/wipe off method: one rag to apply, one rag to remove. Change rags often so you aren’t smearing contaminants or residue over the surface.
(Optional) Grind Any surface cracks, crazing (micro-cracks), or gelcoat blisters need to be ground out and have their edges beveled using a right angle grinder or a rotary tool with a right angle attachment. Grinding and beveling roughs up the surface so the fairing compound can achieve a sound mechanical bond. The repair will look better and last longer.
Sand If necessary before sanding, mask any areas that you do not want to be roughed up. Roughing up the surface by sanding helps the fairing compound adhere better. Use 60-180 grit sandpaper, and sand down to solid material.
Clean Again If not using a dustless sander, remove all sanding residue with a vacuum cleaner. Clean the area again with acetone or denatured alcohol, and allow the solvent to flash.
Additional Surface Prep Considerations :
WOOD Wood is a very absorbent material, so if you’re using an epoxy fairing compound made with a liquid epoxy resin system, you need to ensure the compound achieves a sound bond on this porous surface. Before applying the compound, brush on a thin coating of properly mixed (that is, resin and hardener only) epoxy resin to first wet out the area to be faired. Then you can do one of two things:
- Wait for the wet-out coat to cure, sand to ensure sufficient key (roughness for mechanical bond), remove sanding residue, and apply the fairing putty.
- Or, you can apply the fairing putty to the wet-out surface once the surface is tacky to the touch.
2. Mixing the Fairing Compound
Mixing epoxy fairing compounds.
- Combine the accurately measured resin and hardener in a clean container and mix thoroughly for approximately three minutes.
- Working quickly, add the thickening agent and mix thoroughly. The reason you want to work quickly to mix the thickening agent (and the microballoons in Step 3) is that the mixture starts curing once the resin and hardener are combined in Step 1. Don’t be surprised if the epoxy resin absorbs a decent VOLUME of thickening agent before you achieve the desired consistency. For fairing purposes, the desired consistency is typically like peanut butter.
- Add the glass microballoons and mix thoroughly.
For best results, measure and mix only as much putty as you can apply according to the indicated working life (pot life) and temperature specified by the resin manufacturer.
Use clean, dry tools and work as quickly as you can to mix fairing putty thoroughly when using the recipe method. The mixing of the resin and hardener creates an exothermic reaction which begins the curing process, so you’ll only have a small window of time to apply the fairing putty before it becomes unusable.
After adding and mixing in the thickening agents to the mixed epoxy resin, use the mixing stick to "wrap" the mixture evenly around the inside of the mixing cup. This action will reduce the amount of exotherm (heating process the resin goes through while curing), and increase the time you have to work with the fairing compound.
Always be sure of your measurements in order to achieve the proper cure. If improperly mixed, the unwanted results include no cure, soft cure, or shrinkage from too much heat caused by an excessive exothermic reaction.
To create larger quantities of fairing putty, you can gain greater accuracy measuring by weight. Before you begin, know the working time (pot life) of the product and mix only as much compound as you will be able to use in that time, or it’ll be wasted.
Note that even though the mix ratio by volume of a certain pre-mixed fairing compound might be 1:1, 2:1, or 3:1, the mix ratio by weight will not be equal ratios because the resin and hardener are different densities. Be sure to read the product technical data to determine the proper mix ratio by weight.
- Measure the resin (Part A) quantity first. Place a clean, empty container on the scale and adjust the scale to zero so the weight of the container is not counted. Dispense the desired quantity of resin paste (Part A) into the bottom of the container, taking care to keep it off the sides. Take note of the weight and remove it from the scale. For this example, let’s say you have measured 12 ounces of resin.
In this case, the equation would be: 90/100 x 12 oz. = Amount of hardener needed
So, 1080/100 = 10.8 oz.
- In this example, in Step 1 you measured 12 oz. of resin (Part A), so you would need to measure 10.8 oz. of hardener (Part B) into the second clean container (making sure the scale is set to zero again before adding hardener).
- Place the two weighed amounts of resin and hardener on a clean surface and mix as indicated below.
- Use a clean tongue depressor to dispense and place the correct mix ratio of Part A and Part B on a clean surface.
- Use a plastic spreader to mix the two parts together.
- Mix thoroughly until the putty is a uniform color, with no swirl marks.
Mixing Polyester or Vinyl Ester Fairing Compounds
- Combine the accurately measured polyester finishing resin and MEKP catalyst in a clean container and mix thoroughly.
- Add the thickening agent and mix thoroughly. Don’t be surprised if the polyester resin absorbs a decent VOLUME of thickening agent before you achieve the desired consistency. For fairing purposes, the desired consistency is typically like peanut butter.
3. Applying the Fairing Compound
Use a plastic spreader to apply the fairing putty. It’s not a good idea to try to fill deep holes in a single application because a layer of epoxy that’s too thick can cause excessive heat build from the exothermic curing reaction.
- Fill the low areas proud (meaning just above the fair level) so you can sand them down to fair without having to refill.
- To avoid extra sanding after the compound cures, use the spreader to smooth out the compound as close to the desired shape as you can. Blend it into the surrounding areas.
- For fairing larger areas , use a spreader to apply the compound, slightly overfilling the area to be faired. If the surface is very unfair, use a notched spreader to apply the fairing compound. To level the applied compound, bend a plastic fairing batten so it matches the contour of the surrounding fair areas, and drag it slowly over the filled area.
- Allow to cure completely before sanding.
- You may need repeat the process of filling and sanding low spots until you are happy with the fairness of these areas. Before you know it, your hull will be fair and ready for priming.
Optional for Certain Epoxy Resins: Use of Peel Ply to Prevent Amine Blush
If applying a fairing compound made from the recipe method of epoxy resin, hardener, thickening agent, and filler, the cured surface may develop a film of amine blush, depending on the particular brand of epoxy resin. If amine blush is present, it must be removed before sanding. You can remove it using a ScotchBrite pad and water, and allow the area to dry completely. It’s not hard to do, but it does add extra time, especially if you have a number of areas to fill. Check with the resin manufacturer to determine if amine blush is an issue.
If it is, you can prevent amine blush, by placing a layer of peel ply over the applied fairing compound. Peel ply won’t react with the epoxy, and it’s easy to peel off after the epoxy cures. Be sure to remove the peel ply before sanding. Amine blush is not an issue if you’re using a pre-mixed epoxy fairing compound.
4. Sanding and Wiping
To prepare for application of a primer, barrier coat, topcoat, or gelcoat, allow the last layer of fairing compound to cure completely, then sand. Sanding makes the surface fair by smoothing down the high spots, and it roughs up the surface so the primer can adhere better. How much sanding you need to do depends on how smoothly the fairing material was applied. Sand the surface until it is fair and smooth.
Use a vacuum cleaner to remove sanding residue, then use a clean, lint-free cloth and denatured alcohol or acetone to wipe down the surface. Allow the solvent to flash.
Note that if using a high-build primer, it will only cover fine sanding marks or small pinholes in the faired surface. Refer to the primer manufacturer’s recommendation for the type of sandpaper to use for surface preparation prior to priming with a high-build epoxy primer.
Sanding generates toxic dust, so work in a well-ventilated area and wear protective clothing, and use proper dust collection methods. Be sure you also wear appropriate eye protection and a high-quality respirator at all times during this process.
- Choosing a selection results in a full page refresh.
- New Sailboats
- Sailboats 21-30ft
- Sailboats 31-35ft
- Sailboats 36-40ft
- Sailboats Over 40ft
- Sailboats Under 21feet
- used_sailboats
- Apps and Computer Programs
- Communications
- Fishfinders
- Handheld Electronics
- Plotters MFDS Rradar
- Wind, Speed & Depth Instruments
- Anchoring Mooring
- Running Rigging
- Sails Canvas
- Standing Rigging
- Diesel Engines
- Off Grid Energy
- Cleaning Waxing
- DIY Projects
- Repair, Tools & Materials
- Spare Parts
- Tools & Gadgets
- Cabin Comfort
- Ventilation
- Footwear Apparel
- Foul Weather Gear
- Mailport & PS Advisor
- Inside Practical Sailor Blog
- Activate My Web Access
- Reset Password
- Customer Service

- Free Newsletter

Marshall Sanderling 18: Used Boat Review

Affordable Cruising Sailboats, Continued
Maine Cat 41 Used Boat Review

CS 30 Used Boat Review

Best Crimpers and Strippers for Fixing Marine Electrical Connectors
Thinking Through a Solar Power Installation

How Does the Gulf Stream Influence our Weather?

Can You Run a Marine Air-Conditioner on Battery Power?
Need a New Headsail Furler? Here’s What’s Involved

Master the Sailing Basics: Never Stop Learning the Little Things

How to Mount Your Camera on Deck: Record Your Adventures with…

Un-Stepping the Mast for America’s Great Loop
Sinking? Check Your Stuffing Box

The Rain Catcher’s Guide
How to Change Your Engine Mounts
Keeping Water Clean and Fresh
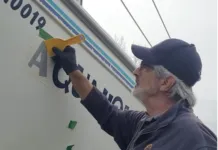
Vinyl Boat Lettering DIY Application and Repair

Those Extras you Don’t Need But Love to Have
Three-Model BBQ Test
Alcohol Stoves— Swan Song or Rebirth?

UV Clothing: Is It Worth the Hype?


Preparing Yourself for Solo Sailing

How to Select Crew for a Passage or Delivery

Preparing A Boat to Sail Solo

Dear Readers
Chafe Protection for Dock Lines
Waxing and Polishing Your Boat

Reducing Engine Room Noise

Tricks and Tips to Forming Do-it-yourself Rigging Terminals
- Boat Maintenance
Keels: Minor Maintenance and Repair
Remedies for rusty iron keels.

The best way to treat an iron keel that’s rusting is to sandblast the whole thing and apply a complete, new, epoxy-based coating system. But that’s not always feasible or desirable. Because of the mess involved, many boat yards do not allow sandblasting. Even when this is permissable, a complete recoating job also means a complete re-fairing job, and that in turn means lots and lots and lots of slow, boring, dirty work if anything approaching a proper, smooth foil is to be achieved.
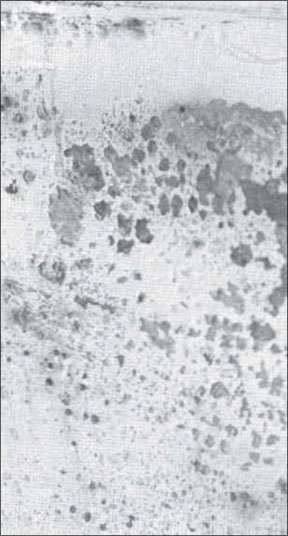
Because of the problems involved in complete refinishing of an iron keel, patch painting of rusted spots is often the only practical way to go.
Begin by cleaning the rusted spots as thoroughly as possible. Take your time here as this is the most important step. Chip off any scale with a cold chisel or welder’s chipping hammer, then wire brush-use a drill-powered brush where possible – and sand with coarse paper until you’re down to clean, bright iron. Use fine sandpaper (#150) to feather in surrounding, sound paint, and you’re ready for your new coating. Get paint on the bare, prepared iron as soon as possible. Iron will begin to oxidize almost immediately, and leaving it bare overnight will make much of your preparation go for naught.
Unfortunately, the best possible anti-rust coatings – those with epoxy bases which are true vapor barriers – are not compatible with other paints. Epoxies just won’t stick to other coatings; and, thus, because patch painting must lap over onto other paint, epoxies can’t be used in this application.
Our own experience backs up the recommendations of the paint manufacturers. The best coating to use in patch painting iron is zinc chromate paint. All the major manufacturers of marine coatings make a good zinc chromate. Take your choice and follow the directions. The most important rule to follow is three coats must be used. The object is to form as nearly an impenetrable barrier to water as possible, and three coats give a far better chance than one or two.
Patch painting isn’t the ultimate answer. Actually the ultimate solution isn’t even the sandblast – epoxy route. It’s replacing the damned iron with lead. But that’s even less economically feasible than sandblasting! Careful preparation and three coats of zinc chromate paint, however, make for a good, economically and manpower effective, finite solution.
-John Pazereskis
As a rule, lead keels require far less care than iron. Nevertheless, they are not maintenance free. While you don’t normally think of your lead keel as corroding away, lead keels can develop significant problems that both degrade performance and reduce the value of your boat.
The main culprit is bottom paints with a high copper content. Copper paint on a lead keel creates a galvanic couple, just as copper paint does on an iron keel. Fortunately, the difference in potential between lead and copper is far less than the difference between iron and copper, so that corrosion problems are commensurately smaller.

However, it is common to see lead keels with crumbly, whitish surface deposits, which when scraped away reveal a porous surface where the lead has corroded. Fortunately, the surface of a lead keel does not corrode and pit in the same manner as an iron keel, and reasonable repairs can be made without expensive equipment.
A drill-powered wire brush will usually grind away surface deposits and do an adequate job of cleaning out shallow corroded areas. It is important to remove as much of the crumbly oxidized lead as possible, to create a good surface for filler bonding.
With the lead clean and bright, fill corroded areas immediately with an epoxy filler. The best epoxy fillers for this purpose are the ones you make yourself from epoxy resin, such as the Gougeon Brothers West System epoxy, and a filler such as phenolic microballoons or microspheres. Remember that lead is pretty soft, and you don’t want your filler to be significantly harder than the surrounding material.
When filling, give the area to be faired a prime coat of unfilled epoxy before applying the thickened epoxy mixture. This will allow a better bond between the filler and the surface. You can allow the clear epoxy to partially kick off before over-coating with filler, but don’t let it cure completely or you’ll get a poor bond.
When the filler has cured, sand or plane it level and smooth. A belt sander or conventional hand bench plane can be used, since lead planes almost as easily as wood.
With all corroded areas and damaged areas cleaned and filled, sand or wire brush the rest of the keel to bright metal. A belt sander or disc sander works fine here, although proper use of either tool to avoid gouging the surface takes a little practice. A lead keel is far easier to bring to bright metal than an iron keel. The fin keel of a 30-footer can be done in an hour or so.
To make sure your keel doesn’t begin to corrode again, you must completely isolate the surface of the keel from the bottom paint with an epoxy barrier.
This is a two-stage process. First, the keel must be primed with a vinyl primer, such as Regatta Vinyltex 50/51 or Interlux Viny-Lux Primewash 353. The primed keel can then be over-coated with an epoxy mastic such as Regatta Epoxydur Mastic 3630-3631. Surface preparation and the timing of application of the coats of vinylepoxy systems are critical, so the manufacturer’s instructions must be followed to the letter.
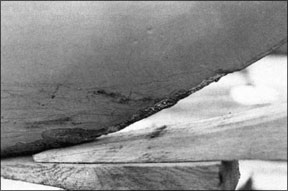
The epoxy mastic coating does not sand well, so special care must be taken in application to get a smooth keel surface. This same epoxy system can be used on iron keels that have been blasted or ground to bright metal, but is only effective on a completely clean surface free of any rust or scale.
Several coats of the epoxy mastic can be used. The thicker the coating, the more effective the barrier between the keel.
The only drawback of epoxy sealing of an external keel is that it no longer functions as a good ground plane for Loran and single sideband, or as access to ground in a lightning protection system. To compensate, you should install an external grounding plate such as the Dynaplate.
Surface corrosion is not limited to the lead keels on older boats. Poorly alloyed keels on new boats can also corrode. Fortunately, the cure is not difficult – only labor intensive – and the prognosis is for complete recovery and a long life. Yearly checkups are recommended, with local retreatment as necessary.
Beauty of Internal Ballast Really Is Skin Deep
If you’re gloating because you think your encapsulated keel frees you from any worries, forget it. Encapsulated ballast frequently requires more complicated care than an external ballast keel.
The danger is damage to the fiberglass shell surrounding the keel.
Even if you haven’t run aground this year, there’s a good chance that some where along the way you have acquired at least some superficial gouges in the lower part of the keel shell. These should be treated before they become problems. Even superficial damage to the gelcoat can allow water penetration into the laminate.
Treatment of superficial gouges in gelcoat or the first layers of the laminate is straightforward. First, wash the damaged area thoroughly with high pressure fresh water. Dry the gouged area with a handheld hair dryer. Roughen the edges of the gouge with very course sandpaper – 50 grit or 36 grit.
Wash the area again thoroughly with acetone. Use a small, stiff bristle brush to clean the gouge completely. Dry again with the hair dryer, after most of the acetone has flashed off. Don’t breathe the stuff.
With the area thoroughly clean and dry, brush on a clear coat of epoxy resin, followed by resin thickened with microspheres or micro-balloons. Stick waxed paper over the epoxy patch to keep the epoxy from sagging out.
When it’s dry, sand smooth and touch up any voids or hollows with more filled epoxy.
When everything is filled, prime the patch and the surrounding area with a two part epoxy primer, such as Woolsey MFP. This is important, because the gelcoat that you have sanded is now pretty porous, and is more likely to develop blisters than polished gelcoat.
More extensive damage to encapsulated keels, requiring structural fiberglass repair, will be dealt with in another article. How do you tell if you’ve got structural damage? As a rule, any time the shell is ground away so that any of the ballast is exposed, or any time laminate is exposed over an area’ greater than a square foot, you probably need to do more than patch with putty.
RELATED ARTICLES MORE FROM AUTHOR
Leave a reply cancel reply.
Log in to leave a comment
Latest Videos
Pearson 37 & 37-2 – Behind the Curtain

How To Test a Boat Engine

Hunter Legend 35.5 – Behind the Curtain

Whipping Line On Your Sailboat
Latest sailboat review.

- Privacy Policy
- Do Not Sell My Personal Information
- Online Account Activation
- Privacy Manager
Log in or Sign up
You are using an out of date browser. It may not display this or other websites correctly. You should upgrade or use an alternative browser .
keel fairing
Discussion in ' Sailboats ' started by rapscallion , Jan 12, 2007 .
rapscallion Senior Member
I have a laser 28 and I would like to fair the keel. After reading some of the threads concerning this I see there are a lot of people her that know a lot more than I do about naca foils. Where would I start with this project? The keel is not symmetrical, so it is difficult for me figure out wich naca foil to go with. The information I have on leway angles comes from an IRC rating that when back calculated to phrf gives a score of 150. There are sailore that can easially sail the boat to a 126 rating, so I feel these numbers are suspect.
Tim B Senior Member
I'll assume you have a single keel, not two assymetric keels. A single Assymetrical keel will cause you to go faster on one tack than the other. In normal sailing this isn't a good thing, though it is used extensively in speed sailing. Unless you really want to get involved in the very detailed design, an NACA-0010 or 0012 section is probably as good as any. The thickness will, obviously, depend on the current keel shape. Get a few profiles printed at scale (QCAD is a freee 2D CAD package if you need one). Back them with something rigid (eg. thin ply), cut them out (carefully) and offer them up to the keel. The gap between the template and keel will need to be made up somehow. Cheers, Tim B.
Paul B Previous Member
Tim B said: ↑ Unless you really want to get involved in the very detailed design, an NACA-0010 or 0012 section is probably as good as any. Click to expand...
Tactic Junior Member
Paul B,could you give examples of foil types you think would be of use in this case and similar cases? I am thinking of a new keel for my boat.
I thought someone would say that. It depends where you want the maximum performace. Downwind with little leeway, a laminar section may well be better. Turbulent se4ctions may be better up-wind. It all depends on the rest of the yacht (and keel planform area etc.) Pure theory may suggest one foil is much better than another, in reality, the slightest bit of dirt or marine growth will reduce the advantage considerably. Keel design is not a closed book, there is a lot more work to be done. However much work is done into yacht balance , keel and rudder design, there will still be personal preferences and an awful lot of misguided advice. Tim B.
I couldn't find anything in the class rules concerning the class keel shape. I believe the boat has downwind performance; I was hoping to choose a foil shape that would help with uphill performance. Any suggestions on that foil shapes to look at first?
Crag Cay Senior Member
www.computerkeels.com These people can provide you with a keel profile template for the Laser 28. Due to the planform of your keel you will need four templates of different lengths. Total cost 250 dollars or so. Look under the listings for 'Universal Templates'.
Mikey Senior Member
Be careful with trying to modify anything to gain performance in this area if you are not experienced and have quite a lot of knowledge... NACA-0010-12 is always a decent choice but will it be better than what you already have?
Tim B said: ↑ there will still be personal preferences and an awful lot of misguided advice. Tim B. Click to expand...
rapscallion said: ↑ I couldn't find anything in the class rules concerning the class keel shape. I believe the boat has downwind performance; I was hoping to choose a foil shape that would help with uphill performance. Any suggestions on that foil shapes to look at first? Click to expand...
yokebutt Boatbuilder
Since the Laser 28 was designed by proper naval architects, there won't be much gain in a section different from what was designed for it. Some boats (J24 notably) that have the keel (or rig) in the wrong place to begin with or had an inappropriate section chosen are another story.
Thank you all for your input and suggestions. Contacting the class association is a good idea.
RHough Retro Dude
It's been a few years since I've done any aircraft design ... I don't remember any Eppler sections that had a drag bucket much wider than the 6 series. Has anyone looked at Selig sections? Here's a graph that points out the difference between a 00 series and a 6x series foil
Attached Files:
Figure4.jpg.
- Advertisement:
Raggi_Thor Nav.arch/Designer/Builder
For a small keelboat on a trailer where you can polish the keel before every race it may make sense to use a 63 profile, on a dingy, wouldn't you lift the board downwind? And on larger boats you have antifouling and fouling that probably ruin the more advanced profiles?
Rusted Keel fix
Catalina Capri 22 fix keel & rudder foil shapes
Keel Attachment Hardware Specifications
Keel Bulb attachment angle
Rudder longer than keel - too risky?
Rebuilding keel and adding pivoting centerboard to Tinkerbelle
Keel Bolt Repair Trailer Sailor
CAD program for redesign of existing keel design
Keel Hole(d)
1984 Gulfstar Keel: is this Gelcoat seam or?
- No, create an account now.
- Yes, my password is:
- Forgot your password?


- Search forums
- Practical Boat Owner's Reader to Reader
filling and fairing cast iron keels
- Thread starter dunkelly
- Start date 3 Oct 2020
Anyone any thoughts on the merits or otherwise of filling and fairing badly pitted cast iron keels .
Well-known member
Seems reasonable; I would think major pitting would create turbulent flow over the keel.
I kind of half did mine... in the past I’ve found they just rust again so didn’t expend too much effort on that job but I’d aquired a Terco Blaster so gave it a go. Got to say how impressed I am by it - took my keel back to the metal in very short order. So then I tried applying some Fertan which was equally impressive but I’ll wait to see hoe completely impressed I am in a few months time. I filled in the worst of the pitting with some ‘marine’ epoxy filler then primed and anti fouled just before the rain came on otherwise I might have spent more time filling. I’ll make a better job of it next lift if the Fertan works..
Active member
To get the job done if you have an SDS drill, you can get a needle gun attachment that remove the rust well. I believe it is an annual chore along with the antifowling. (Katy Louise has encapsulated lead ballast.)
Slight aside, be wary while using a heavy duty twisted wire brush cup on them. They have sufficient bite to remove chunks from the edges even with a fairly low powered angle grinder. Ask me how I know ... Worth using the search feature as this is discussed often here and on other forums. Which boat?
wully1 said: I’d aquired a Terco Blaster so gave it a go. Got to say how impressed I am by it Click to expand...
Lucy52 said: you can get a needle gun attachment that remove the rust well Click to expand...
convey said: be wary while using a heavy duty twisted wire brush cup on them Click to expand...
Lucy52 said: I believe it is an annual chore along with the antifowling. Click to expand...
wully1 said: I’ll make a better job of it next lift if the Fertan works.. Click to expand...
rogerthebodger
Following all the chipping and blasting paint on sone brick cleaner to remove any pust left. then wash with fresh water the paint on phosphoric acid before painting and filling . If you don't remove all the microscopic rust it will just come back.
Dankilb , the instructions say to wash off the dust before overcoating The Fertan? I wiped it off but there was still residue coming off on my fingers when I primed it which is a bit of a worry.

wully1 said: Dankilb , the instructions say to wash off the dust before overcoating The Fertan? I wiped it off but there was still residue coming off on my fingers when I primed it which is a bit of a worry. Click to expand...
dankilb said: Yes, absolutely, the dust seems pretty stubborn, even after washing. Plus the higher-tech paint systems for this sort of application are specified for bare metal, whereas with Fertan (or Vactan or Hydrate80 etc.) there is still a layer of unspecified something below the paint! Click to expand...
wully1 said: I suppose I’ll find out in a year or so... Click to expand...
I stripped my keel before going back in this year. Tercoo for first strip for old filler and loose rust, then polycarbide disks on grinder. Cleaned back with thinners then zinc based 2-pack epoxy primer, fairing filler/sanding, another zinc primer, 2 coats of epoxy primer for antifoul, 2 coats of hard antifoul. I'll let you know at the end of the month how it fared (albeit a short season).
RUST CURERS. The most common way to cure rust is to use an acid convertor, these are most commonly water based, epoxy (glue) based or gel based. They have an acid content roughly somewhere between 4-8%. The names of these you will recognise as Ku-Rust, Jenolite, Fertan, etc and then company named products that sell you a complete rust cure and protection system such as Dinitrol, Supertrol, Bilt Hamber, POR-15, Buzz Weld etc. ACF-50 is an entirely different product and not relevant for keels, very good stuff however! For any of these rust convertors to cure the rust, the corrosion has to be taken right back to pretty much bare metal for them to be 100% effective, this is why they have not worked for the majority of cases of DIYers! Unfortunately they do not soak into deep rusty metal or even shallow rust. You really have to get the surface rust right back to near good metal, every pit, every rust worm and of course this is not easy where welds or seams are involved. RUST PREVENTORS So with expected results to be poor, very tough, or thick or rock hard rust "preventers" are used to coat over the rust convertor as part of a rust protection package. Some of these products are misleading as they say they stop rust... they don,t they just stop rust showing through. In fact long term they can be worse in many situations as they trap in the rust and moisture when a gap is created from corrosion underneath and it actually accelerates the rust. Sometimes if the metal was just open to the elements to dry out say on a car chassis it would have been better... I.e. Just spraying with oil actually can be very effective... no good for a keel of course. Rust preventors like POR-15 chassis original, which used to be marketed with the toughness of being resistant to hitting it with a hammer do have there place. They are excellent for protecting guaranteed rust free metal that is new or has been shot blasted for instance or as part of a treatment where the metal in question will take years to rot out anyway, e.g. Thick heavy duty axles. Unfortunately these products are used to hide rust and they can mislead many customers into thinking they do actually stop corrosion. Sadly they are becoming more widespread on the market, one company actually uses a video of a bloke painting his rusty trailer in the rain claiming that it will stop his rust... sigh! This is all just happening as effective clear coat products have recently been developed such as Dinitrol 4010. Sorry this Is more vehicle based insight now. This is great as you can keep an eye on the areas you have previously treated over the years and if you request it, it will stop all the cowboys in the undersealing world just slapping on rock hard coverings or thick coverings that hides the complete lack of preparation to the metal. Easy money for them! Thankfully most do a good job.
MikeCC said: I stripped my keel before going back in this year. Tercoo for first strip for old filler and loose rust, then polycarbide disks on grinder. Cleaned back with thinners then zinc based 2-pack epoxy primer, fairing filler/sanding, another zinc primer, 2 coats of epoxy primer for antifoul, 2 coats of hard antifoul. I'll let you know at the end of the month how it fared (albeit a short season). Click to expand...
Are there no electronic rust proof protection systems, like Finalcoat for cars?
convey said: Are there no electronic rust proof protection systems, like Finalcoat for cars? Click to expand...
Birdseye said: But what do you do about the keel joint? Or the bottom of the keels where they ground? Truth is, the keels should be lead not iron. Click to expand...
convey said: Excuse the idiot's question, how would lead work for keels that were structural, as on typical bilge keels that support the boat on the hard? I've seen a gentleman make up kevlar shoes for his boat, a shallow draft, centre keeled clinker that is ,as per tradition, pulled up and left on gravel beaches. No idea of the likely longevity, does anyone have any idea? Joints is a problem, I'm presuming they flex a little and that blending them over and joining the matt to the hull is out of the question, or is it? (I've seen the photos of a fully encapsulated bilge keeler that lower edge had worn through and ballast dropped out). Is part of the problem that we're just getting into the end phase of this issue due to the age of the respective boats? As in it's just becoming an issue now for 60s, 70s boats? I've seen an old, very abandonned Westerly who keels where flaking apart impressively, crumbling like old slate, and I would have thought there's were of a better batch of castings. What's the sticking value of matt covering them even when allowing for the joint? As in how long will it remain sufficiently stuck to act as a rot deterent? Click to expand...
Other threads that may be of interest
- 28 Jun 2024
Members online
- justanothersailboat
- Honeysuckle
- green kestrel
- john_morris_uk
- Chiara’s slave
- Irish Rover
- PabloPicasso
- ColourfulOwl
- RivalRedwing
- Achillesheel
Share this page
Visit our Popular Forums
- Monohull Sailboats
- Multihull Sailboats
- Powered Boats
- General Sailing
- Antares Yachts
- Fountaine Pajot
- Lagoon Catamarans
Cruising Business
- Boat Classifieds
- General Classifieds
- Crew Positions
- Commercial Posts
- Vendor Spotlight
Life Aboard a Boat
- Provisioning: Food & Drink
- Families, Kids, & Pets Afloat
- Recreation, Entertainment, & Fun
- Boat Ownership & Making a Living
- Liveaboard's Forum
Seamanship, Navigation & Boat Handling
- Seamanship & Boat Handling
- Training, Licensing, & Certification
- Health, Safety, & Related Gear
- Rules of the Road, Regulations, & Red Tape
Engineering & Systems
- Const. / Maint. / Refit
- Product / Service Reviews
- Electronics: Comms / AV
- Electrical: Batts / Gen / Solar
- Lithium Power Systems
- Engines & Propulsion
- Propellers & Drive Systems
- Plumbing / Fixtures
- Deck Hdw: Rigging / Sails
- Aux. Equipment & Dinghy
- Anchoring & Mooring
Photo Categories
- Member Galleries
- Life Onboard
- Sailing in the Wind
- Power Boats
- Cruising Destinations
- Maint. & Boat Building
- Marine Life
- Scuba Diving & Divers
- General Photos
Recent Photos

Listing Categories
- African Cats
- view more »
- Crew Wanted
- Crew Available
- Enhance Your Account
- Meet the Mods
- Meet the Advisors
- Signup for The Daily Cruiser Email


IMAGES
VIDEO
COMMENTS
The required length of the extended fairing was determined by placing straight edges on either side of the keel at several levels and measuring the distance from the current trailing edge to the intersection. Cores for each keel were cut to size, pre-ground to the proper taper, and tacked in position with a few dabs s of thickened, 10-minute epoxy.
Tanzer 29 Jeanneau Design Sandusky Bay, Lake Erie. Mar 30, 2019. #16. The original owners of my boat did the West System epoxy over the entire iron keel and faired in 2009. It has held up really well. I've repaired a couple of small spots in the past couple years. I used an angle grinder on the repairs. JerryA.
I'm with 4182 on this. You can't shave off that much weight, it will have more negative effect on the boat's performace than positive. When fairing the keel, the most important things to remember are 1) To make sure the keel is symmetrical and 2)The keel is perfectly smooth.
This post is the continuation of Refinish Your Swing Keel for Best Performance - Part 2: Cleaning.I will describe common keel defects, the fairing system I used, sealing a freshly sandblasted keel, applying body filler to build up an accurate hydrodynamic foil shape, and paying extra attention to the shape of the leading edge of the keel.
Interlux HT 120 and HT 450 were used to formulate the filling and fairing compounds. MAS Products feature a low-viscosity laminating resin and a higher viscosity resin for adhesive bonding, filling, fairing, and filleting. The two resins can be combined to form a custom-blended viscosity.
Sailboat Refit #18: In this video I repair the damaged keel to hull joint. Fiberglass and fair the keel before painting.
In this episode of the Art of Boat Building I begin fairing the hull. In this 3 step processes we discuss the method of hand planing followed by sanding with...
This post is the continuation of Refinish your swing keel for best performance - Part 3: Fairing.I will describe: building a fiberglass reinforced guard on the leading edge, applying the final waterproofing coats of epoxy, bonding centering spacers on the upper end, priming with a barrier coat of epoxy paint, and applying ablative bottom paint last.
First on the list was to repair the bottom of the keel and smooth the underwater surfaces of the hull. The keel bottom was cracked and chipped and had the remains of a coral reef stuck to it. Unfortunately, it was also resting on two wood blocks, and the whole boat weighs over 10,000 lb.
Jun 3, 2004. 123. - - Deale, Md. Jan 8, 2005. #1. I'm planning to fair, and fill the keel/hull joint, of the iron keel of my Hunter 28.5 this spring with a product called "POR Patch." I may also use the same maker's "POR 15" to seal the whole keel prior to bottom painting it.
Fairing is more than just fixing dings and dents for cosmetic reasons. It entails everything from filling surface scratches in gelcoat, seamlessly repairing osmosis blisters on a hull, reshaping the leading edge of a keel, making a hull repair disappear, or smoothing the hull to get the fastest underwater profile.
Apr 27, 2016. 14. Catalina 320 Anchorage Marina, Holland, MI. Dec 3, 2018. #13. The backing plates are the original/standard ones. I have a 1994 Catalina 320 (hull #32) that had the same issue upon purchase. My keel bolts/plates inside did not look as rusty, but I had bad keel separation especially at the aft end.
The best way to treat an iron keel that's rusting is to sandblast the whole thing and apply a complete, new, epoxy-based coating system. ... many boat yards do not allow sandblasting. Even when this is permissable, a complete recoating job also means a complete re-fairing job, and that in turn means lots and lots and lots of slow, boring ...
4380 posts · Joined 2000. #4 · Mar 18, 2008 (Edited) Absolutely the only way to go for keel fairing is West Systems epoxy products and fillers WEST SYSTEM Epoxy , 410 Microballons in your case. There is a lot of info on their site and you can order a relevant book or video from their Instructional/video page.
www.computerkeels.com. These people can provide you with a keel profile template for the Laser 28. Due to the planform of your keel you will need four templates of different lengths. Total cost 250 dollars or so. Look under the listings for 'Universal Templates'. Crag Cay, Jan 13, 2007. #7.
On a typical fin keeled boat the keel still takes the boat's weight as the pad are "just" there to stop it falling over. In most cases the keel hardened by including antinomy. The iron keel on my last boat seemed particularly prone to rusting such that it needed the "grit blasting" at just three years old, current boat has a lead keel so saved ...
Here is what I did this winter when i had some exposed lead after checking on keel-hull joint. Sand whole area down to fresh lead right before applying epoxy primer. Clean and degrease as normal. Apply first coat of epoxy primer to exposed lead and wet sand it into the lead with very rough sand paper ( I used 60 grit).
May 24, 2004. 470. Hunter 33.5 Portsmouth, RI. Jan 7, 2013. #2. We have a 1990 Hunter 33.5 (with an iron keel). We we bought it in the spring of 1999, there was some gap at parts of the joint of keel and hull. The yard sanded the area all around the joint (360 Degrees) scrapped out any joint compound near the outer surface and then did a "belly ...
The first step is to remove the old fairing compound. Many boat manufacturers used automotive body filler, which is why you have a problem now. Body filler is easy to remove with a propane torch. Just heat it and scrape it off. The heat won't hurt the keel, but be careful above the lead. I would grind the filler off the keel stub.
Working on a 1981 Lippincott 30, and and just completing a fairing out the hull after a restoration due to pox, many mini blisters. Anyway, my question is on the trailing edge of the keel, should it be squared off or faired smooth to an edge as I did on the lead egde of the keel. Does...
We suspected that iron keel had transferred the energy of stiking a hard object to the hull, leaving the keel looking fine, but the hull cracked and weakened. A lead keel would have evidence of an impact that the surveyer would notice. Anyway, $2400 later, the hull and keel fairing were better than new.