Manöverkunde : Hafenmanöver: 9 Anlege-Varianten für Einhandsegler
, Felix Keßler
· 04.07.2018

Manchmal passiert lange Zeit nichts und dann alles auf einmal. So lautet eine Binsenweisheit, die Segler immer wieder am eigenen Leib zu spüren bekommen, wenn sich auf See unglückliche Umstände in kürzester Zeit verketten. Ein idyllischer Segeltag im Sommer beispielsweise endet mit einem Gewitter – der Hafen wird nicht erreicht, bevor die ersten Böen die Yacht erfassen. Da genügt es schon, wenn sich die zweite Person an Bord kurz vor der Hafeneinfahrt auch noch den Knöchel verstaucht und plötzlich beim Manöver nicht mehr mit ganzer Kraft helfen kann. Daher gilt: Auch unter schwierigen Umständen und im engen Hafenbecken sollten Skipper das Boot einhand kontrollieren und einen Anleger fahren können.
Eine Möglichkeit, sich unter Anleitung erfahrenener Solo-Regattaprofis ans Einhand-Segeln heranzutasten, bieten auch die Einhandtrainings der YACHT. An jeweils drei Tagen im September 2018 wird auf wendigen Seascapes vor Heiligenhafen gesegelt. Hier geht es zu weiteren Informationen.
Wer sich Kenntnisse über das Verhalten der eigenen Yacht direkt und ohne Fremdhilfe aneignen will, sollte das bei verschiedensten Bedingungen probieren. Dabei haben Skipper mit moderneren Yachten einen klaren Vorteil – allerdings auch einen Nachteil. Die immer breiter gewordenen Hecks vereinfachen einige Manöver und ermöglichen andere überhaupt erst. Der Abstand des Anschlagpunktes, etwa die Heckklampe, zur Schiffsmitte bewirkt einen Hebel, über den sich die Yacht drehen lässt. Außerdem sind moderne Hecks meist offen gestaltet, und die Relingsdrähte lassen sich wegnehmen. So kann der Steuermann einen Pfahl oder die Pier sehr leicht erreichen, wenn er rückwärts an sie heranfährt. Was übrigens stark zu empfehlen ist.

Meistgelesene Artikel

Der geteilte Lateralplan neuerer Yachten, mit schmalem, tiefem Kiel und frei stehendem Ruder, hat beim Manövrieren allerdings auch Vorteile, wenn sie richtig genutzt werden. Zwar vertreiben solche Yachten recht schnell und heftig bei Seitenwind über den Bug, das ist der nicht zu unterschätzende Nachteil. Dafür richten sie sich relativ stabil mit dem Heck in Windrichtung aus, was Windfahneneffekt genannt wird. Da solche Yachten zudem in Achterausfahrt sehr kontrolliert zu steuern sind, ergeben sich neue Möglichkeiten für Hafenmanöver über das Heck.
Mit den folgenden Anlege-Szenarien für Einhand-Anleger sind Sie auch auf schwierige Bedinungen gut eingestellt. Klicken Sie auf die Bilder, um die Texte und Manöverabläufe zu vergrößern.

Vorwärts gegen den Wind anzulegen ist eigentlich nichts besonderes: Die Pier wird vorsichtig angefahren und eine Mittelspring ausgebracht. Um einen Poller gelegt, lässt sich das Boot gut gegen das Wegtreiben nach hinten aufstoppen.

Bei Wind parallel zur Pier ist auch das Rückwärtsfahren gegen den Wind eine sinnvolle Option. Dann nähert sich zuerst das Heck der Pier (bei modernen Yachten ist dieser Bereich sehr breit) und kommt der Pier damit entsprechend früh nahe. Nachteil: Der Wind pfeift auch beim Anlegebier noch ins Cockpit.

Sich vom Wind bequem in die Lücke drücken lassen und dabei lässig hinter dem Rad stehen bleiben – ganz so einfach ist es dann doch nicht. Denn wer es nicht schafft, den Heckklampen-Festmacher auszubringen und dann im Vorwärtsgang in diesen einzudampfen, wird weiter nach hinten gedrückt...

Ablandiger Wind und das Boot soll längsseits an die Pier. Wie funktioniert's? Die Mittelspring mit dem Poller verbinden und dann eindampfen: Das ganze Boot saugt sich dann langsam heran.

Traumhaft hinein in die Box: Mit ins Cockpit umgelenkten Mittelsprings ist das auch einhand kein Problem. Voraussetzung ist gründliche Vorbereitung der Springs.

Die Königsdisziplin: Rückwärts in die Box und das trotz starkem Seitenwind. Erneut machen es umgelenkte Festmacher möglich. Ein Kunststück in drei Schritten.

Droht starker Wind die Yacht mit zu viel Speed vorwärts in die Box zu drücken, tut es diese zunächst etwas ungewöhnlich anmutende Methode. Eine lange Leine wird zu einem der Pfähle der Nachbarreihe ausgebracht und die Yacht dann ganz langsam in die eigene Box "abgeseilt". Eine der sichersten Methoden.
Bei diesen beiden Spezialmanövern ist keine Pier in der Nähe. Vielmehr geht es darum, das Boot kontrolliert zu verankern oder an einer Muring festzumachen. Im Mittelpunkt steht bei beiden Manövern der Gedanke, dass der Steuermann das Cockpit am besten nicht verlassen soll. Denn dann vertreibt die Yacht und stellt sich quer zum Wind.

Szenario 1: Das Grundeisen zunächst über das Heck auszubringen kann sinnvoll sein, wenn der Ankerplatz räumlich begrenzt ist und das Eisen an einer bestimmten Stelle fallen soll, oder aber in Tidengewässern, in denen die Yacht bei starker Strömung deutlich vertreiben würde, weil der Steuermann nicht gleichzeitig gegen den Strom dampfen und am Bug den Anker fallen lassen kann. Deshalb kann der Anker über das Heck fallen gelassen werden, wo der Einhandsegler alles in Griffweite hat. Das gelingt jedoch nur wirklich gut mit einem Kettenvorlauf, der komplett in einem Eimer am Heck gesammelt ist sowie einer angesteckten Ankertrosse, die bereits am Bug angeschlagen und im Idealfall zum Steuermann zurückgeführt ist. Ansonsten könnte die am Rumpf entlanglaufende Kette unschöne Kratzer hinterlassen.

Szenario 2: Werden Bojen rückwärts angefahren, kann der Steuermann leicht über das Heck einen Festmacher ausbringen. Außerdem hält er die Boje maximal lange im Blickfeld und riskiert nicht, sie zu überfahren. Als Variante zu Schritt zwei kann auch der Festmacher achtern direkt per Hand zum Bug verbracht werden. Aber Achtung: Das gelingt nur bei sehr wenig Wind und ohne Strömung. Ansonsten kann die querstehende Yacht enorme Kräfte entwickeln. Alternativ kann auch zuerst ein Ende des Festmachers auf er Mittelklape belegt werden. Danach das andere Ende von achtern zum Bug bringen und belegen, anschließend das Ende von der Mittelklape zum Bug. So ist immer ein Ende des Festmachers an Bord belegt und der Skipper muss weniger als die halbe Kraft aufbringen, da die Reibung an der Boje zusätzlich die Zugkraft am losen Ende mindert.
Seemannschaft: Mitsegler-Fehler (pdf)
Einhandsegeln: Manöver und Profi-Tipps (pdf)
Meistgelesen in der Rubrik Segelwissen

Keine Angst vorm Hafenmanöver
Das perfekte Hafenmanöver ist keine Zauberei, sondern die richtige Kombination aus Übung, Vorbereitung, Technik und Kommunikation. Wie das von vielen Seglern und Motorbootfahrern gefürchtete Manöver klappt, zeigen wir in diesem Blogbeitrag.

Ein Segelboot beim Hafenmänover.
Für viele Skipper und Crews sind das Anlegen und das Ablegen in einem Hafen der pure Stress. Das eigene Boot und auch andere Yachten könnten durch einen dummen Fehler beschädigt werden. Und unter den Augen vielen anderer Segler und Motorbootfahrer, die einem beim Hafenmanöver genüsslich aus dem Cockpit zuschauen, möchte man auf keinen Fall zum nächsten Blockbuster im sogenannten Hafenkino werden. Aber keine Angst, mit ein bisschen Übung, dem gezielten Einsatz technischer Hilfsmittel an Bord und klaren Kommandos kann man beim Anlegen und Ablegen auch schnell zum Superstar werden.
Hafenmanöver – Wenn der Blutdruck an Bord steigt
Medizinisch ist es bewiesen, was viele Skipper auch ohne Blutdruckmessung an Bord im Herzen spüren. Die Hafenmanöver und besonders das Anlegen und Ablegen, lassen den Puls nach oben schnellen. Mehr noch als beim Setzen der Segel, dem Einholen des Ankers, der Vorhersage von viel Wind und Wellen oder gar Sturm. Und eigentlich ist dies ganz normal. Beim Autofahren ist die Anspannung auch am höchsten, wenn man in einer fremden Innenstadt mit hohem Verkehrsaufkommen unter Zeitdruck einen Parkplatz finden muss.
Wenn man einen Anlegeplatz nicht kennt, sollte man noch vor dem Einlaufen im Hafenhandbuch den entsprechenden Hafenplan studieren. Wo sind die Stege für die Gastlieger? Wo gibt es eventuell Untiefen? Wie ist die Windrichtung zur Lage der Stege? Wo könnte es windgeschützt sein, wo weniger? Eine gute Vorbereitung des Hafenmanövers vom Skipper an Bord ist der halbe Anleger bzw. Ableger.

Eine Segelyacht wird am Kai festgemacht.
Klare Kommandos beim Ablegen und Anlegen
Ganz wichtig ist es auch, die Crew von seinen Plänen für das Einlaufen rechtzeitig zu informieren. Auch wenn die Mannschaft nur aus dem eigenen Ehepartner besteht, klare Informationen und klare Kommandos beruhigen die Crew. Eine schlecht informierte Besatzung stellt nur in der stressigen Situation des Hafenmanövers noch stressigere Fragen. Das kann dann während des Manövers zum handfesten Streit eskalieren. Nicht umsonst suchen einige Scheidungsanwälte ihre Mandanten direkt im Hafenumfeld.
Fender und Leinen auf dem Boot für das Hafenmanöver vorbereiten
Spätestens beim Einlaufen mit dem Boot in den Hafen sollte alles vorbereitet sein: mindestens zwei Festmacherleinen auf dem Vorschiff und mindestens zwei an den Klampen achtern. Eine Festmacherleine zusätzlich, zum Beispiel für eine Spring, wenn man quer zum Steg liegen möchte, sollte griffbereit liegen. Fender an den Seiten und zwei am Heck sollten ebenfalls schon an der Bordwand hängen. Einen weiteren Ersatzfender bereitzuhalten schadet nicht. Kommt man doch einer anderen Yacht oder dem Steg gefährlich nahe, kann ein Crewmitglied den Fender zum Schutz des Bootes außenbords hängen.

Skipper und Mannschaft besprechen das Hafenmanöver.
Helfer gegen Wind und Strömung
Wie Abstandssensoren und Rückfahrkamera im Auto das Ein‐ und Ausparken revolutioniert und vereinfacht haben, sind es beim Boot das Bug‐ und Heckstrahlruder und der Joystick. Aber was beim Auto ganz automatisch geht, sollte bei einer Yacht vor jedem Hafenmanöver kurz gecheckt werden. Ist das Bugstrahlruder an? Also ist die Sicherung am Schaltpanel gedrückt und leuchtet die On‐Leuchte des Bugstrahlruders an der Steuerungseinheit? Ein kurzer Check des Bugstrahlruders mit kurzem Druck der Schaltknöpfe nach Back‐ und Steuerbord gibt Gewissheit. Die gleiche Prozedur gilt für das Heckstrahlruder.
Viele Motoryachten verfügen über einen Joystick, der je nach System, dem Skipper die Koordination der Maschinen und des Bugstrahlruders abnimmt. So lässt sich auch eine größere Motoryacht spielend leicht auch quer zur Bootsachse an der Pier anlegen. Einfach per Druck des Joystick in die gewünschte Richtung drücken. Dadurch können Motoryachten auch dank des Joystick auf dem Teller drehen und sich wirklich in jede Richtung bewegen.
Wind und Strömung sollte der Skipper aber trotz Joystick oder Bugstrahlruder der Yacht immer im Auge behalten. Yachten haben heutzutage ein flaches Unterwasserschiff und einen relativ hochbordigen Rumpf. Da schiebt der Wind einen schneller an den Dalben, als man vielleicht möchte.
Öfters mal rückwärts fahren
Jeder Steuermann kennt das, eine Yacht lässt sich einfacher steuern, wenn sie vorausfährt, als wenn man mit ihr rückwärts fährt. Im Mittelmeer gehört es aber zum guten Ton, dass man rückwärts zu Pier anlegt. Also sollte man das Rückwärtsfahren vorher am besten außerhalb des Hafens üben, denn jede Yacht hat da ihre charakteristischen Eigenheiten. Auch hier gilt ein Grundsatz, der fast für jedes Hafenmanöver gilt: Weniger ist oft mehr. Vollgas vorwärts, dann wieder schnell Vollgas rückwärts und Steuer schnell hartbackbord oder steuerbord wirken vielleicht cooler, wühlen aber meistens nur den Hafen auf und führen selten zum Ziel. Lieber mit Bedacht manövrieren und das Bugstrahlruder öfter betätigen.
Anlegen nur mit Wind
Die Königsdisziplin für den Steuermann einer Segelyacht ist es unter Segel und ohne Motorhilfe anzulegen. Das erfordert aber sehr viel Übung, eine wirklich eingespielte Crew, beste Kenntnisse des Reviers und des Hafens und eine große Portion Mut. Wer es beherrscht, kann sich als Kapitän sicher sein den Oscar für die beste Hauptrolle im Hafenkino zu bekommen.
Besser ist es, auf Sicherheit zu setzen und mit dem Motor einzulaufen. Denn ein sauberes Anlegemanöver mit Maschine, Bug‐ und Heckstrahlruder oder Joystick und vor allen Dingen ohne großes Gebrüll an Bord ist immer einen Applaus wert und hält den Puls ganz unten.
Impressionen

Aktuelle Blogbeiträge
13.06.2024 Mal was Neues aus der Pantry?
14.05.2024 Was wird eigentlich in der Produktentwicklung gemacht?
30.04.2024 Tag und Nacht - Was ist wichtig beim Segeln rund um die Uhr?
Yachting Monthly
- Digital edition

How to anchor under sail
- Chris Beeson
- June 21, 2016
Can you set and weigh anchor under sail, without turning the ignition key? Tom Cunliffe demonstrates a handy cruising skill

L-R: Crew: The job can be done ably by a team of two, but here I took the helm, with a cockpit crewman to handle the main and a midships pointer to aid communication between bow and stern. Bow man: Weighing anchor without a windlass, the person on the bow hauls hard as soon as the chain goes slack. YM’s deputy editor Rob Peake looks all puffed out but if you time it well it shouldn’t be hard work. Note, too, we found having a spot of jib out helped us gain way. Chain: Sailing off an anchorage, there can be concerns about the anchor chain rubbing against the bow gelcoat. With good communication between bow and stern, this should not happen. Our yacht suffered no damage. Credit: Lester McCarthy/YM

Tom Cunliffe is an RYA Yachtmaster examiner. He has passed and failed hundreds of Yachtmaster candidates over the years
Few of us anchor under sail these days – a pity, because nothing beats making a passage without the engine, then letting go the hook to complete a perfect day. Cranking up the diesel doesn’t only make noise, it also erodes the satisfaction factor. In any case, when engine failure looms, dropping the pick in a safe spot to sort things out is the number one safety measure.
My wife and I cruised extensively in a 13-ton gaff cutter with no engine and no windlass. Tackled sensibly with an understanding of what a boat is likely to do when way comes off, the job holds no horrors. Weighing anchor can be more challenging without a powerful windlass.
To explore the skills of engineless anchoring, we borrowed an Océanis 343 in Lymington and cruised out to the roadstead behind Hurst lighthouse in the West Solent. Lots of space there, and a turning tide to spice things up.
For the purposes of this article, we’re assuming that suitable calculations have been made regarding depth to anchor in, and that we’re using a scope – with chain – of three or four to one.
My experience of heavy displacement yachts with meaty ground tackle tells me that 3:1 is almost always adequate. Four is even more secure. If you’ve all the space in the world, loads of chain and a hefty windlass, lay as much as you like and sleep easy. Light yachts, with no forefoot and tiny anchors strung from chain selected to keep weight out of the bows rather than to hold the boat in a gale, generally need more scope.
Approaching the anchorage

Preparation as you approach the anchorage is key. Here we are anchoring in a wind against tide situation, so we are under headsail only
Approaching an anchorage, what are we aiming to achieve? The ideal is to drop the hook where you want it to lie, then move the yacht away from it, steadily paying out cable, until you’ve laid the chosen scope for the probable HW depth. At this point, the cable is snubbed and the yacht should dig in her tackle. Under sail, one or two sophistications enjoyed by the vessel under power are not possible, so you can only rely on the weight of the boat to dig in the hook. We look at specific situations over the rest of this page and the next, but first, seamanlike preparation is key. Before actually dropping the anchor overboard, a useful order of events goes like this:
- Sort out where you’re going to anchor and decide on a suitable depth at which to let go
- Drop, or roll away any sails that won’t be needed
- Free up the hook and lower it over the bow so that it can be let go promptly
If there’s a windlass, make sure its brake is ready to knock off or that it’s all set to wind out cable electrically. The cable should be suitably marked, or the windlass itself should read how much chain has passed over it

The anchor is ready to go, with chain and warp flaked
Without a windlass, flake the cable you’ll need on the foredeck. Make the bight fast at the mark, so that you don’t have to handle the chain if it’s running out under load. So long as the chain is made off in advance, no fingers need be lost.

The beginning of the warp is often a useful point to make fast on a cleat. Without a windlass, gloves are a good idea too
If a sensible amount of chain is spliced onto a warp to achieve full length, the beginning of the warp is often a useful starting point for making fast. Once all that is done, there are several ways to proceed, depending on the wind and tide situation.
Laying the anchor – wind with tide or no tide

We have wind with tide. At our chosen anchoring spot, the bowman is dropping the anchor and we are about to back the main
Where there’s no tide running, a yacht can approach her anchoring spot under any sail combination at all. If she sails well under main only, this is generally best, because it keeps the foredeck clear for the hands to work the ground tackle. Where it’s windy and you feel uncomfortable without a headsail for manoeuvring, roll most of the genoa away and set just enough to do a bit of good. Here is how it generally happens on my boat:
- Roll or drop the headsail
- Prepare the ground tackle
- Approach the let-go point on a close reach so you can control speed by spilling wind from the mainsail
- Luff up and, as the last of the way comes off, drop anchor

The chain is payed out as wind fills the backed main and the boat falls back
Ideally, if crew numbers allow, back the mainsail to drive the boat astern. To do this, overhaul the mainsheet so you can physically shove the boom out as far as possible. A well-mannered boat will now trundle off making a controlled sternboard, steering just as she would when going astern under power, while the foredeck crew pay out cable to the mark.

If the boat won’t do this, her bow will certainly blow off as she loses way. Depending on how far this is likely to be – and only experience of an individual boat can tell you – it may now be necessary to drop the main to prevent it from filling. If so, do it smartly as soon as you let go the hook, then let her drift off sideways until the cable is all out. You may feel uneasy about not having any sail set, but remember, unrolling some jib or whipping the headsail halyard up only takes a second or two, so if the whole manoeuvre ends up badly out of shape, you can always get way on in a hurry.
If all is well, you’ll feel the anchor grab the bottom. Coil down, tidy up, and hoist the anchor ball.
Laying the anchor – wind against tide

This is the tricky one and you need to judge the best way to do it for your situation, however there should be no discussion about one thing. If you anchor with the main up, the boat will try to lie to the tide as soon as the hook bites. This fills the mainsail as the wind comes abaft the beam, an all-round bad scene. In a small yacht, you might get away with luffing very quickly and dragging down the main just as you let go, but it’s messy. A far better plan is to stow it early and approach under genoa alone, rolling it up steadily to lose way. Where the breeze is stiff and the tide weak, you can approach up-tide and downwind, or sometimes partly across the wind, under bare poles. However, generally speaking, the following is a good starting point for your thinking and a method I have used many times:
- Sail on a close reach, let off the mainsheet and drop the main.
- Stow it away
- Approach the chosen spot under jib, downwind, stemming the tide. Juggle your speed with sheet and furling line so you can become stationary over the ground just when you want to be. If you have a hanked-on headsail, hoist it part-way up and hold the leech out to give you as much way as you need and no more. This is often easier than letting the sheet fly on the whole sail, because the windage of a flapping genoa can be enough to carry the boat straight past where you want to stop
- Let go the anchor and pay out cable as the tide carries you back downstream
- Snub off when you’re ready, and that’s the job.
Laying the anchor – wind across tide
The best maxim for this indeterminate situation is the old favourite: ‘When in doubt, drop the main’. Modern yachts sail well under headsail only and getting shot of canvas from the boom does away with any chance of a gybing débâcle.
Laying the anchor – crash anchoring

Dropping the mainsail in light conditions, ready to crash anchor
Sometimes, in light going, you can’t be sure the hook has really ‘taken’, particularly if the boat is of modest displacement and doesn’t really develop enough inertia to plough the anchor fluke into the ooze. Similar circumstances can arise when a stronger wind is blowing against a weak tide. If it looks like being one of these days and you’re feeling adventurous, the following procedure removes all doubt. Safety precautions are vital, however. No hands near the chain, please. There can be a lot of load.
- Drop the main and approach downwind under jib, even in no tide
- Let go the pick as you sail over your spot, then let the chain run. Keep steering downwind and try to keep way to a minimum by rolling up the sail or dumping sheet until the hook takes. There won’t be the slightest doubt this has happened, because the boat will spin round in short order. Watch out! There can be a serious lurch
- Make sure that as soon as the hook shows signs of biting, you steer so as to swing the stern away from the cable, which will be running down one side or the other

This is a somewhat extreme process. If you aren’t careful, a fin-and-spade profile boat can do her propeller a mischief, and any boat can give her topsides a mashing with the cable. Care avoids these contingencies. The technique is definitely for the young at heart, but it can be a winner in a light boat that lacks the inertia to crank the pick into the bottom, or for any yacht when you really need to know you are securely anchored.
Weighing anchor with a windlass – wind with tide or no tide

With the main hoisted, the bowman uses the windlass to heave up to the hook and breaks out the anchor

- Hoist the mainsail and have the headsail ready to go
- Heave up towards the hook until the cable is ‘up and down’ – the old term for ‘ready to break out’
- If you’ve plenty of space, break out the pick and let the boat fall off on whichever tack suits her. If space is limited, use a backed headsail to help her decide. Bring the anchor on board, clean up with bucket and deck brush while the cockpit idlers cruise slowly away under mainsail. When all is stowed, break out the jib and blast off.
Weighing anchor with a windlass – wind against tide

With mainsail stowed and headsail ready to go, the boat can be brought up to the hook with the tide

1. Keep the mainsail stowed. It won’t hoist easily in any case, because the wind will probably be abaft the beam
2. Heave up to the anchor with no sail set, but the headsail ready to unroll or hoist in short order. You could have it unrolled at this stage, but if you can keep it out of the way the guys up forward will appreciate the clear foredeck
3. When the hook is aweigh, if there is any pressure on you – as there will be in a river, for example, or in a crowded anchorage – break out the jib and get under way. On the other hand, when there’s no stress, why not just clean up, stow, then hoist some sail when you’re ready? If the tide obliges you to use the headsail first, start out with this, then come up onto a close reach, overhaul the mainsheet, shove the boom out and hoist the main. If it can flap as it goes up and any lazyjacks behave themselves, there should be no problem.
Weighing anchor without a windlass – wind with tide or no tide

Haul in the chain as the yacht tacks up towards the anchor, then snub it off and, with enough way on, the anchor should break out
If the going is light, you may be able to hoist the main then heave the boat up to the hook. Try to build up plenty of way pulling the cable so that, if the anchor is well dug in, the boat’s inertia will break it out as she coasts over it. If it’s windy and you’re struggling, you’ll have to sail it out.
- Hoist the main lying well back from the anchor. Ease the sheet out. Unroll a modest amount of jib
- The person at the helm now backs the jib to lay the boat onto one tack or the other, while the crew stands by on the foredeck
- As the yacht pays off, sheet in the main a little – not too much so as to stall it – then sail away on a close reach
- When you’ve travelled something like the scope of your cable, tack smartly and sail across the wind towards the anchor
- The foredeck crew now gathers in slack on the cable as you go. When he or she runs out of slack, snub the cable. One of two things happens. Either the anchor breaks out and you’re off, or the boat snubs hard, allowing you to tack promptly then sail over the hook on the other tack. Once again, the crew grabs the slack when it’s offered, then snubs. This time the anchor will almost certainly break out. If not, try again, and so on

It goes without saying that careless seamanship on the foredeck in his dynamic exercise can lead to damaged hands, so always be ready to take a turn, rather than relying on pure strength to hold the cable. If it’s chain, keep those fingers well clear of the cleat while you’re doing it. I have rarely known this method to fail in real life, but we did have some fun with it on our YM test. We concluded that it was because we weren’t communicating well enough from foredeck to cockpit and vice-versa. When my wife and I did this every day, we didn’t exchange a word. We just knew what we both needed and did it. With a strange crew, I found that it’s not like this. What’s more, a modern yacht can easily sail to windward beyond and over the anchor. Communication will obviate this possibility, as we discovered.
Weighing anchor without a windlass – wind against tide

Because it is quite likely the boat is lying right over the anchor, or even to windward of it, this is the easier of the two scenarios. As usual, because the wind will be abaft the beam, don’t even consider hoisting the main
- Once again, by far the least dramatic way of dealing with this is to take in all the slack on the cable with no sail set at all
- When it’s up and down, take a good look around to check the space available. If there’s all the searoom in the world, break out the anchor by hand, bring it aboard and clean up, then start to hoist sail
- If searoom is limited, have the jib ready to go the moment the hook breaks out, or hoist/unroll it earlier if things are really tight
- Sail away and hoist the main on a close reach when you have enough searoom.
Anchoring under sail is an ancient art. It involves actions such as drifting around with no sail set and no engine turning which seem strange to a sailor of the diesel generation. In the days before the internal combustion engine, such techniques were commonplace. All that’s needed is a little confidence. And, as always, practice.
For all the latest from the sailing world, follow our social media channels Facebook, Twitter and Instagram .
Have you thought about taking out a subscription to Yachting Monthly magazine?
Subscriptions are available in both print and digital editions through our official online shop Magazines Direct and all postage and delivery costs are included.
- Yachting Monthly is packed with all the information you need to help you get the most from your time on the water.
- Take your seamanship to the next level with tips, advice and skills from our expert skippers and sailors
- Impartial in-depth reviews of the latest yachts and equipment will ensure you buy the best whatever your budget
- If you are looking to cruise away with friends Yachting Monthly will give you plenty of ideas of where to sail and anchor
- Anlegen mit Mooringleinen: Schritt für Schritt
Diese Art des Festmachens findet man am häufigsten an städtischen Anlegestellen in Griechenland oder rund um das Mittelmeer, aber sie kann auch überall verwendet werden, wo man rückwärts an Land fahren muss und keine andere Möglichkeit hat, das Boot zu sichern. Die Deutschen nennen ihn inoffiziell einen "römisch-katholischen" Liegeplatz, weil das Boot wie an einem Kreuz festgebunden ist. Nicht, dass man vor dem Manöver beten müsste. Im Gegenteil, mit ein wenig Geschick und Übung gelingt dieses Manöver, auch wenn es zunächst etwas kompliziert erscheint. Wie macht man es also?
1. Schätzen Sie die Situation ein und prüfen Sie die Wettervorhersage
Wie bei allen anderen Ankermanövern sollten Sie zunächst die Situation einschätzen. Finden Sie heraus, aus welcher Richtung der Wind weht. Idealerweise sollte er entlang der Mittellinie des Bootes wehen, entweder vom Kai oder vom Ufer aus, und nicht von der Seite des Bootes. Aber die Wahrheit ist, dass Sie wahrscheinlich sowieso keine andere Wahl haben werden. Wenn der Wind also nicht zu Ihren Gunsten steht, sollten Sie das berücksichtigen, Ihre Leinen sorgfältig festmachen und überprüfen und genügend Fender verwenden. Prüfen Sie die Wettervorhersage für die nächsten Stunden und die Nacht. Wenn ein starkes Gewitter ankündigt sein wird und Sie mit anderen Booten eingepfercht sind, sollten Sie einen anderen Liegeplatz wählen.
Wenn möglich, lassen Sie einen von der Crew aussteigen , um die Lage am Kai zu überprüfen . Schließlich brauchen Sie am Ende des Manövers sowieso einen Helfer an Land. Sie brauchen 2 Poller zum Festmachen an Land (oder irgendetwas anderes Brauchbares). Überprüfen Sie also, ob sie auch wirklich da sind. Sie möchten nicht den Anker werfen und manövrieren, um dann festzustellen, dass Sie nichts zum Anlegen haben. Wenn sich Boote auf einer Seite des Anlegers drängen und die andere Seite völlig frei ist, gibt es dafür in der Regel einen Grund. Überprüfen Sie auch die Höhe des Stegs im Verhältnis zum Wasser. Es kann sein, dass die Anlegestelle nur für größere Transportschiffe vorgesehen ist, was bedeutet, dass Sie umständlich von Ihrem Deck hinaufklettern müssen.
Wenn Sie zwischen zwei anderen Booten festmachen müssen, prüfen Sie, wo deren Anker und Ankerketten liegen und berücksichtigen Sie dies, wenn Sie Ihren Anker fallen lassen. Nach den RYA-Regeln sollte der Anker mit einer Markierungsboje gekennzeichnet sein, aber die Wahrheit ist, dass Sie diesem in Griechenland wahrscheinlich nicht begegnen werden.
2. Vorbereitung des Ankers und des Bootes
Bereiten Sie sich darauf vor, den Anker zu werfen. Es ist gut zu wissen, wie viele Meter der Kette Ihnen zur Verfügung stehen. Wenn Ihr Anker gut hält, wollen Sie dann doch nicht feststellen, dass Sie nicht genug Platz haben, um die Gangway bequem herunterzulassen. Bei einem klassischen 42 Fuß langen Boot ist die Kette in der Regel 60 Meter lang. Vergewissern Sie sich immer, dass die Winde richtig funktioniert.
Bringen Sie Fender an die Seiten des Bootes und mindestens einen an das Heck an. Benutzen Sie die Fender auch dann, wenn Sie der Einzige sind, der dort festgemacht hat; man weiß nie, wer neben einem auftaucht und wie. Bereiten Sie 2 ausreichend lange Leinen für das Heck vor, eine für die Backbordseite, eine für die Steuerbordseite.
3. Rückwärts fahren
Halten Sie mit dem Heck in Richtung der von Ihnen gewählten Stelle am Kai in etwa 100 m Entfernung an und beginnen Sie dann langsam rückwärts senkrecht zum Kai zu fahren . Führen Sie solche Manöver immer mit der geringstmöglichen Geschwindigkeit , aber mit maximaler Konzentration aller Crewmitglieder durch. Wenn Sie zwischen Booten umkehren und genügend Crewmitglieder haben, schicken Sie diese mit Fender in der Hand zur Seite, um eine mögliche Kollision zu verhindern. Angenommen, Sie haben 60 Meter lange Kette, dann lassen Sie den Anker fallen, wenn Ihr Bug etwa 50 Meter vom Kai entfernt ist , und lassen Sie 10 Meter übrig. Zu diesem Zeitpunkt sollten Sie die Bewegung des Bootes achtern vollständig unter Kontrolle haben. Die richtige Stelle zum Abwerfen des Ankers müssen Sie jedoch selbst bestimmen. Das hängt sowohl von der Länge der Ankerkette als auch von der Tiefe und dem Gefälle des Meeresbodens ab.
Wenn Sie niemanden ausgesetzt haben, fahren Sie nahe an den Kai heran (ein provisorischer Fender am Heck ist hier nützlich), damit ein Crewmitglied aussteigen und das Boot festmachen kann. Es ist durchaus möglich, dass jemand am Kai seine Hilfe anbietet, obwohl es natürlich fraglich ist, wie viel Hilfe er tatsächlich leisten wird.
Es gibt jedoch Orte (z.B. in Norwegen, Patagonien oder generell überall abseits der Zivilisation), an denen es nicht möglich ist, rückwärts ans Ufer zu fahren und jemanden anzulanden. In diesem Fall kann man ein Beiboot benutzen, um die Leinen ans Ufer zu bringen und auszusteigen.
4. Sichern Sie das Heck
Die Person auf dem Steg oder Kai macht das Heck mit den vorgesehenen Leinen an den Pollern (oder was auch immer vorhanden ist) fest. Beginnen Sie damit auf der Luvseite. Die Steuerbordleine sollte leicht nach Steuerbord und die Backbordleine nach Backbord abgewinkelt werden. Die Leinen sollten gerade so lang sein, dass Sie den Kai nicht berühren, aber die Gangway absenken können. Auf diese Weise wird das Heck gegen jede seitliche Bewegung gesichert.
Weitere nützliche Segeltipps:
Wie man eine yacht gegen den wind segelt, boote mit skipper: packen für einen segelurlaub, keine panik: umgang mit notfällen auf see, navigation mit sextant: überleben ohne gps, neujahrsvorsatz: mehr öko-segeln, wie man eine yacht bei seitenwind segelt, wie man eine yacht bei rückenwind segelt, das perfekte weihnachtsfest für segler, was man für einen tropischen segeltörn einpacken sollte, 5. ziehen sie den anker fest.
Hier kommt der Moment der Wahrheit. Jetzt werden Sie herausfinden, ob der Anker gut hält und ob Sie das ganze Manöver wiederholen müssen (nicht verzweifeln, das passiert selbst den besten Skippern). Beginnen Sie langsam, Stück für Stück (und nicht mit Gewalt) die Ankerkette zu spannen. Ziehen Sie die Kette immer nur ein wenig ein, beobachten Sie, wie die Kette durchhängt, und halten Sie die Winde an, sobald die Kette straff ist. Warten Sie einen Moment, um zu sehen, ob die Kette wieder schlaff wird, und wenn dies der Fall ist, beginnen Sie erneut mit dem Spannen. Wiederholen Sie diesen Vorgang mehrere Male. Das ist viel besser als rohe Gewalt, die den Anker hochziehen könnte. Denken Sie jedoch daran, dass es relativ wahrscheinlich ist, dass der Anker nicht hält, wenn Sie die Kette zum vierten Mal straffen, und Sie das Manöver wiederholen müssen.
6. Abschließende Kontrolle
Stellen Sie sicher, dass der Anker hält , die Heckleinen straff sind (ziehen Sie sie ggf. nach) und um Unannehmlichkeiten bei der Wiederabreise zu vermeiden, überprüfen Sie, dass Ihr Anker nicht den Anker eines anderen Bootes kreuzt. Führen Sie diese Kontrollen wiederholt und abends vor dem Schlafengehen durch, um sicherzustellen, dass die Ankerkette noch straff ist und der Anker hält, wie er sollte.
7. Lösen der Verankerung
Beim Verlassen der Anlegestelle wird zuerst das Heck losgebunden. Wenn der Wind von der Seite kommt, lösen Sie zuerst die Leine auf der Leeseite und dann die auf der Luvseite. Wenn Sie einen Helfer am Ufer haben, lösen Sie einfach die Leinen und verschieben Sie das Losbinden auf später. Es ist eine gute Idee, das Heck so lange wie möglich mit mindestens einer Leine zu sichern, vorausgesetzt, sie bremst Sie jedoch nicht aus oder gerät nicht in den Propeller. Nähern Sie sich langsam dem Anker, während Sie die Kette straffen. Sobald der Anker lose ist, hieven Sie ihn auf das Boot, winken den Helfern am Pier zu und brechen zu Ihrem nächsten Abenteuer auf.
Sie bevorzugen einen Liegeplatz? Dann werde ich für Sie ein Boot in Kroatien finden. Sie bevorzugen Buchten und einen Anker? Dann ist Griechenland die richtige Wahl. Rufen Sie mich an.


Anchoring – getting it right is not always straightforward
by Simon Jollands | Boat Handling , Crewing skills , Preparation

If you can set an anchor correctly with confidence and know your boat will be safe in a secure anchorage, then you can rest in comfort and will not need to rely on moorings and marinas when cruising.
Anchoring is one of the most important boat handling skills. If you do not know how to anchor correctly then you risk endangering your boat and also others who might be anchored nearby. And if your anchor is unsuitable for the type of seabed beneath your keel then there is a high chance of the anchor dragging. For some boat owners, the fear of the anchor dragging means they stay awake all night, as a result getting little or no sleep and most likely stressing out their crew into the bargain.
Getting anchoring right is not always straightforward. It can be confusing with the many types of anchor available and there will always be conflicting opinions on which anchors would be best suited for your boat and your chosen cruising ground. Anchors and chain weigh considerable amounts, so loading up with excessive amounts of chain and anchors can affect a vessel’s performance and only really be necessary if planning a long distance voyage along a variety of potentially exposed stretches of coastline.
Types of anchor
Choosing the type and size of anchors and cable to carry aboard will depend on the type and size of your vessel and the sea area it is being used in. Most importantly, choose anchors that are big enough for your vessel and those which are recommended by the manufacturers. Cruising yachts normally carry at least two types of anchor, plus suitable lengths of chain and rope cables. Types of anchor include:
- Bruce – good power to weight, easy to handle, holds well in mud, sand and rock
- CQR or plough – good power to weight, stows well on bow roller, though awkward on deck. Holds well in mud and sand. Very popular and reliable
- Delta – good power to weight, also plough shaped. Stows well on bow roller
- Danforth – stows flat, good kedge anchor, hard to break out of mud. Excellent back up anchor. Prone to pull out if the wind or current reverses
- Fisherman’s – the traditional anchor. Good for rocky and heavily weeded seabeds, but heavy and awkward and not so good in sand and mud.
Chain and warp
Anchor cables can be either chain or rope, or both. For an anchor to work effectively, the vessel’s pull on its cable must be parallel with the sea bed, otherwise the anchor will break out from the sea bed and drag. The weight of chain prevents this from happening, providing there is sufficient length of chain lying on the sea bed.
A further factor that helps is the effect of the catenary curve of the cable between the boat and the anchor. This acts as a shock absorber between the boat and the anchor, so if the boat is hit by a sudden gust of wind the cable will straighten and tighten before it pulls hard on the anchor.
Hauling in an anchor and chain can be very heavy work if your vessel lacks an anchor winch, but chain is much stronger and will not chafe on the sea bed, unlike rope. A workable solution is to have the anchor cable consist of part chain, which lies on the sea bed and part rope, to make it more manageable. An all rope cable is much lighter and easier to manage, but less secure and prone to chafe. All rope cables are normally used with kedge anchors.
How much cable should you use? The amount, or scope, depends on the type of cable, the depth of water beneath the keel, plus the weather conditions and the height of tide. If anchoring in calm conditions with little or no tide, then the absolute minimum scope for chain is considered to be 3:1 and 5:1 for rope. In light to moderate conditions a ratio of 5:1 for chain and 8:1 for rope is generally accepted and in worsening conditions a ratio of 8:1 for chain and 10:1 for rope. In tidal areas, the rise and fall of the tide needs to be allowed for and if necessary adjustments will need to be made if at anchor for several hours or over night.
Most anchors have a small hole for attaching a trip line, for use if there is risk of the anchor becoming fouled. The line is either brought back onboard and cleated or connected to a small buoy which floats above the anchor.
Choosing an anchorage
There are a number of factors to consider when choosing a place to anchor. Begin by studying the chart and look for recommended anchorages near your destination, which are marked on the chart with anchor symbols. Look for a location that will be sheltered from wind and waves in as many wind directions as possible and away from strong tidal streams. Also check the chart to see whether the ground will be suitable for anchoring and make sure you check the charted depths.
You will also need to bear in mind the wind direction and forecast for your planned stay and the state of the tide and tidal streams. Anchoring on a lee shore should definitely be avoided, even if the chart has an anchor symbol on it.
Anchoring Tips
Choosing an anchorage:
- Study Charts and almanacs to find a suitable anchorage.
- Consider the seabed, (also on charts). Sand or firm mud are ideal.
- Check the charted depth.
- Consider the conditions forecast for your planned stay, especially wind direction and strength – will the anchorage be sheltered?
- Consider the state of the tides – check the rise and fall and calculate the best depth to anchor in. Doublecheck there will be sufficient depth at low water, and sufficient chain for high water.
- Check the anchorage is well away from strong tidal streams.
Preparing the anchor:
- Is there sufficient cable on board for the depth? In light to moderate conditions use a ratio of 5:1 length of chain to depth, or 8:1 length of rope to depth.
- Approach the anchorage, check other boats. Are they anchored or moored? Where are their anchors? Are they a similar size to yours?
- Choose the spot to lay anchor, check depth is good, approach the spot slowly into the wind or tide (check how other boats are lying).
- If you have crew ask someone to operate the anchor at the bow.
Laying anchor:
- Stop the boat, lower the anchor under control to the seabed.
- Reverse slowly away, laying out cable in a controlled manner.
- When sufficient cable is let out, select neutral and check that the chain is tight and anchor is set and holding .
- If unsure, use a little reverse thrust to check it is holding.
- Take visual bearings of objects ashore to check the anchor is not dragging, remember the boat will swing on the anchor.
- Set deep and shallow alarms on the depth sounder. Then relax…
Weighing anchor:
- To raise anchor, motor slowly towards it until the chain is vertically above it. Ask a crew to indicate when, with hand signals.
- Now bring in the chain, keeping it as near vertical as possible.
- If the anchor does not break out, cleat the chain tight and motor gently astern until the anchor breaks out.
All of this advice and more is available in our easy-to-use, quick to access app for iPhone and Android. Go to SafeSkipper.com for more.

[fts_facebook type=page id=820902544629856 access_token=EAAP9hArvboQBAMMusRb1XctIwYq9fUcSZCVNDQAMjkZCiqAIMiZBkawPJZB3VkeSsH6gCIDfIZAslzZBRAEXYdesg0fu11YIst1FXtABBwdULjOsYFGUYqNujLSxRIWxKAcqm7bb9dmAgzJDZCVhkRj6r9useCQqJr4wJnxkBv909ySYxqj7hYl posts=4 height=650px description=no posts_displayed=page_only]
Recent Posts
- Boating Etiquette: Do’s and Don’ts on the Water
- DIY boat upgrades: Budget-friendly projects to enhance your (older!) boat
- Boat Security: Protecting your vessel from theft & vandalism
- Learning about diesel engine maintenance

- Subscribe Now
- Digital Editions
VIDEO: How to… Rig an anchor
Jon Mendez guides you through how best to rig an effective anchor set-up
A night spent on anchor is one of the finest joys that comes with boat ownership but many people are nervous of relying on their anchor set-up for long stays.
With this guide by Jon Mendez, though, we aim to take the stress out of anchoring by ensuring your set-up is as safe and reliable as possible.
From marking your chain and attaching the shackle to setting up a snubber and, of course, picking the right anchor for your boat this handy guide will help you out.
You can read the full “How to…” article on rigging an anchor in the August 2016 issue of the magazine.

Anchoring Tips for Beginners
Are you ready to set sail on a journey to become anchoring aficionados? Anchoring a sailing yacht may seem like a simple task, but let me tell you, it’s no small feat. It requires a blend of nautical knowledge, careful planning, and a dash of luck (and a pinch of salt, if you ask any old sailor). But fear not, my dear reader, for I am here to provide you with a treasure trove of anchoring tips and tricks to help you navigate the murky waters of anchoring. So batten down the hatches, heave ho, and let’s dive into the art of anchoring a sailing yacht like a pro.
Choosing the Right Anchor
Anchors aweigh, it’s time to choose the right anchor for your ship. With so many anchor types to choose from, it can be a daunting task. But don’t let that weigh anchor on your sailing plans! In this section, we’ll dive into the pros and cons of different anchor types and factors to consider when selecting the perfect anchor for your vessel.

Types of Anchors
Plow anchor.
If you’re looking for an anchor with a classic look and solid performance, the plow anchor might be the way to go. It’s designed to dig deep into the seabed, providing good holding power in most bottom types. However, its bulky shape can take up valuable deck space on smaller boats, and it’s not as effective in rocky or weedy bottoms.
- Good holding power in most bottom types
- classic design
- Bulky shape
- less effective in rocky or weedy bottoms
Fluke Anchor
The fluke anchor, also known as the lightweight plow anchor, is a popular choice for recreational boaters. It’s designed to set quickly and provide reliable holding power in most bottom types. However, it can be less effective in rocky or weedy bottoms, and its sharp tips can be dangerous if mishandled.
- Quick setting
- good holding power in most bottom types
- Less effective in rocky or weedy bottoms
Claw Anchor
The claw anchor, also known as the Bruce anchor, is a versatile anchor that’s ideal for a wide range of bottom types. Its claw-like design helps it dig deep into the seabed, providing excellent holding power. However, its complex design can make it more difficult to stow, and it may not be as effective in very soft or weedy bottoms.
- Complex design
- less effective in very soft or weedy bottoms
Wing Anchor
The wing anchor, also known as the delta anchor, is a popular choice for larger vessels. Its wing-like design helps it set quickly and provide excellent holding power in most bottom types, including rocky and weedy bottoms. However, its larger size and weight can make it more difficult to stow and handle.
- effective in rocky and weedy bottoms.
- Larger size and weight
- more difficult to stow and handle
Mushroom Anchor
If you’re looking for an anchor with a unique design, the mushroom anchor might fit the bill. It’s ideal for soft and muddy bottoms, thanks to its large surface area. However, it’s not as effective in other bottom types, and its unusual shape can make it difficult to store.
- Good holding power in soft and muddy bottoms
- unique design
- Less effective in other bottom types
- difficult to store
Factors to Consider When Choosing an Anchor
When it comes to anchors, size matters. Your boat size will determine the size of the anchor you need, so don’t skimp on this important piece of equipment. As a rule of thumb, your anchor should weigh at least one pound per foot of boat length. Unless you’re planning to sail a miniature boat, then good luck finding a one-pound anchor!

Water Depth
Deeper water means more buoyancy, which means you’ll need a heavier anchor to keep your vessel in place. Consider the depth of the water you’ll be anchoring in when selecting an anchor. And if you’re planning to sail in shallow waters, well, at least you won’t need to worry about getting lost in the Bermuda Triangle.
Bottom Type
Different anchor types are better suited to certain bottom types. Before you drop anchor, make sure you know what type of bottom you’re dealing with. If you’re not sure, just remember: sand is nice, rocks are not.
Anchoring Technique
Anchoring a sailing yacht can be a tricky business, but with the right technique and a bit of practice, it can be a breeze. Here’s a step-by-step guide to help you anchor your boat like a pro:
Step-by-step guide to anchoring
- Search for the perfect spot First things first, grab your trusty sea charts and scan for the ideal anchor spot. Take into account the water depth, bottom type, and potential hazards. Once you’ve found the perfect spot, mark it on your charts.
- Scout the Area First and foremost, scout the area where you plan to drop anchor. Look for a spot that provides adequate shelter from wind and waves, but also has enough space to allow other boats to pass safely. Consider the depth of the water, the type of bottom (e.g. sand, mud, or rock), and any underwater hazards such as rocks, coral, or seaweed.
- Determine the Correct Anchor Spot Once you have found a suitable area, identify the exact spot where you want to drop anchor. Take into account the direction of the wind and current, and make sure there is enough space for your boat to swing in a circle without hitting any other boats or objects.
- Prepare the Anchor Before lowering the anchor, make sure it is securely fastened to the bow of your boat and that the anchor line is free of tangles or knots. Remove any slack from the anchor line and attach a buoy to the end of the line for added visibility and ease of retrieval.
- Approaching the anchor spot Next up, slowly approach the desired spot against the wind. Once you’re in position, set your gear to neutral and let the boat come to a stop. You want to make sure you’re not drifting forward when you lower the anchor.
- Lower the Anchor Slowly lower the anchor into the water, allowing the anchor line to feed out smoothly. Be sure to maintain a stationary position or slowly drifting backwards as the anchor descends to the bottom. Pay attention to the depth gauge and stop lowering the anchor once you have reached the desired depth.
- Set the Anchor Once the anchor has touched the bottom, gently reverse the boat while continuing to let out more anchor chain. As a general rule of thumb, you want to use 5 to 7 times the depth of the water you’re in. So, if you’re in 10 feet of water, use 50 to 70 feet of chain. This will allow the anchor to set properly and dig into the bottom. Be patient and give the anchor time to settle, as this will ensure a secure hold.
- Test the Anchor To test whether the anchor has set, apply a bit of reverse throttle to the boat. Slowly increase the throttle and let it run for a minute. If the anchor holds fast, you can be confident that your boat is securely anchored. If not, you may need to repeat the process, adjust the anchor spot or use a different type of anchor.
- Visual Check If possible, hop in the water and have a look at your anchor. Is it buried in the sand or mud? Is it holding firm? If everything looks good, give yourself a pat on the back and enjoy your anchored spot.
Anchoring Tips for Different Conditions:
- Strong Winds When it comes to strong winds, using two anchors might be the way to go. By placing the anchors in opposite directions, you can increase the holding power and stability of your boat. This technique is often referred to as “double anchoring” and is particularly effective in situations where the wind is expected to change directions.
- Currents If you’re dealing with a strong current, try to anchor at a slight angle to it. This will give your boat more stability and reduce the chances of dragging. And as always, make sure to use enough chain to give your anchor a firm hold. Another option is to use a “Bahamian moor” technique. This involves setting two anchors in opposite directions to account for the changing tide or current. By doing so, you can prevent your boat from dragging and maintain a stable position.

- Crowded Spots In crowded spots, you’ll want to reduce your “Schwojradius” (swing radius). This is the area your boat will swing around with the anchor. To do this, you can either use less anchor chain or add a second anchor. By reducing the amount of chain you let out, you can keep your boat closer to the anchor point and avoid collisions with neighboring boats. If a second anchor is needed, make sure to place it at a 45-degree angle from the first one to increase the holding power.
- Shifting Bottoms If you’re anchoring in an area with a shifting bottom, like sand or mud, make sure to keep an eye on your anchor’s hold. If it starts to drag, try re-setting it by slowly backing down on it with your engine.
Anchor Maintenance and Safety
Now that we’ve covered the basics of anchoring, it’s time to talk about anchor maintenance and safety. After all, you don’t want your anchor to give up on you when you’re in the middle of nowhere, do you?
Importance of Regular Anchor Maintenance and Inspections
We’ve all heard the saying, “an ounce of prevention is worth a pound of cure,” and that’s certainly true when it comes to anchor maintenance. Regular maintenance and inspections can help prevent anchor failure, which could lead to a dangerous situation out on the water. Here are some tips to keep your anchor in tip-top shape:
- Clean your anchor thoroughly after each use, especially if you’re boating in saltwater.
- Inspect the anchor shank, flukes, and chain for signs of wear and tear, such as cracks or rust.
- Replace any worn or damaged parts before heading out on your next voyage.
- Store your anchor properly when not in use, such as in a locker or on a dedicated mount.

Safety Considerations When Anchoring
Anchoring can be a safe and enjoyable experience, but it’s important to keep safety in mind. Here are some key safety considerations to keep in mind:
- Always keep a safe distance from other boats when anchoring. No one wants to be the one who knocks into another vessel!
- Use proper lighting, especially at night, to ensure that other boaters can see your anchored vessel. This will help prevent collisions and keep everyone safe.
- Use less anchor chain or a second anchor in crowded spots to reduce your Schworadius. That way, you won’t have to worry about your boat drifting too close to others.
- Be mindful of changing weather conditions, especially if you’re anchoring in an exposed area. If strong winds or heavy waves are forecasted, it may be best to find a more sheltered spot.
Remember, safe boating is smart boating. Take the time to maintain your anchor properly and follow these safety tips, and you’ll be able to enjoy your time on the water worry-free.
Troubleshooting Common Anchoring Issues
What to do if the anchor won’t set.
You’re not the only one who has trouble setting the mood sometimes.
- Put out more anchor chain
- Check the bottom type
- Try setting the anchor again in a different spot

How to deal with dragging anchor
Nobody likes to feel like they’re going nowhere fast.
- Check the anchor chain for tangles or twists
- Increase the scope of the anchor chain
- Try resetting the anchor
- Consider using a second anchor
Tips for retrieving a stuck anchor
Sometimes things just don’t want to let go.
- Try retrieving the anchor from a different angle
- Slowly rock the boat back and forth to help release the anchor
- Consider diving down to free the anchor if possible
We’ve reached the end of our anchoring adventure. Let’s recap our key takeaways:

- Choosing the right anchor is crucial, so consider factors such as boat size, water depth, and bottom type before dropping anchor.
- When anchoring, follow the step-by-step guide we’ve provided, and be sure to use the appropriate amount of anchor chain.
- In strong winds or crowded spots, consider using a second anchor or less anchor chain to reduce your Schworadius and avoid collisions.
- Regular anchor maintenance and inspections are important to ensure your anchor is in good condition and functioning properly.
- When anchoring, always keep safety in mind and keep clear of other boats. Proper lighting is also key to avoiding accidents.
Remember, like with any skill, practice makes perfect. So get out there and anchor away, me hearties! With these anchoring tips and a little bit of practice, you’ll be anchoring like a pro in no time.
How much anchor chain should I put out?
As a general rule, you should put out at least 3 times but preferred 5-7 times the depth of the water you’re anchoring in. In stronger winds or currents, you may need to put out more chain for better holding.
Can I use a rope as an anchor line?
While rope can be used as an anchor line, it’s recommended to use a chain as the main part of your anchor rode for better strength and durability.
Can I anchor anywhere in the water?
No, there are some areas where anchoring is prohibited due to safety or environmental concerns. Always check local regulations and charts before anchoring in a new area.
Is it safe to anchor overnight in the open sea?
It can be safe to anchor overnight in the open sea if you choose a good anchoring spot and take appropriate safety measures, such as using proper lighting and keeping a watch. However, it’s important to be aware of any weather changes or unexpected conditions that could affect your anchoring.
Can I use any type of rope or chain for anchoring?
No, it’s important to use the appropriate type of rope or chain for anchoring, based on the size and weight of your boat and the conditions in which you will be anchoring. Consult with a boating expert or refer to the manufacturer’s recommendations to ensure you are using the correct equipment.
Similar Posts

How to Sail Around the World on a Budget
Sailing around the world is a dream for many adventurers, but the idea of circumnavigating the globe can seem daunting, especially when considering the potential costs involved. However, with careful planning, a bit of know-how, and a willingness to live frugally, it’s possible to embark on this adventure without breaking the bank. In this article,…

Navigating Life’s Storms: 7 Life Lessons from Sailing
Sailing is more than just a hobby; it is a lifestyle that can help you develop a wide range of skills and abilities. Whether you are a seasoned sailor or just starting, the 7 life lessons from sailing can be applied to various aspects of your life, from your personal relationships to your professional endeavors….

Sailboat Navigation: How to Navigate on Water
Mastering sailboat navigation is of paramount importance for sailors of all levels of experience. Whether you’re a seasoned sailor or a novice setting out on your first boating adventure, having a solid understanding of marine navigation is essential for your safety and confidence on the open waters. By honing your navigational skills, you can ensure…

9 Essential GPS Navigation Tips for Sailing
Sailing is an exhilarating experience that offers an escape from the hustle and bustle of everyday life. However, navigating the open water can be challenging, especially when it comes to staying on course and avoiding potential hazards. That’s where GPS navigation comes in. GPS technology has revolutionized sailing, making it easier and safer than ever…

Basic Sailing Terminology: Sailboat Parts Explained
Sailing is a timeless activity that has captivated the hearts of adventurous souls for centuries. But, let’s face it, for beginners, sailing can be as intimidating as trying to navigate through a dark, labyrinthine maze with a blindfold on. The vast array of sailing terminology, sailboat parts and jargon can seem like a foreign language…

The 6 Points of Sail: Diagram of Wind Direction and Sail Trim
Points of sail are the different angles at which a sailboat can sail in relation to the wind. Understanding these points is crucial for anyone who wants to learn how to sail, and it’s usually taught in sailing schools. Each point has its own characteristics that determine the boat’s speed and direction. The main points…
How to Anchor a Boat: 7 Critical Steps (Lake, River, Sea)
If you want all the freedom your boat can give you, you need to learn to set the anchor. It's not as hard as you think, and with preparation and practice, you can stay where you want to, when you want to.
It's not just a keel and hull and a deck and sails. That's what a ship needs. But what a ship is... what the Black Pearl really is... is freedom. Captain Jack Sparrow
Point your boat at the horizon and you can go anywhere. Well, almost anywhere, so long as there are slips and moorings open when you get there. Or you have a reservation.

How to anchor a boat in 7 steps:
Get good ground tackle, pick a safe anchorage, prepare your crew, pick your spot to drop anchor, drop it and set it, set snubbers and secure, keep an anchor watch, any questions.
In this article, we'll give you the building blocks from the basic setup of your ground tackle, to picking a safe spot to anchor, and take you through the steps of getting a good anchor set. If you're looking to expand your horizons past the mooring field, read on!
- Make sure your ground tackle is solid.
- Pick a safe anchorage.
- Talk it through with your crew.
- Pick your spot to set the hook.
- Drop it, hook it, and set it.
- Set snubbers and other tools.
- Keep an anchor watch.
You need ground tackle - an anchor and a rode - which will hold your boat. Picking a style and size of anchor, choosing your type and length of rode, these are all crucial steps to safe anchoring. But unless you're buying a brand new boat, the odds are high you already have ground tackle of some type. The question is, is it good enough?
Good ground tackle meets the following basic criteria:
- The anchor must be big enough. It should meet the minimum size recommendation for your boat from the manufacturer, though one size up never hurt.
- Rope/chain rodes should have chain large enough to hold for the boat and anchor size, and at least one boat length long.
- There should be sufficient rode for at least seven times the total depth you plan to anchor in for chain, and ten times the depth for rope/chain. More won't hurt you.
- All connections and shackles should be seized (wrapped with wire to prevent unscrewing).
If you aren't familiar with your ground tackle, take it out. Measure the rode length, and make sure any ropes, chains, and anchors are sized for your boat. While you're there, think about marking your rode , then once you've measured it all make sure it meets manufacturer recommendations.
Since this is an entire topic on its own, I've written a detailed guide on ground tackle. It will help you to get a good sense of the different components, their function, and what to look for. You can learn everything about selecting ground tackle here .
While you can just drop your hook anywhere it can reach the bottom, you won't always be happy with the results. Anchoring in a exposed position may not end well, with the anchor maybe resetting or dragging in the middle of the night. There are a few things which make some places better than others for a desirable anchorage.
- Protection from wind, waves, and current in the conditions you expect to face.
- A bottom with good holding.
- Shallow enough to let out good anchor scope.
- Sufficient swing space for the scope you need.
So how can you, from the comfort of your nav station, decide what looks like a suitable spot to anchor? There are tools for this - with charts and cruising guides at the top of the list.
First, you check the charts looking for protected coves without too much water. Many charts even have helpful little anchors in common anchorages.
Second, check cruising guides, both books and online sources like ActiveCaptain or Waterway Guides.
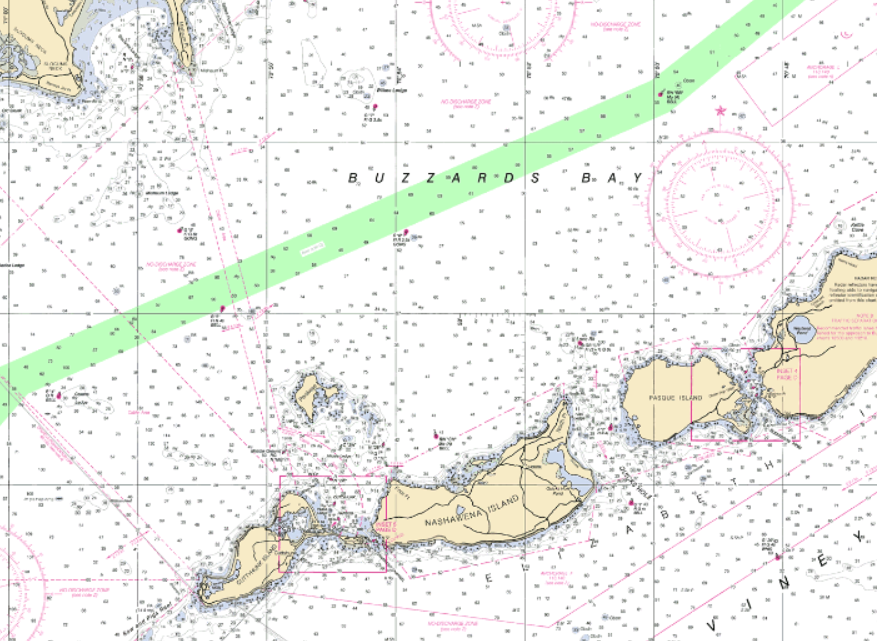
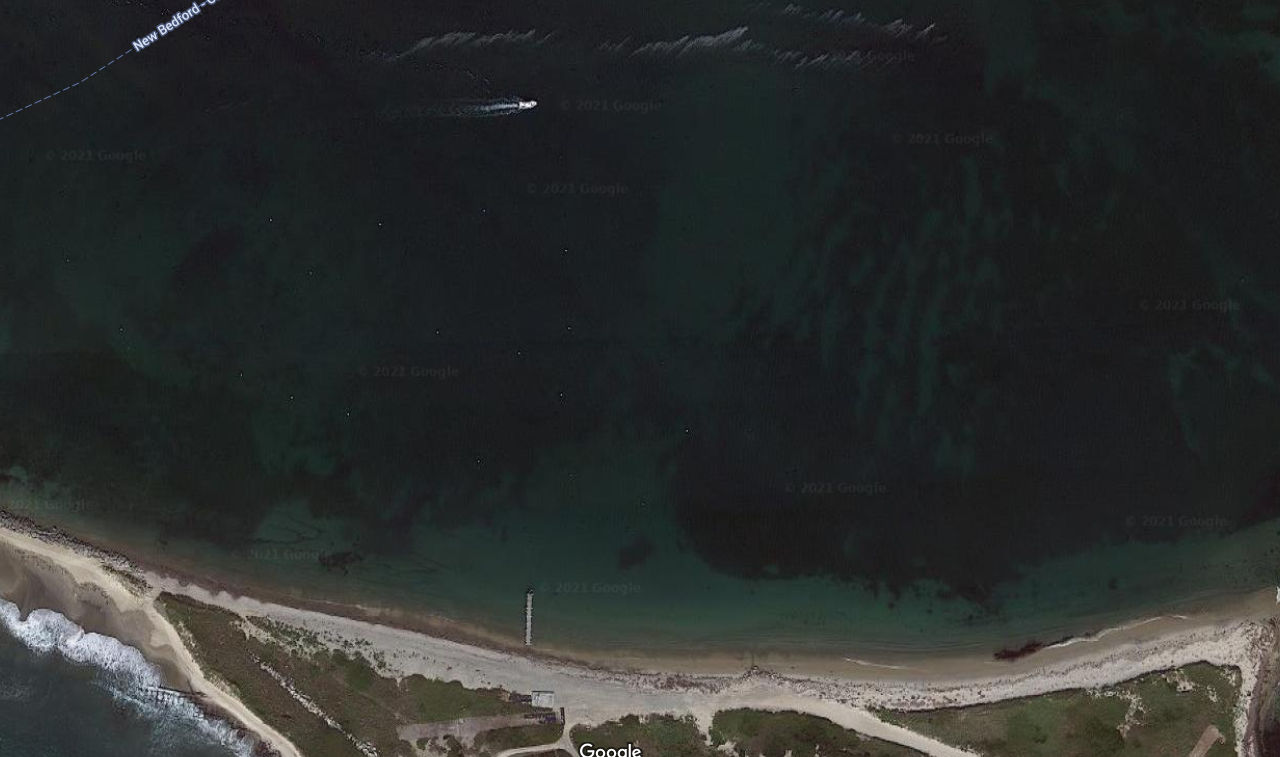
Third, if you've never visited the location, look at a satellite photo from Google Maps. Moored boats and even mooring balls are often visible if you zoom in far enough. Look for mooring fields encroaching or over running marked anchorages, where you may not anchor like the charts suggest. For a good example of the possible disconnect between marked anchorages and reality, check out charts and satellite photos of Nantucket Harbor side by side.
Finally, when you are closer to leaving, check the weather.
For an exercise, look at this bit of chart of one my of favorite cruising destinations in New England, Cuttyhunk island.
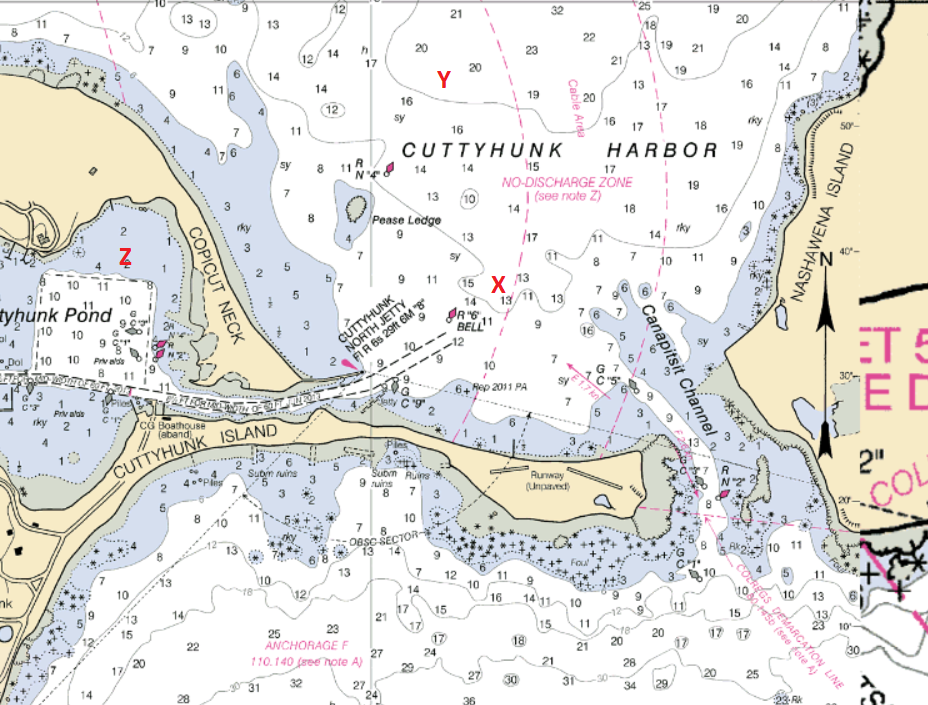
You can see three spots I've labeled X, Y, and Z.
What you can't see on this chart is that the square in the pond's interior is covered with moorings, and there are several rows of moorings north of that sand spit with the runway on it. Also, there's five or six miles of open water to the north of the island before you reach the mainland. You also can't tell that the area labeled "Anchorage F" is open water on Vineyard Sound, and unsuitable for any small craft anchoring because it's usually wave and swell tossed. It's not bad for surfing, if you don't mind all the rocks, but it's an anchorage only for ships.
The first thing this tells me is that this anchorage should be fine in most conditions except in a northerly . I can tell you from first hand experience that if the wind clocks to the north and hoots up into the twenties in the middle of the night, you will be uncomfortable within a very short amount of time. That's plenty of open water fetch to build up wind-driven waves, where the same wind from the south won't do a thing.
X is just outside the row of moorings in about fifteen feet or water. As long as you don't mind wakes from sport fishers blasting out of the channel at dawn on the weekends, it’s great. But maybe right on X isn't so great because of the traffic.
Spot Y avoids the channel traffic, but you're close to half a mile off shore. That's OK, but it might get a little choppy. It's better to tuck in as close as you can, so you're looking for a spot east of X and Y, but not all the way out to Y. You could anchor closer to Nashawena Island if you wanted to, but once you get there, you may find it's not as appealing as it's a long way in to the dinghy dock in the pond.
If you check a cruising guide, you will see similar information about anchoring there - it's comfortable except in a northerly, though there's some sea grass in the sand to be careful of.
The takeaway? If it's not a strong northerly, this is a pretty pleasant spot to anchor if you don't want or can't get a mooring.
And if you're in a trimaran or shoal draft boat, you can sneak right into the inner harbor and drop in spot Z behind the mooring fields.
As you cruise farther and get more adventurous, you'll find places which have less information. But for coastal cruising in places like Europe and North America, most anchorages are well documented.
With more than one person on the boat, someone is going to be on the bow working the windlass or dropping the anchor and someone will be on the helm. It only takes two, so that's what we'll focus on.
There are several key bits of information to communicate from bow to stern and back, so before you start, you need to be clear about who is deciding and who is reacting. It often makes sense for the person on the bow to make the calls because they can see where they're dropping, but not every crew works this way. My wife prefers to be on the bow but have me make "the call" on where to drop the anchor from the helm.
The information everyone needs to know is:
- Roughly where you want to drop the anchor
- When the anchor should drop.
- How much scope to use, or how much water you're dropping in. The person on the bow can't see the instruments.
- What to do with the engine, such as go in neutral, back down, turn the bow, and so on.
Talk it through as you approach the anchorage. Whoever is heading to the bow should have a rough plan, like "we're going to drop the anchor on a line between the stern of the white and blue boat, in about twenty-five feet."
If you all start on the same page, your odds are much better of finishing together.
Radios are good basic communication
Some crews swear by radios, since communication is instantaneous and unambiguous, assuming they work and you can hear each other. A quality set of duplex headsets with windproof microphones can help some people as they're learning this new skill, and it keeps you from having to yell to be heard.
Use hand signals as a backup
If you forget to charge the radios, or one drops overboard, or it's too windy to hear, you will need a backup communication system. After hundreds of times anchoring together, my wife and I have our hand signals down pat.
- Thumbs Up - Engine in forward (idle), shake up and down for more throttle.
- Thumbs Down - Engine in reverse (idle), shake up and down for more throttle
- Pointing Port or Starboard - turn helm in that direction
- Fist - engine in neutral and/or stop turning.
As we approach the targeted drop area, she watches me at the helm. When I want her to drop, I check depth and slowly flash fingers to show the number. She confirms by repeating the depth signal back. I confirm with a thumbs up or re-flash the number if her confirmation doesn't match, then she drops the anchor.
We've also got a few signals for when we pull the anchor, like "off the bottom" (hand pointing down and arm in a stirring motion) and "anchor up" (arm raised and hand waving in a circle).
Of course, with a well developed and practiced "back up" set of hand signals, we don't need radios and don't have them. If we anchor at night, we use lights to show on our hands for the signals.
A note on YELLING. Yelling is a common experience for inexperienced teams working an anchor, especially couples. It's best to avoid it. But sometimes you have to raise your voice to be heard over wind and distance when someone is forty feet away from you and upwind. If you have to raise your voice to be heard...watch your choice of words and your tone.
Deciding on an anchorage is a strategic decision, but deciding where to drop in the anchorage is a tactical choice and you can’t make it before you arrive. Charts and cruising guides will help you plan, but you won't know how crowded the anchorage is or the day’s wind and weather until you show up.
You're looking for a spot which meets the criteria from above for an anchorage, but now you have to negotiate anchored boats, moorings that weren't on the charts, and other hazards.

The most important thing to remember when you pick a spot to drop anchor is that your boat will not end up where you drop the anchor . You will end up some distance downwind or down current of your anchor, and you will swing around the anchor as the wind and current change. The trick is getting good at estimating where you will end up.
With sufficient scope, your anchor rode will not point straight down, but will lie mostly on the bottom with only the catenary hanging off the bottom. Depending on your rode style, in normal conditions, the bow will end up some 60-80% of the amount of rode you have out from the anchor. The amount of rode you released plus the length of your boat is the most swing room you need for safety, but for politeness and comfort you will want to be at least a couple of more boat lengths from the next boat.
We've found that if we pick a spot in the middle of a line between the sterns of two well spaced boats and drop there, we settle out with good spacing. Remember, unless the wind drops to zero, boats with similar scope will swing the same way. If you're five boat lengths behind someone in a northerly, if the wind swings to the south, they will be about five boat lengths off your stern.
So don't be shy about asking how much scope your new neighbors have out and match them if you're comfortable.
There are multiple ways and schools of thought on how to drop your anchor, from those who free-fall it when still to those who drop while moving backwards. The end target should be the same: do not allow the chain to pile up on the bottom or on the anchor .
If you do that, you may have a hard time setting.
This procedure is how we do routine set - an easy to catch bottom in moderate winds and current in daylight. We'll get into some more advanced anchoring techniques for tricky bottoms and bad weather [in another article](). Feel free to adapt this to what works best for you and your crew, it’s only a starting place.
Using proper anchor scope
The key to a good anchor set is letting out the right amount of rode. You can't really have too much out, unless it's crowded and the extra might swing you into other boats or shallow water. But it's easy to not let out enough.
Anchoring depth
Your anchoring depth is not the reading on the depth sounder when you drop the hook. Your anchoring depth is the depth of the water at the highest tide where you anchor while you are there. In areas with tiny tides this makes little difference, but if you're dropping in eight feet of water at low tide in an area with a five foot swing, it will make an enormous difference in your scope calculations and you won’t have enough out at high tide.
Check a tide chart if it isn't high tide when you drop. You may need to estimate the tide from the time, or by looking at the shoreline for exposed rocks.
Most of the world has a twice daily tide cycle, with each tide running a little more than six hours from low to high, then six from high back to low. To estimate the high tide depth, take height of the nearest high tide and subtract the nearest low tide height. This is the "swing" of the tide.
Next, figure out how many hours you are from that high tide, then divide that by six. Multiply this number by the "swing" height and this is about how many feet your boat will rise from where you are now while you are dropping.
EXAMPLE: Depth Sounder Reads: 18 feet Next High Tide: +5.3 feet in 2 1/2 hours. Last Low Tide: +.5 feet (tide measurements are given in change from Mean Lower Low Water) Time to tide ÷ 6 = 2.5/6 = .417 Tide Swing = +5.3 - +.5 = 4.8 .417 x 4.8 = 2.0 ft.
So you can expect the depth to read about 20 feet at high tide, and this is the number used to calculate scope. While this is only an estimate, it's close enough to work with. But it won't hurt to always round the maximum depth up for safety.
The scope calculation
There's one other number we need to discuss in calculation - the bow height above the water. Depth for scope doesn't calculate from the surface of the water, we're concerned about the entire amount of mechanical advantage and leverage involved in pulling on the anchor, so we need to know where the anchor rode applies it load to the boat. That is at the bow, on the anchor roller, which is always a few feet above the water.
So the total depth you need to calculate scope is: Depth at High Tide + Bow Height from Water
The Bow Height is a one time measurement, which you should know for your boat. It's usually 4-6 feet, depending on the size of your boat. But ignoring it means if your scope is 7:1, you're letting out up to 42 feet less rode than you need for good holding.
Scope is the ratio of rode led out to the total depth (high tide + bow height) you're anchoring. 7:1 scope is seven times the depth, 5:1 scope is five times the depth, and so on.
All chain rodes can use less scope than rope/chain combinations, but it never hurts to use extra. We use 5:1 with our all chain rode for most normal, non-storm conditions for overnight anchoring. For rope/chain rodes, the recommendation is 7:1 .
EXAMPLE: Expected depth at high tide: 20 feet Bow Roller Height: 4 feet Total depth for scope calculation: 24 feet
So setting your scope at 7:1, you will need to let out 154 feet (24 x 7). For all chain, you can use 5:1 which is 120 feet (24 x 5).
Anchoring in Lakes and Rivers: if you are anchoring some place without tides, you can skip the tide swing estimation. Unless you're on a man-made lake with a dam, where they may raise and lower the water level! Check the dam management site for notes on any planned water height changes before you anchor. For non-tidal rivers, you rarely get depth changes. And the current will keep your bow pointing upriver, so motor up river to your drop spot and drift back to set. Tidal rivers may require two anchors, something a little too complex for this introductory article.
If you want to learn more advanced anchoring techniques, you can check our article on advanced anchoring techniques . There, I'll go over all kinds of different situations.
Try for a controlled drop
We prefer to pull our boat to a stop to where we want to drop, then lower the anchor as quickly as our windlass will allow. But we have an electric windlass, and if you're lowering by hand, you may not have so much control. So a few quick tips can help.
- Always try for a controlled drop. Don't just toss the anchor overboard and let the rope fly out, you'll have no way to deal with it if the rode bunches or tangles and goes overboard.
- If you have a rope rode, before you drop, pull it out and fake it out on the deck - lay it out on the deck so it's free of snarls and tangles and will flow freely. Tie the end to something sturdy.
- Dropping a rope rode by hand, wear gloves if you can so you can ease the drop and control it without rope burns.
- You can free fall an anchor by disengaging your windlass, but be ready to brake it if there is a problem.
To drop, we take the following steps. We approach our drop spot from downwind since the wind will slow us down and blow us back when we’re dropping.
- Idle upwind close to the point we want to drop, then drift to it in neutral.
- Signal the drop.
- Allow the boat to drift back as the anchor drops.
- Pay out limited rode until you reach 3:1 scope, then stop and allow the anchor to catch the bottom. If done right, this should make sure no chain piles up on the bottom.
The set is successful after a solid tug
Once you've reached step four, you're ready to finish the job. The person lowering the anchor should keep a hand or foot on the rode once you've hit step four, this with let them feel the anchor on the bottom. Any bumps as it drags without setting will come right through the rode, and they'll feel a solid tug when the anchor catches.
When we feel it a catch, we engage reverse in idle to tug on the anchor, just to make sure it's caught. Keep that foot on the rode and feel what's happening.
When it's caught well, put the engine in neutral and drift back to pay out the rest of the scope you need for the depth of water. When this is done, tie off the rode to a cleat or secure it, after which the helm should go into a hard reverse for ten or fifteen seconds to dig the anchor in tight.
Keep that foot on the rode to feel if the anchor drags or breaks out. Once you've backed down on the anchor for a good 10-30 seconds without popping it loose, you are set. Put the boat in neutral and tidy things up.
If you have an all chain rode, now is the time to attach your snubber(s) and ease out a little more chain to put the load on the snubber. You want the weight of the boat sitting on a cleat, not on your windlass. Your snubber should reach down almost to or even into the water, and shouldn't rub up against any chafe points.
For a rope/chain anchor, it's time to clean up the unused rode and make sure the bitter end is secure. When we used rope rodes, we did not leave them attached to the boat with the rode was in the locker, but you can do that if you have a spot. Otherwise, tie that bitter around something sturdy, just in case there's a problem. If you have to adjust the rode during the night, you don't want to lose if overboard if you drop it.
Tie it to a winch, or another cleat, or around the mast. Just make sure they it's not wrapped around anything you can damage if it pulls taught.
There are two kinds of anchor watch we always keep on board. The first is the "first hour" watch. Our rule is we wait at least an hour after anchoring before leaving the boat. This gives you time to make sure your set is solid while you tidy things up on board. More than once we've seen excited boaters come in, drop the hook, then lower the dinghy and be off to play within minutes. And more than once, we've had to deal with boats near us dragging right after they've been left.
Manual Watch
Get a hand bearing compass and a pad and pen, we're going this the old fashioned way first. Look on shore for some noticeable landmarks - extra tall trees, flag poles, impressive monuments and statuary, colored roofs - anything which is easy to spot and distinct. Bonus points if it has lights on it.
Next, pick three marks if you can, and take compass sightings on them. It's best if you sit in one spot to take the marks rather than move around the boat. Make note of the bearings.
As long as those bearings change little, you haven't moved. So during the first hour after you anchor, re-check those bearings several times.
You will get some small amount of change, especially in closer objects, but it shouldn’t be more than a degree or two. Your boat swings at anchor, of course. That's one reason you need a few marks.
If you find marks with distinctive lights on them, then you can repeat this check any time of day or night if you think you might be dragging.
Electronic Anchor Watches
The manual method of drag detection works, but has drawbacks. You must be awake to do it, and it requires an active action on your part. So it's less helpful if you want to get a good night’s sleep.
Most marine GPS units, chart plotters and many AIS units have a drag alarm function. There are several apps for phones and tablets on all platforms. Get one, and learn to use it.
The thing to remember about ANY electronic anchor alarm is most of them don't know where your anchor is, they only have GPS location, which is not over thhe anchor. A GPS in the stern of a big boat with 200' of scope out can swing through circle almost 500’ in diameter, and that will look like a dragging anchor to most drag alarms.
What you care about is if the anchor moves, not if the boat moves, because a boat at anchor is always moving. A better drag system allows you to estimate the anchor position. You can also set a watch on a handheld or your phone from the bow when you drop, and that will give you a good approximation of the anchor.
Most alarms work on a "drag radius" - if your boat moves out of that circle, it goes off. Learn to adjust this for your boat and your expected scope, and can spend a quiet night sleeping while your electronics stand by to wake you up before things get exciting.
If you're nervous about leaving your boat, install a drag app for a phone that will send a text alert or make a phone call if it detects dragging. Set that app to call another phone in your crew. Then leave the drag alarm phone on the boat, plugged into a charger, with the drag software running. You can enjoy dinner on land with less worry - your boat will call you if you may be having a problem!
Anchoring is a complex topic, with a lot of variables which go into getting your boat secure for the night. Questions are natural, and we've tried to anticipate a few for you.
What if I can't let out enough scope?
A 7:1 scope is a lot in a crowded anchorage. You may find when you show up on a summer holiday weekend that boats are packed in and lucky to get 5:1 out. If you come in and let out more, you will bump into boats. It is important to keep your anchor scope consistent with the surrounding boats, or you will have problems. However, if you can't let out enough scope to make yourself comfortable, you don't have a lot of options.
You can move to a different anchorage, or anchor on the outside of the anchorage where you can use more scope, though the water will be deeper. Or you can deal with the short scope for the stay and set your drag alarm on a smaller radius and keep a few fenders on deck for quick access if things get close.
How do I to tie the anchor to the boat?
Tie rope/chain anchors to a sturdy bow cleat with a cleat hitch, and secure the bitter end to something stout enough to hold the boat as a backup. I liked to tie a big bowline around the base of the mast, but a winch will work, too.
Chain rode should be snubbed, and the snubber tied to a cleat, but attach the bitter end to the boat. Most anchor lockers have a ring installed to attach the rode. We prefer a length of high modulus line like Vectran or Spectra to tie the last link to this ring, rather than hooking it with a metal shackle. You can use a shackle, but if you have to cut the rode in an emergency and it’s under load, you will need a metal cutting tool to get it off. The super strong Spectra line will cut with a knife.
Can I anchor a boat by myself?
Yes, you can, though you need to be quick on your feet unless you have windlass controls and a chain counter at the helm. The seven basic steps are the same, but you will have to approach your drop spot slowly and come to a near stop with the boat in neutral before you run up and drop the anchor.
You won't be able to feel the rode with your foot when you back down, so take it slow and let everything settle, and keep on eye on the GPS when you back down to see if you're moving once the rode is stretched.
Can I sail off my anchor?
Yes, you can. It's an advanced skill which is beyond this article to address, but it's a handy skill to have in case you ever have engine troubles. You need to get the boat moving up to the anchor to take the weight of the boat off your windlass, so use your main sail.
Can I anchor a boat with two anchors?
You don’t need two anchors often, and you shouldn't have two anchors out when boats around you do not, since they will not swing like you. Two anchors are a specialty application, such as anchoring in a tidal river, or in a strong, steady current, or with a stern anchor to keep the bow pointed in a set direction.
Should you drop anchor in a storm?
That depends where you are. If you are in the open ocean, you usually can't because it's too deep. If it's shallow enough to anchor, head for deeper water and away from land if you can't get to a safe harbor.
Find a protected anchorage and can get to it if you can, then dropping an anchor in sheltered waters is a good way to ride out a storm.
How do I anchor a boat in deep water/the ocean?
You can't anchor a boat at all in water deeper than your anchor rode; the anchor needs to touch the bottom! Since you need at least 3:1 scope for a temporary "lunch hook" set and more for an overnight, it's very hard to anchor in water deeper than about 1/4 the length or your rode. In an emergency, you can anchor with whatever scope slows you down, but anything less than 3:1 isn't restful and less than 4:1 you should not leave the boat unattended.
A "sea anchor" is not an anchor at all, it's a device like a parachute or scoop to slow your boat and keep it control in storm conditions. It does not stop the boat or secure it.
For more information, check out this article for more detail about anchoring in the ocean.
How big of an anchor do you need?
Anchor manufacturers publish tables of size and weight recommendations for different boat dimensions. The best recommendations have guides by boat weight and by length. Check both tables and choose the largest one which comes up. It's better to be a little too big unless you are hauling the anchor by hand.
Check our full guide to anchors and ground tackle and selecting an anchor for more details on sizing anchors.
Leave a comment
You may also like, boat anchoring techniques explained (illustrated guide).
The basics of anchoring in calm conditions in an anchorage with good holding aren't difficult to master, and you should start with basic anchoring techniques if you …

9 Easy Expert Tips for Anchoring a Boat Near Shore

How Much Anchor Chain Should You Let Out When Anchoring?

Boat Anchor Selection Guide: Choose the Perfect Type & Size

How Do You Anchor in a Busy Anchorage?
Boat Reviews
- Boats Specs
- Marine Pros
- Boat Insurance
- Boat Warranties
- Boat Transport
- Boat Towing
- Marine Forecasts
Your Ultimate Boating Resource
Anchoring 101: How to Properly Set Your Anchor

Anchoring is an essential skill for every boater, whether you’re dropping anchor for a relaxing afternoon or securing your vessel for safety during unexpected weather conditions. Proper anchoring techniques will ensure that your boat remains secure and prevents it from drifting away, potentially causing damage or distress to fellow boaters. This article will provide you with a step-by-step guide on how to properly set your anchor, as well as some helpful tips and tricks for successful anchoring.
Table of Contents
- Understanding the Basics of Anchors
- Selecting the Right Anchor and Rode for Your Boat
- Preparing Your Boat for Anchoring
- The Anchoring Process
- Setting the Anchor
- Testing Your Anchor’s Hold
- Tips and Tricks for Successful Anchoring
- How to Retrieve Your Anchor
1. Understanding the Basics of Anchors
There are several types of anchors available on the market, each designed for specific bottom conditions and boat sizes. The most common types of anchors include:
- Fluke or Danforth anchors: Suitable for boats under 30 feet, these anchors have high holding power in sandy or muddy bottoms.
- Plow or CQR anchors: Suitable for boats of various sizes, these anchors excel in most types of bottom conditions, including sand, mud, and grass.
- Claw or Bruce anchors: Suitable for boats under 40 feet, these anchors are versatile and provide a solid grip on rocky, sandy, or grassy bottoms.
- Grapnel anchors: Commonly used for small boats, these anchors work best in rocky bottom conditions.
- Mushroom anchors: Suitable as a permanent or semi-permanent mooring, these anchors are typically used in soft, muddy bottoms.
2. Selecting the Right Anchor and Rode for Your Boat
Consider the following factors when selecting an anchor and rode for your boat:
- Boat size: Larger boats require larger anchors with higher holding power.
- Bottom conditions: Choose an anchor that works well in the specific bottom conditions of your anchoring area (sand, mud, rock, etc.).
- Rode type: The rode is the combination of chain and rope connecting your boat to the anchor. A combination of rope and chain is recommended for most boats, with longer chain lengths for larger boats.
- Rode length: The optimum length of your rode is commonly called the “scope,” which is the ratio of the length of the rode to the depth of the water. A scope of 7:1 (seven times the water depth) is recommended for most situations.
3. Preparing Your Boat for Anchoring
Before anchoring, it is essential to:
- Select a suitable anchorage location: Look for a well-protected area with proper depth, ample swinging room, and favorable bottom conditions.
- Inform your crew: Communicate your anchoring intentions and provide clear instructions to ensure proper coordination and safety among the crew members.
- Retrieve necessary equipment: Make sure the anchor, rode, and any additional tools are ready and easily accessible.
4. The Anchoring Process
Follow these steps to anchor your boat:
- Approach your chosen anchorage location slowly, moving into the wind or current.
- Confirm the depth of the water using your depth sounder.
- Signal your crew to release the anchor when you reach the desired spot.
- Slowly back away from the anchorage point while releasing the rode.
- Once the desired scope has been reached, secure the rode to a cleat or other strong attachment point on the boat.
5. Setting the Anchor
To secure the anchor and ensure it holds properly:
- Maintain consistent tension on the rode as you back away from the anchoring point.
- Once the anchor is in position, gently increase your engine power in reverse, pulling the anchor deeper into the bottom.
- Monitor the anchor’s progress by observing nearby landmarks, boats, or buoys to ensure the anchor does not drag.
6. Testing Your Anchor’s Hold
Always test your anchor’s hold before leaving your boat unattended or going to sleep:
- Observe the shoreline, landmarks or nearby boats to ensure the anchor is not dragging.
- Use a GPS plotter to detect any movement of the boat.
- Rig a trip line (a small line attached to the anchor’s crown) as an additional security measure.
7. Tips and Tricks for Successful Anchoring
- If the anchor has difficulty setting, try a different location or maneuver the boat in a circular path to help the anchor catch onto the bottom.
- When setting multiple anchors, carefully coordinate the angles to avoid tangling the rodes.
- If anchoring in a crowded area, check the anchor’s holding ability at different tide levels, as the swinging radius may change.
8. How to Retrieve Your Anchor
When it’s time to pull up anchor:
- Slowly motor your boat towards the anchor, keeping the rode tight as you go.
- Once the boat is directly above the anchor, signal the crew to retrieve the anchor.
- Carefully release tension on the rode and retrieve it while keeping an eye out for any entanglements or snags.
- Rinse the anchor, chain, and rope thoroughly before storing them securely onboard.
Proper anchoring is crucial for ensuring the safety and enjoyment of your boat and its passengers. By understanding the basics of anchors, selecting the right equipment, and following the correct procedures, you’ll become proficient in setting and retrieving your anchor, making your boating experiences more enjoyable and stress-free.
RELATED ARTICLES
2024 pursuit os 445: an overview, dock your boat smoothly this summer with these tips, the billionaire’s playground: where to spot superyachts around the world, summertime snack ideas for your boating adventure, de-winterize your boat the right way with these professional tips, latest posts, don't miss, our newsletter.
Get the latest boating tips, fishing resources and featured products in your email from BoatingWorld.com!
What type of wood is used for pier pilings?
What is the difference between a dock and a floating pier, what is the proper technique for pulling a beginner wakeboarder, what does ‘no wake’ mean on a lake, what is the difference between wash and wake, 10 essential tips for fishing near private property, the benefits of using a drift sock: guidance for anglers, lure fishing: secrets for imitating live bait and attracting fish, explore the untapped depths of america’s best bass fishing spots, tackle your catch-and-release adventures with these 6 tips, outboard motor maintenance: tips for keeping your engine in top shape, the essential boat tool kit: tools every boater needs, diy boat building: 8 tips and tricks for building your own vessel, the art of miniature maritime craftsmanship: ship in a bottle, antifouling paints: a guide to keeping your boat shipshape, beginner’s guide to standup paddle boarding: tips and techniques, boating for fitness: how to stay active on the water, kayak safety: how to stay safe on the water, anchoring in a kayak or canoe: how to secure your small boat, 2024 aquila 47 molokai review, 2024 sea-doo switch 13 sport review, 2024 aspen c120 review, 2024 yamaha 222xd review, 2024 sailfish 316 dc review, 2023 seavee 340z review, 2023 centurion fi23 review, gear reviews, megabass oneten max lbo jerkbait review, fortress anchors fx-7 anchoring system review, fortress anchors fx-11 anchoring system review, fortress anchors commando anchor kit review, fortress anchors aluminum anchors review, stay in touch.
To be updated with all the latest news, offers and special announcements.
- Privacy Policy
IMAGES
VIDEO
COMMENTS
Längsseits gegen den Wind an der Pier anlegen, mit dem Wind stressfrei aus der Box ablegen oder das Heck versetzen... die Lieblingsmanöver schonen Boot und C...
#hafenmanöver#harbourmanoeuvresDa ich einen Großteil meiner Segelzeit alleine unterwegs bin, brauche ich für alle möglichen Manöver eben auch Techniken, die ...
Einhand anlegen rückwärts in die Box, Segeln, Hafenmanöver, Anlegen mit Achterspring, BoxSingle-handed sailing, backward into the box using springlinezeilen ...
Da solche Yachten zudem in Achterausfahrt sehr kontrolliert zu steuern sind, ergeben sich neue Möglichkeiten für Hafenmanöver über das Heck. Mit den folgenden Anlege-Szenarien für Einhand-Anleger sind Sie auch auf schwierige Bedinungen gut eingestellt. Klicken Sie auf die Bilder, um die Texte und Manöverabläufe zu vergrößern.
Für viele Skipper und Crews sind das Anlegen und das Ablegen in einem Hafen der pure Stress. Das eigene Boot und auch andere Yachten könnten durch einen dummen Fehler beschädigt werden. Und unter den Augen vielen anderer Segler und Motorbootfahrer, die einem beim Hafenmanöver genüsslich aus dem Cockpit zuschauen, möchte man auf keinen ...
Approach the let-go point on a close reach so you can control speed by spilling wind from the mainsail. Luff up and, as the last of the way comes off, drop anchor. The chain is payed out as wind fills the backed main and the boat falls back. Ideally, if crew numbers allow, back the mainsail to drive the boat astern.
Skippertraining Hafenmanöver: bei starkem Seitenwind aus der Box und in die Box. Für viele ein großer Aufreger. Dabei ist die Lösung ganz einfach: Eindampfen...
Anlegen mit Mooringleinen: Schritt für Schritt. Vor allem in Griechenland müssen Sie wissen, wie Sie Ihr Boot mit der mediterranen Anlegetechnik (mit dem Heck zur Pier) festmachen können. Schauen wir uns also im Detail an, wie man das macht. Diese Art des Festmachens findet man am häufigsten an städtischen Anlegestellen in Griechenland ...
Determine the water depth where you want to drop anchor. Calculate the correct amount of anchor scope (a 7:1 ratio is recommended). Lower the anchor and let out enough scope, then secure the rope to a bow cleat. Ensure there is no drag - use landmarks or onboard electronics to measure movement. If needed, reset the anchor.
Cruising yachts normally carry at least two types of anchor, plus suitable lengths of chain and rope cables. Types of anchor include: Bruce - good power to weight, easy to handle, holds well in mud, sand and rock; CQR or plough - good power to weight, stows well on bow roller, though awkward on deck. Holds well in mud and sand.
Anlegen bei ablandigem Wind Der Rudergänger steuert das Boot mit einem Halbwind- oder einem Amwindkurs auf die Pier zu, bzw. in einem Abstand von etwa zwei bis vier Bootslängen (je nach Geschwindigkeit!) parallel zur Pier. Kommando: "Klar zum Anlegen an StB!" - Rückmeldung: "Ist Klar!" Kommandos: "Klar bei Vor- und Achterleine!" und ...
Stress und Angstschweiß - nur einige Symptome, die so manchen Charterskipper im Mittelmeer befallen, wenn es um Manöver geht. Dabei sind sie gar kein Hexenwerk.
Jon Mendez guides you through how best to rig an effective anchor set-up. A night spent on anchor is one of the finest joys that comes with boat ownership but many people are nervous of relying on their anchor set-up for long stays.
Prepare the Anchor. Before lowering the anchor, make sure it is securely fastened to the bow of your boat and that the anchor line is free of tangles or knots. Remove any slack from the anchor line and attach a buoy to the end of the line for added visibility and ease of retrieval. Approaching the anchor spot.
Der Puls schnellt nach oben, das Gebrüll zieht die Blicke auf sich... Hafenkino pur! Damit es nicht so weit kommt, sind hier die besten Tipps zur Vorbereitun...
Total depth for scope calculation: 24 feet. So setting your scope at 7:1, you will need to let out 154 feet (24 x 7). For all chain, you can use 5:1 which is 120 feet (24 x 5). Anchoring in Lakes and Rivers: if you are anchoring some place without tides, you can skip the tide swing estimation.
In einem früheren Video (https://youtu.be/NuGBBXZxDaI) habe ich bereits davon berichtet, wie man sich das Anlegemanöver bei starkem Seitenwind sehr einfach m...
Retrieve necessary equipment: Make sure the anchor, rode, and any additional tools are ready and easily accessible. 4. The Anchoring Process. Follow these steps to anchor your boat: Approach your chosen anchorage location slowly, moving into the wind or current. Confirm the depth of the water using your depth sounder.
Hafenmanöver, Yacht anlegen, Skipper Guide, Anlegen mit Muringleine, Boot anlegen, Boot festmachen
Vorwärts in den Liegeplatz mit unserem Sportboot Bryant 210 Walkabout ist das letzte Hafenmanöver wenn sie das Schiff nach dem mieten zurückbringen.Mit dies...
Ihr müsst seitwärts am Steg anlegen. Und Ihr seid ganz allein mit Eurem Boot unterwegs und niemand kann am Steg helfen. Oder: Ihr habt Leute an Bord, die so ...
Motorbootunterricht, Manöver Liegeplatz rückwärts, gefahren von Brigitte Bachmann, Bootsschule Zürichsee.Mehr Videos mit gesprochenen Anleitungen finden Sie ...
Bücher und Karten See : https://amzn.to/322AApR Lehrbuch Binnen : https://amzn.to/2KUjNzu Nautisches Besteck : https://amzn.to/2Zs8ab9 ONLINE BOO...