- Perfecting Your Model’s Sails: The Art of Rigging | Seacraftclassics
- Blog Seacraftclassics
- Boats and ships
- September 10, 2023

Mastering the Art of Rigging: Enhancing the Authenticity of Your Model’s Sails
When it comes to creating a realistic and authentic model of a sailboat, one of the most crucial aspects is perfecting the rigging, particularly the sails. The art of rigging involves setting up the sails in a way that accurately represents the real-life counterpart, capturing the essence and beauty of sailing. In this article, we will delve into the secrets and techniques of sail rigging that will elevate the realism of your model to new heights.
Unveiling the Secrets of Rigging: Techniques to Perfect Your Model’s Sail Setup
Rigging a sailboat model requires attention to detail and a deep understanding of the principles of sailing. Here are some techniques that will help you achieve impeccable sail rigging:
1. Research and Reference
Before starting the rigging process, it is essential to conduct thorough research on the specific sailboat model you are replicating. Study photographs, blueprints, and even real-life sailboats to understand the intricacies of the rigging. Pay close attention to the arrangement of the sails, the types of rigging lines used, and the tension applied to each line.
2. Use High-Quality Materials
Investing in high-quality rigging materials is crucial for achieving a realistic look and ensuring the longevity of your model. Opt for materials such as fine thread or fishing line for the rigging lines, and choose appropriate fabrics for the sails, such as cotton or silk. These materials will provide the necessary strength and flexibility to accurately represent the tension and shape of the sails.
3. Rigging Techniques
There are several rigging techniques that can enhance the authenticity of your model’s sails:
- Running Rigging: Use thin thread or fishing line to create the running rigging, such as halyards, sheets, and control lines. Ensure that the lines are properly tensioned and secured to the appropriate points on the mast, boom, and deck.
- Standing Rigging: The standing rigging, including shrouds and stays, provides the necessary support for the mast. Use fine thread or wire to create these lines, ensuring they are accurately positioned and tensioned to maintain the correct shape of the mast.
- Sail Attachment: Attach the sails to the mast and boom using small eyelets or hooks. Pay attention to the proper alignment and tension of the sails to achieve a realistic appearance.
Elevate Your Model’s Realism: Tips and Tricks for Achieving Impeccable Sail Rigging
Here are some additional tips and tricks that will take your sail rigging to the next level:
1. Weathering and Aging
To add a touch of realism to your model, consider weathering and aging the sails. Use diluted acrylic paints or fabric dyes to create subtle discolorations and stains that mimic the effects of sun, saltwater, and time. Be sure to apply these effects sparingly and strategically to maintain a natural appearance.
2. Scale Accuracy
Pay close attention to the scale accuracy of your model’s rigging. Ensure that the size and proportions of the rigging lines and hardware are appropriate for the scale of your model. This attention to detail will greatly enhance the overall realism of your sailboat replica.
3. Practice and Patience
Perfecting the art of rigging takes practice and patience. Don’t be discouraged if your first attempts are not flawless. Take the time to learn from your mistakes, refine your techniques, and experiment with different approaches. With each model you build, your skills will improve, and your sail rigging will become more refined.
Mastering the art of rigging is essential for creating a realistic and authentic model of a sailboat. By conducting thorough research, using high-quality materials, and employing the right techniques, you can achieve impeccable sail rigging. Additionally, incorporating weathering and aging effects, ensuring scale accuracy, and practicing patience will elevate the realism of your model’s sails even further. So, set sail on your next model-building adventure and let your rigging skills shine!
Sign up for speacial offers
Subscribe our newsletter.
[mc4wp_form id="806"]
Most Viewed Posts
- Talk about a venue with a view! This Quebec couple had the absolute wedding of …
- Everything You Need to Know About Trading in Your Boat
- Happy 4th of July! Wishing you all a happy holiday weekend on the water with you…
- Wishing all the IMOCA Globe Series teams and skippers competing in the Vendée-Ar…
- The training continues for Alex and the crew. In case you missed it, we won’t b…
Our latest custom models
- model 1329 1329 products
- Custom Sail boats 218 218 products
- Custom Power Boats 399 399 products
- Custom Half Models 532 532 products
- Custom Desk Models 92 92 products
- Join Newsletter & Get 10% Off Your First Order

Join / Login
Rigging tips for building a model ship.
- Updated on: 25th January 2021
- Written by Gary Renshaw
Introduction
Rigging is a significant part of the process of building a model ship. It can be tedious and time-consuming however putting the effort in adds to the beauty of your finished model.
In general, the instructions on rigging provided by the manufacturers of model ship kits are fairly sparse. Whilst there are several specialised and very detailed books on masting and rigging, they are more concerned with matters of historical and technical accuracy than with the sort of advice that might help the beginner to understand the best way of going about what might appear to be quite a daunting task.
Highly recommended is a 3 DVD set available from Modellers Shipyard on Masting and Rigging . This is a comprehensive set which shows all aspects of preparing the masts, spars and yards and the rigging for a period model. For further information call our office or visit our website.
We do strongly recommend “Ship Modelling Simplified” by Mastini – it contains excellent advice on ship modelling in general and has a good section on rigging. Modeller’s Shipyard has produced the following information as an introduction to the Rigging of a model ship. The following points should be noted:
- This is a general guide only and is to be used in conjunction with any instructions and plans provided by the kit manufacturer. In particular, it must be emphasised that any illustrations used in this leaflet are purely for the purpose of example and may not relate to your specific model.
- The approaches described are not the only way of doing things and the order in which the various processes are carried out may be varied, within reason, to suit the individual modeller.
Building a model ship is as much an exercise in using the mind as it is in using your fingers and hands. In this small leaflet, we can’t hope to cover all the problems and queries that may be encountered in the construction of your model. It is necessary to spend as much time thinking about the task at hand as actually doing it. If having thought about it, you still have a problem then contact us. We’ll either be able to advise you ourselves or refer you another modeller in your area who’ll be happy to help you with “hands-on” assistance.
TYPES OF RIGGING
The rigging of a ship can be divided into two main parts:
- “Standing” or “Fixed” rigging, which is used to support the Masts and Bowsprit.
- “Running” rigging, which is used to manipulate spars and sails.
On an “actual” ship any Rigging which didn’t pass through a pulley block was coated with tar to help prevent it rotting. For this reason, standing rigging is often, although not always, black on ship models.
If you do want your standing rigging black, and black cord is not supplied in the kit then you can consider these options:
- You can purchase Black cord.
- The use of black rigging “wax” gives a very authentic tarred look but it is difficult to do well.
- The cord supplied with the kit can be coloured using black dye or “Raven Oil” as used by leatherworkers/saddlers.
- Black felt-tipped “Texta” is an easy way to colour the cord.
- Black “Padawax” shoe colour is also very satisfactory.
When any liquid dye has been used it will be necessary to stretch the cord by hanging it on a clothesline, with weights, to prevent it going slack after installation on the model. It will also probably be necessary to use clear wax to eliminate any furry look in the cord.
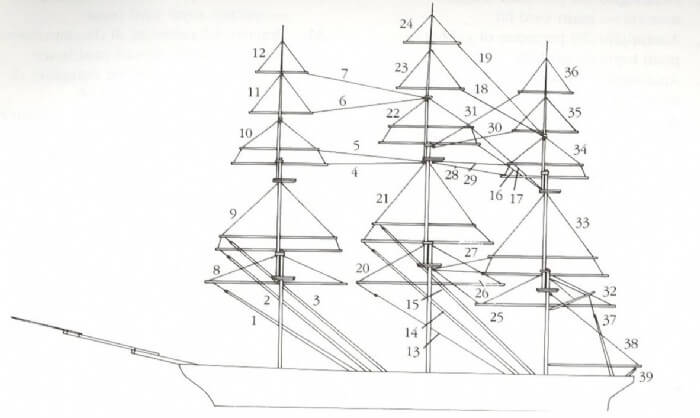
STANDING RIGGING
This includes the rigging of the Stays, Backstay, Bowsprit and Gammoning. This is fairly straightforward and should present few difficulties. Work from the centre of the ship out and try to avoid difficult and confined spaces. A Rigging Tool presented in the Tools section of our Catalogue will be helpful when rigging. The various names for the standing rigging are presented below.
- Fore topmast stay
- Fore topgallant stay
- Flying-jib stay
- Fore royal stay
- Fore skysail stay
- Main topmast stay
- Main topgallant stay
- Main royal stay
- Main skysail stay
- Mizzen stay
- Mizzen topmast stay
- Mizzen topgallant stay
- Mizzen royal stay
- Mizzen skysail stay
- Mizzen topmast backstay
- Mizzen royal backstay
- Mizzen skysail backstay
- Main topmast backstay
- Main topgallant backstay
- Main royal backstay
- Main skysail backstay
- Fore topmast backstay
- Fore topgallant backstay
- Fore royal backstay
- Fore skysail backstay
- Bowsprit shrouds (bobstays)
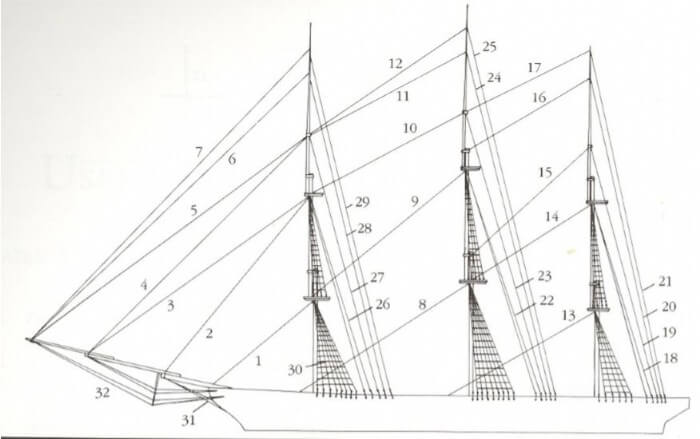
Source: “Ship Modeling Simplified” by Mastini Pages 143 –144
FITTING OF BLOCKS, EYE PINS & CLEATS
Before proceeding further fit all the eye pins and rigging blocks to the bowsprit, masts, yards, and deck – also to the insides of the bulwarks if required. Cleats may be required on the lower masts, deck or bulwarks. Pay particular attention to any area which will be relatively inaccessible once the shrouds and other standing rigging ropes are in place.
It is as well to drill out the holes in the blocks and deadeyes to facilitate the threading of the rigging cord when the time comes.
For the most inaccessible blocks, insert a short piece of thin rigging cord through the hole and glue it to itself forming a loop. Later, when you wish to insert the permanent running rigging you cut the loop, glue the new cord to one end and pull it through the hole using the other end of the pilot cord. No awkward threading
DEADEYES (LOWER) AND CHAIN STRAPS/ DEADEYE STRAPS
In most models, the lower deadeyes are fitted into “deadeye loops” which are inserted into gaps in the outer edge of the “Channel”. Once the complete row of deadeyes are installed a capping strip is fixed along the front.
From the bottom of the deadeye loop either a straight ”Deadeye Strap” or a “Chain Strap” goes to the side of the hull at a lower level. The style of this fitting will depend on the period to which the particular ship belongs and also the price/ quality of the ship being built.
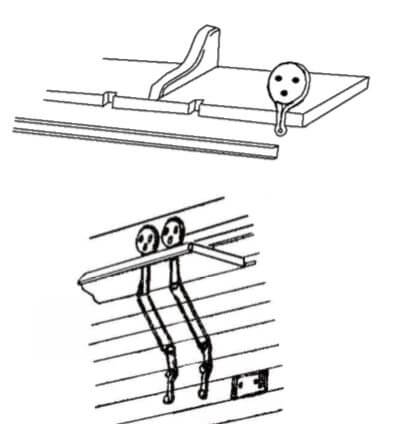
There are several points to keep in mind when setting up these “deadeye assemblies”
The deadeye strap (or chain strap) is rarely, if ever, perpendicular. Rather, it should be at an angle which is an extension of the angle of the shroud which will eventually be attached to the deadeye above it. The diagram on the left of this page should make that mouthful clearer!!
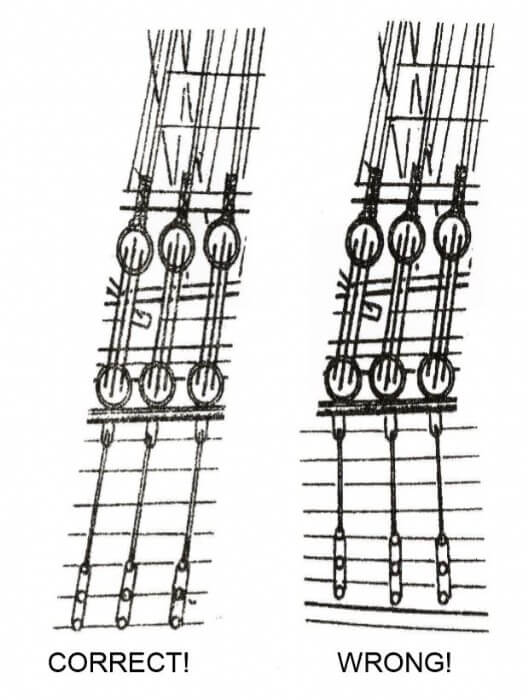
The lower deadeyes, the ones being attached at present, should be placed so that the three holes are positioned with the lowest one being the centre of the three. When at a later stage the upper deadeye is fitted, it is equally important that the centre hole is the highest of the three. Refer to the diagram on the right-hand side of this page.
These together with the “forestays” and “backstays” are the ropes that support the masts. Shrouds, which are the group of ropes to which the ratlines are attached, are made up in pairs with a deadeye at each end of a single rope.
First cut a piece of cord to an appropriate length and with the help of an alligator clip or a small clamp glue one end around a deadeye. This deadeye should then be temporarily connected to the front portside (left hand) lower deadeye using a wire jig. This jig will provide the correct spacing between the upper and the lower deadeye.
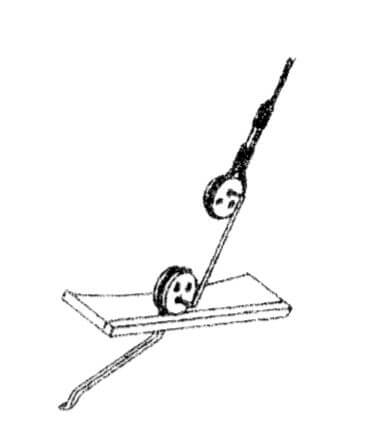
The loose end of the rope then goes up, around the mast and down to the position of the lower deadeye immediately behind the first. Using glue, alligator clip and another wire spacer, the upper deadeye is attached to the shroud. At a latter stage, the double thickness of cord immediately above the upper deadeye will be bound with fine thread as shown as shown in some of our diagrams. The “Lanyards”, made of the thinnest rigging cord, are then installed as shown in the adjoining drawing. Because on the “real thing” the lanyards were constantly used to take up tension on the shrouds they were never tarred and should not be black.
Once the first pair of shrouds has been completed, the exercise is repeated on the other (starboard) side, then, back to the port side and so on.
If, when the others have been done there remains a single lower deadeye on each side then the final pair of shrouds goes from one side of the ship to the other with a large seized eye around the masthead. In all of this, it is important to ensure that the deadeyes are in straight rows parallel with the channels and with each other.
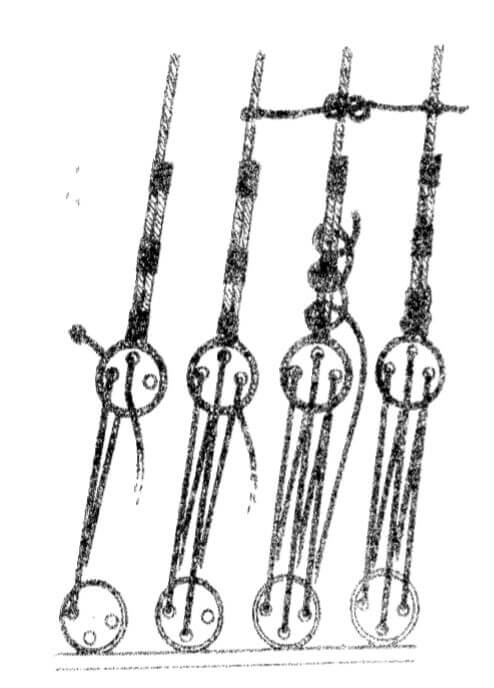
SEQUENCE OF SHROUDS
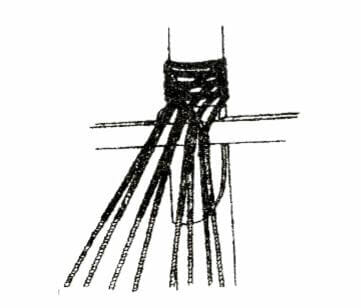
The forestays should now be fitted paying attention to the particular fittings used. Quite commonly “heart deadeyes” and lanyards will be used for tensioning purposes.
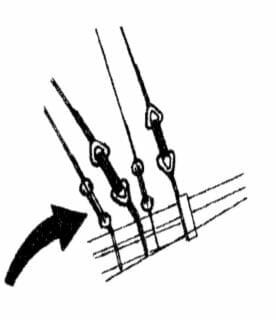
These are always rigged with a large seized eye around the masthead as with the “odd” shrouds (if any). As with the shrouds they are rigged with deadeyes and lanyards but the upper deadeye will normally be at a higher level than that of the shroud deadeyes.
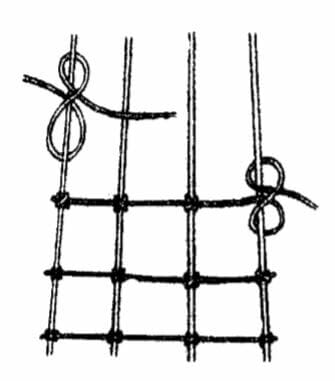
The colour of the ratline cord is grey or fawn. The tying of ratlines can be fairly tedious but it is worth going to some trouble to ensure that it is done well. Among the points to keep in mind are:
- They should not be too tight otherwise they will pull the shrouds together.
- They should be parallel to the waterline.
- On the “real thing” the spacing between each row was about 400mm so, on a model at a scale of say 1:50, the gap would be approximately 10mm.
- Avoid tying knots tightly until all the ratlines are in place. This will allow some “fine tuning” before placing a tiny dab of glue on each knot. Placing a sheet of white plain paper behind the shrouds will assist with gaining contrast to make the tying of the ratlines a tad easier on the eyes.
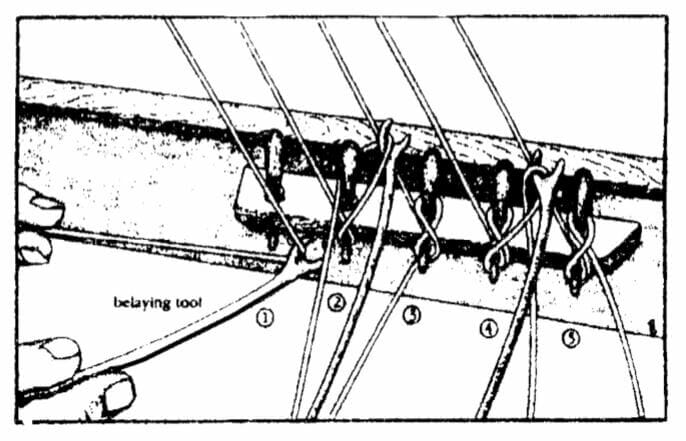
ATTACHING RIGGING LINE TO BELAYING PINS
The adjacent diagram demonstrates clearly the method best used to attach the cord to the belaying pins.
If you have any difficulties determining which belaying pin a rope is intended to go to, a good rule of thumb is that the higher up the mast it starts then the further back it finishes.
ROPE COILS
Plenty of rope coils draped over the belaying pins provide a finishing touch. These can be made from odd lengths of offcuts. If placed into the shapes you require they can be (fixed) permanently by using hair lacquer or nail polish.
WHAT SIZE ROPE TO USE
In the plans or in the instructions there should be a key or description of the size of cord to be used for various purposes. In the unlikely event that no indication is given, then the following can serve as a guide:
Forestays & Anchor ropes – Heavy cord
Shrouds & Backstays – Medium cord
Ratlines & Running Rigging – Lightest cord
RUNNING RIGGING
Once the standing rigging has been completed you can now start the Running Rigging. You will have enlarged the holes in the blocks which are already in place. Do the same with all other blocks as you come to use them.
When threading cord through blocks, you will find that a needle threader (available from sewing shops) will be very handy. Also, a smear of super glue on the end of the cord can stiffen it and make it easier to thread. Work from the centre of the ship out and try to avoid locking yourself into difficult positions. A Rigging Tool presented in the Tools section of our Catalogue will be helpful when rigging.
The various names for the Running Rigging are presented below.
- Fore brace
- Fore lower topsail brace
- Fore upper topsail brace
- Fore lower topgallant brace
- Fore upper topgallant brace
- Fore royal brace
- Fore skysail brace
- Fore yard lift
- Fore topsail yard lift
- Fore topgallant yard lift
- Fore royal yard lift
- Fore skysail yard lift
- Main lower topsail brace
- Main upper topsail brace
- Main lower topgallant brace
- Main upper topgallant brace
- Main royal brace
- Main skysail brace
- Main yard lift
- Main topmast yard lift
- Main topgallant yard lift
- Main royal yard lift
- Main skysail yard lift
- Mizzen yard brace
- Mizzen lower topsail brace
- Mizzen upper topsail brace
- Mizzen lower topgallant brace
- Mizzen upper topgallant brace
- Mizzen royal yard brace
- Mizzen skysail yard brace
- Mizzen topmast yard brace
- Mizzen topgallant yard lift
- Mizzen royal yard lift
- Mizzen skysail yard lift
Source: “Ship Modeling Simplified” by Mastini Pages 145 –146
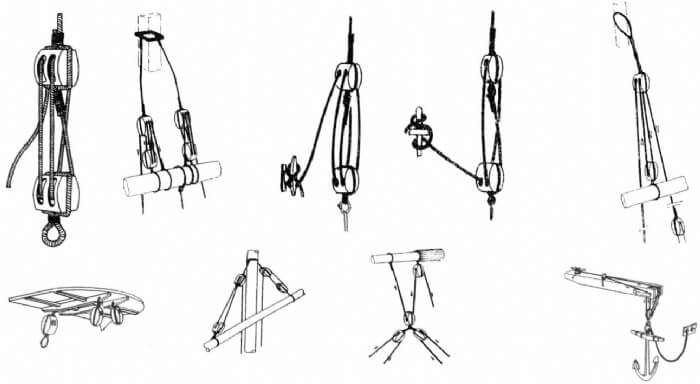
TYPICAL RUNNING RIGGING APPLICATIONS
NAMES OF MASTS & SPARS
- Fore lower mast
- Fore topmast
- Fore topgallant mast
- Fore royal and fore skysail mast
- Main lower mast
- Main topmast
- Main topgallant mast
- Main royal & main topgallant mast
- Mizzen lower mast
- Mizzen topmast
- Mizzen topgallant mast
- Mizzen royal & mizzen skysail mast
- Fore topsail yard
- Fore upper topsail yard
- Fore lower topgallant yard
- Fore upper topgallant yard
- Fore royal yard
- Fore skysail yard
- Main lower topsail yard
- Main upper topsail yard
- Main lower topgallant yard
- Main topgallant yard
- Main royal yard
- Main skysail yard
- Crossjack yard
- Mizzen lower topsail yard
- Mizzen upper topsail yard
- Mizzen lower topgallant yard
- Mizzen upper topgallant yard
- Mizzen royal yard
- Mizzen skysail yard
- Gaffsail boom
- Flying-jibboom
- Martingale boom, dolphin striker
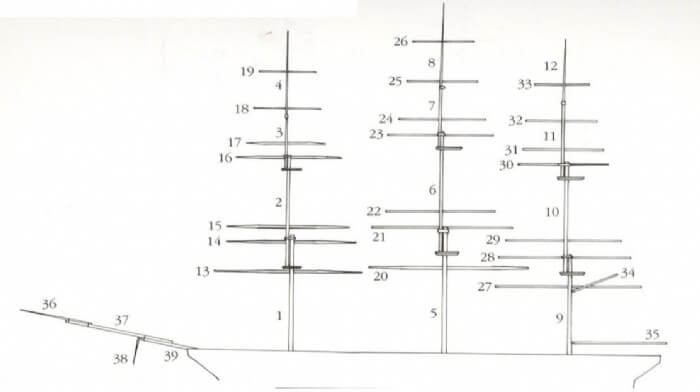
Source: “Ship Modeling Simplified” by Mastini Pages 142 –143
Learn The Art Of Building A Model Ship
Get started in wooden model ship building today
Join 18,543 other modelers to hear about specials, new products and modeling tips
- Become a Member
- Modeling Hub
- Model Ship Building
- Maritime History
- Affiliate Program
Information
- Terms & Conditions
- Privacy Policy
Copyright © 2023 Modelers Central. ABN: 31 114 830 732
- Claim 10% Off First Order
- Get 5% off ALL orders with a Membership
- Gift Vouchers
- Help & Advice
Modelers Central. 2023, All rights reserved.

- Claim 10% Off Your First Order
- Get 5% Off All Orders With A Membership

Get 10% off
Your first order.
10% off applies only to full-price items. By providing your email address, you agree to our Terms & Privacy Policy

10% off applies only to full-price items. By providing your email address & mobile number, you agree to our Terms & Privacy Policy and consent to receive marketing messages from Modelers Central at the addresses provided. You can unsubscribe at any time by replying STOP.
- Vanquish 65
- Mini Maniac
- RG65 Appendages
- Maniac MK II
- IOM Appendages
- Marblehead Class
- Marblehead Appendages
- RT65 Ragnarok
- RT65R Armageddon
- RC65 Adrenaline
- ST65 Sowelu
- Mini40 / F48 Class
- Nightmare X
- Nightmare MK VIII
- MultiOne Class
- FireDragon 1000
- DIY Sail Winch
- Rig Building
Rig building

Fast Shipping or local PickUp
Potter solutions, the one stop model yacht shop.
Sails, rigs, boat stands, accessories and fittings, including the new range of DF65 and DF95 complete packages.
Email Address
the history of the future
At the age of fifteen David Potter started sailing model boats at the world famous Birkenhead Model Yacht Club.
In 2012 he decided to turn his passionate hobby into a business and launched Potter Solutions.
As a qualified engineer, with a good eye for detail, he produces a range of equipment for the majority of radio controlled model yacht classes.
David has competed in this thrilling sport for over Thirty years at both national and international events and is fully aware of the need for products that can deliver in the field at a competitive price.
Whatever your requirements, including information and advice, David is always available for a chat.
featured products
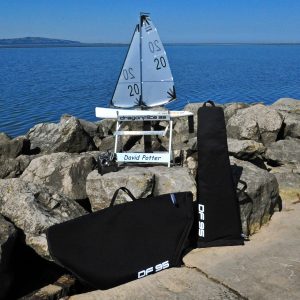
Complete DF95 Package
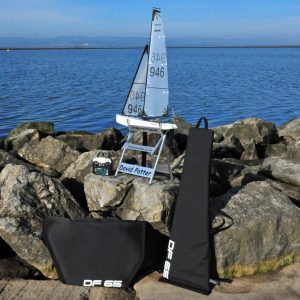
Complete DF65 Package

DF95 Alloy Boat Stand

Pierre Gonnet Mast 11.1mm
Everything in one place.
30 Years of experience in radio sailing means we know what’s required to produce competitive and reliable parts .
Order before 3pm for UK next day delivery *
Most products can be shipped same day. Some products like sails * are made to order unless they are from our standard range. Products that can be dispatched same day will be indicated on the product description.
Secure Ordering online
You can place an order online. Once we receive the order we calculate the shipping cost and send you information on how to make payment. Your personal information is protected and encrypted by Secure Socket Layer (SSL) technology. Our website is ecommerce PCI Compliant .
Customer Service
Excellent customer service is one of the key areas where we can truly make a difference, which is why we work hard to keep our customers happy and make it easy to do business with us. A quick response matters and we aim to reply promptly and professionally.
some of our reviews
A history of trust and service.
“Fast shipping and exactly the parts I needed to complete my new IOM. Highly recommended”
“Bought a boat stand for my Marblehead. Arrived in a couple of days and very happy with the quality.”
“Bought some new sails for my DF95. Potter’s service is excellent. The sails are top quality.”
- Shop Notes, Ship Modeling Tips, Techniques and Research

- Remember me Not recommended on shared computers
Forgot your password?
Masting, rigging and sails
- Start new topic
1,746 topics in this forum
- Recently Updated
- Most Viewed
- Most Replies
- Solved Topics
- Unsolved Topics
Seven-Ten-Seven (7-10-7) template for making masts from square stock
- Nunnehi (Don)
- August 8, 2021
Making your own rope? Want to know how? See these tutorials and topics....

- February 6, 2021
Making an 1.00mm block
- modeller_masa
- Sunday at 05:18 PM
Finding authentic rope looking line for New Bedford Whale boat.

- Sunday at 12:11 AM
At A Loss On How To Rig

- Keith Black
- Saturday at 09:40 PM
jack stay rat lines?
- Roger Pellett
- Friday at 11:53 PM
Need a source for a "how to" all the needet basic knots, best with diagrams/photos

- Thursday at 03:01 AM
Stepping masts on Revell Cutty Sark 1:96
Help with translation of rigging term, instructions for rigging cutty sark, rigging cutter square sail sheets and tack.

Securing yards to masts

Securing the yards

Tiny Spar on 17th Century English Yacht
jack stay on 1850s clippers

HMS Sphinx Bowsprit Rigging

Heller Shroud Loom

Block Tumbler Help
- February 27
Flying fish
- February 24
Lift lines on cutty sark ,Revell 1/96

- February 23
lines to the fife rails?
- February 22
- February 19
how to secure a rope hank to the sheer poles?

- February 15
Topgallant Storm Rig
Tagged with:

- rwiederrich
- February 14
Help with understanding the rigging diagram
- February 10
mast top holes
Question on mayflower rig, black rigging wax, chain plates, member statistics, forum statistics, who's online 53 members , 2 anonymous, 122 guests (see full list).
- Rik Thistle
- Noctavigant
- Knocklouder
- Blue Ensign
- Gaetan Bordeleau
- JacquesCousteau
- Long John Silver
- myMADNESS78
- realworkingsailor

Modelshipworld - Advancing Ship Modeling through Research
SSL Secured
Your security is important for us so this Website is SSL-Secured
NRG Mailing Address
Nautical Research Guild 237 South Lincoln Street Westmont IL, 60559-1917
Model Ship World ® and the MSW logo are Registered Trademarks, and belong to the Nautical Research Guild (United States Patent and Trademark Office: No. 6,929,264 & No. 6,929,274, registered Dec. 20, 2022)
Helpful links.
- Articles Database
- NRG Home Page
- NRG Online Store
- Important: Our Guidelines
- Terms of Use
- Buildlog Index
About the NRG
If you enjoy building ship models that are historically accurate as well as beautiful, then The Nautical Research Guild (NRG) is just right for you.
The Guild is a non-profit educational organization whose mission is to “Advance Ship Modeling Through Research”. We provide support to our members in their efforts to raise the quality of their model ships.
The Nautical Research Guild has published our world-renowned quarterly magazine, The Nautical Research Journal, since 1955. The pages of the Journal are full of articles by accomplished ship modelers who show you how they create those exquisite details on their models, and by maritime historians who show you the correct details to build. The Journal is available in both print and digital editions. Go to the NRG web site (www.thenrg.org) to download a complimentary digital copy of the Journal. The NRG also publishes plan sets, books and compilations of back issues of the Journal and the former Ships in Scale and Model Ship Builder magazines.
Our Emblem ®
Nautical Research Guild ® and the NRG logo are Registered Trademarks, and belong to the Nautical Research Guild (United States Patent and Trademark Office: No. 6,999,236 & No. 6,999,237, registered March 14, 2023)
- Existing user? Sign In
- Latest Posts
- All unread content since my last vist
- Unread topics I have posted in
- Create New...
Nylet. Fine Sails & Quality Products ~ 92 Years
Welcome to the 2024 nylet website: everything for the model yachtsman. world-wide mail order service since 1958., welcome to the 2024 nylet website. nylet 92 years . the oldest established international master sailmakers, since 1932. everything for the model yachtsman. creating the very finest sails. tradition - craftsmanship - innovation. established 1932. 92 years since our firm's founding ethos "fine products, quality first". nylet racing sails are used the world over. makers of model sails to the national maritime museum cornwall. sails made by special commission for collectors & museums. every sail suit carefully made to your special order either in synthetic sailcloth, or for the vintage or classic yacht we make fine sails in cotton. large range of yacht fittings, wires, screws, tools etc. our fast world-wide mail order service (since 1958) is open for business. scroll down for more, or go to top toolbar to click on other pages. thank you for visiting our website, we hope you will find our product listings useful. iom sail rig kits, plus other class rig kits. replacement kit sails such as fairwind, seawind, victoria, etc. sails made for 200 different designs (see the "150 sails" list) and which include the classic - vic smeed's starlet and star baby, also wild duck (plan sold by sarik hobbies) and the recent eventide. prompt despatch from stock of large range of mast & deck fittings, aluminium tubing (incl stiffer 7075), wires & cordage, screws, tools, booklets & other quality products for model yachts, see price list (over 500 items). nylet racing sails with our "wind catching" shape - all sails cut specially to order and designed to enable your yacht to respond to varying *wind conditions, sails you can be proud of to compliment your model racing or cruising yacht. the very finest cotton sails manufactured for sailing yachts and display models. sails with wind catching shape and that extra sparkle. cross-reference listings of fittings in section e of our price list with the online "fittings & photos" page. full size sailmakers and contractors to the admiralty 1932-1966. 1772. silk mercers established in high holborn, london - 8 generations - 252 years of working with fine cloths. model & miniature makers spanning 4 centuries and 12 generations, with an example of our early 18th century work held in the british museum, london. slide & click on any of the 7 links below, or click any link on top bar. this is just one of 35 pages on our website., product & price list.
PRICE LIST - your first stop - approx. 500 items (fully searchable pdf file).
Quick guide to Sails
IOM, M-class, Ten Rater & other sails. Replacement kit sails - Fairwind, Voyager 2, Victoria, Seawind (over 150 other standard sail suits available).
Our Sailmaking Service in detail
Fine 'vintage' style cotton sails.
Creating the Finest Sails for Vintage & pond model yachts, Nylet cotton sails are specially made to order.
IOM rig carry bags & IOM carbon-fibre fin sets, ballast.
Sail rig carry/stowage bags; lead ballast; high quality c.f. fins/rudders.
Nylet 'How To' booklets
A range of 'How to' booklets, the BB3 aspects of fitting out model yachts.
Rig & deck fittings, wires etc.
Prompt despatch on our large range of quality rig & deck fittings (see photos), cordage, wires, stainless steel screws & nuts, brass wood screws, tools, etc.
Vintage yacht restoration
Your vintage model yacht can be carefully restored in our workshop.
Mast & boom tubing
Range of aluminium mast & boom tubing (incl 7075 grade).
Yacht sail winches
Sail winches to suit 36 inch, IOM, Marblehead, 6M, 10R & A-class.
Nylet. Master Sailmakers - Quality First. Established 1932. Click the "contact us" button to email your enquiry and for phone numbers/email/business hours & other/holiday dates.
View more photos of nylet sails, download our order form here., welcome - accueil, bienvenido, velkommen, welkom, tervetuloa, willkommen, benvenuto, velkommen, bem-vindo., nylet ~ master sailmakers ~ "quality first". 2 generations, 108 years of experience. 92 years of model sailmaking (including 35 years full size sailmaking). at nylet we don't just 'make' sails, we create sails, we breathe life into the sailcloth in order that they might be shaped by the wind. using technological advances in materials coupled with innovation, expertise and tradition over 92 years to bring you the very finest model sails. all sails are made specially to your order; please phone us and/or email sail plan, drawing for a quotation. see price list for 'standard' racing sails, iom sails and replacement kit sails (plus three sail pages with full info)., everything for the model racing yachtsman since 1932. world-wide mail order service since 1958. prompt despatch on fittings and stock items. quality mast & deck fittings, sails of all types, screws & nuts etc. accessories, aluminium tubing, iom rig bags and more. fast world-wide mail order service. please click on our price list before enquiring (500 items). over 200 sail designs available. makers of model sails to the national maritime museum cornwall., a warm welcome to our customers and new visitors to our website. if you have logged on recently then please refresh your browser to enable updated pages to be displayed correctly. this website contains approx 35 pages including help/info/tips files. clickable links also on top bar. we are working to bring you nylet products via our long established prompt world-wide mail order service. full details on our dedicated mail order page. we wish all our customers good health and happy sailing., about us; also making your order..
We hope you will find our services and products useful in your model yachting hobby. Our mail order service commenced in 1958 and we have been despatching our products world-wide since then.
Our PRICE LIST gives you instant access to almost 500 items so please refer to this firstly before enquiring. And please note there is no VAT tax (we do not charge VAT). Having firstly visited the list of products to see what we offer, the other dedicated pages on this site are to assist you with further info on sails, aluminium mast/boom tubing, rig & deck fittings (with photos), wires & cordage, screws & bolts etc., sail winches, tools & accessories. To access all other pages and products as well as our "help" pages either click on the individual (sliding) carousel links "read more" or via the top bar. There are some 35 pages on this website (including help files with useful tips). All other pages can be accessed using the drop down menus at the very top of each page.
Nylet are the longest established professional model sailmakers in the world, manufacturing full size sails from 1932 to 1965, and also model yacht sails in cotton from the early 1930's onward. 108 years of experience - 2 generations. We have been exporting our products world-wide since 1958 and offer a comprehensive model sailmaking service including yacht sails made in white Dacron, also racing scrim, and IOM sail rig kits, plus replacement kit sails, also Dacron Heritage sewn sails in 1950's/60's style. For some 35 plus years we have again manufactured finely finished Premium 'vintage' style cotton sails. We offer a large range of rig & deck fittings, wires & cordage, a huge selection of screws, nuts etc, sail numerals, accessories and hardware for modern racing yachts. Also sail winches, and much, much more. For products and prices click on (top bar) "all pages" and select from the drop down list. Please also see customers comments on the various pages. News - Range of sail winches for most yachts, see dedicated winch page; for prices refer to our products & price list in section M (prices start at around £100). Just a note about our sails. As it says on the "sail" pages Nylet sails are finished and are complete with batten stiffeners (where necessary) and all eyelets etc etc. A few customers ask if they are complete - seems some Chinese "kit" sails are not fully finished (I use the word "sails" loosely here!). We are Master Sailmakers and have been for 92 years , so you are purchasing the best. Please read our 3 sail pages for fuller details.
NYLET, a family business (since 1832), has moved with the times over 3 centuries and for many years been run on a mail order basis. We are thus able to focus on orders from home and abroad enabling us to effect a brisk turnaround on stock items. On a personal note, a milestone - in 2024 I celebrate 58 years of model sailmaking (taking over from my late father in 1981) and am pleased to say that I take great pleasure in my work, every sail I make is given equal attention to detail. Our skills represent some 108 years of sailmaking experience when taken together with my late father, who taught me most of what I know. It might actually be 118 years if I reckon his early years working for his father (a keen yachtsman) and making sails for the dinghy he constructed in the mid 1920's (before making sails commercially). Our family firm (originally known as J.Parsons) was established in 1832, 5 generations ago and originally being chandlery supplies and manufacturing canvas goods, sheeting, tilts etc. for narrowboat hauliers as well as farmers, then later in the marquee trade and in turn manufacturing full size sails as well as model sails from the early 1930's. We are proud that in our family business we can say this is some 192 years of manufacturing.
How to order and pay . VISA, MASTERCARD & PayPal accepted, or electronic bank transfer (BACS). Please email or phone with your order. FOR DELIVERY times and making/putting up your order please see relevant info pages.
Les visiteurs de la France s'il vous plait cliquer sur "bienvenue". Los visitantes procedentes de Espana, por favor haga clic en "bienvenue".
Today - Racing sails in scrim and film, Dacron sails & Heritage sewn Dacron sails. Nylet Finest 'Premium' cotton sails, fittings etc. 2016 - Frank Parsons marked his 50th year of model sailmaking. 1966 - Coloured Terylene racing sails. 1932 - Commencement of full size and model sailmaking. 1834 - Founding of the family firm, J.Parsons (canvas goods manufacturers). 1772 - My 4th gt grandfather, Michael, a Silk Mercer in High Holborn, London, working with fine cloths. 1738 - My 5th gt grandfather, Michael Compigné, Goldsmith, London, a specialist miniature maker for private customers, items made in gold & silver. 1620 - My 8th, 7th & 6th gt grandfathers, Clockmakers in Normany, London, and Winchester. From 1620 to 2022, over 400 years of the finest craftsmanship. 400 Plus Years of Tradition
Sails made by Special Commission for Collectors & Museums. Nylet IOM racing sails finely manufactured in racing scrim, white Dacron and satin film. Also replacement kit sails; Classic Varnished Terylene sails, also "Heritage" 1960's style sewn white Dacron sails made exclusively by Nylet. Also Premium 'Vintage' style cotton sails. Any size sails, of any type, made to your drawings or templates. Just a note, sail suits are often wrongly referred to as "sets". In nautical parlance sails are a "suit" whether that be 2, 3 or 4 sails (or more) for a yacht or a working boat, or a ship of the line such as HMS Victory where a dozen or more sails may be involved. All our sails are priced as a suit.
Makers of model sails to the National Maritime Museum Cornwall.
*Note: Wind conditions within sail type & design parameters.
Please note, we are not a "shop" (we have been asked). Phone us to chat, always happy to help.
The Nylet website is often updated weekly; updated March 2024
SOME Testimonials
Thank you for the BB3 booklet - a mine of information.
Thank you for such excellent service again, quality goods sent at lightning speed. A credit to how things should be done.
I had various recommendations of who to get sails from but the other day I saw a yacht with your sails and it just shone out, the shape looked beautiful, so I decided there and then to contact you.
Thanks Frank, sails arrived, what a work of art! They are incredible!
The fittings arrived in record time and I am really grateful to you for such a superb service.
I was pleased to receive my new IOM sails today, they are very good indeed just what I wanted, possibly the best I have ever had, good workmanship.
Many thanks for the superb Seawind sails that arrived this morning. I really appreciate the speed of processing of the order, and the precision of the finished sails.
Sails received with thanks. Great quality and great fit!
The M-class sails arrived and absolutely fantastic, really pleased and more than happy to recommend your workmanship.
The Voyager sails arrived in perfect condition and look beautiful. Thank you very much for the nice work!
Just to let you know that the new IOM sails work very well, thank you. I had 2x1st, 2x2nds,2x3rds, and 1 fourth. So I came first overall after 7 races.
I live on the coast of NSW in Australia. Some time ago I bought Spirit No.2751 (the one featured on your site). I am currently racing the boat here in Australia in several IOM fleets. The elliptical rudder works perfectly and the boat is at full potential now, points higher than the TS2 and the Topiko. Neither are faster off the wind.... Thanks for a great boat, I have never felt another IOM that glides to windward like the Spirit 3. All your efforts are appreciated here.
I just wanted to say a really big thank you for the lovely suit of Dacron Heritage (sewn) sails you have made for my vintage 4 foot model J Class sloop. I have put the sails on the spars and they look superb! They are beautifully made as I expected them to be, but in all fairness it is actually better than I had even hoped for.
Sails have arrived safely and look fantastic. Very many thanks.
Many thanks, order arrived today, superb service as always.
Just a note to thank you for phoning me with the expected delivery of the Dragon sails. They came the same day! I have to say that they look stunning and beautifully made with lovely details.
Safely received! Thanks for the great service.
Hope you are doing well, again, thank you for the (cotton) sails. They turned out beautifully.
I immediately rigged my 36"-class and was happy about the perfect fit of the (cotton) sails. They are wonderful and I am happy. Thank you very much!
Sails arrived this morning, as promised; they are a work of art - the real thing! Whatever else people say about the barge, they will say "who made her sails?"
Sails have arrived safely. But what a superb job, my old girl will be the best dressed yacht at any of our VMYG meetings. Wonderful work of the very highest standard as always from you, I cannot thank you enough.
I've never won anything before with my One metre (IOM) yacht but with your sails newly fitted I won the series of races. An excellent job, marvellous, thank you.
Hi. Sails arrived today, very impressed. Thank you.
I received my sails today....PERFECT...arrives safely. Perfect fit and I look forward to sailing with the new sails!!!!!! THANKS,
Received the sails, many thanks - as usual, quality better than expected!
Hi Frank, The One Metre sails are looking great.
Hi Frank thanks for another great (sail) job.
Thank you for your most attentive service, my best regards.
Dear Frank, the sails arrived safely on time, as promised. Superb quality and workmanship, as ever.
more comments from satisfied customers
Just a quick email to let you know the J class sails arrived in perfect condition and look amazing. I will of course send you some pictures when the boat is finished.
Hi Frank. The sails arrived today - they look great. I very much look forward to getting them rigged and tried out. I've already taken trophies with the sails you made for my 10 rater so hoping for more of the same.
The (Seawind) sails have arrived, the only thing I can say is - WOW. What a difference compared with the standard sails.
Absolutely magnificent (cotton) sails!
Congratulations for your sails! They look perfect and the belly looks fine and regular. Many thanks for the high quality of your work.
Many thanks for the most efficient service.
Sails received with thanks. You are a true craftsman.
Looking forwards to receiving the (Mascotte) sails, your workmanship always gives me pleasure.
Many thanks for the first class service you always give, items arrived this morning so that's my bank holiday weekend sorted!
Sails arrived this morning, superb as usual, thanks again.
Beautiful suit of sails arrived safe this morning, thank you.
Hello Frank, the sails arrived yesterday and are super thanks. I attach a photo of them fitted to my yacht.
Thanks for the BEAUTIFUL (cotton) SAILS which arrived today. What fantastic work. Amazing. Well worth the wait! I've fitted the sails to the spars. Fantastic. My goodness you are a skilled and talented man. I saw the shape you had made before fitting and understood why you did so, but only when rigged did it all make sense. Amazing. And those tiny brass eyelets... I took the yacht to my sister this morning. What a thing of beauty, was the unanimous cry. Forgot to get a picture for you in all the excitement... watch this space. I am so grateful to you, and will be coming back for more!
Thanks for your great service and friendly advice.
Order arrived this morning (next day), all OK, excellent service.
Just arrived, perfect delivery! Thank you Frank, and have a nice Weekend!
Many thanks for the prompt reply (directing me to the price list). Lots of goodies there!
The items arrived in the post today, all Ok. Thank you for the quick and excellent service, its nice to know that small orders like mine are given the same service as larger orders.
Hi Frank, (cotton) sails have arrived, they are perfect, you did a lovely job, will send you a pic when on the boat.
Just received my glorious suit! Magnificent! The tablings..... marvellous!!!... the stitching lines, the overall shape, every detail, all very beautiful indeed! I can't tell you how delighted I am. You must understand, the wind has always held a magical place in my heart and the thin membrane with which we apply our feeble human attempts to have it do our way over an equally mysterious sea..... alchemy indeed. I hold this suit in my hands and it all comes alive again. You sir, are a Wizard of Dacron. Thank you for your brilliant work, I raise a glass to you Sir,
Really thanks again for your great products and service!
The sails arrived safely yesterday and look amazing. I am very pleased with the result and they will make the yacht look smarter than she has ever done.
Hello Frank. Thank you for all your help, the sails, mast and fittings are all first class and Starlet is sailing beautifully.
Amazing. I wish all British businesses ran on your lines!
Hi Frank, sails (Nottingham J) arived safely this morning, very pleased, they are very well made and look beautiful. Merry Christmas.
Thanks Frank, wonderful service.

- Table Dolly Car
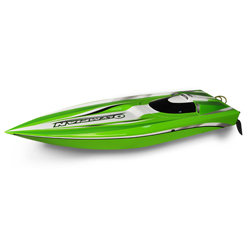
- Super Hornet X650

- Build Your Own
- Parts & Accs.
- News/Events
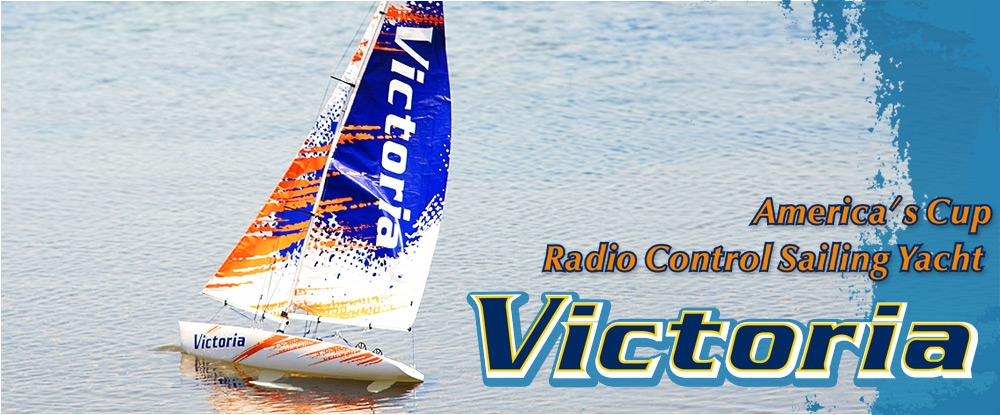
The Victoria R/C Sailing Yacht allows you to enjoy the simply pleasure of sailing on gentle summer breezes on a sunny afternoon....or the intensity of racing in the America's Cup. Ideal for the first-time skipper or beginning R/C enthusiast, the Victoria is a highly prefabricated, easy-to-assemble kit with detailed instruction manual. Recognized by the American Model Yachting Association (AMYA) as a racing class, Thunder Tiger's Victoria has become synonymous with maximum yachting pleasure.
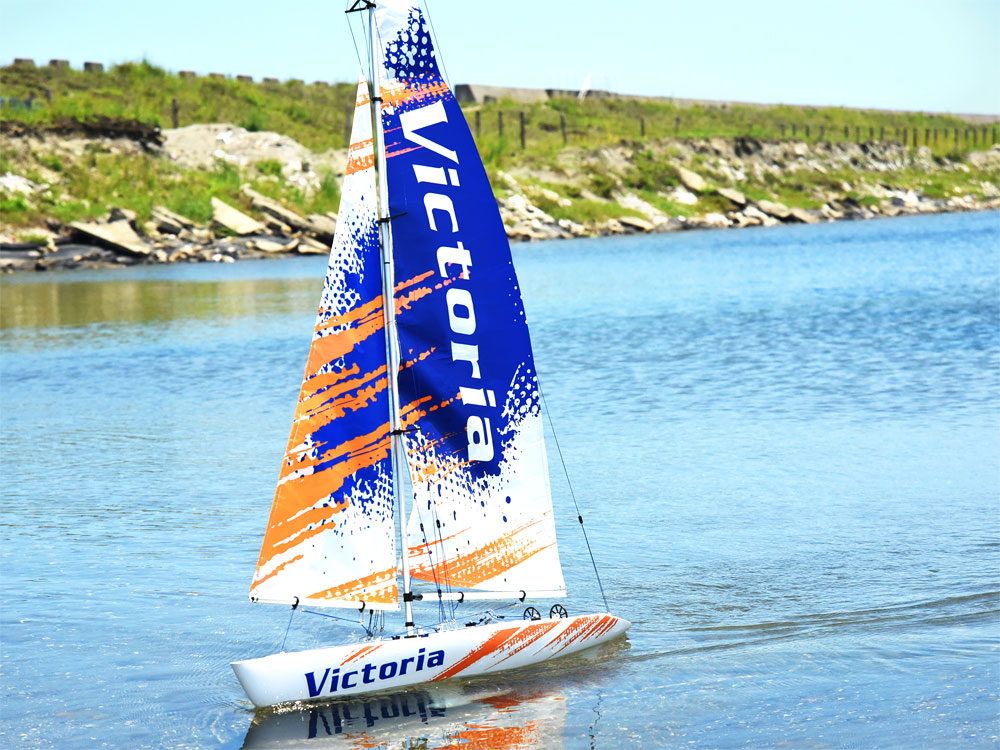
Highly prefabricated with a blow-molded ABS hull/deck, sails, mast, deck fittings and rigging hardware.
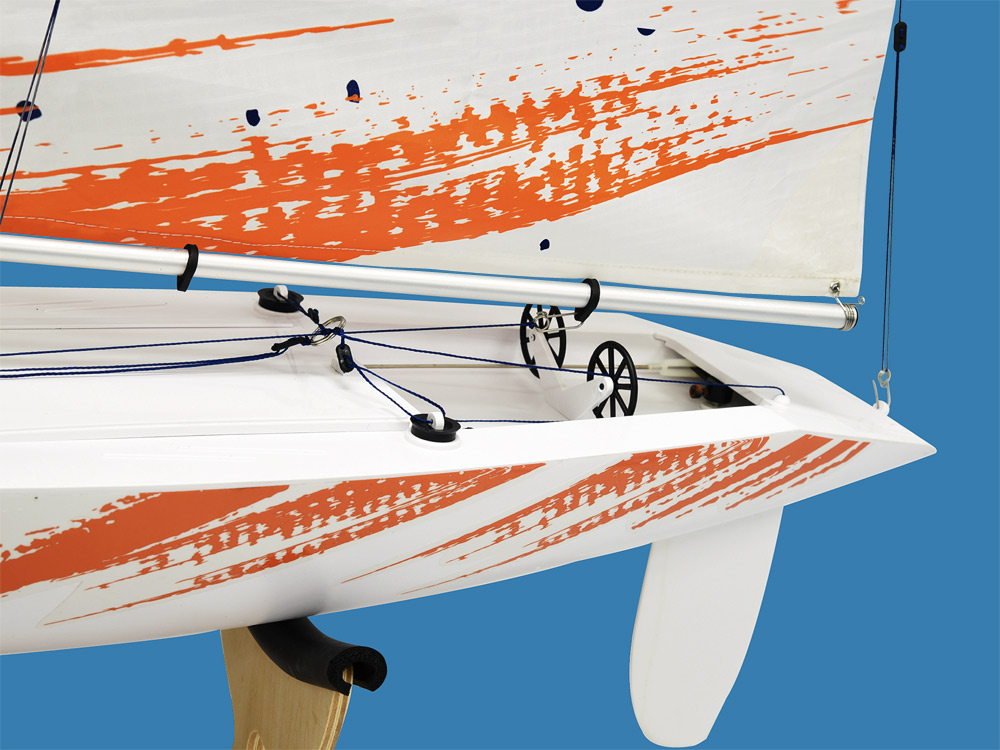
The realistic sail and rigging details combine to result in a model that you will be proud to own.
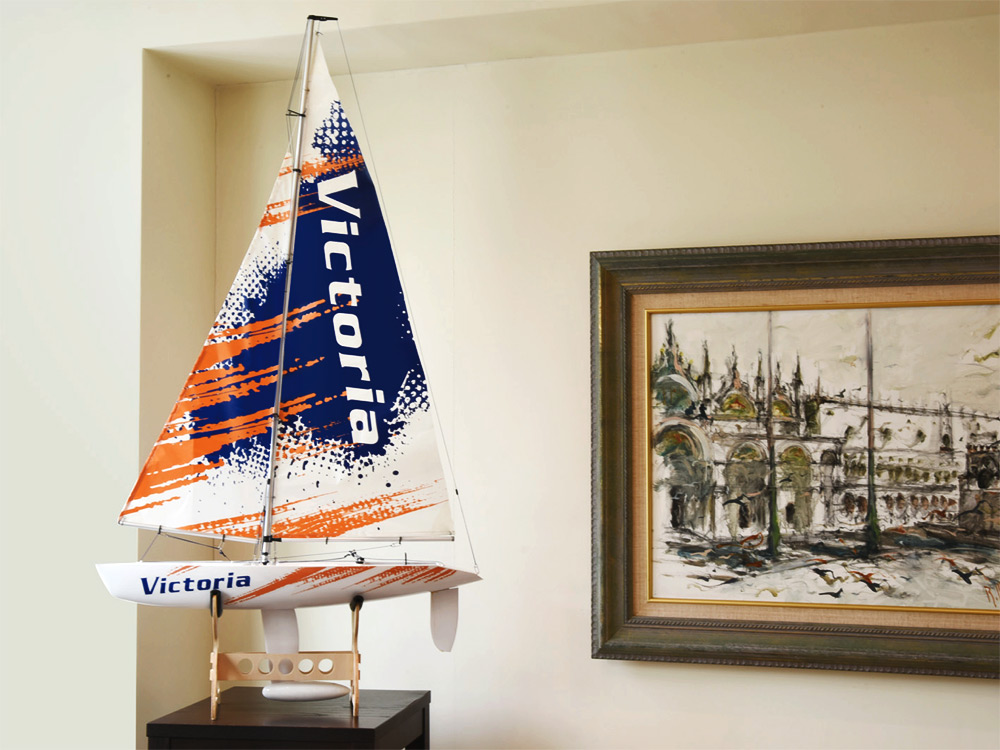
The impressive Victoria stands over 4ft. tall, making it ideal for sailing or display your yacht proudly in home or office.
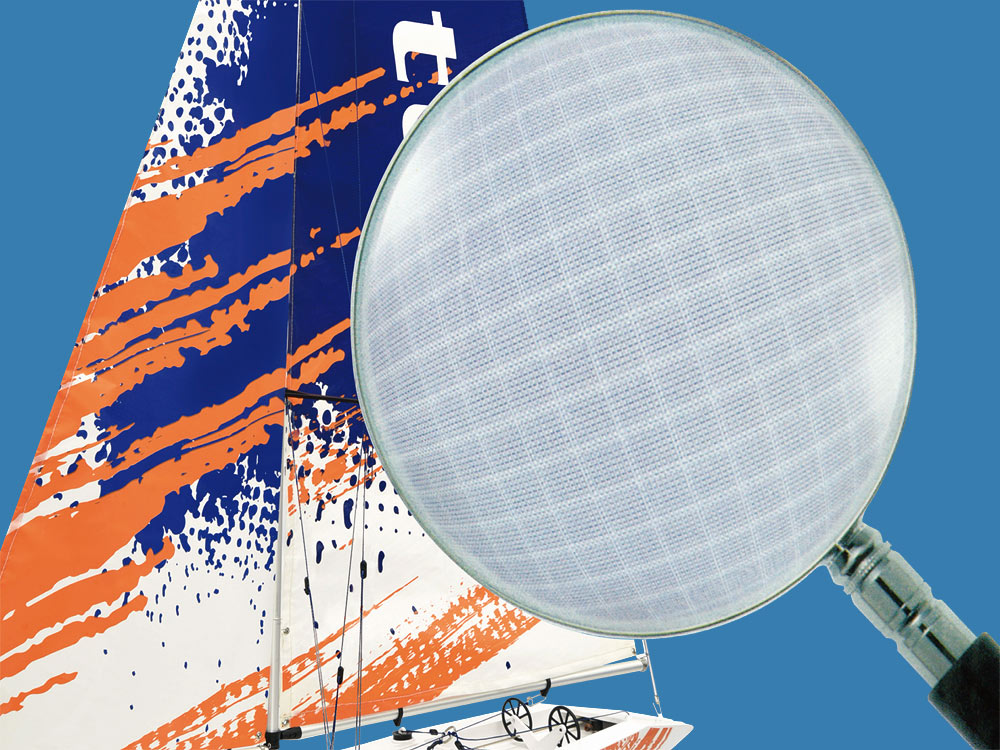
High performance Plus Tear Resist Racing Sails.
File download.
- VICTORIA v2017 Racing Yacht Manual Size: 4.66MB
THUNDER TIGER / About Us News | Download | Video | Terms and Conditions | Privacy Policy | Contact Us
Copyright © 2019 Thunder Tiger All rights reserved.
Pond Sailboat Rigging
by L. Novak (Houston, TX)
Click here to add your own comments
Return to Model Boats Q&A.
Would you prefer to share this page with others by linking to it?
- Click on the HTML link code below.
- Copy and paste it, adding a note of your own, into your blog, a Web page, forums, a blog comment, your Facebook account, or anywhere that someone would find this page valuable.
- Plans Store
- Model Boat Books
- Model Boats Intro
- Building Materials
- Make a Hull
- Plastic Kits
Radio Control
- US Battleships
- Torpedo Boats
- Model Boats Q&A
- Model Ship Gallery
- What's New?
- Privacy Policy

By Petter Blix
Copyright 2009-2018 Building-Model-Boats.com
Trademarks belong to their respective owners
All Rights Reserved
Yachting Monthly
- Digital edition

Expert advice: sails and rigging
- Katy Stickland
- December 22, 2021
Keeping sails and rigging in tip-top shape are of key importance to sailors. Read our tips and tricks from experts to improve their longevity

Sails and rigging are the engine room of any sailing boat from small dinghies up to giant superyachts. No matter how big or how new your boat, the sails and rigging need to be checked regularly and will need intermittent updating.
Updating of rigging on a yacht in particular will often be a requirement for insurance purposes so any owner will want to be mindful of that and make sure they upgrade often enough for those purposes – usually 10-15 years, but check your policy.
But you don’t need to focus on buying new to make improvements to your boat. Sure brand new sails will give you a performance boost, but there is plenty to be done with your old sails and rigging to improve performance and their longevity.
Tidy up your rigging – Dr Nick Bamford

Keeping lines shorter will help keep a clear cockpit. Credit: Dr Nick Bamford
When changing your standing rigging, look at your running rigging too.
The hi-tech, non-stretch polyester with which we just replaced our old wire and rope halyards has massively reduced the friction and now makes hoisting the mainsail a joy.
And this prompted another review. The advantages of all halyards and reefing lines led back to the cockpit, in terms of ease of operation as well as safety, are well known.
But the price you pay is that mountain of spaghetti cluttering up the cockpit!
I realised that a lot of mine was simply not needed. The lines were the length they were because they always had been! It was time for a rethink.
I treated myself to a £20 butane rope knife and set to work, and the result is a joyfully tidy cockpit.
I do have one other rigging tip, which I discovered when I lost a reefing line in the boom.
While specialist mousing devices are not cheap, curtain wire is! And it works a treat

Carabiner at your boom – Harry Dekkers

Carabiners will make it easier to reef. Credit: Harry Dekkers
How often did you try to hook the reefing eye of the mainsail at the forward end of the boom only to find that it has fallen out before you are able to hoist the halyard?
I have overcome this issue by welding carabiners on the existing ramshorn hooks on both sides of the gooseneck.
Secure every inch of your sails – Jonty Pearce

Sails and rigging advice: Ensure genoas are well secured on their roller reefing forestay before leaving the boat. Credit: Theo Stocker
When wandering around marinas, moorings, and boatyards, I am always dismayed by the number of yachts left with a triangle of genoa unfurled on their roller reefing forestay.
Not only does this engender potential weakness as a result of exposure to damaging solar ultraviolet, but that small handkerchief of unrolled sail can be worried by strong winds until it risks a catastrophic unfurling with consequential ripping and destruction of the flogging material.
It seems that every winter I spot a tattered rag of an unfurled sail that could have been properly protected by secure tight rolling.
My habit is to roll my genoa away with at least two turns of overlying sheet to trap the sail; the sheets are then tightened and securely tailed on the winches. This protects against unwanted unfurling and also provides an extra handhold.
When leaving the boat for any time, those more obsessional than I might back the sheets up with a safety lashing around the sail/sheet combination, as well as tying a preventer onto the roller reefing drum so that any damage to its furling line does not result in the sail unwrapping.
Homemade mast steps – Tony Curphey

Tony’s homemade mast steps are still going strong after two circumnavigations of the world. Credit: Tony Curphey
Mast steps are invaluable when you are cruising. They don’t have to be expensive. Mine cost me about £100, which was the price of a flat aluminium bar and Monel pop rivets. It’s necessary to have a good large pop riveter like the trellis one I have.
I used my small, onboard vice to bend them into shape. Make sure each step is wide enough for your foot with hard shoes on.
Start from the deck and put as few on as possible, spacing them apart as far as you can step up. You can use your bosun’s chair to drill and rivet, using 4x 6.4mm rivets per step.
Finish off with two together at the top so that you can stand on them and work at the very top of the mast.
I finished mine off with gold spray paint to match Nicola Deux ’s 1970s mast.
The mast steps have been there for five years and two circumnavigations, and are as firm and strong as when first fitted.
The mast has 14 steps, but I have long legs.
DIY quick-release soft shackles – Duncan Wells
Soft shackles are just the business these days; easy on the hands, no chafe to worry about and no pin to drop in the drink.
Soft shackles made from Dyneema are lighter and stronger than stainless steel, they are also kinder to your boat and your hands.
But a soft shackle, such as the one above does still present and issue in that getting them undone does require you to pull the inner core to open the loop end and allow the diamond knot through. This is why a quick-release system is a good idea.

Tie off the ends once you have passed your quick release lanyard through the shackle. Credit: Duncan Wells
Pull the inner core of the shackle out so it makes a loop sufficient to get the diamond knot through comfortably.
Then make your hole. Use a fid (a pen or screwdriver will do) to separate the 12-strand rope, pass the lanyard through and tie in a knot. Now set the shackle and smooth the outer core from the diamond knot end to the loop end and nip it up tight.
To release, pull on the lanyard.
Preventing chafe on sails and rigging – Julian and Patricia Morgan

Sewing on anti-chafe covers to lines ahead of a passage. Credit: Patricia and Julian Morgan
Chafe and rubbing damage is an ongoing enemy and it is surprising how quickly small rubs can lead to considerable damage to sheets, sails, halyards, lines and equipment.
On long-distance passages we do a detailed boat inspection, using a checklist, at least twice a day, including looking for signs of chafe.
We have installed tough anti-chafe covers on halyards and reefing lines where damage is likely, for example where ropes pass around sheaves or blocks.
We carry a bag full of short lengths of plastic pipe, which we use to pass over mooring and other lines when wear is likely to be an issue.
We also have plenty of readymade Dyneema soft shackles and loops, and have replaced many of our shackles with Dyneema equivalents, again reducing wear and damage.
Sails are very susceptible to chafe on long passages.
We have to be careful that our mainsail does not rub on our spreaders and shrouds when sailing downwind and have had covers sewn over our batten pockets where chafe has arisen.
We put one reef in the main when running to stop the sail touching the upper intermediate shrouds.
The ideal Genoa sheet attachment – Vyv Cox

Sails and rigging advice: A soft shackle makes an ideal genoa sheet attachment. Credit: Vyv Cox
There are many different ways in which genoa sheets may be attached to the sail, ranging from the simple but inelegant cow hitch, via bowlines or other knots, to some quite sophisticated methods.
In most cases they may be much of a muchness but there is one particular case that complicates the issue, and this is the presence of a baby-stay.
On our boat the combination of a large overlapping genoa and baby-stay has probably led to more sailing foul-ups than anything else on the boat.
Over the years we have tried most common methods of attachment but in every one there is a good chance that the knot or join will catch when tacking.
The only answer, short of going forward to unhitch it is to let the boat’s bow fall away until the sail blows free, not conducive to efficient tacking and doubling the effort of sheeting the sail home on the new tack.
We have tried most types of bearing on the stay itself, large and small diameter plastic tubes in various order, but none was truly satisfactory.
Then, soft shackles came onto the market. This seemed like the perfect solution to the problem, and so it proved.
I spliced loops into the end of each sheet, not quite as easily as it might have been as I was using a welding rod as a fid, and working with rope that was several years old.
Nonetheless, after an afternoon’s work we had a new system to try and the transformation was remarkable.
I cannot claim that the sail never hangs up on tacking but the occasions are pretty rare.
We have now used this same original shackle for 10 years and it continues to give excellent service.
Permanent boom preventer – Helen Melton

A permanent preventer attachment makes sailing easier. Credit: Helen Melton
Our Westerly Ocean 43 has a large, fully battened mainsail.
In light winds, or in anything less than flat seas, we have found it is essential to pin the main into place to curb any unnecessary flogging and hence prevent an accidental crash gybe.
Having a dedicated preventer line and pulley blocks in the cockpit locker ready for such conditions was helpful, but attaching it to the end of the boom in a centre cockpit boat whilst at sea felt like a needlessly hazardous manoeuvre that I wasn’t comfortable with.
We solved the problem by rigging a permanent line along the underside of the boom, one end with a hard eye splice and the other with a snap shackle.
From the relative safety of the mast foot, the preventer can now be secured and winched into place.
Wash your turning blocks with warm water – Graham Walker

Sails and rigging advice: Salt crystals and other debris can prevent turning blocks and clutches from running smoothly. Credit: Graham Walker
Before we set off on our Atlantic passage from Las Palmas, we had an expert rigger do full rig inspection for us.
At the same time he gave us a lot of valuable advice about maintenance.
One thing he recommended was to wash all of our turning blocks and clutches with warm, fresh water to remove all the salt crystals and other debris ingrained in the blocks and their bearings.
We took his advice and used a lot of warm water to wash everything down thoroughly.
It was eye-opening to see how much friction we were able to remove from the system by getting everything really clean.
That then translated directly into less effort on sail handling and sail changes.
Think like a climber – Helen Melton

Using an ascender and climbing hardness has made it easier for the crew of SeaEye to climb the mast. Credit: Helen Melton
After a few years of taxing work winching a crew member, sat in a bosun’s chair, up the mast we rethought how to lighten the load, (literally) and bought ourselves two ascenders and a climbing harness.
Also known as jumars, they clip and lock to a rope – we use the spinnaker halyard on our boat – sliding freely in one direction but clamping firmly when pulled in the opposite direction.
By using them in pairs, one with a foot loop affixed, the climber can alternate taking weight through their harness whilst easily manoeuvring the other upwards, then stepping up on the foot loop.
In an emergency, the mast can be ascended alone without support whilst if crew are available, a second halyard can be used as a safety line.
This brings about an added advantage when descending in that they can be lowered away efficiently on the winch.
A rigger, who has recently worked on our boat, works alone and always uses this technique, mousing his own halyard to be 100% certain of the condition of the line bearing his weight.
It is recommended that you wear a helmet when climbing the mast.
Check furling line fairleads – Harry Dekkers

A worn furling line fairlead can make hauling lines heavy work. Credit: Harry Dekkers
Do you sometimes wonder why your headsail furling line is not running freely? Is it the wind, the furling system itself or is it a problem with the furling line fairlead?
I found out that mine was 50 pert cent worn out, as you can see in the picture.
No wonder it took me a lot of effort.
It is also worth remembering that when unfurling your headsail, always control the furling line because if a strong wind makes the headsail run out too fast, the furling line will be tangled in the furling drum and you will only notice it once you need to furl the sail again
Practice working aloft – Graham Walker

Sails and rigging advice: Make sure every crew member has experience going aloft. Credit: Kate Walker
Who normally goes aloft when the need arises?
Depending on the task and the situation it may not always be appropriate for this to be the most experienced person (possibly the skipper) or the lightest member of the crew.
On a long passage it makes good sense for all members of the crew to have experience going aloft and putting other crew members aloft.
Before our transatlantic we made sure that everyone on board had the opportunity to go aloft and experience working on the mast.
Cost-effective mainsheet horse – Tony Curphey

Tony’s mainsheet horse has stood up well to a circumnavigation of the world. Credit: Tony Curphey
Most of the changes I make to my Nicholson 32 are for economic and simplistic reasons.
When I built the new large stern locker to reduce the volume of my cockpit, I had to move the mainsheet horse.
The new mainsheet horse was very simple and cost only the price of four new long 12mm stainless steel ringbolts.
It is also better than the old one because it’s higher so doesn’t chafe on the top guardrail when sailing off the wind.
I used the original four bolt holes for the new long ringbolts but raised them with hardwood by 5 inches.
A single length of 3-strand pre-stretched 10mm polyester rope (the boltrope from an old sail) was passed through all four ringbolt eyes and the ends tied together.
The sliding part of the horse is a 12mm stainless steel bow shackle, over all four parts of the rope. All ringbolts have equal strain.
The rope horse did a complete circumnavigation via the Southern Ocean with very little sign of wear.
Put chafe guard on your genoa sheet – Graham Walker

Chafe guard will make your sheets last longer. Credit: Graham Walker
When we started sailing longer passages we read about the problem of chafe, particularly on genoa sheets when poled out downwind.
The junction between the jaw on the pole and the section of sheet just behind the bowline seemed to be a particular area of wear.
\We learnt that rigging the pole so as to minimise movement between the jaw and the sheet makes a massive difference.
To try to eliminate any possible chafe we put Dyneema chafe guard on the first 2m of the genoa sheets, covering the area that would be in contact with the pole jaw.
After 12 years we’ve replaced a few metres of chafe guard, but we still have our original genoa sheets.
Enjoyed reading Expert advice: sails and rigging?
A subscription to Yachting Monthly magazine costs around 40% less than the cover price .
Print and digital editions are available through Magazines Direct – where you can also find the latest deals .
YM is packed with information to help you get the most from your time on the water.
- Take your seamanship to the next level with tips, advice and skills from our experts
- Impartial in-depth reviews of the latest yachts and equipment
- Cruising guides to help you reach those dream destinations
Follow us on Facebook , Twitter and Instagram.

- standing rigging
- rope and line
- cams, cleats and clutches
- head sail gear
- roller furling
- main sail control
- mast hardware
- eye straps and pad eyes
- fairleads and bulls eyes
- anchor and docking
- miscellaneous hardware
- Alexander Roberts
- My Wishlist
We will be closed Friday, March 29th in observance of Good Friday.
Rigging Only is a full service rigging shop. All running rigging, standing rigging, life lines, wire splicing, and custom hardware are assembled right here in our shop. We know our products, and we deliver that expertise with every job we do.
N ote: Some orders may incur additional shipping costs, particularly those with heavy or long items.
All prices are subject to change without notice.
Location & Hours

- Customer Service
- Order Tracking
- Your Account
- Store Policies & Info
- Privacy Policy
- Helpful Links
- Payment Methods
Shopping Cart: 0 Items
Rig Sails: A Comprehensive Guide to Sailboat Rigging
by Emma Sullivan | Aug 19, 2023 | Sailboat Gear and Equipment

Short answer: rig sails
Rig sails refer to the various types of sails used in sailing rigs. They include mainsails, jibs, spinnakers, genoas, and more. Rig sails play a crucial role in harnessing wind power to propel boats and are designed for different wind conditions and sailing purposes.
How to Rig Sails: A Step-by-Step Guide for Beginners
Title: Mastering the Art of Rigging Sails: A Step-by-Step Guide for Novice Sailors
Introduction: Sailing, with its mystique and undeniable allure, has been captivating hearts for centuries. As a beginner sailor, understanding the process of rigging sails may seem like venturing into uncharted waters. Fear not! In this comprehensive guide, we will take you through the ins and outs of sail rigging, ensuring smooth sailing experiences ahead.
1. Unveiling the Anatomy of a Sailboat: Before delving into rigging sails, it is essential to familiarize yourself with the fundamental components of a sailboat . From mast to boom, stays to shrouds, each part plays a crucial role in successfully setting up your sails for optimum performance .
2. The Art of Preparation: Preparing your sailboat before embarking on your adventure is akin to an artist priming their canvas before creating a masterpiece. This section covers key pre-rigging steps such as inspecting your equipment for wear and tear, verifying weather conditions, and readying necessary tools.
3. Setting Up the Mast: The mast serves as the backbone of your sailboat’s rigging system. We will guide you through erecting and securing this towering structure with precision and ease while emphasizing safety measures that should never be overlooked.
4. Attaching Shrouds and Stays: Once the mast is securely in place, attaching shrouds (cables supporting vertical stability) and stays (supporting lateral stability) work together harmoniously to maintain balance during sailing maneuvers. Our step-by-step instructions ensure these crucial elements are properly adjusted for optimal sail performance .
5. Hoisting Your Sails Before Hoisting Anchor: This exciting moment marks when all previous efforts culminate into tangible forward momentum on water! Guided by our expert advice, we’ll walk you through hoisting main sails or jibs sequentially while highlighting commonly overlooked details that impact sail trim and efficiency.
6. Fine-tuning Sail Trim: As any seasoned sailor will attest, the art of sail trim can transform a seemingly average voyage into an exhilarating, breeze-filled escapade. Gain insights into adjusting sail controls, such as halyards and sheets, to optimize sailing performance in various wind conditions.
7. Navigating Nautical Knots: A sailor’s toolkit is incomplete without proficiency in tying essential knots . In this segment, we’ll showcase a selection of nautical hitching marvels, from the versatile bowline to the secure figure-eight knot . Master these knot-tying skills for security and confidence when rigging sails .
8. Deploying Safety Measures: While embracing the excitement of setting out on your sailing adventure, it is paramount to prioritize safety precautions that protect you and your crew on the water. We’ll share vital tips regarding life jacket usage, weather awareness, emergency protocols, and more.
9. Practice Makes Perfect: Troubleshooting Common Issues: Even with meticulous planning and execution during sail rigging, occasional mishaps may occur while on the water. Fear not; this section unravels common troubleshooting scenarios a novice might face along their journey while providing practical solutions to keep any minor setbacks from dampening spirits.
Conclusion: With this all-encompassing guide to rigging sails designed exclusively for beginners like you, embark on your maiden voyage with confidence! By understanding each step intricately and embracing best practices in safety and knot-tying techniques, you’ll master the art of rigging sails—a critical stepping stone towards becoming an adept sailor capable of navigating endless seascapes with grace. So hoist those sails high as you venture forth into a world brimming with endless possibilities—it’s time to set sail!
Mastering the Art of Rigging Sails: A Comprehensive FAQ
Are you ready to take your sailing skills to the next level? Look no further! In this comprehensive FAQ, we will dive into everything you need to know about mastering the art of rigging sails . From understanding the different types of rigging systems to troubleshooting common issues, we’ve got you covered. So grab a cup of coffee and let’s set sail on this knowledge-filled adventure !
1. What is Rigging and Why is it Important? Rigging refers to the system of ropes, wires, and other devices used to support and control the sails on a boat . It plays a vital role in harnessing the wind’s power effectively, allowing sailors to maneuver their vessels with precision. Proper rigging ensures optimal sail shape, enhances speed and stability, and improves overall performance on the water.
2. Different Types of Rigging Systems There are several types of rigging systems commonly used in sailing:
– Fractional Rig: This type employs a forestay that attaches below the masthead, making it highly versatile for various wind conditions. – Masthead Rig: In this traditional rig setup, both the headstay and backstay attach at the top of the mast. – Cat-Rigged: A single mast positioned well forward in the boat characterizes cat-rigged vessels . – Slutter Rig: Combining elements from both sloop and cutter rigs, slutter rigs use more than one headstay.
Understanding these different rig configurations allows sailors to choose what best suits their intended use and sailing conditions.
3. Essential Knots for Sail Rigging Knot tying is an essential skill for any sailor . Here are a few crucial knots for sail rigging:
– Bowline Knot: This versatile knot creates a secure loop that won’t slip under load. – Cleat Hitch: Used for securing lines onto cleats without tying knots . – Reef Knot: Ideal for tying two ends of a line together, especially when reefing sails . – Taut-Line Hitch: Perfect for adjusting the tension of a line under load.
Mastery of these knots will make sail rigging both efficient and effective.
4. Troubleshooting Common Rigging Issues Rigging problems can arise even for seasoned sailors. Here are some common issues you may encounter and how to tackle them:
– Excessive Mast Bend: This can lead to inefficient sail shape. Adjust the backstay tension to correct it. – Loose Shroud or Stay: A loose shroud affects mast stability and ultimately, sail performance. Tighten the appropriate stay using a turnbuckle or other tensioning mechanisms. – Slipping Halyards: Prevent halyards (ropes used to raise sails) from slipping by tying a stopper knot at the end. – Snapped Masthead Sheave: Replace the damaged sheave with a similar-sized one before it compromises your sailing experience .
Remember that regular inspections and maintenance are crucial for preventing major rigging mishaps.
5. Tips for Efficient Sail Rigging To maximize your sail rigging efficiency, consider these valuable tips:
– Label Your Lines: Invest time in labeling your lines according to their function or purpose; this saves time during set-up or troubleshooting. – Use High-Quality Hardware: Investing in top-notch pulleys, blocks, and shackles ensures reliability during critical moments on the water . – Practice Kaizen Methodology: Continuously seek small improvements in your rigging setup over time to enhance overall system performance gradually.
By adhering to these tips, you’ll be well on your way to becoming a seasoned sailor who consistently achieves peak rigging proficiency.
Mastering the art of rigging sails is an exciting journey filled with endless learning opportunities. Understanding different types of rigs, essential knots, and troubleshooting common issues will empower you as a sailor. Remember to prioritize regular maintenance, practice efficient rigging techniques, and continuously seek improvement. So go ahead, hoist your sails, catch the wind, and embark on unforgettable nautical adventures !
Exploring the Different Types of Rig Sails: Which One is Right for You?
Title: Exploring the Different Types of Rig Sails: Which One is Right for You?
Introduction: When it comes to sailing, one crucial element that determines the performance and maneuverability of your boat is its rig sails. Designed to harness the power of the wind, rig sails come in various types, each offering unique characteristics and advantages. In this blog post, we will delve into the different types of rig sails available, helping you navigate through your options and choose the perfect one for your sailing needs.
1. The Classic Mainsail: Starting off with a timeless choice, the classic mainsail remains a popular option due to its versatility and easy handling. Its triangular shape offers excellent efficiency in directional stability and steering upwind. This traditional sail design allows sailors to adjust settings swiftly in response to changing wind conditions, making it ideal for both cruising enthusiasts and racing warriors alike.
2. The Genoa: For those seeking enhanced speed and performance, look no further than the genoa sail. As an overlapping headsail that extends beyond the mast’s leading edge, this type of sail maximizes surface area exposed to wind pressure, translating into increased momentum while sailing close-hauled or reaching. With impressive light-air capabilities and superb pointing ability when partially reefed, genoas are a favorite among competitive sailors chasing buoy-to-buoy supremacy.
3. The Jib: Similar to a genoa but with less overlap on the mast’s leading edge, jibs find favor among sailors seeking greater balance between speed and manageability. Their reduced surface area generates reasonable power without compromising control during gusty conditions or tighter maneuvers . Overall, jibs make excellent companions for cruisers embarking on long journeys where varying wind conditions may be encountered.
4. The Spinnaker: Enterprising thrill-seekers looking to catch downwind winds with flair will undoubtedly appreciate spinnakers’ gossamer elegance and exhilarating potential for acceleration. Often employed during downwind sailing or racing, these large, billowing sails can capture even the slightest zephyr, propelling your boat to impressive speeds. Spinnakers come in a wide range of cuts and sizes, from traditional symmetrical designs to asymmetrical versions that simplify handling for solo sailors.
5. The Code Zero: When it comes to reaching faster than the wind itself or making significant headway at low wind angles, using a Code Zero sail is an ingenious choice . This specialized sail combines the characteristics of both a genoa and a spinnaker, tingling your competitive instincts with remarkable speed possibilities in light air conditions. Its projecting bow-sprit allows effective sheeting angles and creates lift while minimizing drag, ensuring you triumph over calmer waters .
Conclusion: Choosing the right rig sails involves assessing various factors such as your sailing style preferences, your boat’s design and size, and the prevailing weather conditions you typically encounter. Whether you opt for the time-honored mainsail or revel in the adrenaline rush provided by spinnakers or Code Zero sails, understanding their strengths will enable you to select the most suitable sail for maximum performance on your voyages. So weigh anchor , hoist your chosen rig sail high and confidently set course towards endless nautical adventures!
Pro Tips and Tricks for Efficiently Rigging Sails to Enhance Performance
As sailing enthusiasts, we understand the importance of harnessing the power of the wind to maximize performance on the water. Rigging your sails efficiently is not only key to enhancing your boat’s speed, but it also improves maneuverability and overall control. In this blog post, we’ll delve into some professional, witty, and clever tips and tricks that will take your sail rigging skills to the next level.
1. Choose the right materials: The choice of materials for your sail rigging can greatly affect its performance . Opt for high-quality lines that ensure minimal stretch, such as Dyneema or Spectra. These are not only lightweight but also provide excellent strength and durability.
2. Tension is everything: Proper tensioning of your rigging lines is crucial for optimal sail shape and control. Too loose, and you risk losing power; too tight, and you may hinder maneuverability. Experiment with different tensions until you find the sweet spot that maximizes both speed and responsiveness.
3. Know your angles: Understanding how wind interacts with your sails at different angles is a game-changer in sail rigging efficiency. Adjusting your sheets based on wind direction allows you to fine-tune sail shape and trim effectively. Keep in mind that small tweaks make a big difference!
4. Balance is key: Achieving a balanced rig ensures that the forces acting on your boat are evenly distributed across all sails . This minimizes excess heel or weather helm discrepancies, resulting in better control and improved performance. Invest time in adjusting shrouds, stays, and halyards to achieve perfect balance.
5. Be mindful of weight distribution: A well-balanced boat not only requires proper rig tuning but also careful attention to weight distribution onboard – including crew positioning! Storing heavy gear low in the boat reduces unnecessary drag while maintaining stability.
6. Take advantage of sail controls: Utilize cunningham, outhauls, and leech lines to fine-tune your sails’ shape under different wind conditions. These control mechanisms allow for quick adjustments on the fly, ensuring that your sails are always optimized for performance .
7. Innovative gadgets: The sailing world is never short of clever gadgets designed to enhance rigging efficiency. Explore options like mast-mounted cameras or sensors that provide real-time feedback on sail shape and trim , allowing you to adjust and optimize accordingly.
8. Seek professional guidance: Investing in a professional rigging tune-up can significantly improve your sailing experience . Knowledgeable professionals can help identify any issues with your setup or offer expert advice tailored to your specific boat and needs.
9. Embrace trial and error: Sailing is a lifelong learning process, so don’t be afraid to experiment! Rigging sails efficiently often requires tinkering and making adjustments until you find the perfect setup for your vessel. Each boat is unique, so embrace the journey of finding what works best for you.
10. Have fun! While rigging sails may seem like a technical chore at times, it’s important to remember why we love sailing – the sheer joy of being out on the water! So don’t forget to enjoy the process, celebrate even small improvements in performance, and share a laugh with fellow sailors along the way.
By incorporating these pro tips and tricks into your sail rigging routine, you’ll not only enhance your boat’s performance but also deepen your understanding of the art of sailing. So grab those lines, hop aboard, and let the wind carry you towards newfound speed and excitement!
Common Mistakes to Avoid When Rigging Sails and How to Fix Them
Rigging sails may seem like a straightforward task, but even the most seasoned sailors can make mistakes that result in compromised performance or even safety hazards on the water. In this blog post, we will highlight some common mistakes to avoid when rigging sails and provide you with effective solutions to fix them. Get ready to set sail with confidence!
1. Insufficient Tension: One of the most common mistakes is failing to achieve sufficient tension in your sails. A poorly tensioned sail can lead to reduced speed , unstable handling, and decreased control over your vessel. To fix this issue, invest in a reliable tension gauge specifically designed for sailboat rigging. Follow manufacturer recommendations to ensure the ideal tension for your particular sails.
2. Misaligned Mast: A misaligned mast is another frequent mistake that can affect sail efficiency . Ensure that your mast is properly aligned both horizontally and vertically before setting off on your sailing adventure . Utilize a spirit level and adjust accordingly until it aligns perfectly perpendicular to the deck.
3. Incorrect Halyard Tension: Neglecting proper halyard tension can cause unwanted wrinkles or excessive sagging in your sails, hampering their performance significantly. Take the time to understand the specific requirements of each type of halyard on your boat and adjust them accordingly during rigging for optimal performance.
4. Mismatched Sail Shape: Using a mismatched or improperly trimmed sail shape is a grave error that can hinder sailing efficiency greatly. Invest time in learning how different types of sails should be shaped and trimmed based on wind conditions and points of sail (such as upwind or downwind). Regularly adjust trim settings while observing telltales for indications of efficient airflow over the surface of the sail .
5. Inadequate Sheet Length: If you find yourself struggling to trim or control your sails due to inadequate sheet length (rope used to control the angle), it’s time for an upgrade. Ensure that your sheet length accommodates the full range of sail adjustment required during various wind conditions and sailing angles. Purchase longer sheets or consider installing a suitable purchase system to ensure optimal control.
6. Disorganized Running Rigging: A cluttered or disorganized running rigging setup not only makes it difficult to operate smoothly but can also lead to tangled lines or malfunctioning hardware. Take the time to neatly organize and label your lines, ensuring easy identification and a streamlined operation on deck.
7. Neglected Standing Rigging Inspection: Over time, wear and tear can weaken standing rigging components such as shrouds and stays. Neglecting routine inspections can result in unexpected failures that jeopardize both crew safety and equipment integrity. Regularly inspect all standing rigging elements for signs of damage, corrosion, or fatigue; replace any suspect parts promptly before undertaking any voyages.
By avoiding these common mistakes and addressing them properly with the provided solutions, you’ll be well on your way to optimizing your sailboat’s performance while maintaining safety on the water. Remember, attention to detail and continuous learning are key when it comes to rigging sails effectively – so embrace the challenge and set sail with confidence!
The Ultimate Cheat Sheet for Troubleshooting Your Rigging Sails
Title: The Ultimate Cheat Sheet for Troubleshooting Your Rigging Sails: Unveiling the Secrets of Smooth Sailing
Introduction:
Setting sail and gliding through the open waves with your trusty vessel is an exhilarating experience every sailor craves. However, sailing bliss can quickly turn into a nightmare if your rigging sails encounter problems along the way. Whether you’re a seasoned sailor or just starting out in this adventure, our ultimate cheat sheet will equip you with insightful tips and tricks to troubleshoot rigging sail issues like a true professional. So, gather around fellow sailors, as we embark on this journey to uncover the secrets of smooth sailing !
1. Unraveling the Mysteries of Mast and Boom Alignment:
One crucial aspect of troubleshooting your rigging sails lies in ensuring proper alignment between the mast and boom. Misalignment can result in inefficient performance and even potential damage to your entire rigging system. To tackle this issue effectively: – Start by examining all fittings and connections thoroughly. – Verify that linear alignment is maintained when viewed from multiple angles. – Utilize a tension gauge to achieve optimal tension across the shrouds and stays.
2. Nipping It in the Bud: Dealing with Frayed or Damaged Lines:
Frayed or damaged lines are not only visually unappealing but also compromise their strength, putting your sails at risk during strong winds or sudden maneuvers. By following these steps, you can address this common problem head-on: – Regularly inspect all lines for signs of wear such as fraying, cuts, or thinning sections. – Replace any compromised lines immediately to ensure maximum safety. – Opt for high-quality materials resistant to UV rays and wear-and-tear for durability.
3. Grave Dangers Lurking Aloft: Identifying Issues with Standing Rigging:
The standing rigging plays a vital role in providing stability and support to your sails while underway. Spotting potential issues affecting the standing rigging can save you from catastrophic failures out on the water: – Conduct a comprehensive visual inspection, looking for signs of rust, corrosion, or deformities in key components. – Assess the tension of your shrouds and stays, making adjustments as required to maintain proper tuning. – Seek professional assistance if you encounter severe structural concerns to avoid compromising safety.
4. Untangling Snaggy Situations: Resolving Halyard Hang-Ups:
There are few things more frustrating than a halyard getting tangled or jamming at the most inconvenient moments. Here’s how to steer clear of such snags: – Regularly inspect halyards for signs of fraying or wear near sheaves and exits points. – Lubricate moving parts with quality marine-grade lubricants to ensure smooth halyard movement. – Install external organizers or fairleads where needed to guide halyards away from obstructions.
Conclusion:
Nailing down the art of troubleshooting your rigging sails is the key to achieving uninterrupted adventures on the open seas. By following this ultimate cheat sheet, you can confidently face common issues head-on and navigate through unexpected challenges like a seasoned sailor. Remember, diligence in maintenance and a deep understanding of your rigging system will unlock a world of safe and unforgettable sailing experiences. So tighten those lines, set sail with confidence, and let the wind carry you towards new horizons!
Recent Posts
- Approaching a Mooring Buoy: Essential Tips for Safe Navigation
- Best Tiller Autopilot: Enhance Your Sailing Experience
- Nautical Navigator: Essential Tools and Techniques for Seamanship
- Sail Making Material: A Comprehensive Guide
- 2 Person Dinghy: The Ultimate Guide to Choosing the Perfect Boat
- Sailboat Gear and Equipment
- Sailboat Lifestyle
- Sailboat Maintenance
- Sailboat Racing
- Sailboat Tips and Tricks
- Sailboat Types
- Sailing Adventures
- Sailing Destinations
- Sailing Safety
- Sailing Techniques
Sailboat Parts Explained: Illustrated Guide (with Diagrams)
When you first get into sailing, there are a lot of sailboat parts to learn. Scouting for a good guide to all the parts, I couldn't find any, so I wrote one myself.
Below, I'll go over each different sailboat part. And I mean each and every one of them. I'll walk you through them one by one, and explain each part's function. I've also made sure to add good illustrations and clear diagrams.
This article is a great reference for beginners and experienced sailors alike. It's a great starting point, but also a great reference manual. Let's kick off with a quick general overview of the different sailboat parts.
General Overview
The different segments
You can divide up a sailboat in four general segments. These segments are arbitrary (I made them up) but it will help us to understand the parts more quickly. Some are super straightforward and some have a bit more ninja names.
Something like that. You can see the different segments highlighted in this diagram below:
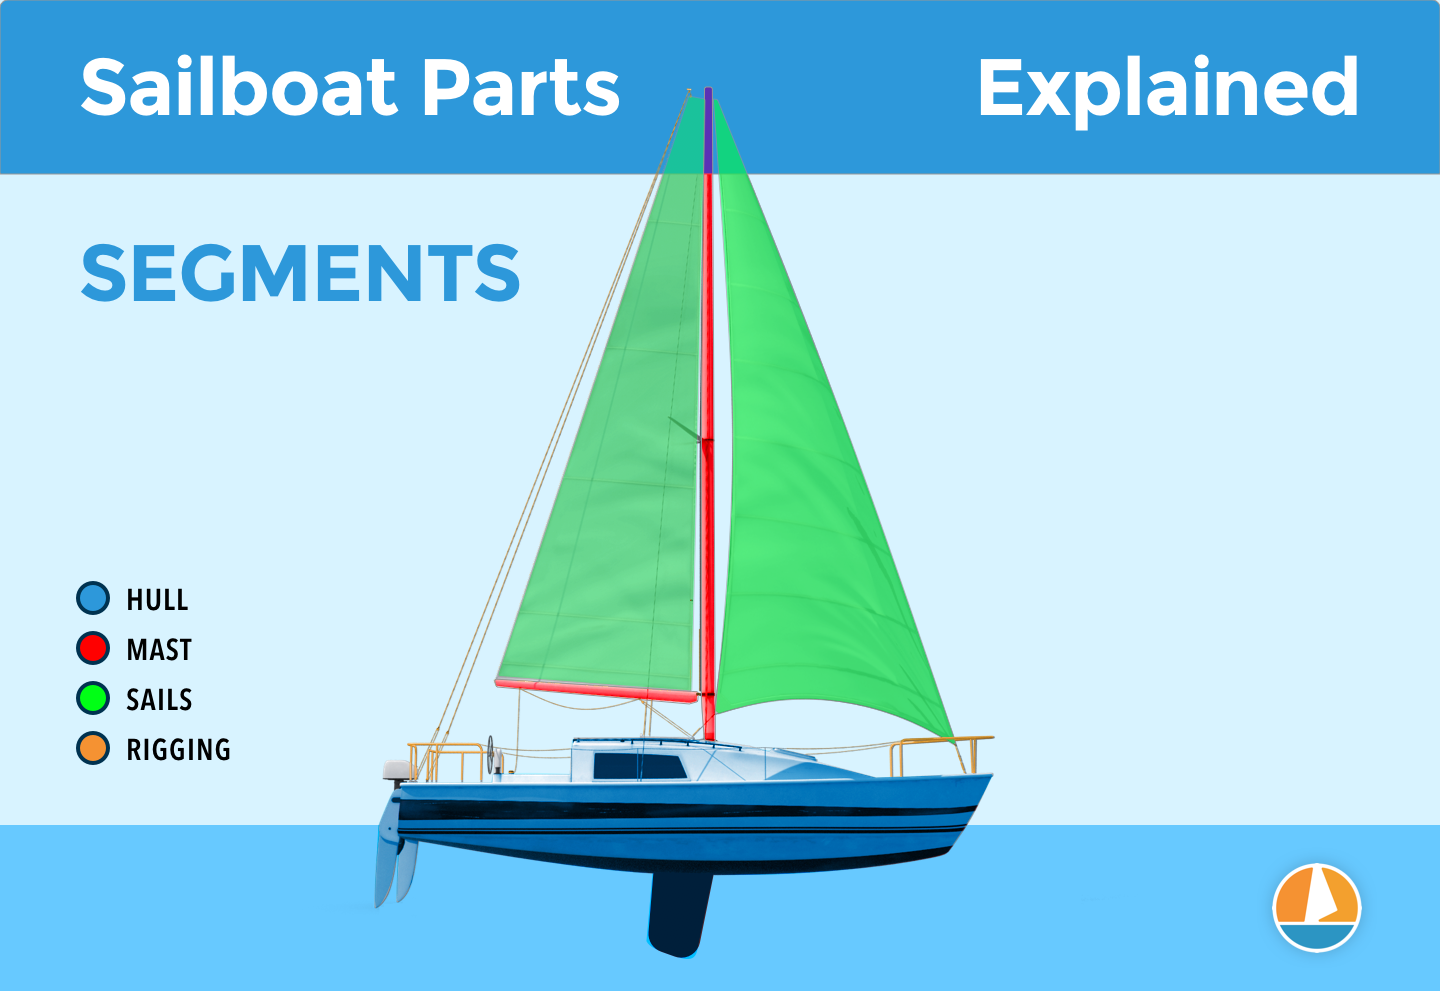
The hull is what most people would consider 'the boat'. It's the part that provides buoyancy and carries everything else: sails, masts, rigging, and so on. Without the hull, there would be no boat. The hull can be divided into different parts: deck, keel, cabin, waterline, bilge, bow, stern, rudder, and many more.
I'll show you those specific parts later on. First, let's move on to the mast.

Sailboats Explained
The mast is the long, standing pole holding the sails. It is typically placed just off-center of a sailboat (a little bit to the front) and gives the sailboat its characteristic shape. The mast is crucial for any sailboat: without a mast, any sailboat would become just a regular boat.
I think this segment speaks mostly for itself. Most modern sailboats you see will have two sails up, but they can carry a variety of other specialty sails. And there are all kinds of sail plans out there, which determine the amount and shape of sails that are used.
The Rigging
This is probably the most complex category of all of them.
Rigging is the means with which the sails are attached to the mast. The rigging consists of all kinds of lines, cables, spars, and hardware. It's the segment with the most different parts.
The most important parts
If you learn anything from this article, here are the most important parts of any sailboat. You will find all of these parts in some shape or form on almost any sailboat.
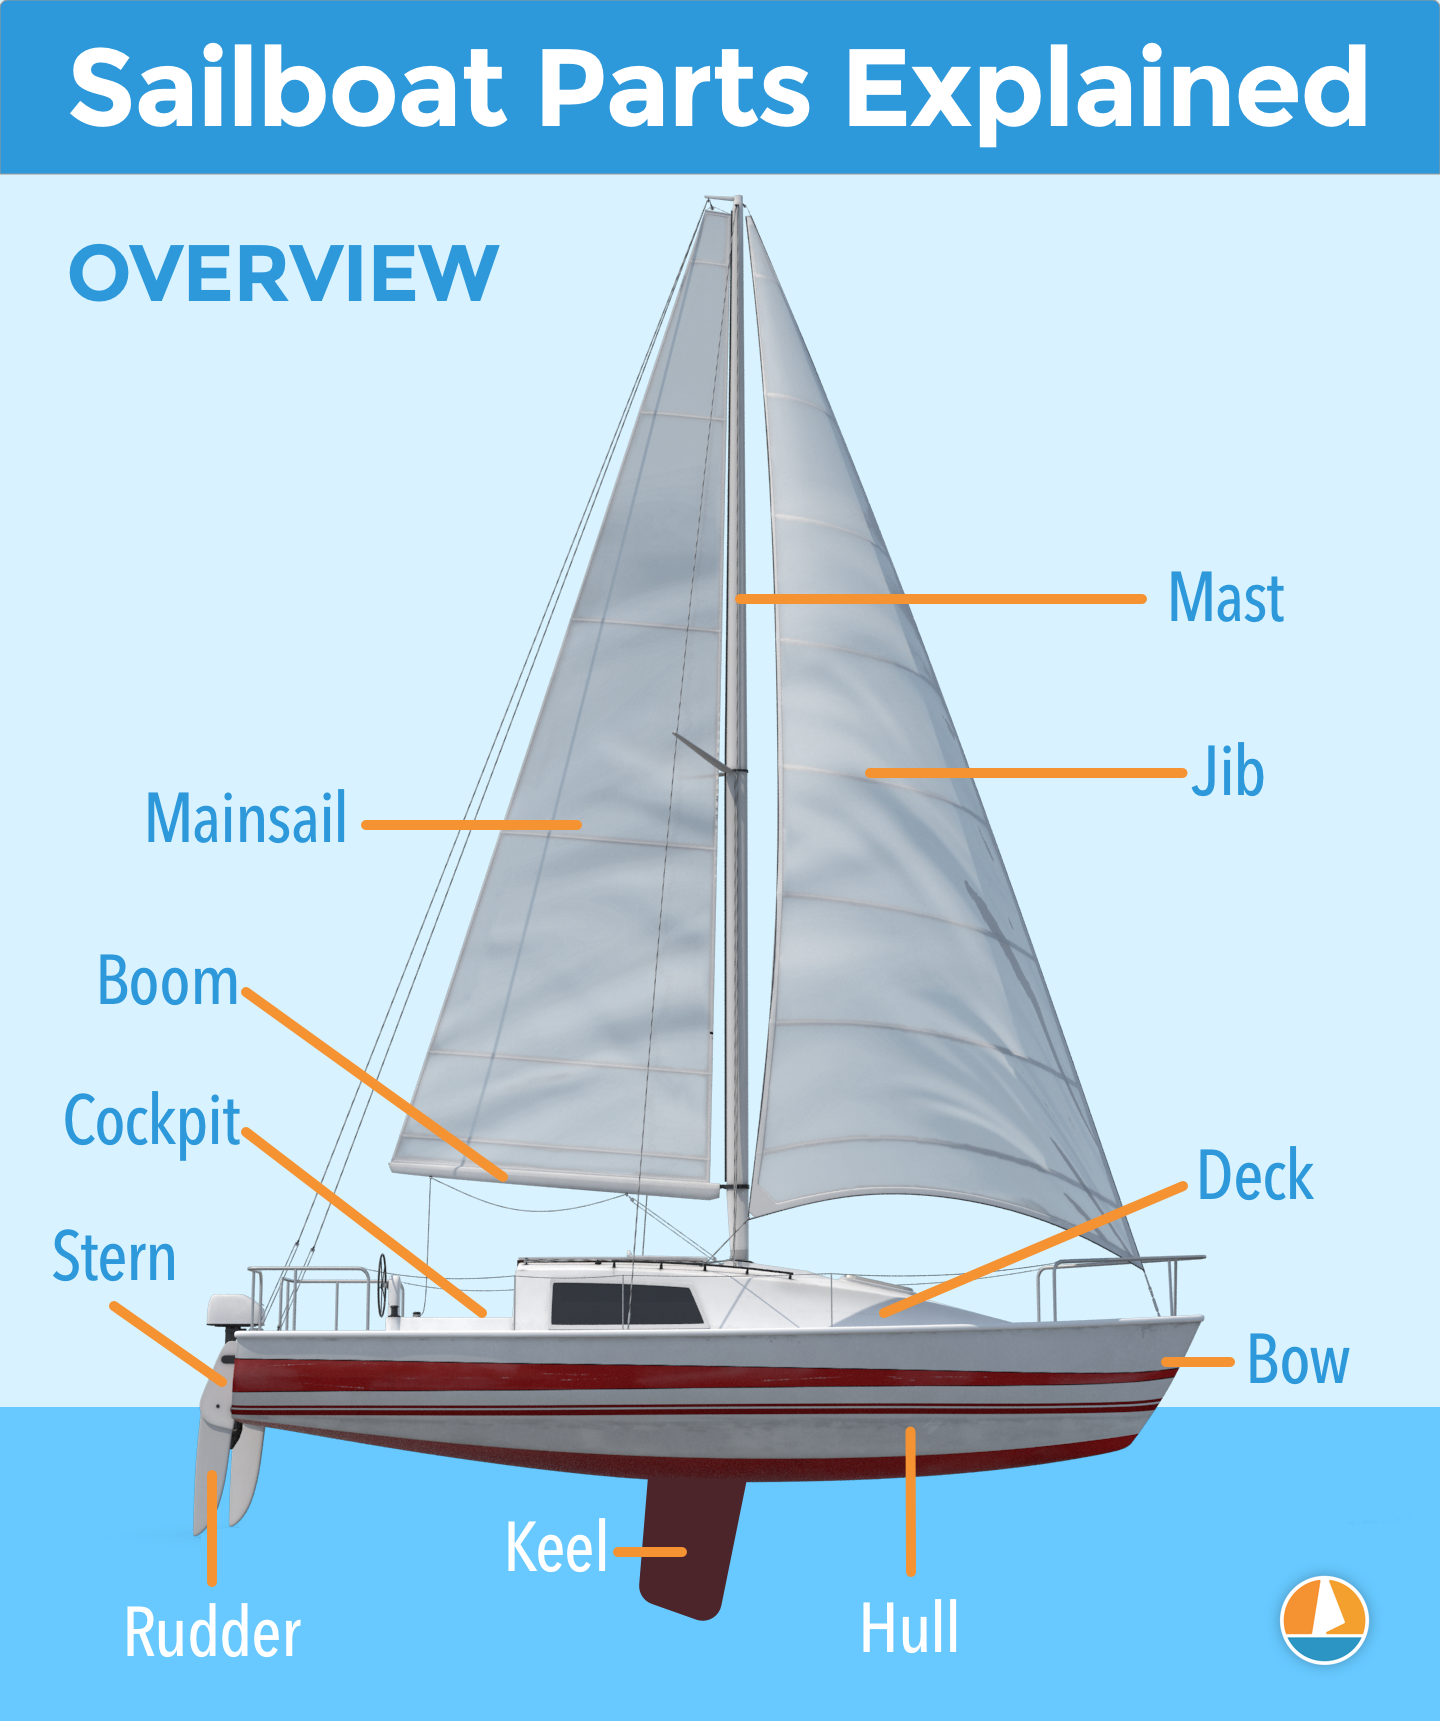
Okay, we now have a good starting point and a good basic understanding of the different sailboat parts. It's time for the good stuff. We're going to dive into each segment in detail.
Below, I'll go over them one by one, pointing out its different parts on a diagram, listing them with a brief explanation, and showing you examples as well.
After reading this article, you'll recognize every single sailboat part and know them by name. And if you forget one, you're free to look it up in this guide.
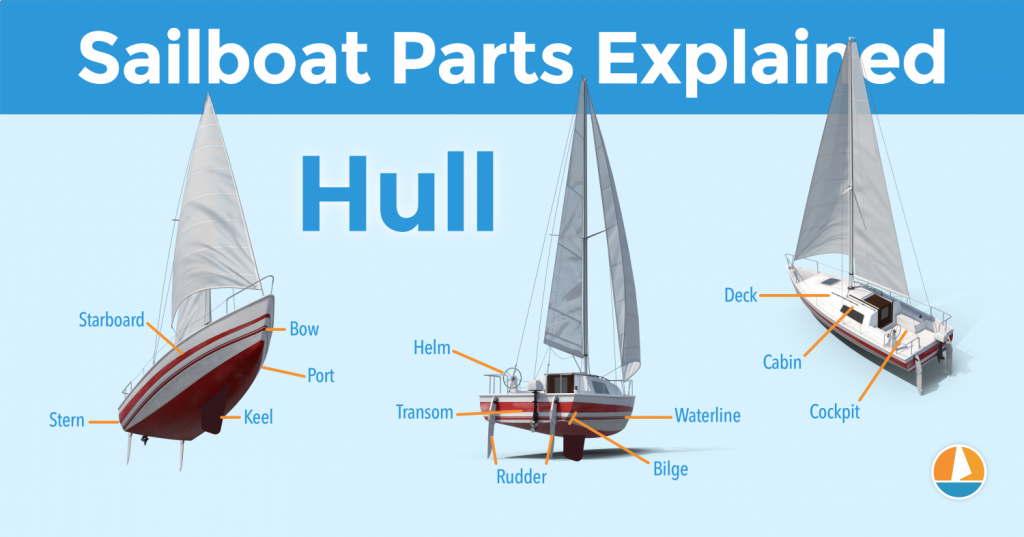
On this page:
The hull is the heart of the boat. It's what carries everything: the mast, the sails, the rigging, the passengers. The hull is what provides the sailboat with its buoyancy, allowing it to stay afloat.
Sailboats mostly use displacement hulls, which is a shape that displaces water when moving through it. They are generally very round and use buoyancy to support its own weight. These two characteristics make sure it is a smooth ride.
There are different hull shapes that work and handle differently. If you want to learn more about them, here's the Illustrated Guide to Boat Hull Types (with 11 Examples ). But for now, all we need to know is that the hull is the rounded, floating part of any sailboat.
Instead of simply calling the different sides of a hull front, back, left and right , we use different names in sailing. Let's take a look at them.
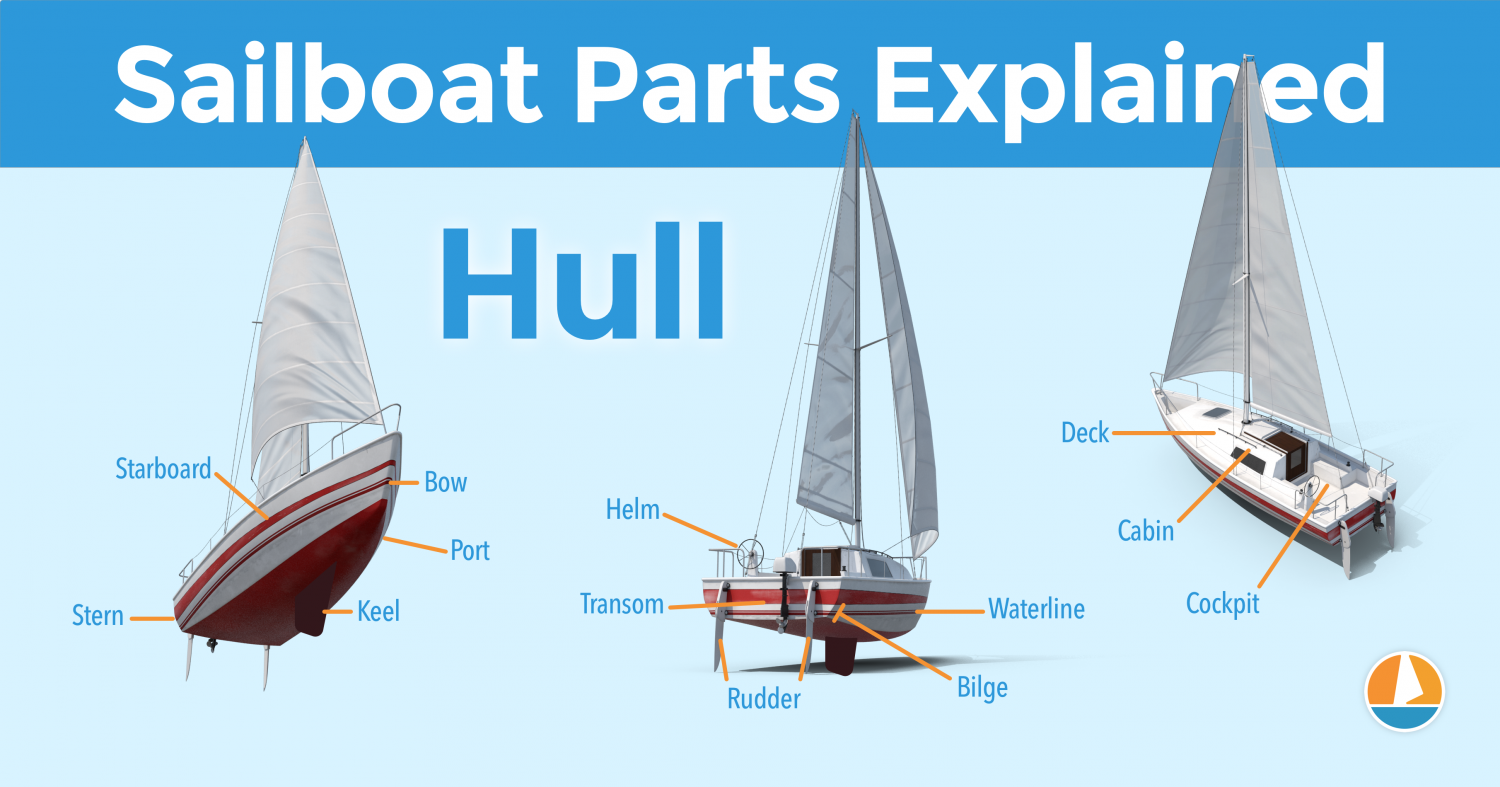
The bow is the front part of the hull. It's simply the nautical word for 'front'. It's the pointy bit that cuts through the water. The shape of the bow determines partially how the boat handles.
The stern is the back part of the hull. It's simply the nautical word for 'back'. The shape of the stern partially determines the stability and speed of the boat. With motorboats, the stern lies deep inside the water, and the hull is flatter aft. Aft also means back. This allows it to plane, increasing the hull speed. For sailboats, stability is much more important, so the hull is rounded throughout, increasing its buoyancy and hydrodynamic properties.
The transom is the backplate of the boat's hull. It's the most aft (rear) part of the boat.
Port is the left side of a sailboat.
Starboard is the right side of a sailboat
The bilges are the part where the bottom and the sides of the hull meet. On sailboats, these are typically very round, which helps with hydrodynamics. On powerboats, they tend to have an angle.
The waterline is the point where the boat's hull meets the water. Generally, boat owners paint the waterline and use antifouling paint below it, to protect it from marine growth.
The deck is the top part of the boat's hull. In a way, it's the cap of the boat, and it holds the deck hardware and rigging.
Displacement hulls are very round and smooth, which makes them very efficient and comfortable. But it also makes them very easy to capsize: think of a canoe, for example.
The keel is a large fin that offsets the tendency to capsize by providing counterbalance. Typically, the keel carries ballast in the tip, creating a counterweight to the wind's force on the sails.
The rudder is the horizontal plate at the back of the boat that is used to steer by setting a course and maintaining it. It is connected to the helm or tiller.
Tiller or Helm
- The helm is simply the nautical term for the wheel.
- The tiller is simply the nautical term for the steering stick.
The tiller or helm is attached to the rudder and is used to steer the boat. Most smaller sailboats (below 30') have a tiller, most larger sailboats use a helm. Large ocean-going vessels tend to have two helms.
The cockpit is the recessed part in the deck where the helmsman sits or stands. It tends to have some benches. It houses the outside navigation and systems interfaces, like the compass, chartplotter, and so on. It also houses the mainsheet traveler and winches for the jib. Most boats are set up so that the entire vessel can be operated from the cockpit (hence the name). More on those different parts later.
Most larger boats have some sort of roofed part, which is called the cabin. The cabin is used as a shelter, and on cruising sailboats you'll find the galley for cooking, a bed, bath room, and so on.
The mast is the pole on a sailboat that holds the sails. Sailboats can have one or multiple masts, depending on the mast configuration. Most sailboats have only one or two masts. Three masts or more is less common.
The boom is the horizontal pole on the mast, that holds the mainsail in place.
The sails seem simple, but actually consist of many moving parts. The parts I list below work for most modern sailboats - I mean 90% of them. However, there are all sorts of specialty sails that are not included here, to keep things concise.
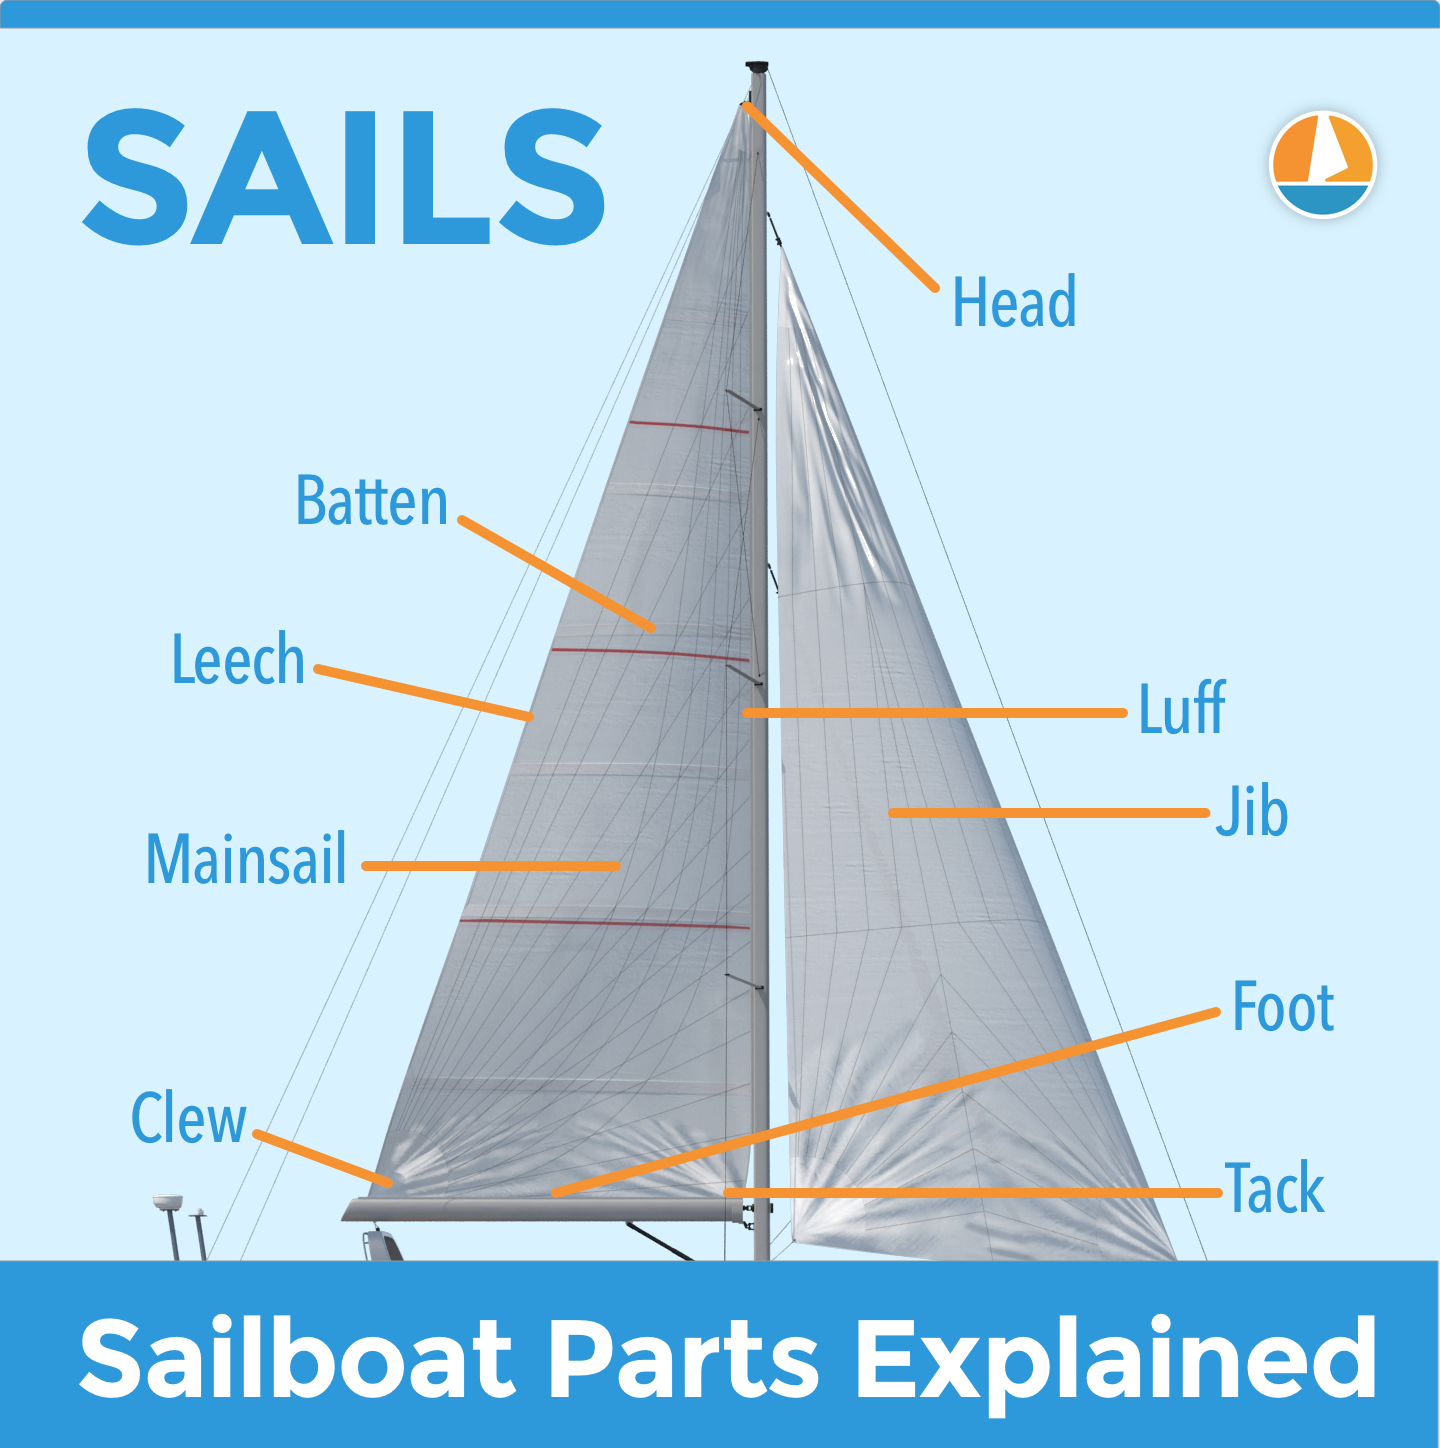
The mainsail is the largest sail on the largest mast. Most sailboats use a sloop rigging (just one mast with one bermuda mainsail). In that case, the main is easy to recognize. With other rig types, it gets more difficult, since there can be multiple tall masts and large sails.
If you want to take a look at the different sail plans and rig types that are out there, I suggest reading my previous guide on how to recognize any sailboat here (opens in new tab).
Sail sides:
- Leech - Leech is the name for the back side of the sail, running from the top to the bottom.
- Luff - Luff is the name for the front side of the sail, running from the top to the bottom.
- Foot - Foot is the name for the lower side of the sail, where it meets the boom.
Sail corners:
- Clew - The clew is the lower aft (back) corner of the mainsail, where the leech is connected to the foot. The clew is attached to the boom.
- Tack - The tack is the lower front corner of the mainsail
- Head - The head is the top corner of the mainsail
Battens are horizontal sail reinforcers that flatten and stiffen the sail.
Telltales are small strings that show you whether your sail trim is correct. You'll find telltales on both your jib and mainsail.
The jib is the standard sized headsail on a Bermuda Sloop rig (which is the sail plan most modern sailboats use).
As I mentioned: there are all kinds, types, and shapes of sails. For an overview of the most common sail types, check out my Guide on Sail Types here (with photos).
The rigging is what is used to attach your sails and mast to your boat. Rigging, in other words, mostly consists of all kinds of lines. Lines are just another word for ropes. Come to think of it, sailors really find all kinds of ways to complicate the word rope ...
Two types of rigging
There are two types of rigging: running and standing rigging. The difference between the two is very simple.
- The running rigging is the rigging on a sailboat that's used to operate the sails. For example, the halyard, which is used to lower and heave the mainsail.
- The standing rigging is the rigging that is used to support the mast and sail plan.
Standing Rigging
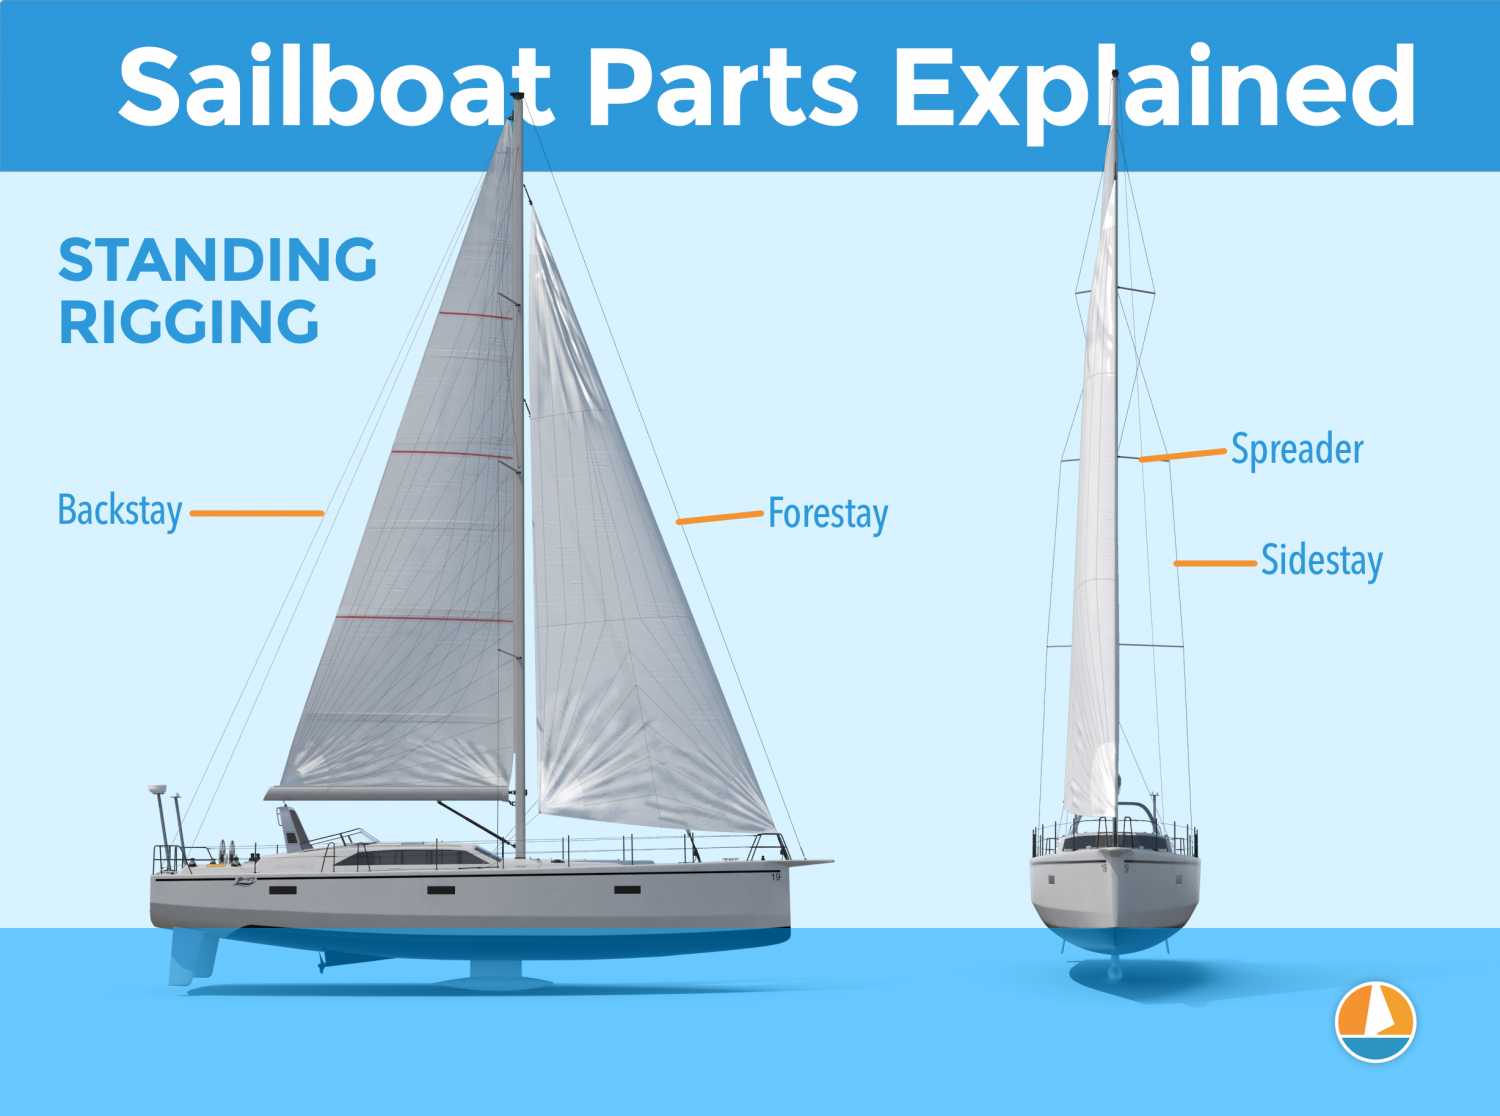
Here are the different parts that belong to the standing rigging:
- Forestay or Headstay - Line or cable that supports the mast and is attached to the bow of the boat. This is often a steel cable.
- Backstay - Line or cable that supports the mast and is attached to the stern of the boat. This is often a steel cable.
- Sidestay or Shroud - Line or cable that supports the mast from the sides of the boat. Most sailboats use at least two sidestays (one on each side).
- Spreader - The sidestays are spaced to steer clear from the mast using spreaders.
Running Rigging: different words for rope
Ropes play a big part in sailing, and especially in control over the sails. In sailboat jargon, we call ropes 'lines'. But there are some lines with a specific function that have a different name. I think this makes it easier to communicate with your crew: you don't have to define which line you mean. Instead, you simply shout 'mainsheet!'. Yeah, that works.
Running rigging consists of the lines, sheets, and hardware that are used to control, raise, lower, shape and manipulate the sails on a sailboat. Rigging varies for different rig types, but since most sailboats are use a sloop rig, nearly all sailboats use the following running rigging:
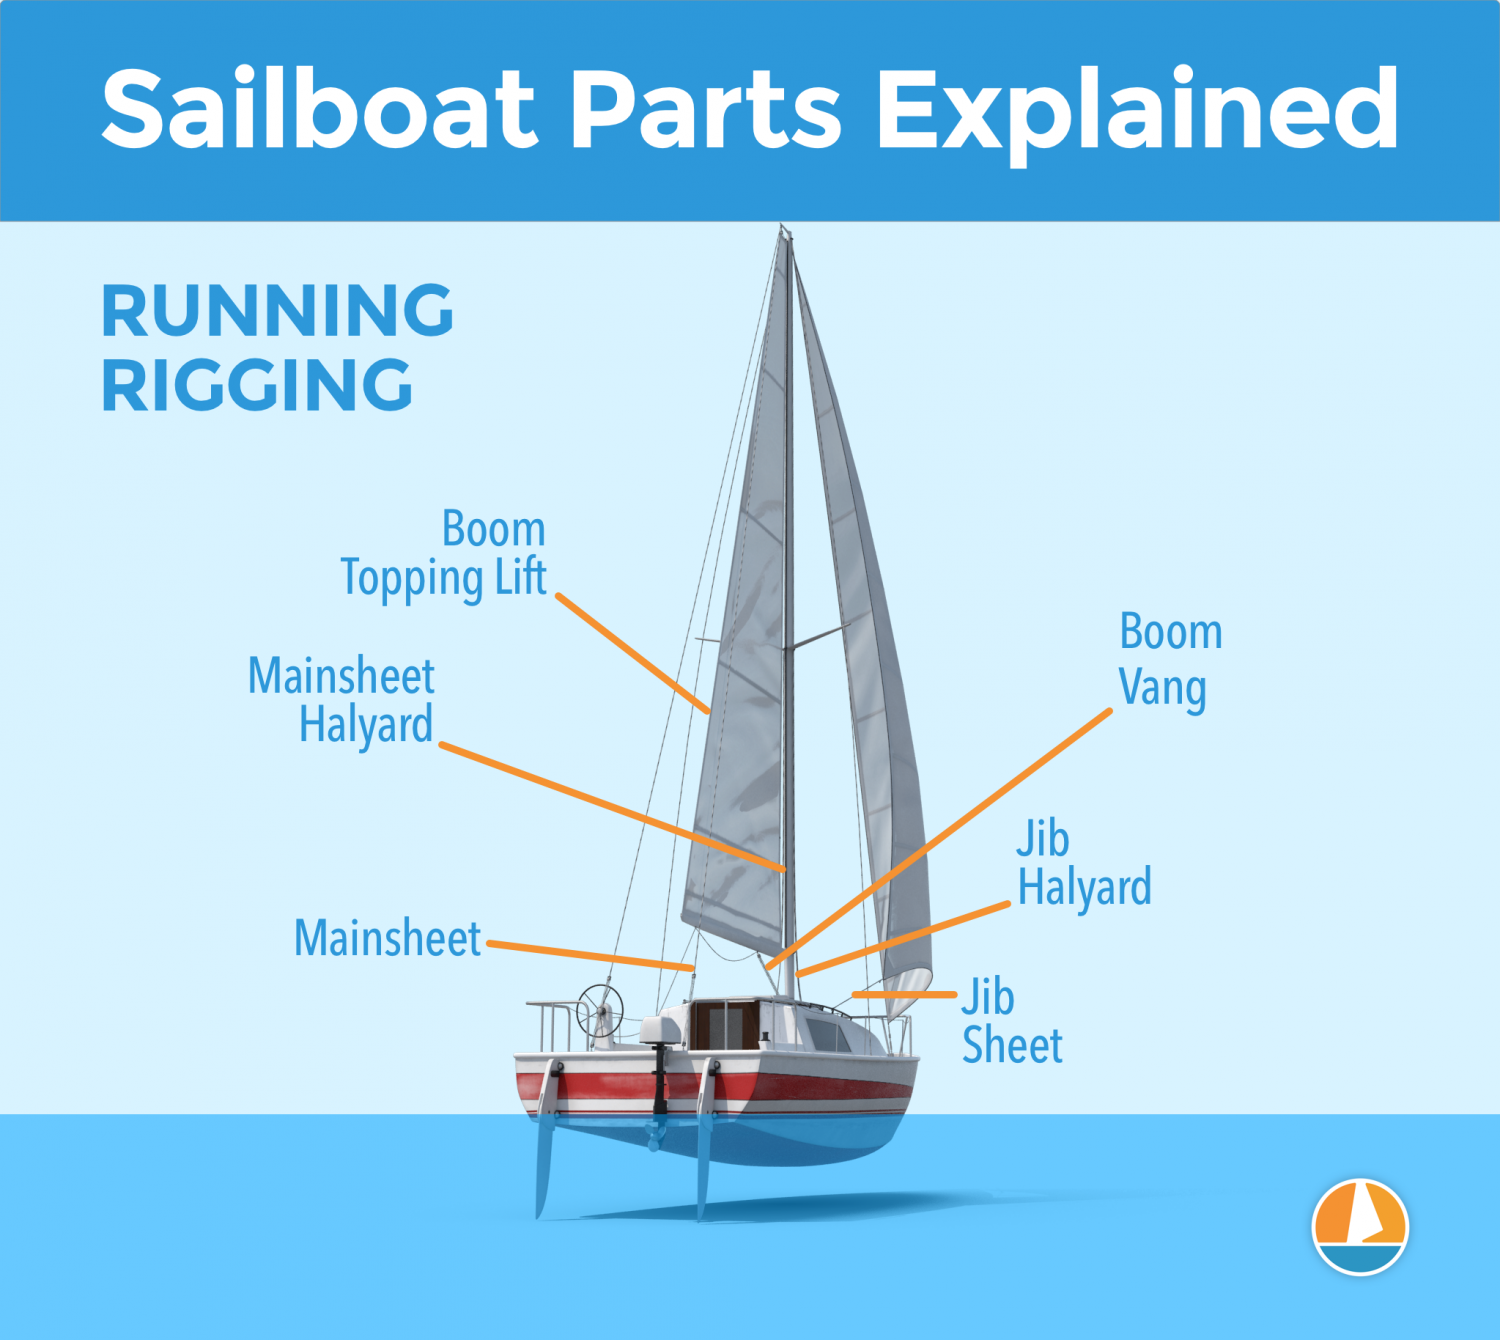
- Halyards -'Halyard' is simply the nautical name for lines or ropes that are used to raise and lower the mainsail. The halyard is attached to the top of the mainsail sheet, or the gaffer, which is a top spar that attaches to the mainsail. You'll find halyards on both the mainsail and jib.
- Sheets - 'Sheet' is simply the nautical term for lines or ropes that are used to set the angle of the sail.
- Mainsheet - The line, or sheet, that is used to set the angle of the mainsail. The mainsheet is attached to the Mainsheet traveler. More on that under hardware.
- Jib Sheet - The jib mostly comes with two sheets: one on each side of the mast. This prevents you from having to loosen your sheet, throwing it around the other side of the mast, and tightening it. The jib sheets are often controlled using winches (more on that under hardware).
- Cleats are small on-deck hooks that can be used to tie down sheets and lines after trimming them.
- Reefing lines - Lines that run through the mainsail, used to put a reef in the main.
- The Boom Topping Lift is a line that is attached to the aft (back) end of the boom and runs to the top of the mast. It supports the boom whenever you take down the mainsail.
- The Boom Vang is a line that places downward tension on the boom.
There are some more tensioning lines, but I'll leave them for now. I could probably do an entire guide on the different sheets on a sailboat. Who knows, perhaps I'll write it.
This is a new segment, that I didn't mention before. It's a bit of an odd duck, so I threw all sorts of stuff into this category. But they are just as important as all the other parts. Your hardware consists of cleats, winches, traveler and so on. If you don't know what all of this means, no worries: neither did I. Below, you'll find a complete overview of the different parts.
Deck Hardware
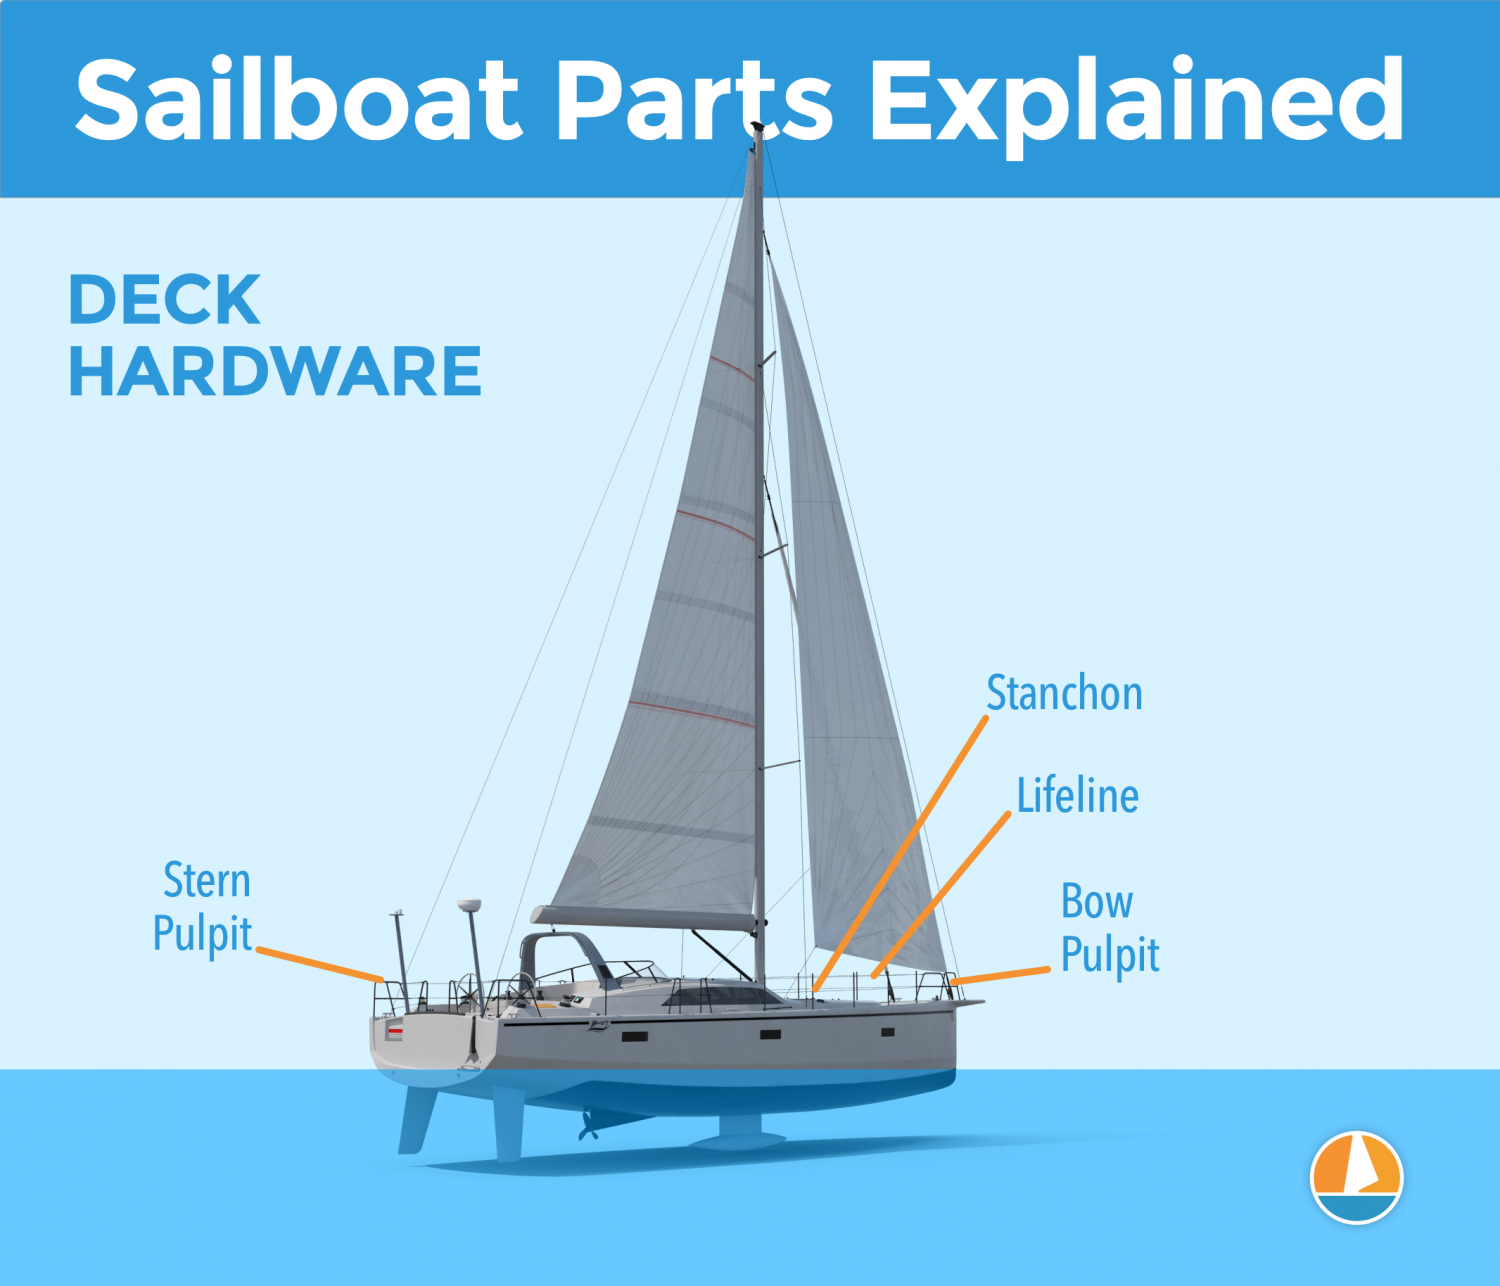
Just a brief mention of the different deck hardware parts:
- Pulpits are fenced platforms on the sailboat's stern and bow, which is why they are called the bow pulpit and stern pulpit here. They typically have a solid steel framing for safety.
- Stanchons are the standing poles supporting the lifeline , which combined for a sort of fencing around the sailboat's deck. On most sailboats, steel and steel cables are used for the stanchons and lifelines.
Mainsheet Traveler
The mainsheet traveler is a rail in the cockpit that is used to control the mainsheet. It helps to lock the mainsheet in place, fixing the mainsails angle to the wind.
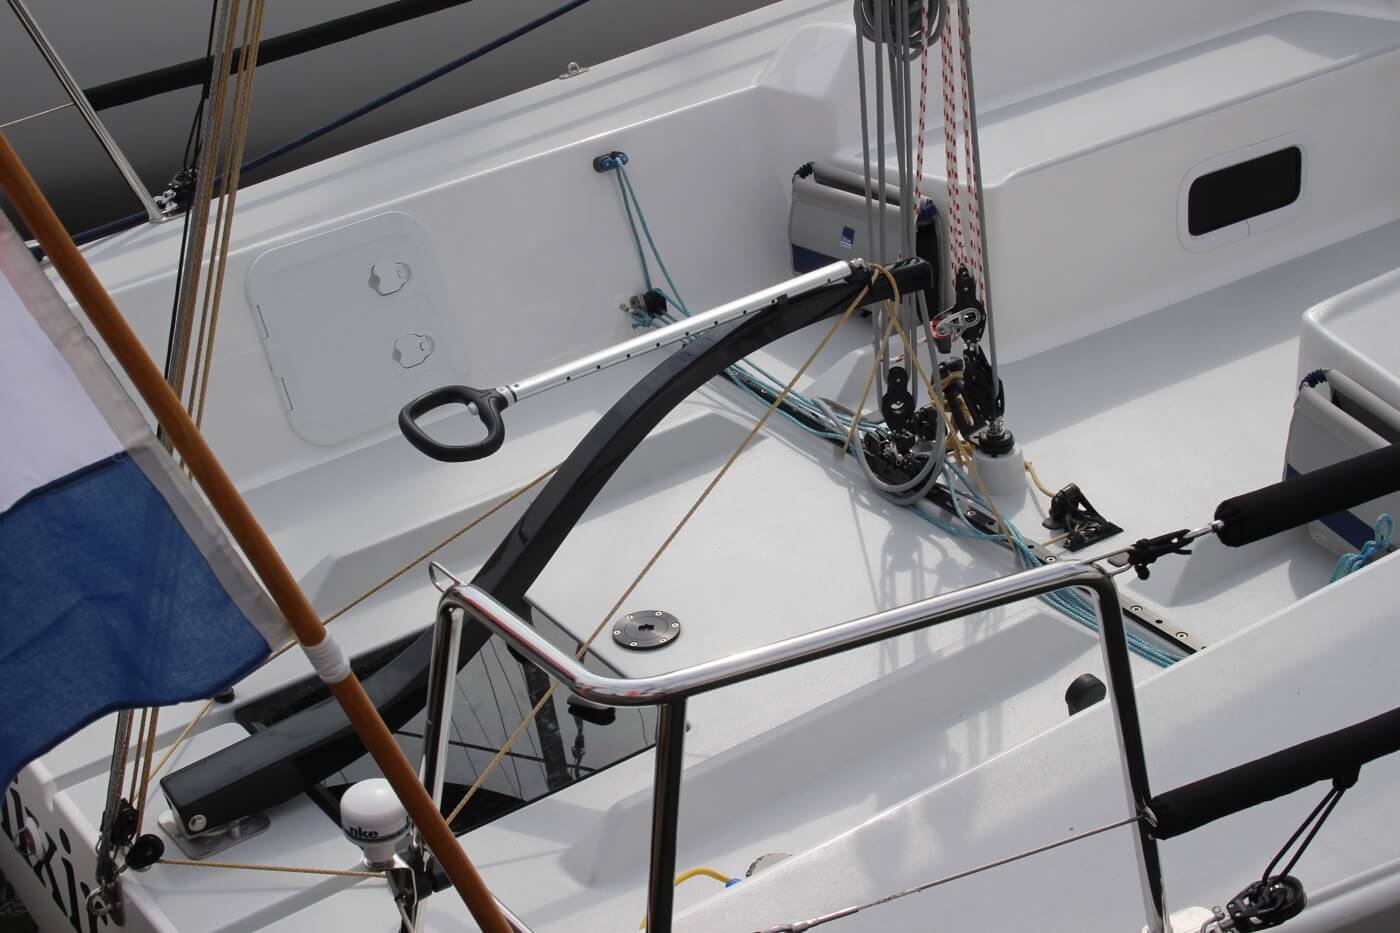
If you're interested in learning more about how to use the mainsheet traveler, Matej has written a great list of tips for using your mainsheet traveler the right way . It's a good starting point for beginners.
Winches are mechanical or electronic spools that are used to easily trim lines and sheets. Most sailboats use winches to control the jib sheets. Modern large sailing yachts use electronic winches for nearly all lines. This makes it incredibly easy to trim your lines.
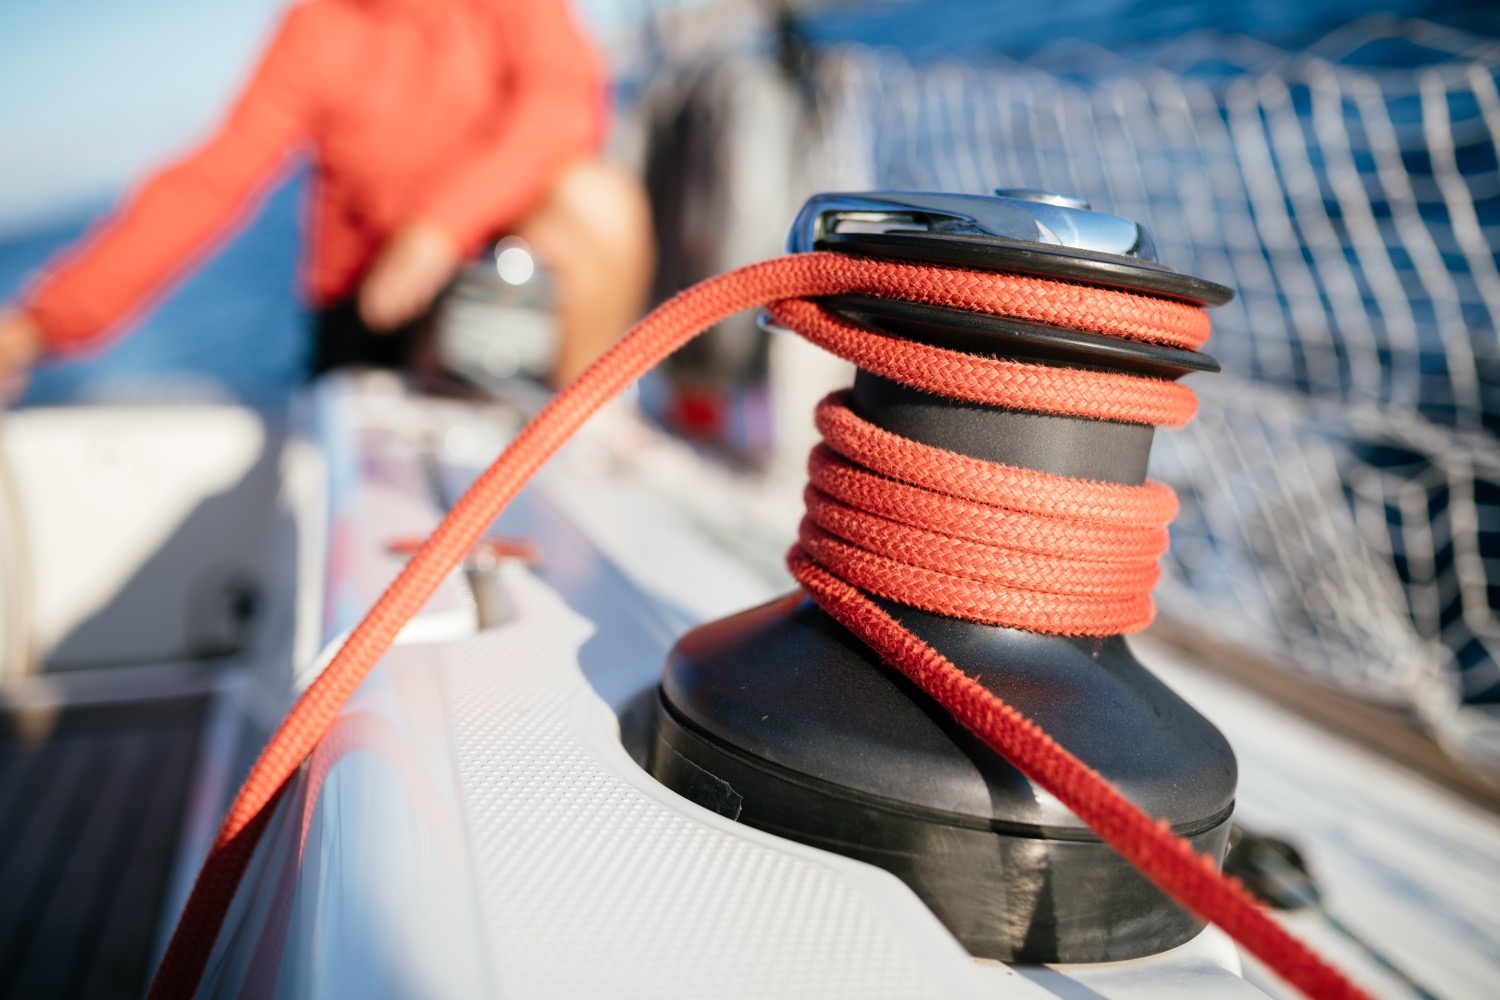
You'll find the compass typically in the cockpit. It's the most old-skool navigation tool out there, but I'm convinced it's also one of the most reliable. In any way, it definitely is the most solid backup navigator you can get for the money.
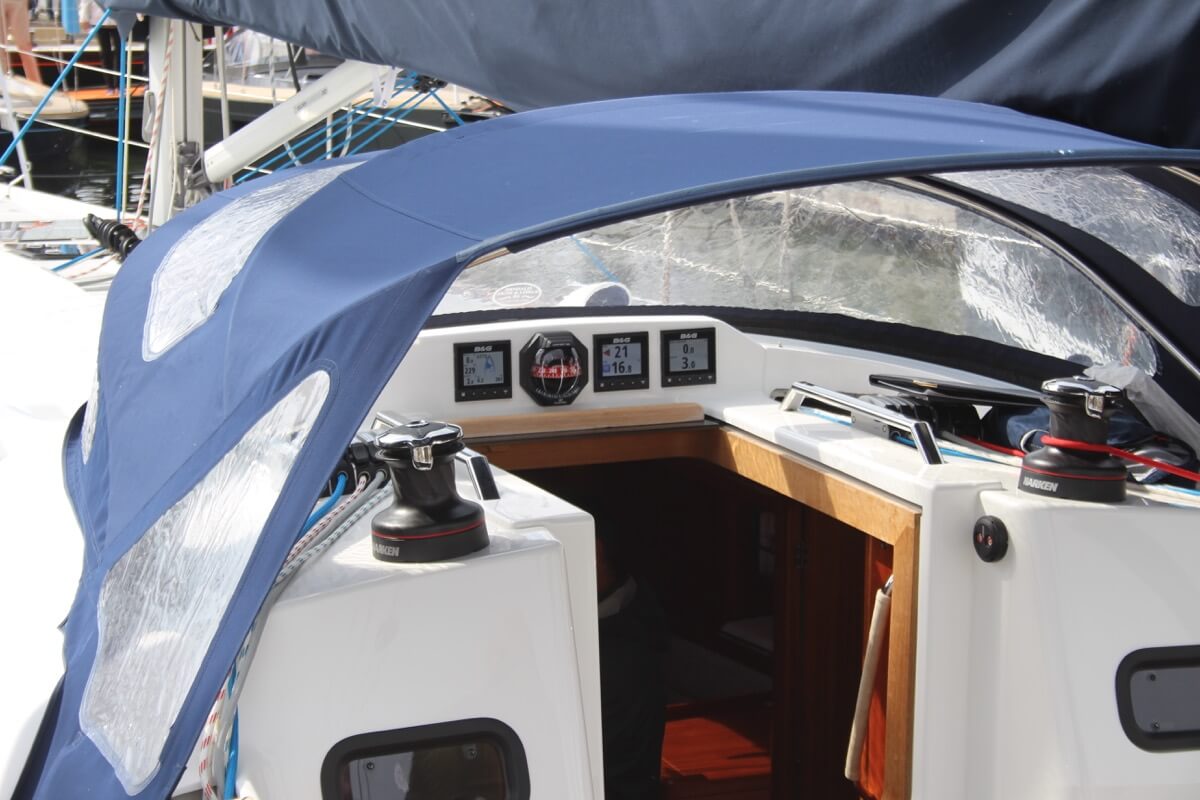
Want to learn how to use a compass quickly and reliably? It's easy. Just read my step-by-step beginner guide on How To Use a Compass (opens in new tab .
Chartplotter
Most sailboats nowadays use, besides a compass and a map, a chartplotter. Chartplotters are GPS devices that show a map and a course. It's very similar to your normal car navigation.
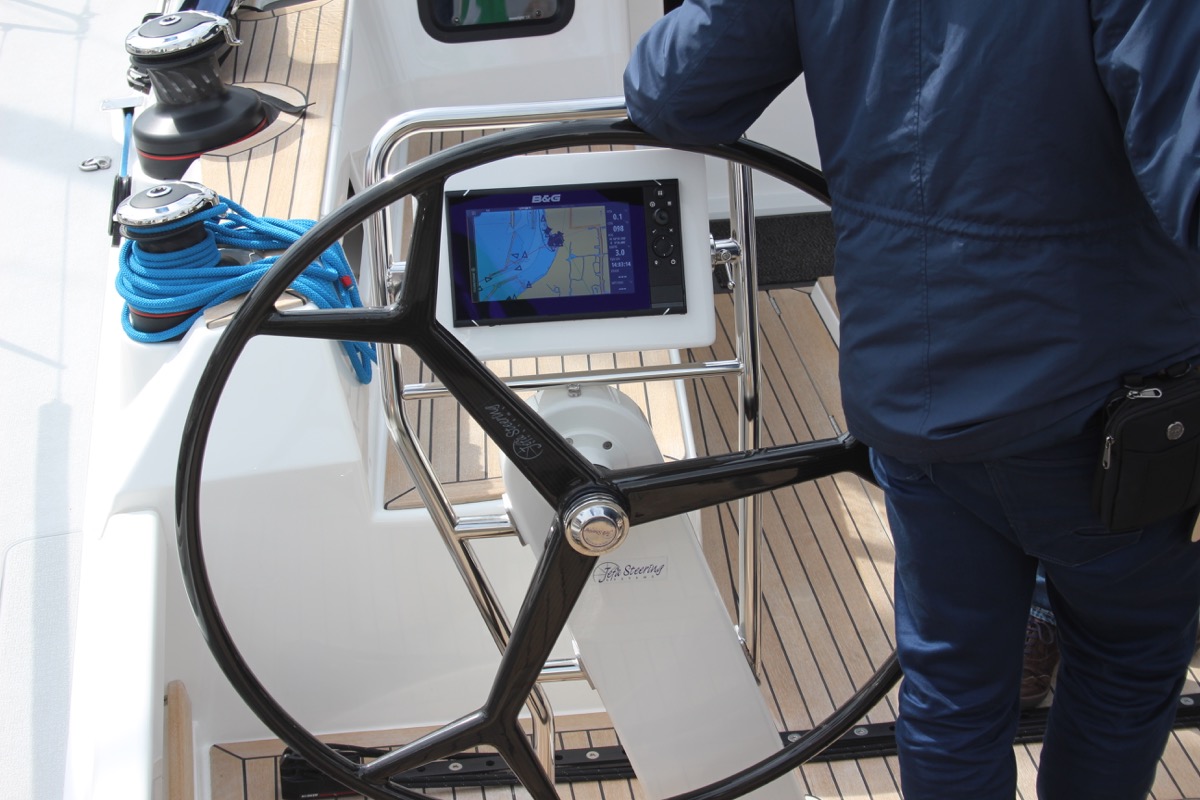
Outboard motor
Most sailboats have some sort of motor to help out when there's just the slightest breeze. These engines aren't very big or powerful, and most sailboats up to 32' use an outboard motor. You'll find these at the back of the boat.
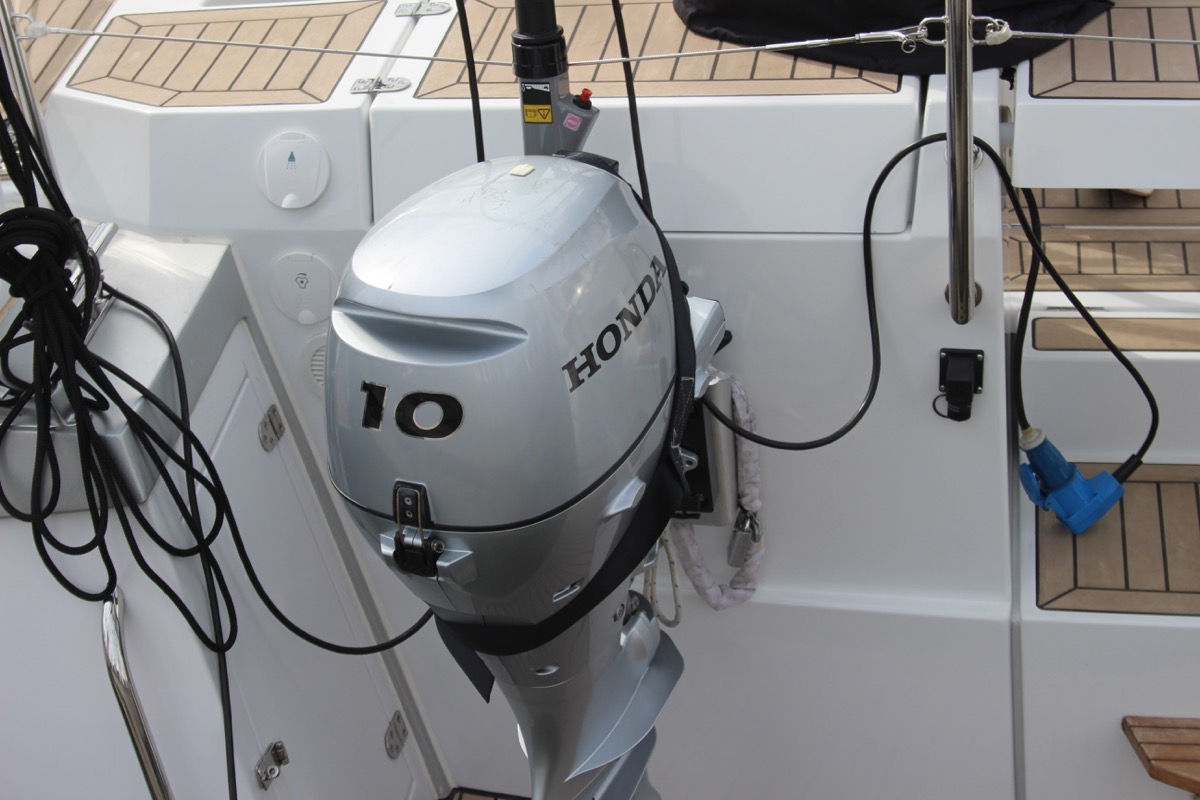
Most sailboats carry 1 - 3 anchors: one bow anchor (the main one) and two stern anchors. The last two are optional and are mostly used by bluewater cruisers.
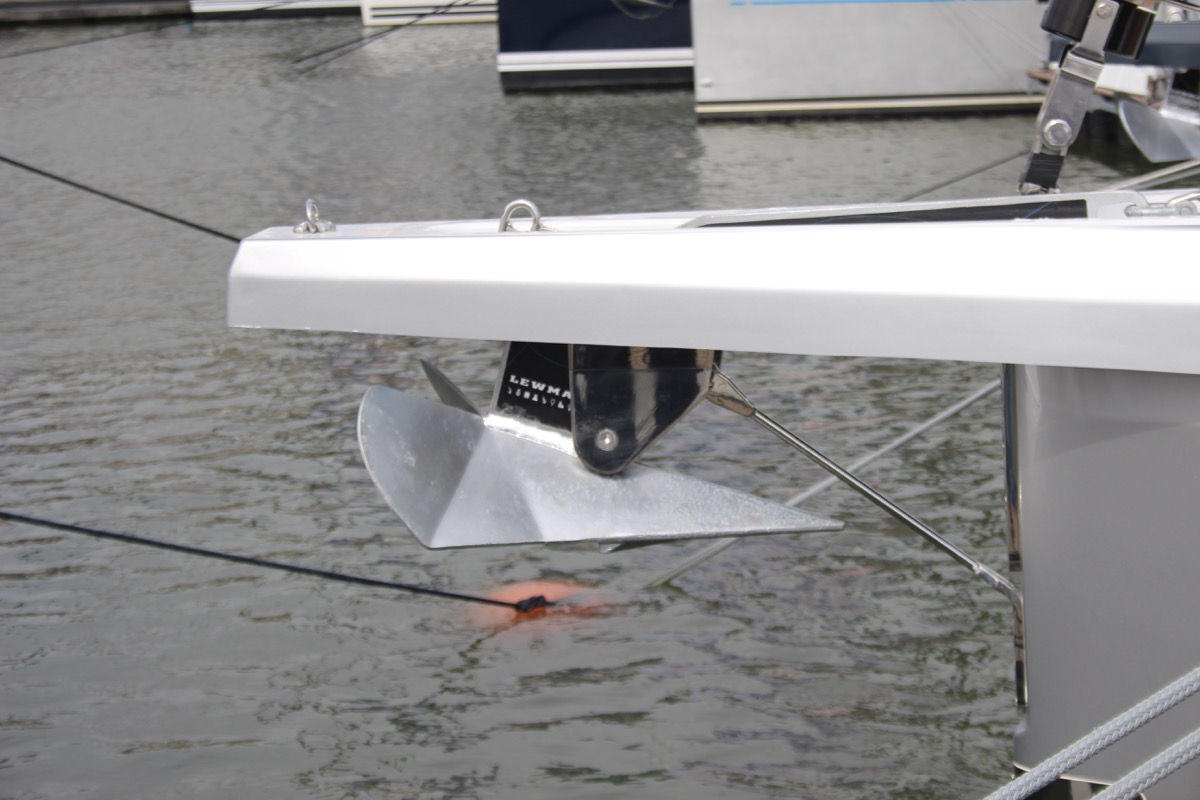
I hope this was helpful, and that you've gained a good understanding of the different parts involved in sailing. I wanted to write a good walk-through instead of overwhelming you with lists and lists of nautical terms. I hope I've succeeded. If so, I appreciate any comments and tips below.
I've tried to be as comprehensive as possible, without getting into the real nitty gritty. That would make for a gigantic article. However, if you feel I've left something out that really should be in here, please let me know in the comments below, so I can update the article.
I own a small 20 foot yacht called a Red witch made locally back in the 70s here in Western Australia i found your article great and enjoyed reading it i know it will be a great help for me in my future leaning to sail regards John.
David Gardner
İ think this is a good explanation of the difference between a ”rope” and a ”line”:
Rope is unemployed cordage. In other words, when it is in a coil and has not been assigned a job, it is just a rope.
On the other hand, when you prepare a rope for a specific task, it becomes employed and is a line. The line is labeled by the job it performs; for example, anchor line, dock line, fender line, etc.
Hey Mr. Buckles
I am taking on new crew to race with me on my Flying Scot (19ft dingy). I find your Sailboat Parts Explained to be clear and concise. I believe it will help my new crew learn the language that we use on the boat quickly without being overwhelmed.
PS: my grandparents were from Friesland and emigrated to America.
Thank you Shawn for the well written, clear and easy to digest introductory article. Just after reading this first article I feel excited and ready to set sails and go!! LOL!! Cheers! Daniel.
steve Balog
well done, chap
Great intro. However, the overview diagram misidentifies the cockpit location. The cockpit is located aft of the helm. Your diagram points to a location to the fore of the helm.
William Thompson-Ambrose
An excellent introduction to the basic anatomy and function of the sailboat. Anyone who wants to start sailing should consider the above article before stepping aboard! Thank-you
James Huskisson
Thanks for you efforts mate. We’ve all got to start somewhere. Thanks for sharing. Hoping to my first yacht. 25ft Holland. Would love to cross the Bass Strait one day to Tasmania. 👌 Cheers mate
Alan Alexander Percy
thankyou ijust aquired my first sailboat at 66yrs of age its down at pelican point a beautifull place in virginia usa my sailboat is a redwing 30 if you are ever in the area i wouldnt mind your guidance and superior knowledge of how to sail but iam sure your fantastic article will help my sailboat is wings 30 ft
Thanks for quick refresher course. Having sailed in California for 20+ years I now live in Spain where I have to take a spanish exam for a sailboat license. Problem is, it’s only in spanish. So a lot to learn for an old guy like me.
Very comprehensive, thank you
Your article really brought all the pieces together for me today. I have been adventuring my first sailing voyage for 2 months from the Carolinas and am now in Eleuthera waiting on weather to make the Exumas!!! Great job and thanks
Helen Ballard
I’ve at last found something of an adventure to have in sailing, so I’m starting at the basics, I have done a little sailing but need more despite being over 60 life in the old dog etc, thanks for your information 😊
Barbara Scott
I don’t have a sailboat, neither do l plan to literally take to the waters. But for mental exercise, l have decided to take to sailing in my Bermuda sloop, learning what it takes to become a good sailor and run a tight ship, even if it’s just imaginary. Thank you for helping me on my journey to countless adventures and misadventures, just to keep it out of the doldrums! (I’m a 69 year old African American female who have rediscovered why l enjoyed reading The Adventures of Robert Louis Stevenson as well as his captivating description of sea, wind, sailboat,and sailor).
Great article and very good information source for a beginner like me. But I didn’t find out what I had hoped to, which is, what are all those noisy bits of kit on top of the mast? I know the one with the arrow is a weather vane, but the rest? Many thanks, Jay.
Louis Cohen
The main halyard is attached to the head of the mainsail, not the to the mainsheet. In the USA, we say gaff, not gaffer. The gaff often has its own halyard separate from the main halyard.
Other than that it’s a nice article with good diagrams.
A Girl Who Has an Open Sail Dream
Wow! That was a lot of great detail! Thank you, this is going to help me a lot on my project!
Hi, good info, do u know a book that explains all the systems on a candc 27,
Emma Delaney
As a hobbyist, I was hesitant to invest in expensive CAD software, but CADHOBBY IntelliCAD has proven to be a cost-effective alternative that delivers the same quality and performance.
https://www.cadhobby.com/
Leave a comment
You may also like, guide to understanding sail rig types (with pictures).
There are a lot of different sail rig types and it can be difficult to remember what's what. So I've come up with a system. Let me explain it in this article.

The Ultimate Guide to Sail Types and Rigs (with Pictures)
The Illustrated Guide To Boat Hull Types (11 Examples)

How To Live On a Boat For Free: How I'd Do It

How To Live on a Sailboat: Consider These 5 Things
Own your first boat within a year on any budget.
A sailboat doesn't have to be expensive if you know what you're doing. If you want to learn how to make your sailing dream reality within a year, leave your email and I'll send you free updates . I don't like spam - I will only send helpful content.
Ready to Own Your First Boat?
Just tell us the best email address to send your tips to:

The global authority in superyachting
- NEWSLETTERS
- Yachts Home
- The Superyacht Directory
- Yacht Reports
- Brokerage News
- The largest yachts in the world
- The Register
- Yacht Advice
- Yacht Design
- 12m to 24m yachts
- Monaco Yacht Show
- Builder Directory
- Designer Directory
- Interior Design Directory
- Naval Architect Directory
- Yachts for sale home
- Motor yachts
- Sailing yachts
- Explorer yachts
- Classic yachts
- Sale Broker Directory
- Charter Home
- Yachts for Charter
- Charter Destinations
- Charter Broker Directory
- Destinations Home
- Mediterranean
- South Pacific
- Rest of the World
- Boat Life Home
- Owners' Experiences
- Interiors Suppliers
- Owners' Club
- Captains' Club
- BOAT Showcase
- Boat Presents
- Events Home
- World Superyacht Awards
- Superyacht Design Festival
- Design and Innovation Awards
- Young Designer of the Year Award
- Artistry and Craft Awards
- Explorer Yachts Summit
- Ocean Talks
- The Ocean Awards
- BOAT Connect
- Between the bays
- Golf Invitational
- Boat Pro Home
- Pricing Plan
- Superyacht Insight
- Product Features
- Premium Content
- Testimonials
- Global Order Book
- Tenders & Equipment
.jpg/r%5Bwidth%5D=320/c01b08f0-3198-11ec-b3da-5dc06521023f-Black%20Pearl%20-%20Tom%20Van%20Oossanen%20(3).webp)
The definitive guide to sailing yacht rigging
Related articles, superyacht directory.
Do you know your Bermudan rig from your DynaRig or wingsails? And which is best? BOAT explains it all...
Take a look at a modern racing yacht from above, beating to windward and heeled to the breeze, and you can see at a glance why Bermudan rigs have stood the test of time. With its fore and aft sails bladed into efficient aerodynamic shapes, a modern yacht can slice close to the wind and be driven hard. Such a sight would have been outlandish a century ago. Then, a typical trading barquentine could set 18 sails to catch light airs, but it needed a large crew to battle with canvas far out on the yards. In a modern miracle as incredible in its way as flight, today’s racing yachts can sail faster than the speed of the wind – in some cases several times faster.
A mainsail set on a single spar is an age-old concept but only in the 19th century was it adapted as the Bermudan or Marconi rig. A one-piece mainsail set on a mast without a gaff, hoisted with one halyard and controlled by one sheet, was simpler and more efficient. This revolution became the power train of pleasure yachting and racing.
But perhaps the time is coming for a re-evaluation of simpler rigs requiring fewer crew – alternatives with lower loads operated by automated systems. In an era of reduced carbon consumption, could more radical sailplans even herald a revival in sail power?
The evergreen Bermudan rig
The Bermudan rig is the all-rounder, able to perform well at all angles of sail. It is efficient upwind, while downwind the sail area can be significantly boosted with a big gennaker or spinnaker. For good reasons, it is the first choice for nearly every modern sailing yacht up to around 60 to 65 metres for cruising and regatta racing alike. At larger sizes, however, things start to become trickier, and the trade-offs get interesting.
Over the last decade, sail handling technology has steadily advanced to allow sloop rigs to grow larger and larger. “But with that comes a highly loaded rig, many tonnes of compression from tension in the rigging, and you have to build structure in the boat to accept that,” explains Paul MacDonald, founder and superyacht sales manager of Southern Spars.
“You have to have a lot of deck gear and captive winches below decks and the machinery for that. But over the years, boom furling systems and MPS [Multi Purpose Sails for downwind angles] stored on a drum, for example, have made sail handling safer.
Bill Tripp is the designer behind the 86-metre Aquijo , which broke new ground in 2015 as the world’s largest Bermudan ketch. Tripp prefers to call the rig a "sketch", a portmanteau word for a rig that is neither a sloop nor a ketch “because the main and mizzen are identical”. Even though the sailplan is divided over two masts, each spar is still a towering 90 metres above the water. Aquijo perfectly illustrates the issues involved with a Bermudan rig when scaled up.
“The sloop is great but I prefer the ‘sketch’ for sailing around the world under full control due to the desirability of a two-masted rig for reaching ability, which dominates passages, and the safety of controllable loads when sailing in all kinds of conditions miles from nowhere,” he says.
Upwind, Aquijo sets a jib, staysail, mainsail and mizzen, all in North Sails 3Di, totalling 3,821 square metres. A furling Code sail for reaching and downwind angles increases that to a vast 5,051 square metres.
While Aquijo has a crew retinue of 17, it can be controlled under sail by six or seven people. With custom winches to handle halyards and sheets, the sails can be hoisted astonishingly quickly for such a large rig. “It takes five minutes to put the main up, on average, and the main and mizzen can go up at the same time,” Tripp says. Aquijo has now sailed 100,000 nautical miles around the world and the owner is planning another circumnavigation through the Northwest Passage.
Tripp is not convinced of the wisdom of a much larger single-masted sloop rig. “If you are day sailing in the Med, a sloop would be awesome, but I am not sure if you had fewer sails you would be able to [reduce canvas] well enough. Also the mast is a windage problem when the keel is up and you are beam-to. If you are on anchor, that’s no problem but you’d have to be able to cope with being on the docks in 70 knots. The windage at 120 metres is not only more but the centre of effort is so much higher, and so the heeling loads all go up.”
However, British designer Malcolm McKeon , the name behind the high-performance, sloop-rigged carbon composite superyachts Missy and Ribelle , is pushing the sloop rig to new heights. His 85-metre design concept Apex, developed with Royal Huisman , would be the largest sloop-rigged yacht in the world. “The loads are enormous,” he admits, “but it is all scalable.”
“The big disadvantage is sail handling. The downwind sails are pretty complicated once you start hoisting and retrieving, even with drum and reel systems. It is not straightforward.” But, he adds, “I think we know the advantages of a sloop: if you want all-round performance you can’t beat it, even at the top end.”
Advantages of a clipper rig
The DynaRig has been around as a concept since the 1960s when German engineer Wilhelm Prölss devised these free-standing, rotating rigs as a fuel-saving solution for large commercial vessels. The idea was ahead of its time, so much so that its first realisation came nearly 40 years later when American owner Tom Perkins bought the residual technology and commissioned Dykstra Naval Architects to create a three-masted DynaRig for Maltese Falcon , his 88-metre Perini Navi.
The DynaRig is not as efficient upwind as the Bermudan rig, and is probably not the best solution for a yacht smaller than around 65 metres, suggests Jeroen de Vos of Dykstra. “We wouldn’t advise putting a DynaRig on a small yacht because there are other ways to manage sail handling. But on a larger yacht the DynaRig becomes an alternative because there is no rigging, no highly loaded sheets, low-tech [small] sails and no big winches.”
The beauty of the DynaRig is that its automatic systems can be handled by one or two people and, notes de Vos, “you don’t have to get out of your chair to go sailing. Maltese Falcon can sail on and off the anchor and can set 2,400 square metres of sail in six minutes. On other boats it takes six minutes to get the sail cover off.”
Damon Roberts of Magma Structures, which built the rigs for Maltese Falcon and the only other DynaRig yacht to date, the 106-metre Black Pearl , says: “You can do any manoeuvre easily; it’s like sailing a dinghy. There are no highly loaded sheets or ropes or flogging lines. You can luff up, bear away, tack and gybe at any time and really enjoy sailing the boat without any apparent fuss.”
So with all these advantages, why has the DynaRig been chosen for only two sailing superyachts? For some designers, such as Malcolm McKeon, it is partly to do with compromises imposed by the large mast tubes and bearing diameters on the internal structure and layout, “particularly in the cockpit area,” he says. He also points out that the clipper ship look is not to every owner’s taste. “Sloops are more conventional looking,” he says.
Damon Roberts says there is still development work to be done. He has teamed up with Southern Spars and, with their additional resources, expects evolution with several new projects. “These include two at the moment that are twin-masted DynaRigs,” he says. “We did quite a lot of wind tunnel work early on as we felt that was really the sweet spot for it, and people will be stunned at how efficient these are.”
The future of the wingsail
Wingsails have been around for decades too, but with their adoption by the last two America’s Cups and the confluence with foiling technology, they have undergone rapid and revolutionary development.
To date, there is no proven solution for reefing a wing that would be suitable for offshore cruising or ocean passages. As the pronounced aerodynamic “nose” at the leading edge of a wing can develop force in strong winds, they could potentially make a large yacht uncontrollable in port as well.
“How do you get rid of sail and how does [a boat] handle when caught out in heavy wind conditions – which you will be? How do you keep the angle of attack all the way up the rig and how do you handle squalls?” Roberts asks. “A mechanism to reduce sail might be easy to sketch out but it is difficult to engineer.”
Jeroen de Vos says: “The wingsails are more developed towards performance and I wouldn’t say that they are as practical as soft sails or would ever make handling easier. But if somebody wants that, why not? Reefable soft sails, wings that are inflated, hoisted panels, possibly these are applicable. The development of this area is happening very rapidly.”
Paul MacDonald of Southern Spars agrees that the time is not here yet but thinks it will come. “In reality we are in the early days of wings. For the America’s Cup, they are the most efficient way of sailing by a long shot, but with them comes handling issues, which the industry hasn’t resolved yet. But I am sure they will be in 10 years’ time. Designers such as VPLP are starting to [work on concepts] and we are going to see something that is usable and efficient and suitable for ocean work eventually,” he says. “And whatever the solution is, you imagine that it will scale.”
Looking to the future
A drive for greener superyachts could present an opportunity for sail, but perhaps it needs to be less daunting.
“There is this intimidation of sheets and backstays, and sailing is a language you don’t learn in a year,” Tripp says. “But we have a project we are doing now with a yard with some new rig technology and some soft wings that we think is going to be viable.
“We can uncomplicate sailing more. If we can win people over from motorboats it will help, but we are only winning these battles one or two at a time. We need [more] projects like Sailing Yacht A , which are something really different, and do more things better with less energy. We as architects need to elicit change.”
McKeon also sees change coming. “People are more and more concerned about keeping their image green and sails are the way to do that,” he says. “Simpler sailing systems are needed. The current generation is used to Bermudan sloops. In years to come, the traditionalists will all be gone, and maybe new people will be more accepting of [different ideas]. I think in the future we will certainly have wings.”
More about this yacht
Yachts for sale, similar yachts for sale, yachts for charter, more stories, most popular, from our partners, sponsored listings.

Beginner’s Guide: How To Rig A Sailboat – Step By Step Tutorial
Alex Morgan

Rigging a sailboat is a crucial process that ensures the proper setup and functioning of a sailboat’s various components. Understanding the process and components involved in rigging is essential for any sailor or boat enthusiast. In this article, we will provide a comprehensive guide on how to rig a sailboat.
Introduction to Rigging a Sailboat
Rigging a sailboat refers to the process of setting up the components that enable the sailboat to navigate through the water using wind power. This includes assembling and positioning various parts such as the mast, boom, standing rigging, running rigging, and sails.
Understanding the Components of a Sailboat Rigging
Before diving into the rigging process, it is important to have a good understanding of the key components involved. These components include:
The mast is the tall vertical spar that provides vertical support to the sails and holds them in place.
The boom is the horizontal spar that runs along the bottom edge of the sail and helps control the shape and position of the sail.
- Standing Rigging:
Standing rigging consists of the wires and cables that support and stabilize the mast, keeping it upright.
- Running Rigging:
Running rigging refers to the lines and ropes used to control the sails, such as halyards, sheets, and control lines.
Preparing to Rig a Sailboat
Before rigging a sailboat, there are a few important steps to take. These include:
- Checking the Weather Conditions:
It is crucial to assess the weather conditions before rigging a sailboat. Unfavorable weather, such as high winds or storms, can make rigging unsafe.
- Gathering the Necessary Tools and Equipment:
Make sure to have all the necessary tools and equipment readily available before starting the rigging process. This may include wrenches, hammers, tape, and other common tools.
- Inspecting the Rigging Components:
In the upcoming sections of this article, we will provide a step-by-step guide on how to rig a sailboat, as well as important safety considerations and tips to keep in mind. By following these guidelines, you will be able to rig your sailboat correctly and safely, allowing for a smooth and enjoyable sailing experience.
Key takeaway:
- Rigging a sailboat maximizes efficiency: Proper rigging allows for optimized sailing performance, ensuring the boat moves smoothly through the water.
- Understanding sailboat rigging components: Familiarity with the various parts of a sailboat rigging, such as the mast, boom, and standing and running riggings, is essential for effective rigging setup.
- Importance of safety in sailboat rigging: Ensuring safety is crucial during the rigging process, including wearing a personal flotation device, securing loose ends and lines, and being mindful of overhead power lines.
Get ready to set sail and dive into the fascinating world of sailboat rigging! We’ll embark on a journey to understand the various components that make up a sailboat’s rigging. From the majestic mast to the nimble boom , and the intricate standing rigging to the dynamic running rigging , we’ll explore the crucial elements that ensure smooth sailing. Not forgetting the magnificent sail, which catches the wind and propels us forward. So grab your sea legs and let’s uncover the secrets of sailboat rigging together.
Understanding the mast is crucial when rigging a sailboat. Here are the key components and steps to consider:
1. The mast supports the sails and rigging of the sailboat. It is made of aluminum or carbon fiber .
2. Before stepping the mast , ensure that the area is clear and the boat is stable. Have all necessary tools and equipment ready.
3. Inspect the mast for damage or wear. Check for corrosion , loose fittings , and cracks . Address any issues before proceeding.
4. To step the mast , carefully lift it into an upright position and insert the base into the mast step on the deck of the sailboat.
5. Secure the mast using the appropriate rigging and fasteners . Attach the standing rigging , such as shrouds and stays , to the mast and the boat’s hull .
Fact: The mast of a sailboat is designed to withstand wind resistance and the tension of the rigging for stability and safe sailing.
The boom is an essential part of sailboat rigging. It is a horizontal spar that stretches from the mast to the aft of the boat. Constructed with durable yet lightweight materials like aluminum or carbon fiber, the boom provides crucial support and has control over the shape and position of the sail. It is connected to the mast through a boom gooseneck , allowing it to pivot. One end of the boom is attached to the mainsail, while the other end is equipped with a boom vang or kicker, which manages the tension and angle of the boom. When the sail is raised, the boom is also lifted and positioned horizontally by using the topping lift or lazy jacks.
An incident serves as a warning that emphasizes the significance of properly securing the boom. In strong winds, an improperly fastened boom swung across the deck, resulting in damage to the boat and creating a safety hazard. This incident highlights the importance of correctly installing and securely fastening all rigging components, including the boom, to prevent accidents and damage.
3. Standing Rigging
When rigging a sailboat, the standing rigging plays a vital role in providing stability and support to the mast . It consists of several key components, including the mast itself, along with the shrouds , forestay , backstay , and intermediate shrouds .
The mast, a vertical pole , acts as the primary support structure for the sails and the standing rigging. Connected to the top of the mast are the shrouds , which are cables or wires that extend to the sides of the boat, providing essential lateral support .
The forestay is another vital piece of the standing rigging. It is a cable or wire that runs from the top of the mast to the bow of the boat, ensuring forward support . Similarly, the backstay , also a cable or wire, runs from the mast’s top to the stern of the boat, providing important backward support .
To further enhance the rig’s stability , intermediate shrouds are installed. These additional cables or wires are positioned between the main shrouds, as well as the forestay or backstay. They offer extra support , strengthening the standing rigging system.
Regular inspections of the standing rigging are essential to detect any signs of wear, such as fraying or corrosion . It is crucial to ensure that all connections within the rig are tight and secure, to uphold its integrity. Should any issues be identified, immediate attention must be given to prevent accidents or damage to the boat. Prioritizing safety is of utmost importance when rigging a sailboat, thereby necessitating proper maintenance of the standing rigging. This ensures a safe and enjoyable sailing experience.
Note: <p> tags have been kept intact.
4. Running Rigging
Running Rigging
When rigging a sailboat, the running rigging is essential for controlling the sails and adjusting their position. It is important to consider several aspects when dealing with the running rigging.
1. Choose the right rope: The running rigging typically consists of ropes with varying properties such as strength, stretch, and durability. Weather conditions and sailboat size should be considered when selecting the appropriate rope.
2. Inspect and maintain the running rigging: Regularly check for signs of wear, fraying, or damage. To ensure safety and efficiency, replace worn-out ropes.
3. Learn essential knot tying techniques: Having knowledge of knots like the bowline, cleat hitch, and reef knot is crucial for securing the running rigging and adjusting sails.
4. Understand different controls: The running rigging includes controls such as halyards, sheets, and control lines. Familiarize yourself with their functions and proper usage to effectively control sail position and tension.
5. Practice proper sail trimming: Adjusting the tension of the running rigging significantly affects sailboat performance. Mastering sail trimming techniques will help optimize sail shape and maximize speed.
By considering these factors and mastering running rigging techniques, you can enhance your sailing experience and ensure the safe operation of your sailboat.
The sail is the central component of sailboat rigging as it effectively harnesses the power of the wind to propel the boat.
When considering the sail, there are several key aspects to keep in mind:
– Material: Sails are typically constructed from durable and lightweight materials such as Dacron or polyester. These materials provide strength and resistance to various weather conditions.
– Shape: The shape of the sail plays a critical role in its overall performance. A well-shaped sail should have a smooth and aerodynamic profile, which allows for maximum efficiency in capturing wind power.
– Size: The size of the sail is determined by its sail area, which is measured in square feet or square meters. Larger sails have the ability to generate more power, but they require greater skill and experience to handle effectively.
– Reefing: Reefing is the process of reducing the sail’s size to adapt to strong winds. Sails equipped with reefing points allow sailors to decrease the sail area, providing better control in challenging weather conditions.
– Types: There are various types of sails, each specifically designed for different purposes. Common sail types include mainsails, jibs, genoas, spinnakers, and storm sails. Each type possesses its own unique characteristics and is utilized under specific wind conditions.
Understanding the sail and its characteristics is vital for sailors, as it directly influences the boat’s speed, maneuverability, and overall safety on the water.
Getting ready to rig a sailboat requires careful preparation and attention to detail. In this section, we’ll dive into the essential steps you need to take before setting sail. From checking the weather conditions to gathering the necessary tools and equipment, and inspecting the rigging components, we’ll ensure that you’re fully equipped to navigate the open waters with confidence. So, let’s get started on our journey to successfully rigging a sailboat!
1. Checking the Weather Conditions
Checking the weather conditions is crucial before rigging a sailboat for a safe and enjoyable sailing experience. Monitoring the wind speed is important in order to assess the ideal sailing conditions . By checking the wind speed forecast , you can determine if the wind is strong or light . Strong winds can make sailboat control difficult, while very light winds can result in slow progress.
Another important factor to consider is the wind direction . Assessing the wind direction is crucial for route planning and sail adjustment. Favorable wind direction helps propel the sailboat efficiently, making your sailing experience more enjoyable.
In addition to wind speed and direction, it is also important to consider weather patterns . Keep an eye out for impending storms or heavy rain. It is best to avoid sailing in severe weather conditions that may pose a safety risk. Safety should always be a top priority when venturing out on a sailboat.
Another aspect to consider is visibility . Ensure good visibility by checking for fog, haze, or any other conditions that may hinder navigation. Clear visibility is important for being aware of other boats and potential obstacles that may come your way.
Be aware of the local conditions . Take into account factors such as sea breezes, coastal influences, or tidal currents. These local factors greatly affect sailboat performance and safety. By considering all of these elements, you can have a successful and enjoyable sailing experience.
Here’s a true story to emphasize the importance of checking the weather conditions. One sunny afternoon, a group of friends decided to go sailing. Before heading out, they took the time to check the weather conditions. They noticed that the wind speed was expected to be around 10 knots, which was perfect for their sailboat. The wind direction was coming from the northwest, allowing for a pleasant upwind journey. With clear visibility and no approaching storms, they set out confidently, enjoying a smooth and exhilarating sail. This positive experience was made possible by their careful attention to checking the weather conditions beforehand.
2. Gathering the Necessary Tools and Equipment
To efficiently gather all of the necessary tools and equipment for rigging a sailboat, follow these simple steps:
- First and foremost, carefully inspect your toolbox to ensure that you have all of the basic tools such as wrenches, screwdrivers, and pliers.
- Make sure to check if you have a tape measure or ruler available as they are essential for precise measurements of ropes or cables.
- Don’t forget to include a sharp knife or rope cutter in your arsenal as they will come in handy for cutting ropes or cables to the desired lengths.
- Gather all the required rigging hardware including shackles, pulleys, cleats, and turnbuckles.
- It is always prudent to check for spare ropes or cables in case replacements are needed during the rigging process.
- If needed, consider having a sailing knife or marlinspike tool for splicing ropes or cables.
- For rigging a larger sailboat, it is crucial to have a mast crane or hoist to assist with stepping the mast.
- Ensure that you have a ladder or some other means of reaching higher parts of the sailboat, such as the top of the mast.
Once, during the preparation of rigging my sailboat, I had a moment of realization when I discovered that I had forgotten to bring a screwdriver . This unfortunate predicament occurred while I was in a remote location with no nearby stores. Being resourceful, I improvised by utilizing a multipurpose tool with a small knife blade, which served as a makeshift screwdriver. Although it was not the ideal solution, it allowed me to accomplish the task. Since that incident, I have learned the importance of double-checking my toolbox before commencing any rigging endeavor. This practice ensures that I have all of the necessary tools and equipment, preventing any unexpected surprises along the way.
3. Inspecting the Rigging Components
Inspecting the rigging components is essential for rigging a sailboat safely. Here is a step-by-step guide on inspecting the rigging components:
1. Visually inspect the mast, boom, and standing rigging for damage, such as corrosion, cracks, or loose fittings.
2. Check the tension of the standing rigging using a tension gauge. It should be within the recommended range from the manufacturer.
3. Examine the turnbuckles, clevis pins, and shackles for wear or deformation. Replace any damaged or worn-out hardware.
4. Inspect the running rigging, including halyards and sheets, for fraying, signs of wear, or weak spots. Replace any worn-out lines.
5. Check the sail for tears, wear, or missing hardware such as grommets or luff tape.
6. Pay attention to the connections between the standing rigging and the mast. Ensure secure connections without any loose or missing cotter pins or rigging screws.
7. Inspect all fittings, such as mast steps, spreader brackets, and tangs, to ensure they are securely fastened and in good condition.
8. Conduct a sea trial to assess the rigging’s performance and make necessary adjustments.
Regularly inspecting the rigging components is crucial for maintaining the sailboat’s rigging system’s integrity, ensuring safe sailing conditions, and preventing accidents or failures at sea.
Once, I went sailing on a friend’s boat without inspecting the rigging components beforehand. While at sea, a sudden gust of wind caused one of the shrouds to snap. Fortunately, no one was hurt, but we had to cut the sail loose and carefully return to the marina. This incident taught me the importance of inspecting the rigging components before sailing to avoid unforeseen dangers.
Step-by-Step Guide on How to Rig a Sailboat
Get ready to set sail with our step-by-step guide on rigging a sailboat ! We’ll take you through the process from start to finish, covering everything from stepping the mast to setting up the running rigging . Learn the essential techniques and tips for each sub-section, including attaching the standing rigging and installing the boom and sails . Whether you’re a seasoned sailor or a beginner, this guide will have you ready to navigate the open waters with confidence .
1. Stepping the Mast
To step the mast of a sailboat, follow these steps:
1. Prepare the mast: Position the mast near the base of the boat.
2. Attach the base plate: Securely fasten the base plate to the designated area on the boat.
3. Insert the mast step: Lower the mast step into the base plate and align it with the holes or slots.
4. Secure the mast step: Use fastening screws or bolts to fix the mast step in place.
5. Raise the mast: Lift the mast upright with the help of one or more crew members.
6. Align the mast: Adjust the mast so that it is straight and aligned with the boat’s centerline.
7. Attach the shrouds: Connect the shrouds to the upper section of the mast, ensuring proper tension.
8. Secure the forestay: Attach the forestay to the bow of the boat, ensuring it is securely fastened.
9. Final adjustments: Check the tension of the shrouds and forestay, making any necessary rigging adjustments.
Following these steps ensures that the mast is properly stepped and securely in place, allowing for a safe and efficient rigging process. Always prioritize safety precautions and follow manufacturer guidelines for your specific sailboat model.
2. Attaching the Standing Rigging
To attach the standing rigging on a sailboat, commence by preparing the essential tools and equipment, including wire cutters, crimping tools, and turnbuckles.
Next, carefully inspect the standing rigging components for any indications of wear or damage.
After inspection, fasten the bottom ends of the shrouds and stays to the chainplates on the deck.
Then, securely affix the top ends of the shrouds and stays to the mast using adjustable turnbuckles .
To ensure proper tension, adjust the turnbuckles accordingly until the mast is upright and centered.
Utilize a tension gauge to measure the tension in the standing rigging, aiming for around 15-20% of the breaking strength of the rigging wire.
Double-check all connections and fittings to verify their security and proper tightness.
It is crucial to regularly inspect the standing rigging for any signs of wear or fatigue and make any necessary adjustments or replacements.
By diligently following these steps, you can effectively attach the standing rigging on your sailboat, ensuring its stability and safety while on the water.
3. Installing the Boom and Sails
To successfully complete the installation of the boom and sails on a sailboat, follow these steps:
1. Begin by securely attaching the boom to the mast. Slide it into the gooseneck fitting and ensure it is firmly fastened using a boom vang or another appropriate mechanism.
2. Next, attach the main sail to the boom. Slide the luff of the sail into the mast track and securely fix it in place using sail slides or cars.
3. Connect the mainsheet to the boom. One end should be attached to the boom while the other end is connected to a block or cleat on the boat.
4. Proceed to attach the jib or genoa. Make sure to securely attach the hanks or furler line to the forestay to ensure stability.
5. Connect the jib sheets. One end of each jib sheet should be attached to the clew of the jib or genoa, while the other end is connected to a block or winch on the boat.
6. Before setting sail, it is essential to thoroughly inspect all lines and connections. Ensure that they are properly tensioned and that all connections are securely fastened.
During my own experience of installing the boom and sails on my sailboat, I unexpectedly encountered a strong gust of wind. As a result, the boom began swinging uncontrollably, requiring me to quickly secure it to prevent any damage. This particular incident served as a vital reminder of the significance of properly attaching and securing the boom, as well as the importance of being prepared for unforeseen weather conditions while rigging a sailboat.
4. Setting Up the Running Rigging
Setting up the running rigging on a sailboat involves several important steps. First, attach the halyard securely to the head of the sail. Then, connect the sheets to the clew of the sail. If necessary, make sure to secure the reefing lines . Attach the outhaul line to the clew of the sail and connect the downhaul line to the tack of the sail. It is crucial to ensure that all lines are properly cleated and organized. Take a moment to double-check the tension and alignment of each line. If you are using a roller furling system, carefully wrap the line around the furling drum and securely fasten it. Perform a thorough visual inspection of the running rigging to check for any signs of wear or damage. Properly setting up the running rigging is essential for safe and efficient sailing. It allows for precise control of the sail’s position and shape, ultimately optimizing the boat’s performance on the water.
Safety Considerations and Tips
When it comes to rigging a sailboat, safety should always be our top priority. In this section, we’ll explore essential safety considerations and share some valuable tips to ensure smooth sailing. From the importance of wearing a personal flotation device to securing loose ends and lines, and being cautious around overhead power lines, we’ll equip you with the knowledge and awareness needed for a safe and enjoyable sailing experience. So, let’s set sail and dive into the world of safety on the water!
1. Always Wear a Personal Flotation Device
When rigging a sailboat, it is crucial to prioritize safety and always wear a personal flotation device ( PFD ). Follow these steps to properly use a PFD:
- Select the appropriate Coast Guard-approved PFD that fits your size and weight.
- Put on the PFD correctly by placing your arms through the armholes and securing all the straps for a snug fit .
- Adjust the PFD for comfort , ensuring it is neither too tight nor too loose, allowing freedom of movement and adequate buoyancy .
- Regularly inspect the PFD for any signs of wear or damage, such as tears or broken straps, and replace any damaged PFDs immediately .
- Always wear your PFD when on or near the water, even if you are a strong swimmer .
By always wearing a personal flotation device and following these steps, you will ensure your safety and reduce the risk of accidents while rigging a sailboat. Remember, prioritize safety when enjoying water activities.
2. Secure Loose Ends and Lines
Inspect lines and ropes for frayed or damaged areas. Secure loose ends and lines with knots or appropriate cleats or clamps. Ensure all lines are properly tensioned to prevent loosening during sailing. Double-check all connections and attachments for security. Use additional safety measures like extra knots or stopper knots to prevent line slippage.
To ensure a safe sailing experience , it is crucial to secure loose ends and lines properly . Neglecting this important step can lead to accidents or damage to the sailboat. By inspecting, securing, and tensioning lines , you can have peace of mind knowing that everything is in place. Replace or repair any compromised lines or ropes promptly. Securing loose ends and lines allows for worry-free sailing trips .
3. Be Mindful of Overhead Power Lines
When rigging a sailboat, it is crucial to be mindful of overhead power lines for safety. It is important to survey the area for power lines before rigging the sailboat. Maintain a safe distance of at least 10 feet from power lines. It is crucial to avoid hoisting tall masts or long antenna systems near power lines to prevent contact. Lower the mast and tall structures when passing under a power line to minimize the risk of contact. It is also essential to be cautious in areas where power lines run over the water and steer clear to prevent accidents.
A true story emphasizes the importance of being mindful of overhead power lines. In this case, a group of sailors disregarded safety precautions and their sailboat’s mast made contact with a low-hanging power line, resulting in a dangerous electrical shock. Fortunately, no serious injuries occurred, but it serves as a stark reminder of the need to be aware of power lines while rigging a sailboat.
Some Facts About How To Rig A Sailboat:
- ✅ Small sailboat rigging projects can improve sailing performance and save money. (Source: stingysailor.com)
- ✅ Rigging guides are available for small sailboats, providing instructions and tips for rigging. (Source: westcoastsailing.net)
- ✅ Running rigging includes lines used to control and trim the sails, such as halyards and sheets. (Source: sailingellidah.com)
- ✅ Hardware used in sailboat rigging includes winches, blocks, and furling systems. (Source: sailingellidah.com)
- ✅ A step-by-step guide can help beginners rig a small sailboat for sailing. (Source: tripsavvy.com)
Frequently Asked Questions
1. how do i rig a small sailboat.
To rig a small sailboat, follow these steps: – Install or check the rudder, ensuring it is firmly attached. – Attach or check the tiller, the long steering arm mounted to the rudder. – Attach the jib halyard by connecting the halyard shackle to the head of the sail and the grommet in the tack to the bottom of the forestay. – Hank on the jib by attaching the hanks of the sail to the forestay one at a time. – Run the jib sheets by tying or shackling them to the clew of the sail and running them back to the cockpit. – Attach the mainsail by spreading it out and attaching the halyard shackle to the head of the sail. – Secure the tack, clew, and foot of the mainsail to the boom using various lines and mechanisms. – Insert the mainsail slugs into the mast groove, gradually raising the mainsail as the slugs are inserted. – Cleat the main halyard and lower the centerboard into the water. – Raise the jib by pulling down on the jib halyard and cleating it on the other side of the mast. – Tighten the mainsheet and one jibsheet to adjust the sails and start moving forward.
2. What are the different types of sailboat rigs?
Sailboat rigs can be classified into three main types: – Sloop rig: This rig has a single mast with a mainsail and a headsail, typically a jib or genoa. – Cutter rig: This rig has two headsails, a smaller jib or staysail closer to the mast, and a larger headsail, usually a genoa, forward of it, alongside a mainsail. – Ketch rig: This rig has two masts, with the main mast taller than the mizzen mast. It usually has a mainsail, headsail, and a mizzen sail. Each rig has distinct characteristics and is suitable for different sailing conditions and preferences.
3. What are the essential parts of a sailboat?
The essential parts of a sailboat include: – Mast: The tall vertical spar that supports the sails. – Boom: The horizontal spar connected to the mast, which extends outward and supports the foot of the mainsail. – Rudder: The underwater appendage that steers the boat. – Centerboard or keel: A retractable or fixed fin-like structure that provides stability and prevents sideways drift. – Sails: The fabric structures that capture the wind’s energy to propel the boat. – Running rigging: The lines or ropes used to control the sails and sailing equipment. – Standing rigging: The wires and cables that support the mast and reinforce the spars. These are the basic components necessary for the functioning of a sailboat.
4. What is a spinnaker halyard?
A spinnaker halyard is a line used to hoist and control a spinnaker sail. The spinnaker is a large, lightweight sail that is used for downwind sailing or reaching in moderate to strong winds. The halyard attaches to the head of the spinnaker and is used to raise it to the top of the mast. Once hoisted, the spinnaker halyard can be adjusted to control the tension and shape of the sail.
5. Why is it important to maintain and replace worn running rigging?
It is important to maintain and replace worn running rigging for several reasons: – Safety: Worn or damaged rigging can compromise the integrity and stability of the boat, posing a safety risk to both crew and vessel. – Performance: Worn rigging can affect the efficiency and performance of the sails, diminishing the boat’s speed and maneuverability. – Reliability: Aging or worn rigging is more prone to failure, which can lead to unexpected problems and breakdowns. Regular inspection and replacement of worn running rigging is essential to ensure the safe and efficient operation of a sailboat.
6. Where can I find sailboat rigging books or guides?
There are several sources where you can find sailboat rigging books or guides: – Online: Websites such as West Coast Sailing and Stingy Sailor offer downloadable rigging guides for different sailboat models. – Bookstores: Many bookstores carry a wide selection of boating and sailing books, including those specifically focused on sailboat rigging. – Sailing schools and clubs: Local sailing schools or yacht clubs often have resources available for learning about sailboat rigging. – Manufacturers: Some sailboat manufacturers, like Hobie Cat and RS Sailing, provide rigging guides for their specific sailboat models. Consulting these resources can provide valuable information and instructions for rigging your sailboat properly.
About the author
Leave a Reply Cancel reply
Your email address will not be published. Required fields are marked *
Save my name, email, and website in this browser for the next time I comment.
Latest posts

The history of sailing – from ancient times to modern adventures
History of Sailing Sailing is a time-honored tradition that has evolved over millennia, from its humble beginnings as a means of transportation to a beloved modern-day recreational activity. The history of sailing is a fascinating journey that spans cultures and centuries, rich in innovation and adventure. In this article, we’ll explore the remarkable evolution of…

Sailing Solo: Adventures and Challenges of Single-Handed Sailing
Solo Sailing Sailing has always been a pursuit of freedom, adventure, and self-discovery. While sailing with a crew is a fantastic experience, there’s a unique allure to sailing solo – just you, the wind, and the open sea. Single-handed sailing, as it’s often called, is a journey of self-reliance, resilience, and the ultimate test of…

Sustainable Sailing: Eco-Friendly Practices on the boat
Eco Friendly Sailing Sailing is an exhilarating and timeless way to explore the beauty of the open water, but it’s important to remember that our oceans and environment need our protection. Sustainable sailing, which involves eco-friendly practices and mindful decision-making, allows sailors to enjoy their adventures while minimizing their impact on the environment. In this…

IMAGES
VIDEO
COMMENTS
Rigging Line; Running Rigging; Turnbuckles & Rigging Screws; Variant boom; Gizmo Set; Rigging tools; Rig Kits. EC12 Rig Kit; IOM Rig Kits; ODOM Rig Kit and Hardware; RG65; Santa Barbara Rig Kit; Soling 50 Rig Kit; Star 45 Rig Kit; U.S. One Meter Rig Kits; Sailmaking Materials. Sail Identification; DF-95 & DF-65 . DF-65 Hatch & Battery Sets ...
The art of rigging involves setting up the sails in a way that accurately represents the real-life counterpart, capturing the essence and beauty of sailing. In this article, we will delve into the secrets and techniques of sail rigging that will elevate the realism of your model to new heights. Unveiling the Secrets of Rigging: Techniques to ...
Work from the centre of the ship out and try to avoid locking yourself into difficult positions. A Rigging Tool presented in the Tools section of our Catalogue will be helpful when rigging. The various names for the Running Rigging are presented below. Fore brace. Fore lower topsail brace.
Rig Building Tips: IOM class rules don't allow rotating masts and the masts mostly used are without an internal track. The best mast is 12mm or ½" aluminum tube available at local hardware and metal stores. If you want to invest more you can order from RC yachting accessory dealers as well and save maybe 50g with the rig.
the history of the future. At the age of fifteen David Potter started sailing model boats at the world famous Birkenhead Model Yacht Club. In 2012 he decided to turn his passionate hobby into a business and launched Potter Solutions. As a qualified engineer, with a good eye for detail, he produces a range of equipment for the majority of radio ...
Rigging Cutter Square Sail Sheets and Tack By Thukydides, March 5. 5 replies; 219 views; Dr PR; March 8 ... Model Ship World ® and the MSW logo are Registered Trademarks, and belong to the Nautical Research Guild (United States Patent and Trademark Office: No. 6,929,264 & No. 6,929,274, registered Dec. 20, 2022) ... rigging and sails IPS Theme ...
Install and rig the booms and gaffs. Make the sails based on the actual layout of my ship. De-rig the booms and gaffs, and remove them from the ship. Attach sails to the booms and gaffs as appropriate. Re-install the booms and gaffs, and their rigging. Add the additional rigging for each sail.
If you are looking for high-quality rigs and parts for your radio-controlled sailboat, look no further than Sailboat RC. We offer a wide range of products, from masts and booms to sails and fittings, to suit your needs and preferences. Sailboat RC is the home of 3x World Champions and a trusted source of RC sailing expertise. Shop now and enjoy the poetry of sails!
In nautical parlance sails are a "suit" whether that be 2, 3 or 4 sails (or more) for a yacht or a working boat, or a ship of the line such as HMS Victory where a dozen or more sails may be involved. All our sails are priced as a suit. Makers of model sails to the National Maritime Museum Cornwall.
The Model Shipways Bluenose kit provides rigging line in a few different sizes: 0.008″ (very thin, like thread), 0.021″ (medium weight), and 0.028″ (thicker). These don't match what's indicated on the plans. The plans show a variety of thicknesses, like .006″, .012″, and more.
Almost any material used for scale model sail making is, by definition, too thick. With furled sails, though, it's possible to compensate for that problem by reducing the sail's depth - and thus the size of the bundle. A favourite material for furled sails is "silkspan" tissue, subjected to a special (but quite simple) treatment.
Recognized by the American Model Yachting Association (AMYA) as a racing class, Thunder Tiger's Victoria has become synonymous with maximum yachting pleasure. FEATURES Highly prefabricated with a blow-molded ABS hull/deck, sails, mast, deck fittings and rigging hardware.
PLEASE NOTE: THIS VIDEO HAS BEEN UPDATED WITH ENHANCED GRAPHICS AND IMPROVED SOUND. CHECK IT OUT HERE https://youtu.be/tRgWtPaCQQcA beginners guide to sailbo...
Pond Sailboat Rigging. by L. Novak. (Houston, TX) I just acquired a pond sail boat that is in a very sad state of disrepair. I have completed the restoration of the hull and getting ready to put the mast back on and add sails. Unfortunately there were no sails and all of the rigging was gone when I got the boat so I have no idea as to how to re ...
Gaff ketch - two-masted (mizzen), two mainsails, staysails, fore-and-aft rigged. Full-rigged ship or tall ship - three or more masts, mainsail on each mast, staysails, square-rigged. The first word is the shape and rigging of the mainsail. So this is the way the sail is attached to the mast. I'll go into this later on.
Sails and rigging are the engine room of any sailing boat from small dinghies up to giant superyachts. No matter how big or how new your boat, the sails and rigging need to be checked regularly and will need intermittent updating. Updating of rigging on a yacht in particular will often be a requirement for insurance purposes so any owner will ...
Rigging Only is dedicated to providing quality sailboat hardware and sailboat rigging at affordable prices to sailors through out the world. Checkout View Cart (0) (508) 992-0434 ... we cannot provide estimates or build a replacement rig based solely on the model of your boat. Please call or see our Measurement Guides section for help on ...
Short answer: rig sails Rig sails refer to the various types of sails used in sailing rigs. They include mainsails, jibs, spinnakers, genoas, and more. Rig sails play a crucial role in harnessing wind power to propel boats and are designed for different wind conditions and sailing purposes. How to Rig Sails: A Step-by-Step Guide.
The running rigging is the rigging on a sailboat that's used to operate the sails. For example, the halyard, which is used to lower and heave the mainsail. The standing rigging is the rigging that is used to support the mast and sail plan. Standing Rigging. Here are the different parts that belong to the standing rigging:
Upwind, Aquijo sets a jib, staysail, mainsail and mizzen, all in North Sails 3Di, totalling 3,821 square metres. A furling Code sail for reaching and downwind angles increases that to a vast 5,051 square metres. While Aquijo has a crew retinue of 17, it can be controlled under sail by six or seven people.
To step the mast of a sailboat, follow these steps: 1. Prepare the mast: Position the mast near the base of the boat. 2. Attach the base plate: Securely fasten the base plate to the designated area on the boat. 3. Insert the mast step: Lower the mast step into the base plate and align it with the holes or slots. 4.
A beginners guide to sailboat rigging, including standing rigging and running rigging. This animated tutorial is the first in a series and covers sails, line...
Incredible detail in the rigging.. this is a one of a kind.. #sailing #sailboat #yacht #modelyacht #modelboat #..." Stunning model Sail boat. Incredible detail in the rigging.. this is a one of a kind.. #sailing #sailboat #yacht #modelyacht #modelboat #... | Instagram