Currently not on view

Two Sailboats
We are always open to learning more about our collections and updating the website. Does this record contain inaccurate information or language that you feel we should improve or change? Contact us here .
Please note that this particular artwork might not be on view when you visit. Don’t worry—we have plenty of exhibitions for you to explore.
Princeton Blog
Blog categories.
- All categories
- Mixed Media
- Oil Painting
- Artist Spotlight
- Fashionable Fridays: Art in Fashion
- Featured Brush
- Artist Tips
- Free Projects
- Painting Techniques
- What's New at Princeton Brush
- Where's Howard?

November 7, 2017
Watercolor Sailboat Painting Tutorial

Los Angeles-based watercolor artist Maria Raczynska demonstrates how to paint a beautiful birds-eye ocean scene with a sailboat in this video tutorial!
Filter Blog Categories
Filter gallery categories, gallery categories.
- Kurt Weismair
- Terry Moeller
- Gentian Osman
- Kickstradomis
- Holly Hanley
- Michael Fitts
- Josh Tiessen
- Imperial Gallery
- Heritage Gallery
- Summit Gallery
- Neptune Gallery
- Umbria Gallery
- Select Artiste Gallery
- Expressionism
Join Our Mailing List
Sign up now to receive monthly newsletters featuring talented artists, tutorials, news and more!
We do not sell your information. All emails include an unsubscribe link. You may opt-out at any time. See our privacy policy .

Jenna Rainey
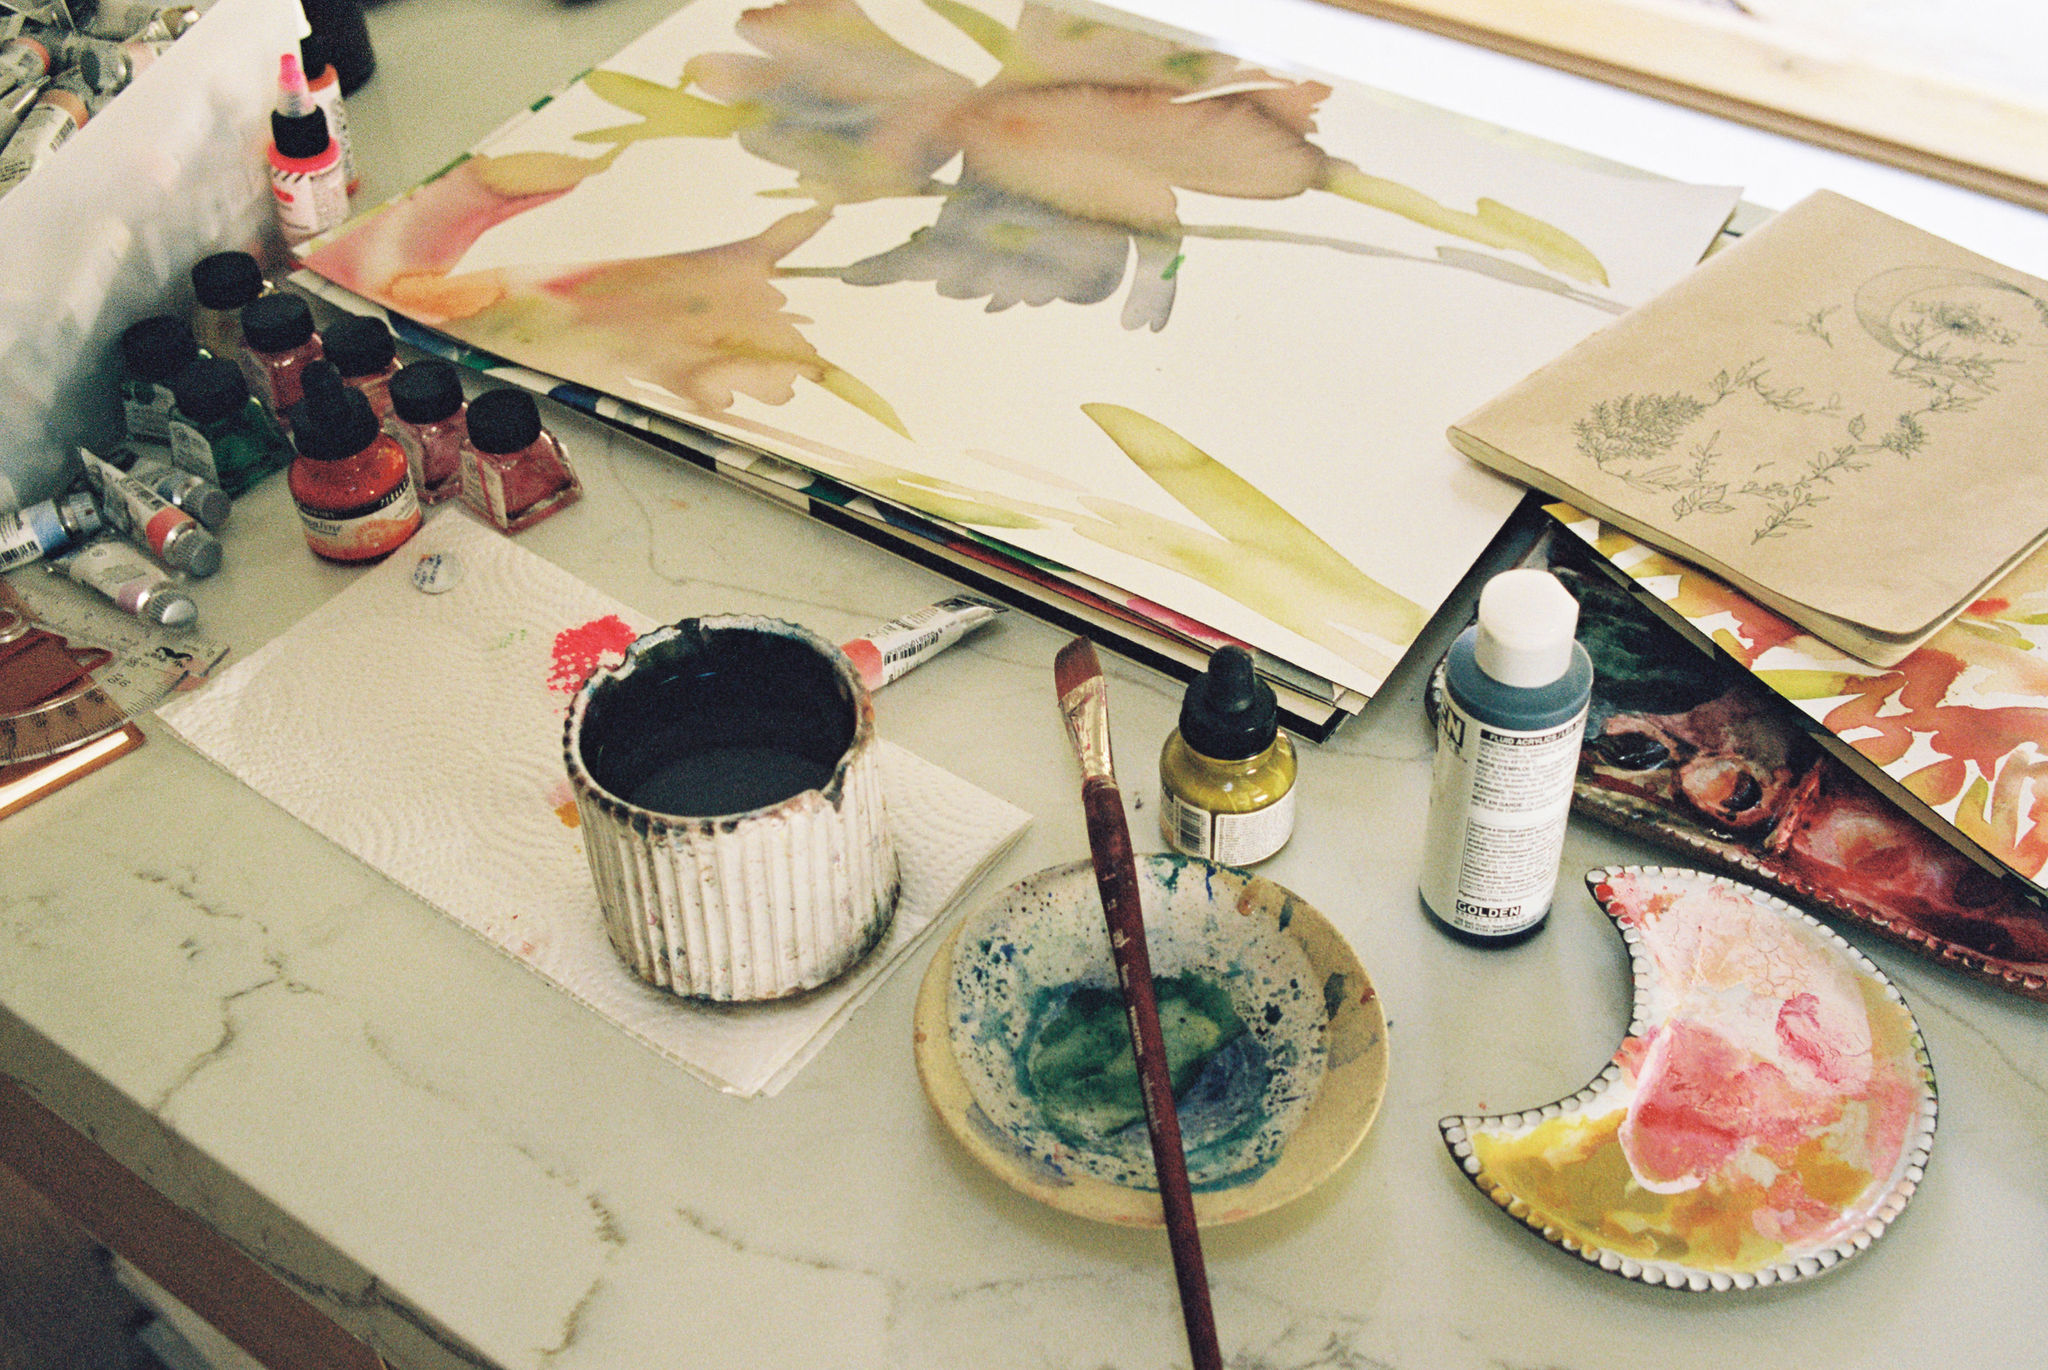
My supplies

CEO + ARTIST + EDUCATOR

hey friend!
I’m jenna rainey. , i'm an artist, self-taught designer, and multi-faceted creative entrepreneur who is hell-bent on teaching everyone how to find their inner creative voice..
My favorite supplies
A highly creative nerd with a unique breed of humor and the proud earner of a self-bestowed award for being the world’s most curious and driven human.

Hey I'm Jenna!
Hang out on youtube, it’s like netflix-binging bob ross videos, but with a dose of dry + quirky humor and fewer happy little tree references. .

Wanna Learn Watercolor ?
i wrote some books

DEVELOP YOUR ARTISTIC STYLE
GRAB THE FREE GUIDE

Watercolor Sailboat
Jenna .
This week, I'm teaching you how to paint a quick and easy watercolor sailboat landscape!
When I don't have a lot of time or I just want to play with colors and basic shapes, I paint loose-style. It's just whimsical and fun!
This watercolor sailboat takes less than 10 minutes to paint but includes simple techniques to inspire and spark creativity. This is a great tutorial for beginners, too!
Watercolor Sailboat Step by Step
00:00 – Intro. 00:32 – Color mixing. 01:06 – Painting the sail boat. 02:16 – Painting waves. 03:01 – Painting trees and background. 04:53 – Painting the sky. 06:14 – My thoughts on the painting. 06:51 – YOUR thoughts?
Links & Freebies
Get access to all my favorite art supplies and business tools here. My Amazon storefront with supplies and other random things I love. My Spotify painting playlist My Floral Watercolor E-book My Calligraphy E-book
Related videos
Complete Beginner's Guide to Watercolor Complete Beginner's Guide to Watercolor: Top Questions Answered Complete Beginner's Guide to Watercolor Flowers Watercolor Techniques: Wet-on-Wet Watercolor Techniques: Wet-on-Dry 10 Tips to Improve Watercolor
… and for even more tutorials, subscribe to my YouTube channel!
Patreon Community
Join my Patreon community! You have a variety of fun options to choose from like:
- Watch my YouTube tutorials ad-free
- Get early access to the tutorials before they're released on YouTube
- Patreon-exclusive tutorials
Head on over to Patreon to get all the fun details.
by Jenna Rainey
+ show Comments
- Hide Comments
add a comment
Leave a Reply Cancel reply
Your email address will not be published. Required fields are marked *

Browse By Category
art + creativity
So Hot Right Now

Business Resources
5 Energy Management Tips for Creative Entrepreneurs

The Best Watercolor Tutorials For Beginners

How to Avoid Shiny Object Syndrome as a Creative Entrepreneur

Social Media
Growing Your Business On Social Media in 2024
Is Social Media Making Your Art Bad?

10 Unconventional Methods to Spark Your Artistic Inspiration
back to blog home
Previous Post
« How to Map Out Your Content Calendar
“Should I Have a Blog?” Reasons Why Blogs Are Important »

The Complete Beginner's Guide to Watercolor
Get a rundown of all my recommended supplies, learn fundamental techniques and tips including color theory and composition, and walk away feeling super confident with your new love of watercolor!

Free e-book
Freebie Alert!
*signing up will subscribe you to our email list, you may unsubscribe at any time, though doing so means we cannot contact you with more free, valuable education and tips on this topic. you also agree to our terms and conditions and privacy policy ., an artist, self-taught designer, and multi-faceted creative entrepreneur who is hell-bent on teaching everyone how to find their inner creative voice., i'm jenna rainey..

Customer Support
YOU'VE GOT MAIL!
back to the top

Read the blog
watch me on youtube
my art community
art retreats
everyday watercolor books
licensing resources + tips
The Ceo advice column
Customer service
program login
community login
contact us!
© 2018-2024 JENNA RAINEY LLC | TERMS & CONDITIONS | PRIVACY POLICY | SITE CREDIT

@JENNARAINEY
Claude Monet’s six most splendid paintings of sailboats
by Barista Uno | Nov 15, 2021 | Maritime Art, Culture and History

Sailboats held as much as fascination for French Impressionist master Claude Monet as water lilies and haystacks . He made several paintings of them. The following, in my opinion, are his most splendid works on the subject. They spotlight not only the beauty and elegance of sailboats. More importantly, they show Monet’s inimitable handling of colour, light and atmosphere.
“For me, a landscape does not exist in its own right, since its appearance changes at every moment; but the surrounding atmosphere brings it to life – the air and the light, which vary continuously. For me, it is only the surrounding atmosphere which gives subjects their true value.”
— claude monet, 1891 (as quoted by tate uk ).

Sailboat in Petit-Gennevilliers, 1874 Claude Monet (1840–1926) Courtesy of Wikimedia Commons
A sky exploding with wonderful colours and reflections on the serene waters of the Seine combine to transform an ordinary sailboat into something majestic.

Sailboats, regatta at Argenteuil, 1874 Claude Monet (1840–1926) Courtesy of Wikimedia Commons
Monet used the same pale palette for the sky, the sailboats and the river, adding tints of red for the houses to break the uniformity. Sky and water are dappled, and the boats are appear bunched together as they move gracefully along the river. All this gives the painting a peculiar kind of vitality and charm.

Le Havre, Fishing Boats Leaving the Port, 1874 Claude Monet (1840–1926) Courtesy of Wikimedia Commons
It’s a wet morning, but a crowd has gathered on the waterfront to watch the fishing boats sail out of the harbour to the open sea. The small figures in the foreground make the boats and their proud sails seem like multistoried buildings. This is captivating art with a narrative element.

Fishing Boats at Sea, 1868 Claude Monet (1840–1926) Courtesy of Wikiart: Visual Art Encyclopedia
Monet turned an ordinary day in the life of fishermen into a theatrical scene. The boat in the foreground is like an actor making his stage entrance as the curtain of day is raised. The two boats are rendered in dark brown to provide a contrast to the streaks of white light in the sky.

The Cliffs at Étretat, 1886 Claude Monet (1840–1926) Courtesy of Wikiart: Visual Art Encyclopedia
This painting — one of many done by Monet of the Étretat cliffs — is bursting with energy. Small patches of green, yellow and brownish orange are skillfully blended to create the impression of a dynamic but not choppy sea. The brightly coloured sky and the flotilla of small fishing boats accentuate the massive, towering cliffs.

Seascape, Storm, 1866 Claude Monet (1840–1926) Courtesy of The Clark, Massachusetts, USA
Seascape, Storm is an early work by Monet that is markedly different in style and technique from his later Impressionist paintings. In lieu of small, swift brushtrokes, the colours are applied solidly with some areas worked with a palette knife. The fishing boat is set against an ominous grey sky, and the sea is mostly a dark green. Just below the horizon line is a long strip of bright green, Monet suggesting perhaps that the storm will blow over, that there is hope.
You may also like
Art vs. reality: claude monet’s paintings of étretat.

Did you like this article? Buy me a coffee
Let us know what you think of this article.
If you like this site buy me a coffee

Recent Posts
- Sunset over water: The power of black & white
- ‘I am a feminist’: A male writer speaks up
- Sunsets at sea: Colour versus black & white photography
- Which is correct: ‘in a boat’ or ‘on a boat’?
- Women in boats: A celebration of beauty
Don't Miss the Brew!
Sign up to be notified of updates to Marine Cafe Blog
You have Successfully Subscribed!
Pin it on pinterest.
How To Paint A Sailboat: A Complete Guide

Last Updated by
Daniel Wade
June 15, 2022
Whether you’re new to owning a sailboat or not, you have likely put some thought into painting your boat yourself. It is important to keep your boat well painted as it can save you a lot of money in the long run. It can also save you a lot of money if you choose to paint your boat yourself.
Whether or not this is the first time you have painted your boat, you will still find this article useful. It has lots of tips and tricks for making sure you get the job done and get it done well. Hiring a professional may be easier, but there is a sense of pride and accomplishment in doing it yourself. If you use this article as a reference, you can’t go wrong.
Table of contents
Why is it important to paint your sailboat?
Painting your boat is not just an excuse to put some creative flair into your boat, it is an important process in keeping the boat safe. Safe from salt, safe from barnacles, and safe from damage. The paint acts as a vital protective layer, without it your boat will be vulnerable to all kinds of damage. If you have a wooden hull, this protective layer will keep the wood from rotting. It can also plug any minuscule holes that might allow sea life and salt to make its way into the body of the boat.
There is also, of course, the added benefit of having a boat that looks good . A boat is a point of pride and should be treated as such. Having a glossy looking boat is something to be proud of. Most boats are not painted far above the waterline, so it is even an opportunity to make your boat stand out. Some people also believe that painting a boat brings good luck. Unless of course, you paint it green, green is thought to bring bad luck. Whether or not you believe that is up to you.
What are the benefits of painting your boat yourself?
When it comes to painting your boat there are only two options. Hire a professional boat painting contractor, or bite the bullet and do it yourself. They both have their pros and cons, of course, but there is so much more to be gained by doing it yourself. First of all, painting your boat yourself is just as fun as it is difficult. Learning to paint is a valuable life skill that you won’t regret learning as early on in your sailing career as possible. If you can learn to paint your boat now, you will save yourself a small fortune in the long run.
Hiring a contractor is expensive, to say the least, it may be faster and easier overall, but the extra cost can make it simply not feasible. Or simply unappealing. If this is the first time you are painting your sailboat you will need to make a one-off purchase of all the equipment needed for prepping, painting, and finishing the boat. After these one-off purchases are out of the way, you will only need to buy paint and new rollers the next time. Even if you need to buy all the equipment brand new, it can be cheaper than hiring someone else to do the job for you.
How often do you need to paint your sailboat?
The general rule of thumb for painting your boat is that it will need bottom paint about once a year. This is when you will need to take the boat completely out of the water and give it a fresh new coat. If your boat spends all of its time in the water, it certainly needs painting at least once a year. The saltwater is so corrosive that you shouldn’t let your boat go without a fresh coat of bottom paint for more than 2 years. Even if your boat only spends half its time in the water, and the other half on land, you will find that its best to keep its coat topped up.
The top paint, or the above waterline paint, doesn’t need painting anywhere near as often. It isn’t in direct contact with the seawater so it simply isn’t going to get eroded down as much. The salty sea spray can still be damaging over time so this paint should be re-done every 3 years. It can be more or less frequent depending on use and personal preference. Some people like to do above waterline paint yearly, with the rest of their boat, but it isn’t necessary.
What are the best paints to use for your sailboat?
There are plenty of great brands of paint out there, in various colors and shades, so you won’t struggle for choice. There are some things you might want to look for in your paint . For example, you may have noticed that a lot of boats tend to have red hulls. This isn’t just a fashion statement, and while red is supposed to bring luck this isn’t the main reason either. The reason is that this red/orange paint is perfect for added protection along the bottom of your boat.
This red/orange paint is interestingly chosen because it is, of course, traditional; but mostly because of its copper. The copper is actually what gives the paint its red/orange color.
Copper is perfect for the bottom of your boat for several reasons. First, copper acts as a biocide. It stops worms from making their way into the hull if your boat is wooden. If it is metal or fiberglass, it still has the benefit of stopping barnacles and other sea life from attaching themselves deep into the hull of the boat. Copper is also strong enough to hold up to scraping.
Scraping is when you scrape barnacles and other sea life off the hull of your boat. Scraping is an important part of keeping your boat in good condition. It is important to check with the marina or port authority whether or not you are allowed to scrape. If you scrape without permission you may find yourself on the receiving end of a hefty fine. The reason is that they don’t want you introducing invasive species on to the marina floor. This is mostly a problem when you are coming from somewhere vastly foreign, not sailing from New York to Chicago for example.
How many coats of paint does a sailboat need?
When painting your boat it’s a good idea to think about how many coats of paint you are going to need. There is no exact number that is needed, it is mostly to do with how well protected your boat needs to be and how much time you have on your hands. Every coat takes time and attention to detail.
If you choose to do four coats of paint it is going to be time-consuming but very well protected. That being said, the minimum number of coats is two. One is not enough. If your boat only spends part of the time in the water, two to three coats are plenty.
If you are someone who lives on their boat full-time, or at least most of the time, you may want to do more coats. Three, maybe even four, might be ideal here. The reason is that first, your boat is going to experience way more wear and tear than one that is just an ocean part-timer. And second, taking out your boat (which is also your home) is a giant hassle. It is a tedious process, so doing it as infrequently as possible is probably in your best interest. More coats last longer. When you are sailing from place to place, finding somewhere to take your boat out of the water and perform this maintenance is inconvenient. You want to be doing it as little as possible.
What safety precautions do I need to take when painting my sailboat?
All paint can be toxic when inhaled. Even if it is “non-toxic” paint it is going to be harmful to your lungs. They aren’t meant to inhale anything but air, even non-toxic paint is going to be bad for them. This is why it is important to wear a face mask.
Your mask should be specifically for painting, not surgical masks or other cheap medial masks. They are not going to be strong enough, with a fine enough air filter. Whether you feel the need to wear eyewear is up to you during the painting process.
Before the painting begins, when you are scraping and sanding, it is a good idea to wear some goggles to keep debris and splinters out of your eyes. It is also a good idea to wear gloves. You don’t want to rough your hands up too much, they need protection from not only the paint but splinters and sharp pieces of metal.
Painting a boat can be dangerous work. Without taking the proper safety precautions you are putting yourself at unnecessary risk. This safety equipment costs just a few bucks and is equally important as any of the other tools needed to paint your boat.
What tools do I need to paint a boat?
There is more to painting your boat than just using paint and a brush . You will also need tough sandpaper , potentially an angle grinder or welder , paint, primer , brushes, paint rollers , paint thinner , and solvent. You will need to make sure you have all of these things before you start painting. You can pick any of these items up at a boating goods store.
It is a good idea to bring some buckets with you for filling with water, both for rinsing off your boat and your brushes. All of your safety equipment needs to be brought too.
If this is your first time painting your boat yourself, you may find you need to buy all of these things at once. That can be a lot to stomach when its all in one go, luckily, most of these tools and equipment can be reused. Besides, it is still going to be far cheaper than hiring someone to do it for you. All of this equipment is an investment in your boat.
How to paint a sailboat
Whether this is the first time you have painted your boat or not, you may find some of the tips in this next section useful. Painting your sailboat may be tricky at first, but over time you will get the hang of it. The problem with painting your boat is that it can be a very expensive mistake if you get it wrong.
It is important to read this guide carefully, take your time, and make sure you do the job properly. It may be slow going at first, speed will come over time. Once you have gathered all of your safety equipment and tools you are ready to get started.
The workspace
First of all, you need to ensure you have the right workspace. You cant paint your boat in the water so you are going to need to find somewhere to do your work. This is easy enough if you don’t live on your boat full time, take the boat to your house and do your painting on the driveway. If this isn’t an option because you don’t have space or live on your boat full time, you are going to need to rent somewhere. There are typically places affiliated with the marina that you can use. In some cases, these even come with a majority of the equipment you will need. This, of course, drums up the price a bit, but that’s unavoidable.
Your workspace needs to be well ventilated, or you risk making yourself very sick. Both from paint fumes, rubbing alcohol fumes, and fine matter from when you sand the hull down. This means painting your boat in your garage, if it even fits, is not always the best idea. If you do decide to paint outside, it is important to consider the chance of rain. Of course, your boat is pretty waterproof, but once you begin sanding rain might damage the wood if left to sit there.
Before you do anything else, it is important to look your boat over fully from top to bottom. You are looking for any bumps, scrapes, cracks and general damage. This damage is not going to be noticeable while the boat is in the water, so just before you paint it is one of the only times you get to have a close look. Once you have made note of all this damage, it is time to get to work repairing it. Depending on just how severe this damage is, you may want to get help with this next stage.
All of this damage needs to be repaired before anything else can take place. Painting over these damaged areas is just going to hide the problem temporarily, the next time it comes to painting you will find they are far worse. If you don’t deal with this now, they are going to snowball into complicated and expensive repairs.
After your repairs are done it is time to start sanding. This is very time consuming as you need to do it three times. Per coat. First, take the 600 grit sandpaper and make your way around the boat. It is best to use electrical tape to mark out a section at a time so you don’t keep losing your place. After you have finished with the 600 grit sandpaper, it is time to move on to 800, then 1200. This process is important so you will be painting on as smooth a surface as possible. It is then a good idea to wipe the surfaces of the boat down with a damp cloth to remove any of the dust and flakes of metal/wood. Otherwise, you end up painting over them.
You could wash the boat down with a hose but you want to avoid getting the boat unnecessarily wet now that the hull has lost its protective layer. If you are sanding down a boat with a copper paint bottom, you may find the sanding process difficult. Just do your best, it doesn’t need to be 100% perfect. It is important to get as much of the old paint off as possible. Your new paint won’t adhere to the old paint as well as it would to the boat hull itself.
Putting on a layer of primer is not 100% necessary but it is recommended. The idea is that you want your topcoat to adhere to the boat as well as possible, a layer of primer can help you do that. The primer needs to be painted on evenly all over the boat. If you only feel like doing below the waterline, that is fine too. It will save you a lot of time. Putting on the layer of primer is not the most time-consuming part, it is mostly the sanding down that you will have to do. You will need to sand down using the 600 grit paper, then the 800, then 1200. Just like last time. Your layer of primer needs to be as smooth as possible for the maximum adhesion.
Now comes the paint. It is recommended to do at least two layers of paint. One undercoat and one top. Some people choose to go as far as two layers of primer, two layers of undercoat, and three layers of topcoat. This is going to be very time consuming, remember you will need to sand down three times between each layer of paint. You can paint using a brush if you like but is far easier to use a roller. It is also far easier if you employ someone to help you with this stage. It could be your spouse, child, friend, or anyone. It doesn’t need to be a paid professional. It can take a long time to go through this process. Especially if you are effectively doing 8 layers of paint (including primer).
The fastest way to paint, especially if you are on your own, is to use a sprayer. They are easy to use, with a little practice. If you haven’t used one before you may find that you struggle to get an even coat. You should always paint in vertical stripes, not horizontal. Additionally, it is a good idea to have someone following after you with a small brush doing small touch-up jobs. Any unevenness will need to be sanded down and repainted. The whole painting process can take a week if you aren’t efficient.
Take pictures
It is a good idea to take pictures throughout the whole process. This is for future reference. For example, if you take pictures of the boat when you are assessing it for damage, you can compare them to after you have repaired or sanded the trouble spots down. If you cant see the trouble spots still, great! If you can, it will help you keep an eye on them after you have painted too. It’s a good idea to catalog all of these areas if they start to become regular problems you may want to have your boat looked at by a mechanic. You might also like to have a before and after picture for your blog, or just as a personal memento.
Hopefully, you now have all the theory needed to paint your boat. There is a lot more that goes into painting your boat than simply grabbing some paint and a brush. It takes planning, practice, and attention to detail. If you follow this guide you will have no trouble at all. If this is your first time painting your boat, don’t be disheartened if it takes a lot longer than you expected. Speed will come with time, it is far more important to get the job done right than get it done quickly. If you put the work in you will be painting like a pro in no time at all.
Related Articles
I've personally had thousands of questions about sailing and sailboats over the years. As I learn and experience sailing, and the community, I share the answers that work and make sense to me, here on Life of Sailing.
by this author
Repairs and Maintenance
Most Recent

What Does "Sailing By The Lee" Mean?
October 3, 2023

The Best Sailing Schools And Programs: Reviews & Ratings
September 26, 2023
Important Legal Info
Lifeofsailing.com is a participant in the Amazon Services LLC Associates Program, an affiliate advertising program designed to provide a means for sites to earn advertising fees by advertising and linking to Amazon. This site also participates in other affiliate programs and is compensated for referring traffic and business to these companies.
Similar Posts

How To Choose The Right Sailing Instructor
August 16, 2023

Cost To Sail Around The World
May 16, 2023

Small Sailboat Sizes: A Complete Guide
October 30, 2022
Popular Posts

Best Liveaboard Catamaran Sailboats
December 28, 2023

Can a Novice Sail Around the World?
Elizabeth O'Malley

4 Best Electric Outboard Motors

How Long Did It Take The Vikings To Sail To England?

10 Best Sailboat Brands (And Why)
December 20, 2023

7 Best Places To Liveaboard A Sailboat
Get the best sailing content.
Top Rated Posts
Lifeofsailing.com is a participant in the Amazon Services LLC Associates Program, an affiliate advertising program designed to provide a means for sites to earn advertising fees by advertising and linking to Amazon. This site also participates in other affiliate programs and is compensated for referring traffic and business to these companies. (866) 342-SAIL
© 2024 Life of Sailing Email: [email protected] Address: 11816 Inwood Rd #3024 Dallas, TX 75244 Disclaimer Privacy Policy

Step-by-Step Guide: How to Paint a Sailboat with Acrylics
Alex Morgan
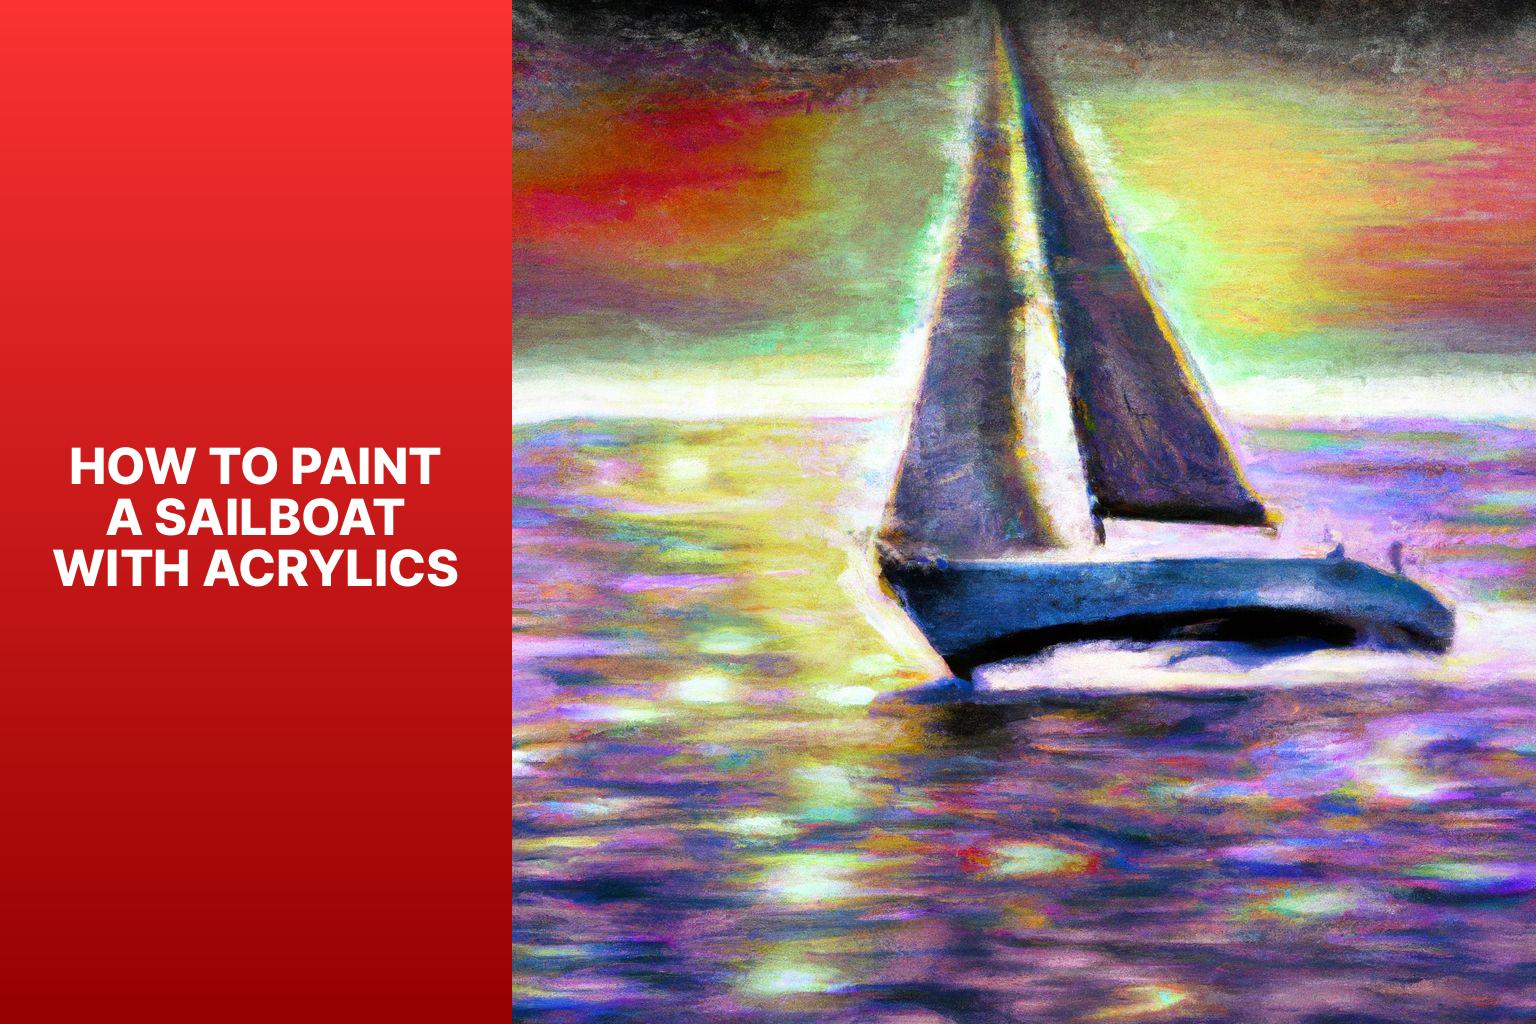
Painting a sailboat with acrylics can be a rewarding and enjoyable artistic endeavor. Whether you are a beginner or an experienced artist, this article will provide you with a comprehensive guide to creating a stunning sailboat painting using acrylic paints.
To begin with, you will need specific materials and tools to ensure a successful painting process. These include acrylic paints in various colors, a set of brushes suitable for acrylic painting, a palette for mixing colors, a canvas or painting surface, a water container for cleaning brushes, a palette knife for texture, and a reference image or sketch of a sailboat.
Before you start painting, it is essential to prepare the surface properly. This involves cleaning the surface to remove any dust or debris, and then applying a layer of primer or gesso to create a smooth and even base for your paint to adhere to.
To achieve the desired result, it is important to understand and practice basic techniques for painting with acrylics. This includes learning how to mix colors to create different shades and tones, how to layer and blend colors to add depth and dimension, and how to create texture and detail in your sailboat painting.
Once you are familiar with the techniques, you can follow a step-by-step guide to painting a sailboat. This includes sketching the sailboat outline, blocking in the background colors, adding base colors to the sailboat, adding details and highlights, and refining the painting to ensure a polished and professional look.
To complete your sailboat painting, don’t forget the finishing touches and sealing the artwork to protect it and enhance its longevity. We will share some tips and tricks to help you master the art of painting a sailboat with acrylics, allowing you to express your creativity and create beautiful marine-inspired artworks. So gather your materials and get ready to set sail on your artistic journey!
Key takeaway:
- Using acrylic paints and appropriate tools is essential for painting a sailboat. Acrylic paints are versatile and easy to work with.
- Properly preparing the surface by cleaning and applying primer or gesso ensures a smooth painting surface.
- Understanding basic techniques such as color mixing, layering, blending, and creating texture and detail is important for painting a realistic sailboat.
- Following a step-by-step guide helps in achieving a well-executed sailboat painting.
- Finishing touches and sealing the painting enhance its longevity and protect it from damage.
- Tips and tricks such as using reference images or sketches and refining the painting contribute to a successful acrylic sailboat painting.
Materials and Tools Needed for Painting a Sailboat
Are you ready to set sail on a creative painting journey? This section has all the juicy details about the materials and tools needed to paint a stunning sailboat with acrylics. We’ll dive into the vibrant world of acrylic paints , the magic touch of different brushes , the perfect palette for mixing colors, the ideal canvas or painting surface, the essential water container and palette knife , and the importance of having a reference image or sketch. Get your creative gears ready, because we’re about to embark on an artistic adventure !
Acrylic Paints
When painting a sailboat with acrylic paints , it is crucial to choose the right type of acrylic paint . Consider the following factors when selecting acrylic paints :
– Quality : Opt for high-quality acrylic paints for vibrant and long-lasting colors.
– Color range : Look for brands that offer a wide range of colors, including various shades of blue for painting the sky, water, and sails of the sailboat.
– Opacity : Consider the opacity of the acrylic paints . Some colors are more opaque, allowing for solid coverage, while others are more transparent, allowing for layering and glazing techniques.
– Drying time : Check the drying time of the acrylic paints . Faster drying paints are great for quickly building layers, while slower drying paints allow for more blending and wet-on-wet techniques.
– Brand reputation : Research and choose acrylic paints from reputable brands known for their quality and consistency.
Pro-tip : Before starting your painting, it’s recommended to do a small color swatch test to see how the colors appear on your chosen canvas or painting surface. This will help you make any necessary adjustments before committing to the final artwork.
When painting a sailboat with acrylics, the right brushes are crucial for achieving desired results. Here is a list of brushes to consider:
1. Round brushes: Perfect for creating fine details like rigging and small waves. They come in various sizes, from small for intricate work to larger for broader strokes.
2. Flat brushes: Ideal for creating straight lines and sharp edges. Great for painting sails, the horizon, or other flat surfaces on the sailboat.
3. Fan brushes: Excellent for creating texture like foliage or water splashes. Can also blend colors and create soft, feathery strokes.
4. Filbert brushes: Versatile brushes for both fine details and broader strokes. Particularly useful for painting the hull and larger areas.
5. Detail brushes: Perfect for adding intricate details and highlights. Allows for precise control in adding fine lines, textures, and highlights.
Fact: Using the right brushes not only makes painting a sailboat easier but also enhances the overall quality of your artwork. Experimenting with different brush shapes and sizes can help achieve different effects and add depth to the painting.
When painting a sailboat with acrylics , a palette is essential for effectively mixing and organizing colors. A palette serves as a flat surface where you can arrange and blend paints.
Canvas or Painting Surface
Choosing the right canvas or painting surface is crucial for a successful sailboat painting with acrylics. The size and material of the canvas are important factors that affect the outcome of the painting.
A larger canvas allows for more details and a grander composition, while a smaller canvas is more manageable and quicker to complete. The most popular canvas materials are cotton , linen , and polyester .
Cotton canvas is affordable and suitable for beginners. Linen canvas , though more expensive, offers a smoother surface and better longevity. Polyester canvas is a synthetic option that is resistant to moisture. Regardless of the material you choose, it is important to prime the canvas with gesso or primer before painting.
This creates a smooth and stable surface for the acrylic paints, resulting in better color vibrancy and a longer-lasting artwork. When selecting a canvas or painting surface, consider your artistic vision and preferences to create a stunning sailboat painting with acrylics.
Water Container and Palette Knife
The sub-topic “ Water Container and Palette Knife ” in the article “ How To Paint A Sailboat With Acrylics ” can be represented in a table format:
Using a water container is essential in acrylic painting to keep your brushes clean and prevent paint from drying. The container should be filled with clean water and changed when dirty to ensure a constant supply of clean water for rinsing and thinning paint.
The palette knife is a versatile tool for mixing colors directly on the palette. Its flat blade is perfect for scraping and lifting paint, allowing for experimentation with color combinations and creation of various textures in artwork. The palette knife can be used to apply paint directly to the canvas for precise and controlled brushwork.
By having a water container and palette knife in your painting toolkit, you’ll be equipped to efficiently and creatively work with acrylic paints, bringing your sailboat painting to life.
Reference Image or Sketch
When painting a sailboat with acrylics, having a reference image or sketch is crucial for accuracy and capturing the essence of the subject. The reference image serves as a visual guide, helping artists understand the structure, proportions, and details of the sailboat.
To create a reference image or sketch, start by selecting a clear and high-resolution photograph of the sailboat. It should showcase the desired angle and composition for the painting. Then, use a pencil or grid method to transfer the main outlines and important features onto your canvas or painting surface.
The reference image or sketch acts as a roadmap throughout the painting process. It helps artists determine the placement of the sailboat, the position of the sails, the shape of the hull, and other details. By referring to the image or sketch, artists can ensure accuracy and achieve a realistic representation of the sailboat.
Remember to use the reference image or sketch as a guideline rather than strictly copying it. Allow yourself to add your own artistic interpretation and style to make the painting unique. Experiment with colors, textures, and brushwork to bring the sailboat to life on your canvas.
With a well-prepared reference image or sketch, artists can confidently paint a sailboat with acrylics, capturing its beauty and spirit in their artwork.
Preparing the Surface for Painting
Preparing the surface is a crucial step in painting a sailboat with acrylics . In this section, we’ll discover the necessary techniques to ensure a smooth and long-lasting finish. First, we’ll explore the importance of cleaning the surface thoroughly. Then, we’ll dive into the significance of applying primer or gesso before starting the actual painting process. These essential steps will set the foundation for a successful sailboat painting adventure. So let’s get our brushes ready and make that canvas shine!
Cleaning the Surface
When preparing to paint a sailboat with acrylics, it is essential to follow these important steps for cleaning the surface:
1. Begin by using a soft brush or cloth to remove any dust or debris from the surface. This step is crucial for ensuring proper adhesion of the paint.
2. In case there are stains or dirt that cannot be removed using a brush, gently clean the area with mild soap and water. It is important to avoid harsh chemicals as they may cause damage.
3. Prior to painting, it is necessary to eliminate any peeling or flaking paint. This can be done by carefully smoothing the surface using sandpaper or a scraper.
4. After the cleaning and preparation process, it is recommended to apply a layer of primer or gesso. This will create a smooth surface, enhancing color saturation and durability.
Remember to take your time and handle the surface gently during the cleaning process to prevent any damage. Properly cleaning and preparing the surface guarantees a beautiful painting that will last for a long time.
Applying Primer or Gesso
Applying primer or gesso is necessary for preparing the surface before painting a sailboat with acrylics . It creates a smooth base for the paint, improving the quality and durability of the artwork.
To apply primer or gesso:
- Clean the surface: Remove dust, dirt, and grease using a soft cloth or brush.
- Choose the right primer or gesso: Use acrylic gesso , which dries quickly and works well with acrylic paints.
- Prepare the primer or gesso: Stir it thoroughly and thin with water if needed, following the manufacturer’s instructions.
- Apply the primer or gesso: Use a brush or palette knife to apply an even layer, covering the entire area to be painted.
- Allow drying time: Let the primer or gesso dry completely, which usually takes 1-2 hours, but may vary based on the product and environment.
Applying primer or gesso creates a strong foundation for your sailboat painting, ensuring vibrant colors and good adherence to the surface. It also prevents unwanted paint absorption into the canvas or other surfaces. Follow the manufacturer’s instructions for best results.
Understanding Basic Techniques for Painting a Sailboat
Discover the vibrant world of sailboat painting as we delve into the fundamental techniques that bring these majestic vessels to life. From mixing colors to layering and blending, and even creating texture and detail, we’ll explore the artistry and skill required to capture the essence of a sailboat on canvas. Get ready to embark on a creative journey as we unlock the secrets of painting a sailboat with acrylics !
Mixing Colors
When mixing colors in acrylic painting, there are techniques to achieve the desired result.
– Start with the primary colors : red, blue, and yellow. These are the foundation for all other colors.
– Use a color wheel to understand color relationships. Opposite colors on the wheel, such as blue and orange, create contrast when mixed.
– Experiment with different color ratios to create shades and tints. Adding more blue to yellow creates a green shade , while adding more yellow to blue creates a green tint .
– Gradually add small amounts of one color to another, mixing and blending until the desired hue is achieved.
– Consider the effect of adding white or black to a color. Adding white creates a lighter shade , while adding black creates a darker shade .
– Take note of the drying time of acrylic paints, as the color may slightly shift once dry. Let the mixed colors dry before making adjustments.
– Clean brushes thoroughly between color mixing to avoid contamination and achieve accurate colors.
By understanding these mixing techniques, you can confidently create a wide range of colors for your sailboat painting. Experiment and explore different combinations to achieve unique and vibrant results.
Layering and Blending
Layering and blending are pivotal techniques in the realm of acrylic painting. Employ the following strategies to attain the desired effect:
– Emphasize layering: Begin by applying thin coats of paint and gradually intensify the color and texture in order to exercise better control over the varying shades and values.
– Master the art of wet-on-wet blending: Meld hues by applying wet paint atop another still wet layer, resulting in seamless transitions and smooth gradients.
– Harness the power of dry brushing: Utilize a minimal amount of paint with a dry brush to fashion texture and highlights, which is ideal for incorporating intricate details.
– Embrace glazing: Introduce translucent layers of paint onto dry layers to yield depth and radiance, thereby permitting subtle variations in color and an atmosphere-like aura.
– Achieve blending with a palette knife: Directly mix and blend colors on the painting surface using a palette knife, imbuing the artwork with texture and dimension.
Experiment with these techniques to ascertain the most effective approach. The combination of layering and blending can augment the depth, dimension, and opulence of your acrylic paintings, thereby enabling you to create captivating sailboat masterpieces.
Creating Texture and Detail
Creating texture and detail is essential when painting a sailboat with acrylics . These techniques enhance the depth and visual interest of the artwork. To achieve texture, it is recommended to utilize methods such as dry brushing , sponging , or palette knife strokes.
Implementing these techniques effectively can add texture not only to the sails , water , but also to the boat as a whole.
One approach to create texture on the sails is by using the dry brush technique. This involves applying a small amount of paint to a dry brush and gently brushing it onto the canvas. By doing so, a rough and textured appearance is achieved, giving the impression of fabric on the sails. To replicate waves and ripples on the water, consider using a palette knife to apply thick, undiluted paint with a scraping motion.
Adding intricate details is crucial in bringing the sailboat to life. Using fine brushes and thin paint, you can incorporate intricate elements such as rigging , ropes , and various features on the boat. Paying close attention to these details will greatly enhance the realism and overall quality of the painting.
Don’t be afraid to experiment with different techniques and brushes in order to achieve the desired textures and details. Remember, practice and patience are key when mastering the art of creating texture and detail in sailboat paintings.
Fun Fact: Incorporating texture and detail in a painting can give the artwork a three-dimensional appearance, captivating viewers.
Step-by-Step Guide to Painting a Sailboat
Master the art of painting a sailboat with acrylics with this step-by-step guide.
We’ll take you through the process, from sketching the sailboat to refining the final touches.
Discover how to block in the background, add base colors, and bring your sailboat to life with details and highlights.
With these expert tips and techniques, you’ll be able to create a stunning sailboat painting that showcases your artistic skills.
Get ready to embark on a creative journey and immerse yourself in the world of sailboat artistry.
Sketching the Sailboat
To begin sketching the sailboat before painting with acrylics, follow these steps:
1. Take a blank canvas or painting surface.
2. Take a look at the reference image or sketch of the sailboat.
3. Recognize the basic shapes and proportions of the sailboat, including the hull , sails , and mast .
4. Use a pencil or charcoal to create a light outline of the sailboat on the canvas. Begin with simple shapes and lines.
5. Pay close attention to the positioning and size of various elements, such as the sails and the angle of the mast.
6. Add more intricate details to the sketch, such as windows, ropes, or flags. It is important to ensure accurate proportions and perspectives.
7. Erase any unnecessary lines or mistakes while refining the sketch. Focus on capturing the overall shape and composition.
8. Once you are satisfied with the sketch, go over the lines with a fine-tipped pen or marker to define them. Alternatively, you can use a dark pencil.
9. Review the sketch to make sure it accurately represents the sailboat and the desired composition.
10. The sketch is now ready to serve as a guide for painting the sailboat with acrylics.
By following these steps, you can create a detailed and accurate sketch of a sailboat before starting the painting process.
Blocking in the Background
Blocking in the background is an important step in painting a sailboat with acrylics. It establishes the composition and sets the tone for the rest of the painting. Here is a step-by-step guide on how to block in the background :
1. Choose the colors for the background based on the atmosphere and mood you desire. Soft blues and greens create a calm and serene scene, while bold and contrasting colors produce a dramatic and vibrant effect.
2. Apply the background colors onto the canvas with a large brush, starting from the top and working your way down. Use broad strokes to cover the entire background area.
3. Block in the basic shapes and forms of any objects or elements that will be part of the background, such as the sky, clouds, trees, or distant land .
4. Focus on capturing the general shapes and colors rather than intricate details. Use loose and expressive brushstrokes at this stage.
5. Blend the colors together where they meet to create a smooth transition. Use a clean, damp brush to softly blend the edges.
6. Step back and assess the overall look and feel of the background. Make necessary adjustments to the colors or shapes to ensure it complements the rest of the painting.
By following these steps, you can effectively block in the background of your sailboat painting and set the stage for the rest of your artwork.
Blocking in the background has been used by artists for centuries to establish the foundation of a painting. It creates depth, atmosphere, and a harmonious composition. Whether it’s a landscape, still life, or sailboat painting, blocking in the background is an essential part of the painting process, allowing artists to develop their vision and bring their artwork to life.
Adding Base Colors to the Sailboat
To effectively add base colors to the sailboat when painting with acrylics, adhere to the following instructions:
1. Begin by preparing your palette with the necessary base colors for the sailboat. This includes utilizing blue for the water, white for the sails, and brown for the wooden parts.
2. Use your brush to apply the first base color to the appropriate areas of the sailboat. For larger areas, employ broad strokes , while smaller details require finer strokes .
3. Layer each base color onto its respective area of the sailboat, ensuring smooth and even coverage. Add additional coats as needed.
4. When necessary, seamlessly blend the base colors together. This can be achieved by gently mixing the colors with either a clean brush or a palette knife, resulting in a gradual gradient .
5. Throughout the painting process, refer to your chosen image or sketch to ensure accurate color placement and shading.
6. Before proceeding to add details and highlights to the sailboat, allow the base colors ample time to dry completely .
By following these steps attentively, you will lay a solid foundation for your sailboat painting by effectively and accurately incorporating the base colors.
Adding Details and Highlights
When adding details and highlights to a sailboat painting with acrylics , consider techniques that enhance the realism and quality of the artwork.
1. Use a smaller brush size .
2. Mix the appropriate colors .
3. Apply thin layers of paint.
4. Focus on light and shadows.
5. Use a dry brush technique for highlights .
6. Add finer details with a fine liner brush .
7. Step back and assess the painting regularly.
Following these guidelines, artists can create depth and dimension in their sailboat paintings while capturing the essence of light and highlighting important elements of the subject.
Refining the Painting
To refine a sailboat painting with acrylics, the first step is to assess the sailboat’s composition and proportions. It is important to adjust as necessary in order to accurately represent the sailboat. Once the basic structure of the sailboat is in place, it is time to refine the details. This can be done by adding fine lines, curves, and shading for depth.
To make the painting more visually appealing, highlights should be added to catch the light, such as on the sail edges and hull. In order to achieve a realistic effect, it is important to blend colors seamlessly. After the sailboat itself is refined, attention should be turned to the background. Evaluate and enhance the background colors to ensure they complement the sailboat. If necessary, improve the water texture and depth to add more dimension to the painting.
To truly bring the painting to life, consider adding additional details like seagulls or waves. After all the refinements have been made, step back and evaluate the final painting. Make any touch-ups or adjustments as necessary to perfect the artwork. The process of refining the painting is crucial for capturing the beauty and intricacies of a sailboat with acrylics. These final touches will truly make the artwork special and bring it to life.
Finishing Touches and Sealing the Painting
To complete the sailboat acrylic painting, follow these steps for the finishing touches and sealing :
1. Remove any masking tape or painter’s tape used to create clean lines.
2. Inspect the painting for touch-ups or additional details. Use small brushes and acrylic paint to carefully add necessary final touches.
3. Allow the painting to dry completely before proceeding to sealing.
4. Use a varnish or sealant specifically made for acrylic paintings. Apply a thin, even coat using a soft brush. Follow the manufacturer’s instructions .
5. Let the varnish dry completely, which typically takes several hours.
6. Inspect the painting for any missed areas during the sealing. Touch up these spots with more varnish .
7. Consider applying a second coat of varnish for extra protection and a glossier or matte finish. Follow the manufacturer’s instructions and let each coat dry completely.
8. Once the painting is fully sealed and dry, you can frame or display it as desired.
By following these steps, you can add the finishing touches and seal your acrylic sailboat painting to protect and enhance its appearance.
Tips and Tricks for Painting a Sailboat with Acrylics
Here are some practical tips and tricks for painting a sailboat with acrylics:
1. Prepare your workspace by covering it with newspaper or a drop cloth to avoid paint splatters or spills.
2. Start by sketching the sailboat outline on your canvas using a pencil as a guideline.
3. Mix your acrylic paints on a palette to achieve the desired colors for the hull, sails, and details.
4. Use a larger brush to paint the background and base colors of the sailboat. Apply thin layers of paint and let each layer dry before adding another.
5. Once the base colors are dry, use a smaller brush to add details like windows , ropes , and flags . Pay attention to the intricate features of the sailboat.
6. Create depth and dimension by adding shadows and highlights . Use lighter shades for areas that catch the light and darker shades for areas in shadow.
7. To add texture to the water surrounding the sailboat, use a palette knife or dry brush technique for a more realistic and dynamic look.
8. Allow the painting to dry completely before adding final touches or varnish to protect it.
By following these tips and tricks, you can create a beautiful sailboat painting with acrylics.
Some Facts About How To Paint A Sailboat With Acrylics:
- ✅ Acrylic paint is commonly used for painting sailboats due to its versatility and quick drying time.
- ✅ Sailboat paintings created with acrylics can capture the vibrant colors of the water and sky.
- ✅ Using different brush techniques and layering, artists can create texture and depth in their sailboat paintings.
- ✅ Acrylic paints are available in a wide range of colors, allowing artists to accurately depict the details of a sailboat.
- ✅ To protect the finished sailboat painting, artists often apply a varnish or sealant to ensure its longevity.
Frequently Asked Questions
Faqs for “how to paint a sailboat with acrylics”, q: how can i cancel my contracts or subscriptions with youtube.
A: To cancel your contracts or subscriptions with YouTube, you can visit the “Verträge hier kündigen” section on YouTube. This section provides information and instructions on how to terminate your agreements with YouTube.
Q: Can I participate in testing new features on YouTube?
A: Yes, you can! YouTube offers an opportunity for users to test new features before they are widely released. Simply go to the “Neue Funktionen testen” section and follow the instructions to opt-in for testing new features on YouTube.
Q: Where can I find the guidelines and safety measures for using YouTube?
A: You can find the guidelines and safety measures for using YouTube in the “Richtlinien & Sicherheit” section. This section provides detailed information on YouTube’s community guidelines, rules against harassment and hate speech, and other safety measures to ensure a positive and secure experience on the platform.
Q: What information does the NetzDG Transparenzbericht on YouTube provide?
A: The NetzDG Transparenzbericht on YouTube offers information about the company’s compliance with the NetzDG law in Germany. It provides transparency reports related to efforts in combating illegal content and hate speech on the platform.
Q: How does YouTube work? Can you provide an overview?
A: YouTube is a video-sharing platform where users can upload, view, and interact with videos. In the “Wie funktioniert YouTube?” section, you can find a comprehensive overview of how YouTube works, including instructions on creating an account, uploading videos, and engaging with other users.
Q: Who owns the copyright for content on YouTube?
A: Google LLC owns the copyright for content on YouTube until 2023, as indicated by the “© 2023 Google LLC” statement. Users should be aware of the terms and conditions regarding copyright ownership when using YouTube.
About the author

Leave a Reply Cancel reply
Your email address will not be published. Required fields are marked *
Save my name, email, and website in this browser for the next time I comment.
Latest posts

The history of sailing – from ancient times to modern adventures
History of Sailing Sailing is a time-honored tradition that has evolved over millennia, from its humble beginnings as a means of transportation to a beloved modern-day recreational activity. The history of sailing is a fascinating journey that spans cultures and centuries, rich in innovation and adventure. In this article, we’ll explore the remarkable evolution of…

Sailing Solo: Adventures and Challenges of Single-Handed Sailing
Solo Sailing Sailing has always been a pursuit of freedom, adventure, and self-discovery. While sailing with a crew is a fantastic experience, there’s a unique allure to sailing solo – just you, the wind, and the open sea. Single-handed sailing, as it’s often called, is a journey of self-reliance, resilience, and the ultimate test of…

Sustainable Sailing: Eco-Friendly Practices on the boat
Eco Friendly Sailing Sailing is an exhilarating and timeless way to explore the beauty of the open water, but it’s important to remember that our oceans and environment need our protection. Sustainable sailing, which involves eco-friendly practices and mindful decision-making, allows sailors to enjoy their adventures while minimizing their impact on the environment. In this…
Category : Paintings of boats by Claude Monet
Subcategories.
This category has the following 6 subcategories, out of 6 total.
- Bateaux sur la plage à Étretat (1 F)
- Boats Moored at Le Petit-Gennevilliers by Claude Monet (6 F)
- Fishing boats at Étretat (1885) (3 F)
- Red Boats at Argenteuil (1875) by Claude Monet (7 F)
- The Canoe on the Epte by Claude Monet (7 F)
- The Railway Bridge at Argenteuil, Claude Monet, musée d'Orsay, 1874 (3 F)
Media in category "Paintings of boats by Claude Monet"
The following 200 files are in this category, out of 242 total.

- Paintings by Claude Monet by subject
- Impressionist paintings of boats
- Paintings of boats by artist
- 1870s paintings by Claude Monet
Navigation menu
- AI Generator
2,367 Sailboat Paintings Stock Photos & High-Res Pictures
Browse 2,367 sailboat paintings photos and images available, or start a new search to explore more photos and images..

On this expedition, we’ll walk the streets of Moscow, on the Moskva River in western Russia.
This story was created for the Google Expeditions project by ePublishing Partners and AirPano, now available on Google Arts & Culture
With a population of about 12 million people, the city is very much alive today, but its squares and building also serve as a kind of museum of the city’s rich history.
Vodovzvodnaya Tower
Here is a bird’s eye view of Moscow from atop the Kremlin’s Vodovzvodnaya Tower. Moscow’s Kremlin, a complex of structures along the Moskva River, is the heart of the Soviet Union’s government. The word kremlin means “fortress inside a city.” You will understand that meaning as you take in the walls and towers that surround the Kremlin.
The original Kremlin was a wooden structure, but in the 14th century it was rebuilt in white stone. Even later, much of the white stone was replaced with whitewashed brick.
The Vodovzvodnaya Tower stands almost 62 meters high and was built in 1488 by Italian architect Anotonio Gilardi. The tower contains a water pumping machine that was installed in 1633.
This water pump took water from the Moskva River and supplied water to Russia’s first pressurized pipe system, and so was named “Vodovzvodnaya” which means “water lifting.” Note that the tower you see is not the original. The tower had to be rebuilt after it was blown up in 1812 by the French army.
Cathedral Square
If you look beyond the Kremlin’s white-walled and green-roofed structure, you’ll see an area where a number of golden domes rise into the sky. This is Cathedral Square. Three cathedrals, two churches, and the Ivan the Great Bell Tower stand together on the square.
In the 15th century, all of the Kremlin’s streets converged here, and for several centuries, this was a focal point of power—the power of the Russian Orthodox Church and the power of Russia’s ruling elite. All of Russia’s tsars were crowned here, and their funeral processions proceeded from here as well.
The Moskva River
Look down. The river you see winding alongside Moscow’s Kremlin is the Moskva River. This river is about 503 kilometers long and flows right through western Russian as well as through the heart of Moscow.
The river is a popular route for both private and commercial boats, but it does freeze over during the frigid winter months.
The Cathedral of Christ the Saviour
As you gaze up the river, you’ll see the Cathedral of Christ the Saviour. This 103m-high white-walled and copper-domed structure is the world’s tallest Orthodox Christian church. Tsar Alexander I ordered the cathedral built in 1812.
However, what you see is the second cathedral to be built on the site. The first was destroyed by Joseph Stalin to make room for a palace. But during World War II, construction of the palace was abandoned. Years later, the cathedral was rebuilt.
Saviour Tower
Also called Spasskaya Tower, Saviour Tower is easy to recognize by the illuminated red Kremlin star at the top of its wooden spire. This Gothic-inspired tower was built in 1491, and contains the official entrance to the Kremlin. Until 1658, it was called Frolovskaya Tower.
But when an icon of the Saviour was placed above the gate facing Red Square, the name was officially changed. This tower is so important to the Russian people that it is used as a greeting place for all foreign leaders who visit Russia.
The design of the tower changed over the years. The clock and turret, or belfry, were added in the 17th century. Chimes were added in 1851, and then repaired in after being damaged during the October Revolution in 1917.
Bolshoi Theatre
If you turn your gaze to the right, there in the distance you’ll see the Bolshoi Theatre, which is home to the Russian opera and ballet. The theater, which features a neoclassical façade, has been rebuilt several times over the years.
The Russian people are so proud of this theatre that it is pictured on the 100-ruble banknote.
Kotelnicheskaya Embankment Building
Turn your gaze to the left of the Saviour Tower and look out toward the far end of the river. There, on the left side, you’ll see the dark silhouette of one of the city’s seven Stalinist skyscrapers, the Kotelnicheskaya Embankment Building.
These skyscrapers were designed by Kmitry Chechulin and Andrei Rostkovsky, and built between 1947-1952. This 32-level 176m-tall building features terra cotta panels and numerous pseudo-Gothic turrets. This building houses apartments and elite living suites.
Saint Basil’s Cathedral
If you look at Red Square directly across the street from Saviour Tower, you’ll see Saint Basil’s Cathedral. This fancifully painted brick building, which was built in 1560, was designed to suggest a bonfire. The structure is actually a collection of ten churches.
Eight are positioned around one central church called the Church of Intercession. It is thought that this design was meant to represent an eight-pointed star. The tenth church was later built on top of Saint Basil’s grave.
The Bolshoi Theatre company was founded in around 1780 by Prince Peter Urusov and English impresario Michael Maddox. Performances were originally held in a private home and then in the Petrovka Theatre.
The Petrovka Theater was destroyed by a fire in 1805, and a new theatre—the New Arbat Imperial Theatre—was built in 1808. Unfortunately, this theatre was also destroyed by fire in 1812.
The Bolshoi Theatre, built in 1821, has featured performances by many greats, including choreographer Alexander Gorsky, conductor Sergei Rachmininov, and singer Fyodor Chaliapin.
Many world-famous ballerinas made their names here, including Maria Plsetskaya, Glina Ulanova, Vladimir Vasiliev, and Maris Liepa.
The Statue Above the Theatre's Entrance
The statue that stands above the Bolshoi’s entrance depicts Apollo riding a four-horse chariot. Apollo was the Greek god of, among other things, music and dance. The Bolshoi Theatre itself is neoclassical in design. The architecture suggests an ancient Greek temple.
If you look to the left side of the theatre, off in the distance you will see the top spire of the Vodovzvodnaya Tower. This tower was originally built in 1488 but needed repairs after being blown up by Napoleon’s troops in 1812.
The red star at the very top of the tower’s spire was installed to mark the 20th anniversary of the 1917 October Revolution, when Bolsheviks seized state power.
Ostankino Tower
Look into the far distance behind the Bolshoi Theatre and you’ll see a structure reaching high into the sky. This is the Ostankino Tower, a 540m-tall radio and television tower built in the late 1960s.
This tower was designed by Nikolai Nikitin and built to commemorate the 50th anniversary of the October Revolution. At the time it was built, it was the world’s tallest free-standing structure.
There are restaurants and an observation deck at the top of the tower. If you were to ride the tower’s elevator to the top, the ride would only last 58 seconds!
Statue of Peter the Great
As you stroll to the west away from the Kremlin, you’ll see a great statue rising up from what seems the middle of the river, where the Moskva River and Vodootvodny Canal merge.
The statue doesn’t really rise from the water, but stands upon a small man-made island to create that illusion. Standing 98m-high, the statue depicts Tsar Peter the Great, who reigned from 1682 to 1725, standing on a tower of ships.
The biggest ship at the top is meant to symbolize the Russian Navy, which was created by Peter the Great. In fact, the statue was created to celebrate 300 years of the Russian Navy.
The statue was designed by Zurab Tsereteli and erected in 1997. However, not everyone liked the statue. You will notice that you cannot walk right up to the base of the statue, and there is a good reason for that.
Many thought the statue was ugly and disliked it so much that they threatened to destroy it. So, the base has been fenced off to protect the statue from harm. Moscow even offered the city of St. Petersburg the statue, but St. Petersburg declined.
The Luzhniki Olympic Stadium
Across the river to the left of the statue of Peter the Great is the Luzhniki Olympic Stadium. This oval-shaped stadium can seat over 78,000 people. The stadium was first built in 1955 and was originally named Central Lenin Stadium.
A roof was added and other renovations took place in 1996. This stadium was used for the 1980 Summer Olympics, the 2008 UEFA Champions League Final, the 2013 World Athletics Championships, and it will host the 2018 FIFA World Cup.
The Kremlin from Manege Square
Located right next to the Kremlin and Red Square is Manege Square. This square, which was created in the late 1700s, is rich in history and architectural treasures.
It is a large, open area where people come to relax, stroll, and meet up to enjoy lunch at a café or to go shopping at Okhotny Ryad, the nearby underground mall. Famous landmarks form the square’s borders.
The buildings of Moscow State University stand on the north side of the square. The Hotel Moskva stands to the east, and the State Historical Museum to the south.
On the west side is the Moscow Manege, the riding academy for which the square was named (from the French word manège , an arena for training horses). Numerous subway lines converge at Manege Square, making it a true Moscow focal point.
Look to the east of the Kremlin, and you’ll see a large open area. This is Red Square. Red Square was not named for the red bricks you see in the surrounding buildings. Its name comes from the word krasnyi which used to mean beautiful, but has since changed to mean red.
This area was once a collection of poor, run-down wooden houses. But in the late 1400s, Prince Ivan III (also known as Ivan the Great) ordered the houses torn down to make room for the new Kremlin.
Senate Palace
To the right of Red Square you’ll see a triangular shaped neoclassicist building. This is the Senate Palace. This building was built between 1776 and 1787 under the orders of Catherine II.
Originally, the building was the home of the Governing Senate of Imperial Russia, but today it is the location of the Russian presidential administration. The building features the circular, 24.7m-diameter Catherine Hall where important ceremonies take place.
Lenin's Mausoleum
To the immediate left of the Senate Palace you’ll notice a small, square structure located along the edge of Red Square. This is Lenin’s Mausoleum, or tomb. Vladimir Lenin was propelled to the role of Russia’s leader by the Bolshevik Revolution of 1917.
His embalmed body has been on display in this tomb since his death in 1924. The step-pyramid-type mausoleum is designed to resemble other famous tombs, such as the Tomb of Cyrus the Great in Iran.
Welcome to South Africa's Oldest and Largest Game Park
Learning with google arts & culture, western cape, south africa, mountains, oceans and animals - south africa's western cape has it all, trip to the moon 1966, california state parks, the route of cervantes (1/2) 1547-1580, sir isaac newton.
What we know about the container ship that crashed into the Baltimore bridge
- The ship that crashed into the Francis Scott Key Bridge on Tuesday was the Singapore-flagged Dali.
- The container ship had been chartered by Maersk, the Danish shipping company.
- Two people were recovered from the water but six remain missing, authorities said.
A container ship crashed into a major bridge in Baltimore early Tuesday, causing its collapse into the Patapsco River.
A livestream showed vehicles traveling on the Francis Scott Key Bridge just moments before the impact at 1:28 a.m. ET.
Baltimore first responders called the situation a "developing mass casualty event" and a "dire emergency," per The Associated Press.
James Wallace, chief of the Baltimore Fire Department, said in a press conference that two people had been recovered from the water.
One was uninjured, but the other was transported to a local trauma center in a "very serious condition."
Wallace said up to 20 people were thought to have fallen into the river and some six people were still missing.
Richard Worley, Baltimore's police chief, said there was "no indication" the collision was purposeful or an act of terrorism.
Wes Moore, the governor of Maryland, declared a state of emergency around 6 a.m. ET. He said his office was in close communication with Pete Buttigieg, the transportation secretary.
"We are working with an interagency team to quickly deploy federal resources from the Biden Administration," Moore added.
Understanding why the bridge collapsed could have implications for safety, in both the shipping and civil engineering sectors.
The container ship is the Singapore-flagged Dali, which is about 984 feet long, and 157 feet wide, per a listing on VesselFinder.
An unclassified Cybersecurity and Infrastructure Security Agency report said that the ship "lost propulsion" as it was leaving port, ABC News reported.
The crew notified officials that they had lost control and warned of a possible collision, the report said, per the outlet.
The Dali's owner is listed as Grace Ocean, a Singapore-based firm, and its manager is listed as Synergy Marine, which is also headquartered in Singapore.
Shipping news outlet TradeWinds reported that Grace Ocean confirmed the Dali was involved in the collapse, but is still determining what caused the crash.
Related stories
Staff for Grace Ocean declined to comment on the collision when contacted by Business Insider.
"All crew members, including the two pilots have been accounted for and there are no reports of any injuries. There has also been no pollution," Synergy Marine said in a statement.
The company did not respond to a request for further comment from BI.
'Horrified'
Maersk chartered the Dali, with a schedule for the ship on its website.
"We are horrified by what has happened in Baltimore, and our thoughts are with all of those affected," the Danish shipping company said in a statement.
Maersk added: "We are closely following the investigations conducted by authorities and Synergy, and we will do our utmost to keep our customers informed."
Per ship tracking data, the Dali left Baltimore on its way to Colombo, the capital of Sri Lanka, at around 1 a.m., about half an hour before the crash.
The Port of Baltimore is thought to be the largest in the US for roll-on/roll-off ships carrying trucks and trailers.
Barbara Rossi, associate professor of engineering science at the University of Oxford, told BI the force of the impact on one of the bridge's supporting structures "must have been immense" to lead to the collapse.
Dr Salvatore Mercogliano, a shipping analyst and maritime historian at Campbell University, told BI: "It appears Dali left the channel while outbound. She would have been under the control of the ship's master with a Chesapeake Bay pilot onboard to advise the master.
"The deviation out of the channel is probably due to a mechanical issue as the ship had just departed the port, but you cannot rule out human error as that was the cause of the Ever Forward in 2022 just outside of Baltimore."
He was referring to the incident two years ago when the container ship became grounded for a month in Chesapeake Bay after loading up cargo at the Port of Baltimore.
The US Coast Guard found the incident was caused by pilot error, cellphone use, and "inadequate bridge resource management."
Claudia Norrgren, from the maritime research firm Veson Nautical, told BI: "The industry bodies who are here to protect against incidents like this, such as the vessel's flag state, classification society, and regulatory bodies, will step in and conduct a formal investigation into the incident. Until then, it'll be very hard for anyone to truly know what happened on board."
This may not have been the first time the Dali hit a structure.
In 2016, maritime blogs such as Shipwreck Log and ship-tracking site VesselFinder posted videos of what appears to be the stern of the same, blue-hulled container vessel scraping against a quay in Antwerp.
A representative for the Port of Antwerp told BI the Dali did collide with a quay there eight years ago but couldn't "give any information about the cause of the accident."
The Dali is listed as being built in 2015 by Hyundai Heavy Industries in South Korea.
Watch: The shipwreck at the center of a battle between China and the Philippines
- Main content
IMAGES
VIDEO
COMMENTS
Hey guys here is a super Fun and EASY watercolor tutorial for you to try abstract sailboats!! I go over this step by step- lots of fun with wet on wet techni...
Beginners Drawing Course: http://bit.ly/2Gn4rOIDrawYTMy Art and Creativity PODCAST:https://goo.gl/uGLjdkInstagram: https://www.instagram.com/lironyanil/My bo...
Two Sailboats. 1880 Winslow Homer (American, 1836-1910) Homer's skill as a watercolor painter grew during his second long sojourn in Gloucester, Massachusetts, in the summer of 1880, when his work became breathtakingly fluid and impressionistic. Exploiting the texture of the paper and the range of transparency in his pigments, Homer used ...
Learn how to paint a sailboat scene in this, step by step, acrylic painting tutorial with artist Ashley Krieger. This lesson will teach you the steps to take...
Consider these steps: 1. Choosing the Right Primer: Select a primer that is compatible with the type of paint you'll be using and suitable for the boat's material. 2. How to Apply Primer: Follow the manufacturer's instructions and apply the primer evenly across the entire surface of the sailboat.
Since I didn't have a sailboat there, I sketched and took photos of the sailboats moving up and down the Sound. The shimmering water is the tricky part of this painting. It's a great opportunity to practice your dry brush! This painting needs rough press paper to get that sparkling water. The rest of the painting is simple.
Watercolor Sailboat Painting Tutorial. Los Angeles-based watercolor artist Maria Raczynska demonstrates how to paint a beautiful birds-eye ocean scene with a sailboat in this video tutorial!
This watercolor sailboat takes less than 10 minutes to paint but includes simple techniques to inspire and spark creativity. This is a great tutorial for beginners, too! Watercolor Sailboat Step by Step. 00:00 - Intro. 00:32 - Color mixing. 01:06 - Painting the sail boat.
The boat in the foreground is like an actor making his stage entrance as the curtain of day is raised. The two boats are rendered in dark brown to provide a contrast to the streaks of white light in the sky. The Cliffs at Étretat, 1886 Claude Monet (1840-1926) Courtesy of Wikiart: Visual Art Encyclopedia. This painting — one of many done ...
It is recommended to do at least two layers of paint. One undercoat and one top. Some people choose to go as far as two layers of primer, two layers of undercoat, and three layers of topcoat. This is going to be very time consuming, remember you will need to sand down three times between each layer of paint.
Blocking in the background is an important step in painting a sailboat with acrylics. It establishes the composition and sets the tone for the rest of the painting. Here is a step-by-step guide on how to block in the background: 1. Choose the colors for the background based on the atmosphere and mood you desire.
Paintings of Sailboats. Ali Wisch. Updated: Aug 2, 2017. Original: Dec 15, 2016. With water covering nearly seventy-one percent of the earth's surface, it is no surprise that people have been portraying the sea through marine art since prehistoric times. There are many marine artists who are keeping this tradition alive: here are six of them.
Claude Monet - Boats on the Beach at Étretat - 1947.95 - Art Institute of Chicago.jpg 3,000 × 2,364; 4.34 MB Claude Monet - El Geldersekade de Amsterdam en invierno.jpg 1,205 × 1,024; 373 KB Claude Monet - Fishing Boats.jpg 2,700 × 1,905; 1.76 MB
Hello my creative friends! In this acrylic painting tutorial we will go step by step to learn how to paint a sailboat in the ocean. Thank you to my awesome p...
Crepin's painting portrays, with great accuracy, the close-quarters combat that so often occurred in naval battles. 4. Snow Storm - Steam-Boat off a Harbour's Mouth - J.M.W Turner. As noted above, J.M.W. Turner was among the most famous artists who focused on the life and voyages of sailors and their ships.
watercolor painting sail boat on an ocean or lake - sailboat paintings stock illustrations. Watercolor painting sail boat on an ocean or lake. warm sea - wash drawing - sailboat paintings stock illustrations ... Two Small Vessels and a Dutch Man-of-War in a Breeze, c. 1660. Artist: Velde, Willem van de, the Younger (1633-1707)
Sailboat Art Painting, Sailboat Decor, Printable Wall Art, Nautical Decor, Vintage Wall Art, Nursery Wall Art, Cottage Decor, Coastal Art (1.9k) $ 7.90 ... actually two of us, thank-you!!" HAND PAINTED MINIATURE on a canvas print of ship in the night. Shay. 4 out of 5 stars "Looks great! Clean print, and looks like a real painting until you ...
Tall maritime painting of two sailboats out to sea. Sails appear to be down, with white birds. Category Mid-20th Century American Other Paintings. Materials. Canvas, Rope, Wood, Paint. View Full Details. Tall Nautical Sailboat Painting with Rope Frame, Signed. H 18.25 in W 13.25 in D 1 in.
The permanent exposition is at the Central House of Artists in Moscow (two halls of 150 square meters). Presents modern and contemporary artworks: painting, graphics, sculpture and crafts. The gallery collaborates with contemporary Russian artists, from universally recognized masters to painters and sculptors making their debuts in Moscow.
This video shows how to paint a sailing boat in watercolor. It´s simple and easy, for beginners. Get my drawing book: http://amzn.to/1K7L8EdFollow my Instagr...
Moscow's Kremlin, a complex of structures along the Moskva River, is the heart of the Soviet Union's government. The word kremlin means "fortress inside a city.". You will understand that meaning as you take in the walls and towers that surround the Kremlin. The original Kremlin was a wooden structure, but in the 14th century it was ...
A container ship crashed into a major bridge in Baltimore early Tuesday, causing its collapse into the Patapsco River. A livestream showed vehicles traveling on the Francis Scott Key Bridge just ...
1. Arbat, the most charming street in Moscow. The Arbat Quarter or District is a historic district in Moscow where the famous Arbat Street (or Old Arbat) is located, about a 20-30 minute walk west of Red Square, or 15 minutes from the Cathedral of Christ the Savior, to mention two central landmarks.. Located in the historic center of Moscow between Arbatskaya and Smolenskaya-Sennaya Squares ...
Walking tour around Moscow-City.Thanks for watching!MY GEAR THAT I USEMinimalist Handheld SetupiPhone 11 128GB https://amzn.to/3zfqbboMic for Street https://...