* Free U.K. Delivery *
- Collections
- Commissions
- AED AFN ALL AMD ANG AUD AWG AZN BAM BBD BDT BGN BIF BND BOB BSD BWP BZD CAD CDF CHF CNY CRC CVE CZK DJF DKK DOP DZD EGP ETB EUR FJD FKP GBP GMD GNF GTQ GYD HKD HNL HUF IDR ILS INR ISK JMD JPY KES KGS KHR KMF KRW KYD KZT LAK LBP LKR MAD MDL MKD MMK MNT MOP MUR MVR MWK MYR NGN NIO NPR NZD PEN PGK PHP PKR PLN PYG QAR RON RSD RWF SAR SBD SEK SGD SHP SLL STD THB TJS TOP TTD TWD TZS UAH UGX USD UYU UZS VND VUV WST XAF XCD XOF XPF YER
Your Basket is Empty
- £0.00 Subtotal
I Agree with the Terms & Conditions [View Terms]
We design and produce every piece from our studio in Norfolk and are extremely proud to fly the flag for British and handmade products.
Every piece in our collection is entirely handmade and guaranteed to have a little bit of wow and whole lot of love.

Featured collection

Notify me when this product is available:

family and the dog
Choose the number of family members & the dog colour

Family collection
Collection list

Featured products

Autumn Stroll

London (Red)

Sunset Landscape

To the Moon and Back
Get in touch.

Sign up to get the latest on sales, new releases and more …
Search our shop
beach pebble art


How to Make DIY Pebble Art in 5 Easy Steps (2024 Reviews)

Some of the best crafts feature materials you can easily find in or around your home. Pebble art is one that many kids love to do because it’s fun searching for pebbles and getting imaginative with the pictures we create. Plus, the finished pieces look perfect hanging on the walls of your home.
This tutorial walks you through the process of creating any type of pebble art picture you want. For the purpose of showing you how to do it, our crafting experts made a simple rocky ocean scene, but feel free to change up your picture to make anything you want!
How to Create Your Own Pebble Rock Art
Tutorial overview.
- Total Time: 1 hr
- Skill Level: Beginner
- Estimated Cost: $25
Follow along with the steps below to create your very own pebble art. Don’t forget: This project is versatile. You can use the steps below for any design you want to make, and you can finish off your picture however you’d like. Make a forest of woodland animals, a portrait of your family , or a silhouette of a person looking at the night sky. This is the perfect craft to get creative with!

All Photos Credit: Amy Boyington
What You’ll Need
Equipment / tools:.
- Craft scissors
- Hot glue gun
- Pencil with eraser
- 8×10 picture frame with glass removed
- 1 sheet of heavy cardstock
- Assortment of pebbles
- Optional: Materials to complete your design, like watercolor paint, twigs, or craft wire
Tips for Choosing the Right Materials for Pebble Art
Before we get started, here are a few tips that could help you complete this pebble art project:
- Choose pebbles in a variety of shapes, sizes, and colors. If you can’t or don’t want to search outside, you can order packs of assorted pebbles on Etsy, Amazon, and other online stores, or find them in your local craft store.
- Any craft scissors will do, but our crafting experts recommend long-bladed scissors that cut easily through heavy cardstock without snagging or bending it. Check out our guide to the best craft scissors for some ideas.
- Choose a hot glue gun with high heat capabilities, like a dual temperature hot glue gun. The high heat will ensure a strong adhesion between the cardstock and pebbles.
- When looking for cardstock, you’ll see that it comes in different weights. For this project, you’ll need a heavier cardstock that can support the weight of the pebbles. The example here uses a 110 lb cardstock weight, but anywhere from 90 lb to 130 lb can work.
Craft Instructions
Ready to make your pebble art project? Follow the steps below.
1. Fit the cardstock to the frame
Most cardstock comes in the regular paper size of 8.5 inches by 11 inches, so you’ll need to trim yours down to fit your 8×10 frame. To do this, center the cardboard back of your picture frame over the cardstock and lightly trace around the back. Then, use craft scissors to cut off the excess cardstock.

Next, you’ll need to mark off where the front of your frame sits on the cardstock. This helps you keep your pebbles and picture within the frame’s dimensions. With your pencil, lightly trace around the inner frame’s corners to give you that guideline.

2. Plan your design
Now, it’s time to plan your design on your cardstock. It’s much easier to do this before you start gluing, just to make sure you fit the pebbles together to create the picture you want.
You can play around with pebble sizes and shapes for a while to get a good fit. You may wish to use pebbles with varying shades of color. But feel free to do whatever you’d like here! Just be sure to keep your pebbles within your frame guidelines you traced in the last step.

3. Glue the pebbles
Heat your glue gun until it’s ready to glue, which usually takes a minute or two. If you have a dual-temperature hot glue gun, use the higher temperature setting.
One by one, pick up a pebble and place a dot of glue on the paper where it will sit. Put the pebble back in place, gently pushing it on the paper to create a strong adhesion.
Continue until you’ve glued all the pebbles. Allow everything to set for five to ten minutes before moving on.

4. Complete the picture
You can choose to leave your pebble art as is. Pebble art looks beautiful without adding anything to your picture. Before framing, use your pencil eraser to erase the frame guidelines you traced on the cardstock.

You may wish to add some details with a pencil for more minimalistic pictures or with watercolor paint for fun pops of color. You can also use twigs, leaves, craft wire, beads, or whatever else you want, to embellish your pebble art. For instance, if you want to have a tree with birds sitting on its branches, you can make the tree and birds with pebbles but use real branches or craft wire to make the branches.
For example, you can chose to use watercolors to paint the sky and ocean. You can do this before you add your pebbles, too, if you prefer.

5. Frame it
Now, all you need to do is frame your piece! To give the picture extra support, you can slide the back of the frame underneath the picture. Then, place the frame on top and lock it into place. This keeps the picture sturdy as you place it in the frame.

Pebble Art Tips
There are so many ways to do pebble art. You can form pebbles into all sorts of shapes, pictures, and even words and phrases. Here are a few tips that might help you as you design your pebble art:
- Clean off your pebbles first if they’re ones you’ve gathered from outside. Once dirt and grime gets on your cardstock, it can be almost impossible to get it off.
- Clean up any strings left from your hot glue after you’ve glued down all your pebbles, unless you like the look of them there — that’s fine too!
- If you’re using a lightweight cardstock that you don’t think will support your pebbles, use your hot glue gun to glue a few pieces together in the corners.
- Try not to overwhelm the picture with pebbles. The idea is to make sort of a minimalistic picture with the pebbles so that they stand out on the page.
Hopefully, this tutorial has inspired you to create your own simple pebble art with your kiddos. Keep following Creative Family Moments for crafting tutorials, crafting reviews, family activities, and more.
Related posts

A stud finder is an essential Read Article

Think of a cast-iron skillet and Read Article

Board games are a great way Read Article

Cleaning the air of your home Read Article
©2022 Creative Family Moments® all rights reserved
Creative Family Moments
All Reviews : 1 , 2
- Design & Decor
How To Create Pebble Art – 5 Easy Steps!
Have you ever wanted to make some beautiful and natural pebble art for your home? Follow along to learn how to create your own pebble art family!
I have admired some beautiful pebble art ideas for a few months now and my daughter and I have wanted to give it a try! The best thing about this project is that it is a great outdoor and indoor activity.

Materials You Will Need to Make Pebble Art (The list is pretty simple!)
- Picture Frame
- Card stock (we used white)
- Adhesive – I used E6000 glue* and my daughter used her glue gun. That girl hot glues everything!
- Pebbles & beach glass
- Driftwood & twigs
*E6000 glue is a strong craft adhesive but it isn’t meant for children to handle. Just be sure to read the directions of use.
Optional Material
- Decorative Stones – my daughter used some of these 🙂

Finding Pebbles & Beach Glass While Enjoying the Beach
One of my favourite afternoons I had over the March break was walking along the beach in Port Stanley on a hunt for the perfect pebbles and beach glass.
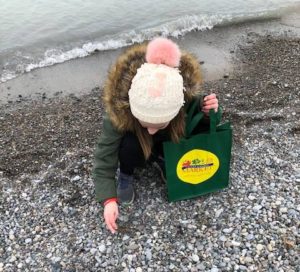
We tried to find stones of different shapes and sizes but the most important thing is to pick out ones that are as flat as possible. Keep in mind they will be glued to card stock so thinner stones adhere better because they are lighter. The stones also look better within the frame if they aren’t protruding too far out from the frame itself.
But who knew it was so hard to find beach glass?! Thankfully, we did find a few pieces and a shout out to my older brother who shared some helpful tips – focus on the water’s edge and dig down into the sand a little ways.
My favourite beach glass pieces are the greeny-blue ones but we ended up finding more that were clear glass. No problem! I cheated a little bit and coloured some of my clear pieces of beach glass with a green pencil crayon and I don’t think that anyone will ever know. 🙂
We also found a few pieces of driftwood and went on a hunt for twigs when we got home.
Creating Your Pebble Art – Step by Step
Step 1 – organize materials.

We began by organizing our materials onto paper plates. This made it easier to plan out our picture.
Step 2 – Prepare Picture Frames
Next, I removed the glass from the picture frames and then we traced and cut the card stock to fit the frame. We decided to glue two layers of white card stock onto the hard back part of the frame so that the brown colour didn’t show through.

Although we chose to remove the glass from two regular pictures frames for our pebble art, you can also use a shadow-box style frame with the glass because it has enough depth to fit the stones.
I did this step of gluing the card stock to the back of the frame for both of us with the E6000 glue (windows open and gloves on). After that, my daughter was able to go wild with her glue gun and materials!
Step 3 – Prepare “Mock Up” Of Your Picture

Using a spare piece of card stock of the appropriate size, we created a “mock up” of our picture.

Step 4 – Glue Your Materials to Create Your Picture
The best part was watching our pictures take shape by moving each piece onto the white card stock within the frame and gluing it down. The background was nice and secure because it was already attached to the back of the frame and it gave a solid white background because we used two pieces of card stock instead of one.
Step 5 – Let Dry Overnight and Then Enjoy!
Once we had created our pictures, we lay them flat to dry and left them overnight.

My daughter used some of her decorative stones from Michael’s and she ended up making two pieces of art.
This is my daughter’s favourite piece! She says it reminds her of the beach. It’s a great option for parents of little ones.

What We Loved About This Crafting Adventure
My daughter and I pretty much loved everything about this project! It’s one of our favourites. Walking along the beach with frozen fingers while we dug down into the sand at the water’s edge, coming up with a picture that was special to us, watching little pebbles become people, owls and stepping stones… this project is a keeper.

Related Posts
Easy Rock Art Craft for Kids
DIY Painted Oars – Easy and Inexpensive Wall Art
Fall Craft – Burlap Wine Wrapper
14 thoughts on “ How To Create Pebble Art – 5 Easy Steps! ”
Love this! I have a question…why 2 pieces of glass for the frame? I’m not sure what you did with a second piece but love how it turned out. I would really appreciate it if you could answer my question. Thank you for sharing! Carol
Hi Carol and thank you! 🙂 We actually removed the glass from the frames (I mention two frames because my daughter and I were both doing one) but I think what you’re referring to is that we used 2 pieces of cardstock glued to the back of each frame so that they had an opaque background (I didn’t want the black colour of the back of the frame to show through the cardstock). I hope this makes sense but let me know if you’d like more clarification! Thanks for reading!
Is there a less toxic glue to use? I don’t trust the glue gun to hold the rocks once you hang the picture. But I hate using something that will make me sick.
Hi there! I haven’t used anything except the E6000 glue but my daughter used a glue gun and so far everything has stayed in place. If you use quality glue from a store like Michaels, I think you should be OK!
Did you use shadow frames or regular frames? Thanks
I just chose a regular frame but shadow frames work as well. So long as you like the look of your frame, either should work fine!
Hi. I’ve a question. Can I use a normal picture frame instead a shadow box frame??
Hi! For sure! The picture frame I used was just a normal frame with the glass removed. My daughter chose a shadow box. Either work!
Hello. I was wondering how you prep the stones?
I just give them a rinse and let them dry!
Love your pics just started doung rock art and you gave me wonderful ideas. Thanks
Good luck with it! Thanks for reading. 🙂
Love the pieces you and your daughter made. Great ideas and easy to follow directions. What glue did you use for the two pieces of card stock? I have gotten bumpy finishes trying that. Love to know what you do. Thanks, Sharon
Hi Sharon! I just used a tiny amount of the E6000 glue since I had it on hand for the pebbles. A bit much for the task but it just needed a small amount around the edges and it sat flat without bumps. I hope this helps! KJ
Leave a Reply Cancel reply
Your email address will not be published. Required fields are marked *
Cruise Routes (Interactive Map)
Request a quote download brochure
Russian River Cruises
- Find your cruise
- Moscow — St. Petersburg
- Moscow — Astrakhan
- Astrakhan — St. Petersburg
- St. Petersburg
- Cruise Highlights
- News & Travel Tips
Lorem Ipsum
Moscow to Saint Petersburg
13 days – 12 nights

Collapse Full Itinerary

Gold, Platinum Airport transfer / Check-in at centrally located Marriott Aurora***** or Ararat Park Hyatt*****
Imperial : Private airport transfer / Check-in at the luxurious Four Seasons Moscow***** only a minute from the Kremlin and Red Square

Volga dream experience:

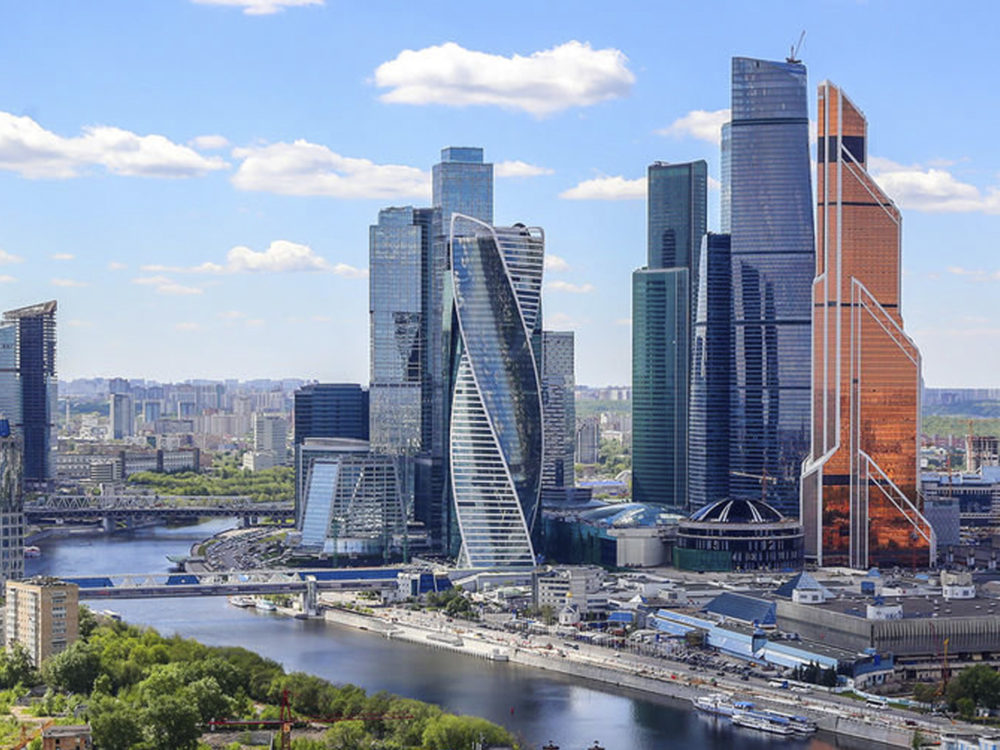
Gold: City Tour / Novodevichy Cemetery Imperial, Platinum: City tour / Lunch in a Moscow City Skyscraper / Novodevichy Cemetery / Sparrow Hills

Meals: Breakfast
Platinum / Imperial
Meals: Breakfast, Lunch

Gold: Moscow Kremlin / Armory Museum / Red Square / GUM Department Store
Platinum: Moscow Kremlin / Armory Museum / Red Square / St. Basil’s Cathedral / GUM Department Store / Park Zaryadye

Gold: Tretyakov Gallery / Moscow Metro Tour.
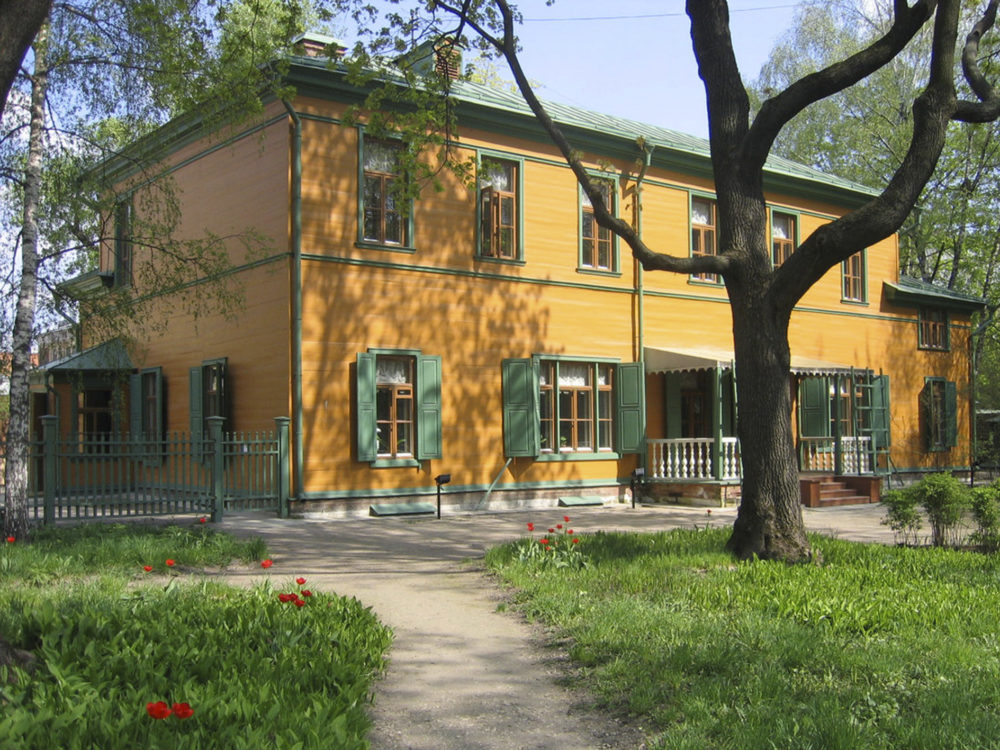
Platinum: Leo Tolstoy House-Museum in Hamovniki / Tretyakov Gallery / Moscow Metro Tour.

Meals: Breakfast, Dinner
Meals: Breakfast, Lunch, Dinner

Gold, Platinum: Town of Uglich / Church of St. Dmitri-on-the-Blood

Volga dream experience: Costumed Russian Tea Ceremony & Russian Cooking Class

Gold, Platinum: Yaroslavl City Tour / Governor’s house

Volga dream experience: Sun Deck Barbeque

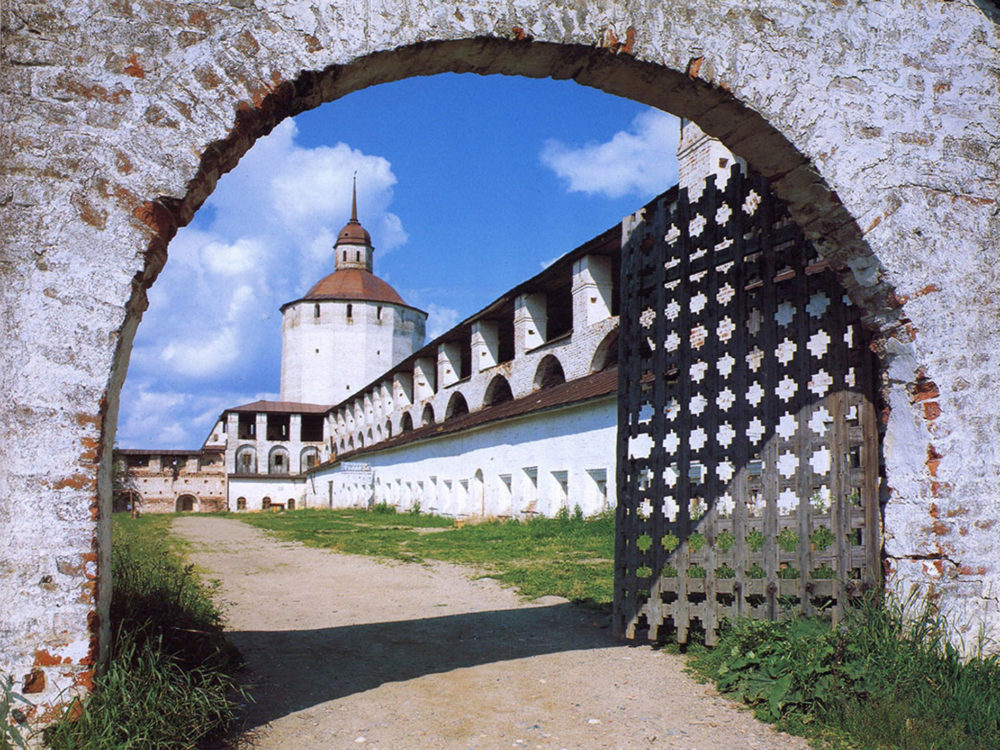
Gold: Kirillo-Belozersky Monastery
Platinum: Ferapontov Monastery
Meals: Breakfast, Lunch, Russian Dinner with Vodka Tasting

Gold, Platinum: Kizhi Island / Lake Onega

Volga dream experience: Piano Concert – Compositions by Tchaikovsky and Rakhmaninov

Gold, Platinum: Svirstroy village / Local resident’s home / Local primary school

Volga dream experience: Farewell Dinner, Captain’s cocktail

Gold: City Tour / Peter and Paul Fortress
Platinum: City Tour / St. Isaac’s Cathedral / Canal boat / Yusupov Palace

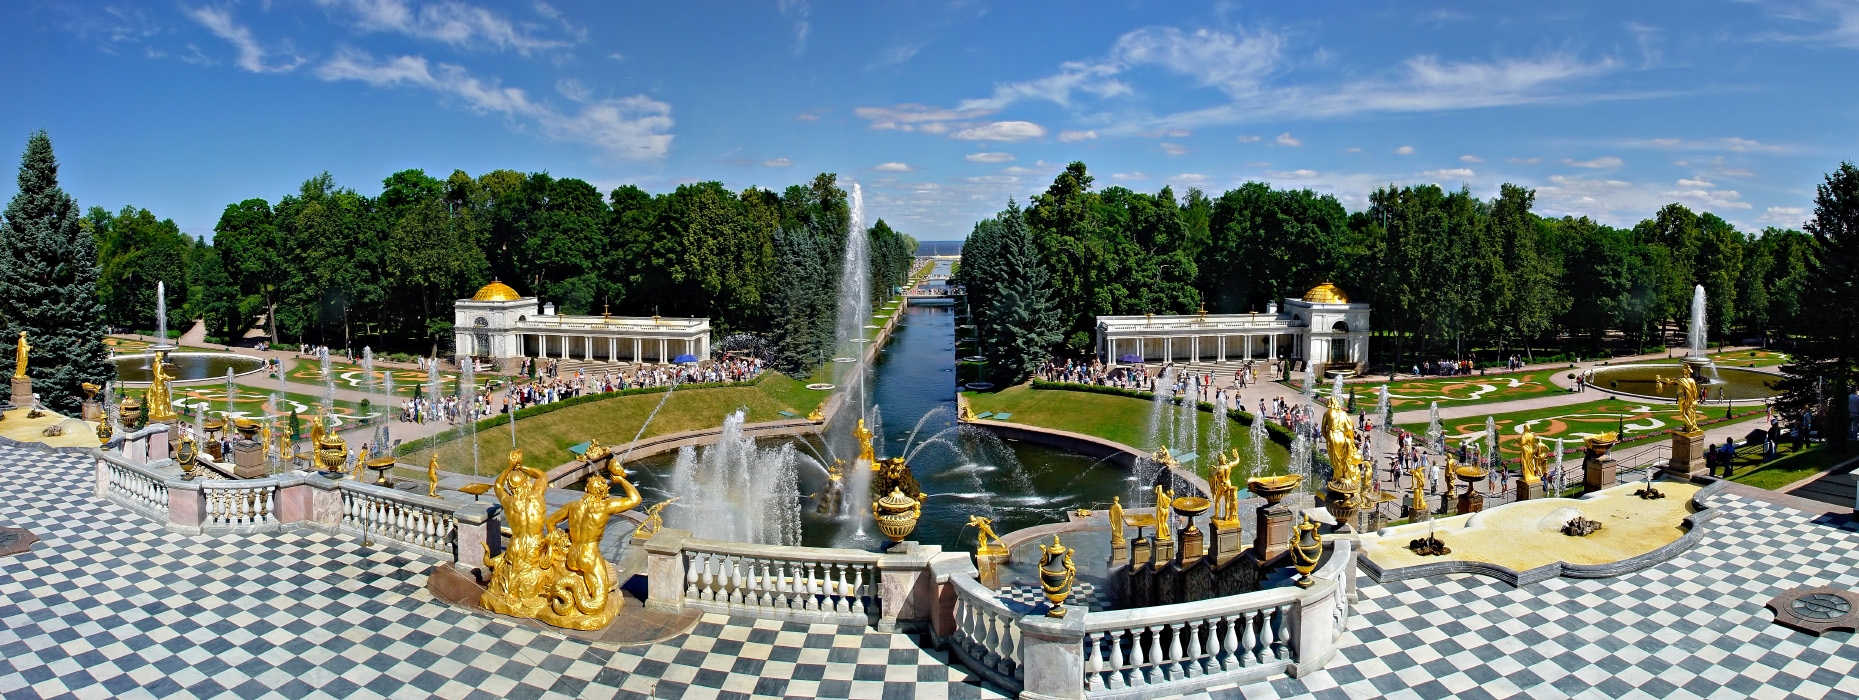
Gold: The State Hermitage Museum / Peterhof: Park and a historic Cottage
Platinum: The State Hermitage Museum (Early Entrance!) / Gold Room / Peterhof: Park and a historic Cottage

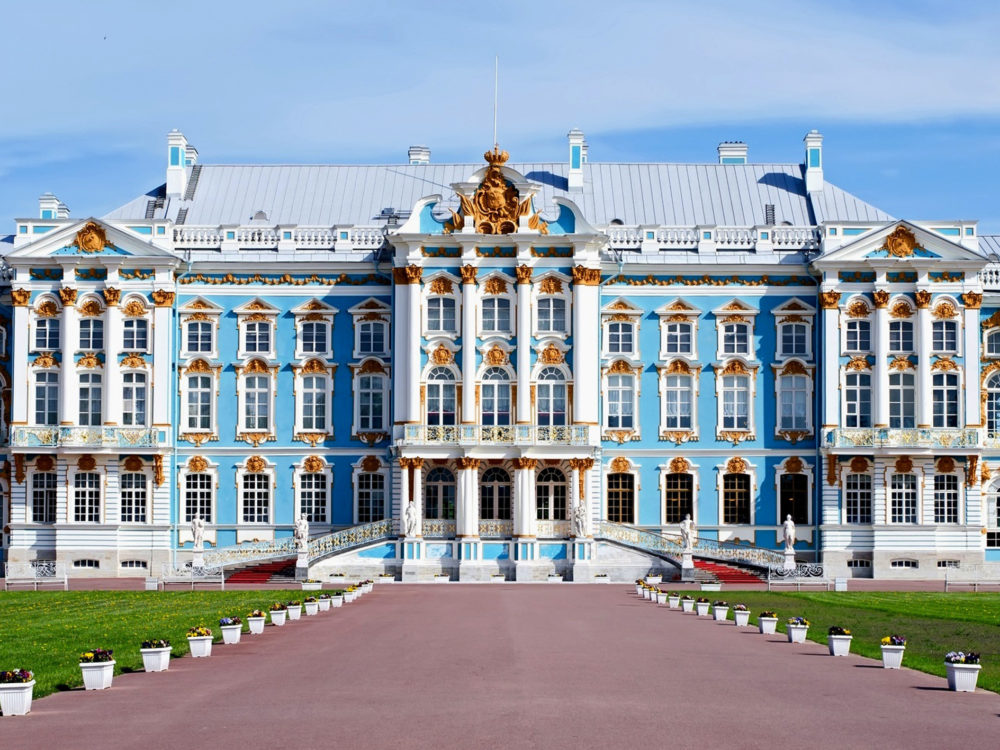
Gold: Catherine’s Palace / Amber Room
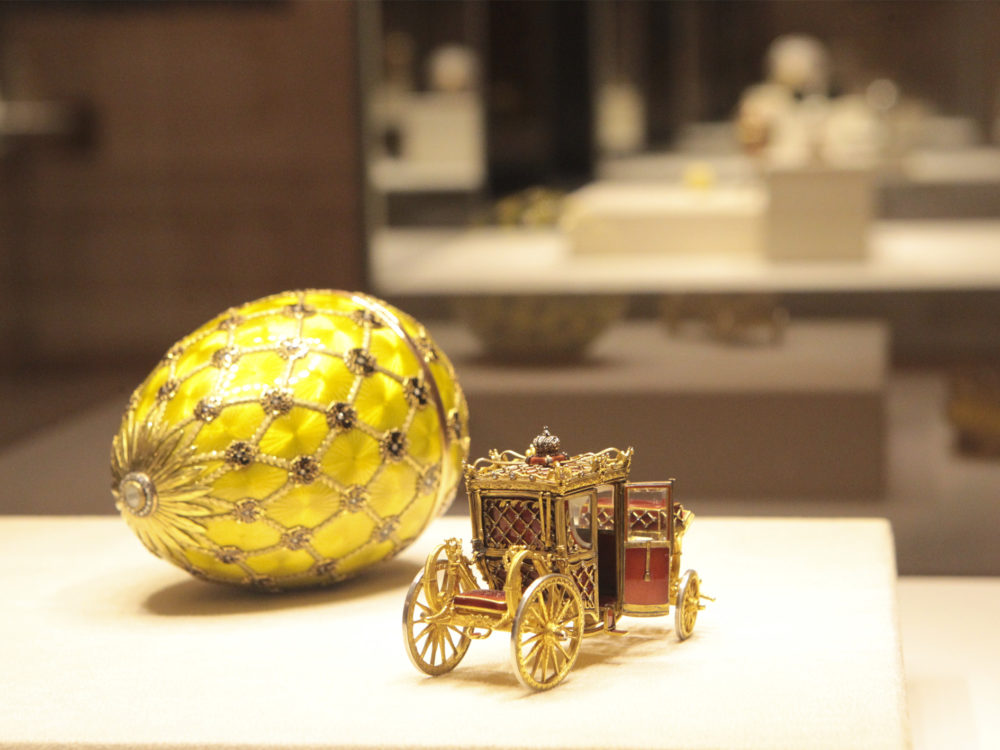
Platinum: Faberge Museum / Catherine’s Palace / Amber Room
Meals: Breakfast / Imperial
Gold, Platinum, Imperial: Check-out / Airport transfer

Volga dream experience: -

The rates are set for a cruising season. The price is not dependent on the month within a selected year
Choose a date
View all months May July August
Choose Staterooms
All prices are per person based on double occupancy.
All rates are per person, based on double occupancy. Actual size of cabins can slightly differ within one category.
Request a quote
Journey: Volga Dream
Price per person: not specified
The Best Street Art in Moscow

A crowd-sourced toplist with the best street art in Moscow. Edited by "Jay-Jay" Dorsey .
2 Moscow Museum of Modern Art

4 Art gallery Cristina

5 Le Connaisseur

6 Moskovskiy Dom Fotografii

8 Red October gallery

9 Zurab Tsereteli Art Gallery

11 The State Tretyakov Gallery

12 Art Gallery Carré d'artistes Moscow

13 The Pushkin State Museum of Fine Arts

14 Galereya Tirazh

15 Fragment Gallery

16 "Albion Gallery" gallery of antique fine art

17 Cube.Moscow

18 National Centre for Contemporary Art

19 Gorky Central Park of Culture and Leisure

20 Moscow Art Theatre

- Third Transport Ring
- Moscow City Centre
- Garden Ring
- Bulvarnoe Ring
- Zamoskvorechye
- Dorogomilovo
- Krasnoselsky
- Meshchansky
- More neighbourhoods
Help out? Suggest a street art installation that we might have missed.
- San Antonio
- Philadelphia
- Porto Cesareo
- Torre Lapillo
- Rio de Janeiro
- Benalmádena
- Torremolinos
- Les Menuires
- New Orleans
THE 10 BEST Moscow Boat Rides & Cruises
Boat rides & cruises in moscow.
- Boat Rentals
- Scuba & Snorkeling
- Fishing Charters & Tours
- Water Sports
- Stand-Up Paddleboarding
- Surfing, Windsurfing & Kitesurfing
- Kayaking & Canoeing
- Waterskiing & Jetskiing
- Parasailing & Paragliding
- River Rafting & Tubing
- Dolphin & Whale Watching
- Speed Boats Tours
- Submarine Tours
- 5.0 of 5 bubbles
- 4.0 of 5 bubbles & up
- 3.0 of 5 bubbles & up
- 2.0 of 5 bubbles & up
- 3rd Transport Ring (TTK)
- District Central (TsAO)
- Garden Ring
- District Northern (SAO)
- Good for Big Groups
- Good for Couples
- Good for a Rainy Day
- Budget-friendly
- Good for Kids
- Hidden Gems
- Honeymoon spot
- Good for Adrenaline Seekers
- Adventurous
- Things to do ranked using Tripadvisor data including reviews, ratings, photos, and popularity.
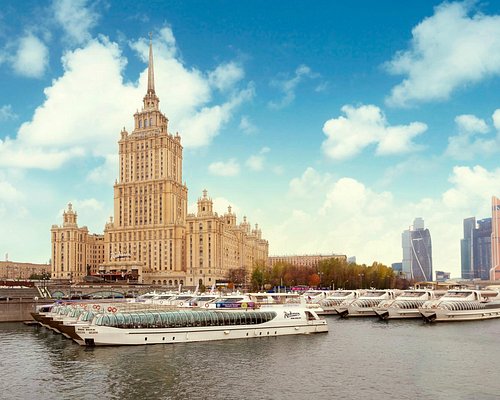
1. Flotilla Radisson Royal

2. Moscow River Boat Tours

3. Sup-Club

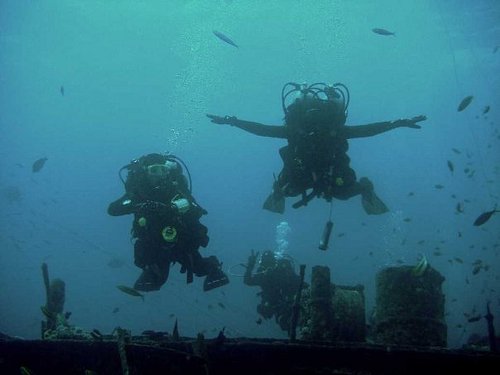
4. Akvanavt Diving Centre
5. Diving Center Crocus City Oceanarium

6. CheapRussia Tours
7. Kite School Kiteclass

8. SUP Center
9. Erwin. Reka
11. Easy Russia Tour Guide
12. Lovely Russia Tours

13. Capital River Boat Tours - Moscow Centre

14. Alfa Centr
15. Diving Club Divers

16. Sup Outdoor

17. MORE MOSCOW
19. Soho Sailing Style
20. Diving Center Crocodile
21. Dive-Project

22. Mosparokhodstvo
24. Kosinskiy Children Marine Club

25. Kayak Moscow
26. DIVECLUB CHE

27. Moswake
28. FLOW Moscow

29. Morskiye Volki

30. S-cruises
What travelers are saying

- CheapRussia Tours
- Easy Russia Tour Guide
- Lovely Russia Tours
- MORE MOSCOW
- Insider Moscow Tours
- Flotilla Radisson Royal
- Moscow River Boat Tours
- Capital River Boat Tours - Moscow Centre
- Diving Center Crocus City Oceanarium
IMAGES
COMMENTS
Sailboats Pebble Art - Great Lakes Sailing Picture - FREE SHIPPING - Nautical Boating Beach Glass Art (54) $ 50.00. FREE shipping Add to Favorites Sea Glass Pebble Art, Pebble Art Sailboat, Gift for Her, Friendship Gift, Seaglass Picture, Coastal Decor (492) $ 29.00. Add to Favorites ...
Check out our sailboats pebble art selection for the very best in unique or custom, handmade pieces from our wall hangings shops.
27-feb-2020 - This wall hanging was made by me from pebbles collected along Lake Ontario, and along the shores of the Finger Lakes in New York State. This piece is constructed from canvas board and a wood frame. It can hang on a wall or sit on a shelf. The sky is the limit with pebble art. If you are interested
Learn how to easily make boat painting using pebble art. To learn professional pebble art contact Satyen Sharma on [email protected]
Nov 28, 2022 - Explore robert beardsley's board "SAILBOAT PEBBLE ART" on Pinterest. See more ideas about pebble art, sailboat, driftwood art.
Unique, handmade pebble art. Beautiful bespoke pictures for a quirky home decor. Unusual gift idea. Nautical designs, all made in Britain. Framed stone art for all occasions, birthdays, weddings, christmas, anniversary, celebrating friendship & family, and many more.
Jun 14, 2019 - This Wall Hangings item by FroggyandCoCreations has 16 favorites from Etsy shoppers. Ships from Spencerport, NY. Listed on Jul 24, 2022
Love this: art made of pebbles and sea glass. Lighthouse and sailboats. Adorable. Artist: Sharon Nowlan.
Nov 20, 2019 - Snail wall art framed snail pebble art nursery wall decor | Etsy. Nov 20, 2019 - Snail wall art framed snail pebble art nursery wall decor | Etsy. Pinterest. Today. Watch. Shop. Explore. When autocomplete results are available use up and down arrows to review and enter to select. Touch device users, explore by touch or with swipe ...
One by one, pick up a pebble and place a dot of glue on the paper where it will sit. Put the pebble back in place, gently pushing it on the paper to create a strong adhesion. Continue until you've glued all the pebbles. Allow everything to set for five to ten minutes before moving on. 4.
Step 5 - Let Dry Overnight and Then Enjoy! Once we had created our pictures, we lay them flat to dry and left them overnight. Our Pebble Art Family. My daughter used some of her decorative stones from Michael's and she ended up making two pieces of art. This is my daughter's favourite piece!
Check out our sail boat pebble art selection for the very best in unique or custom, handmade pieces from our wall hangings shops.
Walking tour around Moscow-City.Thanks for watching!MY GEAR THAT I USEMinimalist Handheld SetupiPhone 11 128GB https://amzn.to/3zfqbboMic for Street https://...
Book and travel with confidence. Moscow — St. Petersburg Moscow — Astrakhan Astrakhan — St. Petersburg. 13 days - 12 nights. Moscow and St. Petersburg are Russia's best-known cities, but the towns of Russia's historic Golden Ring are delightful too. The luxurious Volga Dream offers a unique opportunity to visit these Russian gems by ...
Check out our pebble boat art selection for the very best in unique or custom, handmade pieces from our wall decor shops.
Presented by Art Miami, Palm Beach Modern and Contemporary art fair returns this week for its seventh edition March 21-24, 2024. Debuting with an invite-only VIP Preview benefiting the Ann ...
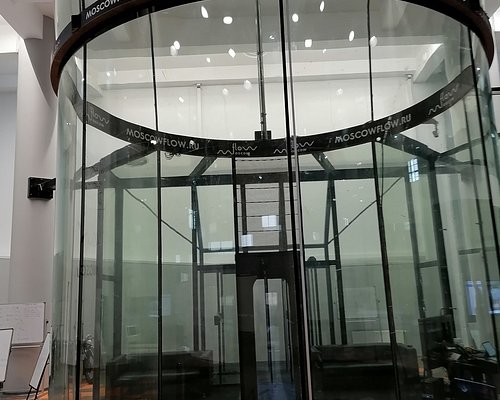
Popup art displays in the parking lot / garage of Ritz-Carlton Moscow hotel. Entrance from only one elevator to -2 floor from the hotel lobby. A nice coffee bar inside and several smaller galleries. Fresh art and all for sale. Not many people - good place to relax for a while.
Aug 2, 2022 - Explore Maria Psara's board "pebble boat" on Pinterest. See more ideas about sea glass art, sea glass crafts, glass crafts.
Check out our sailing pebble art selection for the very best in unique or custom, handmade pieces from our shops.
Sep 22, 2023 - This Pin was discovered by lizzi b. Discover (and save!) your own Pins on Pinterest
Sea Glass Pebble Art, Pebble Art Nature, Gift after Loss , Sympathy Gift, Seaglass Picture, In Memory Of This exact item was previously sold. We are able to provide this product with a slight variation due to material differences! A perfect gift for the wonderful friends in your life! Sweet messages printed on high quality watercolor card stock ...
Explore the scenic and historic attractions of Moscow from the water with the best boat tours and cruises. Enjoy the views of the Kremlin, the Cathedral of Christ the Savior, and the Sparrow Hills on a relaxing or informative boat ride. Or, spice up your trip with some water sports and activities in Moscow. Find out more on Tripadvisor.
SOLD - Sea Glass Pebble Art, Pebble Art Bird, Gift for Her, Friendship Gift, Seaglass Picture, Bird Lover Gift This exact item was previously sold. We are able to provide this product with a slight variation due to material differences! A perfect gift for a girlfriend, mom, wife, or neighbor! Sweet messages printed on high quality watercolor ...