How to Paint a Boat
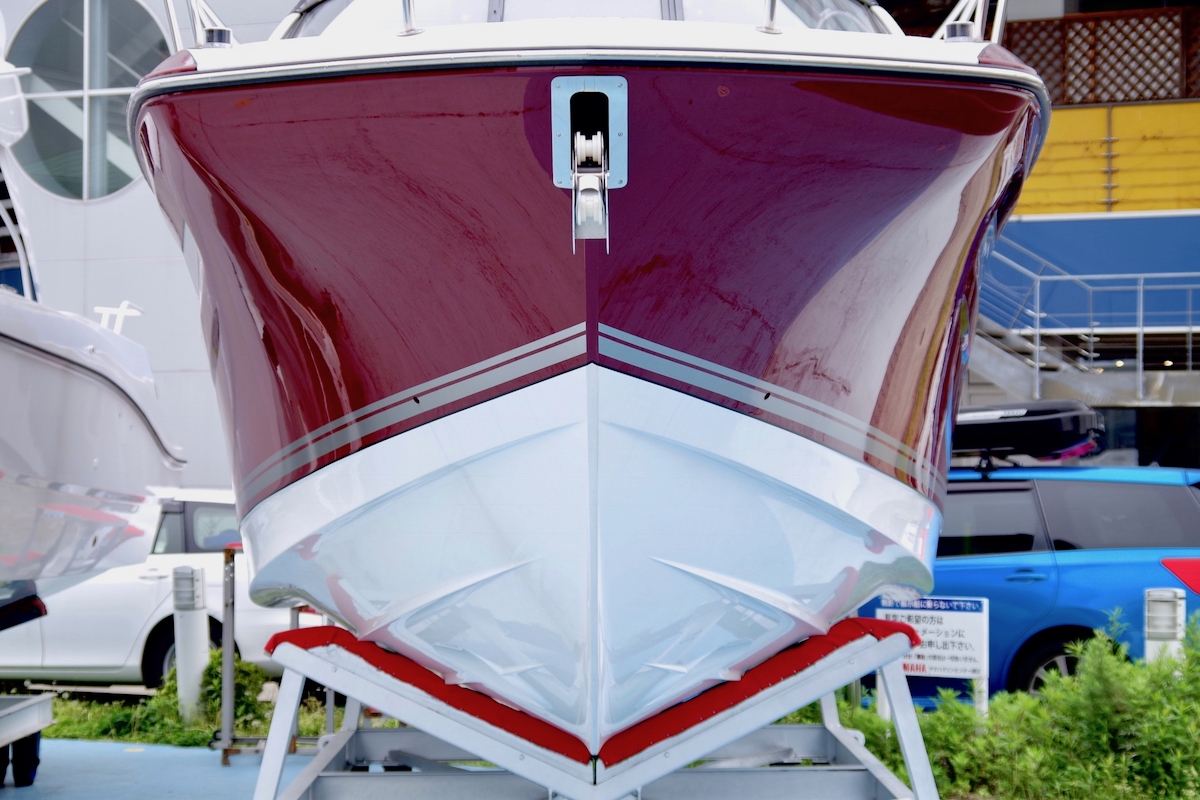
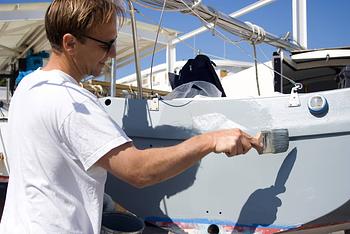
Learning how to paint a boat is easy, and if you want to make your boat look like new, you'll be surprised what a fresh layer of paint can do. Proper boat maintenance will go a long way in keeping your pride and joy looking great, but when that boat starts to appear aged, knowing how to paint a boat is the key to making it look like new again. And although painting a boat can be time-consuming and expensive, there’s no better way to improve an older boat’s appearance. While this is a rather complex process, we can boil it all down to these five basic steps.
How to Paint a Boat Step-by-Step:
- Remove all hardware (like rails, cleats, and vents) and/or any teak or wood trim on the boat.
- Repair any surface imperfections like chips, dings, or gouges.
- Prep the surface by washing, de-waxing, and thoroughly sanding it.
- Apply the primer, then the paint.
- Wax the boat from stem to stern to protect the new paint job.
Then, simply keep it clean, and rinse it thoroughly after use in saltwater. Remember, before you paint a boat always read the warning labels on all of the supplies and be sure to use the proper protective equipment.

How to Paint a Fiberglass Boat
Painting fiberglass boats isn’t really much different from painting wood boats, except for the type of paint you’ll use and a few details in the prep and application. We should note that the very best finish can be attained by professionals who spray on the paint, rather than applying it with a brush and roller. However, anyone can do a bang-up job painting a boat if they make sure the surface has been properly prepped, and take care during the application.
Paints for Fiberglass Boats
- Single-Part Enamel Paints – These paints are easiest to apply and are less expensive than some other options. However, they also are subject to UV damage over time and the gloss doesn’t tend to hold up as well over the long haul especially if it isn’t constantly waxed and maintained.
- Single-Part Polyurethane Paints – Urethane paints are also easy to apply, don’t cost nearly as much as two-part polyurethanes, and have a long-lasting gloss.
- Two-Part Polyurethane Paints – These undisputedly look best and last longest. Many people would even argue they can out-shine a boat’s original gel coat. However, they are very expensive and are more labor-intensive, as they require mixing, an epoxy primer, and specific temperature and humidity levels for application.
Whichever of these you choose, job number-one is following the manufacturer’s instructions to a tee. We can’t lay out all the details here because each paint has its own specific requirements. The bottom line, however, is that each has its own instructions that can be quite exacting. And remember that like any paint job, good prep work is the key to success. De-waxing is one of the most important factors, because even a tiny amount of wax will prevent the paint from adhering to the fiberglass. Either acetone or a dedicated wax-stripper can be used but in either case, be sure to do a thorough job.
Tips for Painting a Fiberglass Boat
- Most people will use a standard “roll and tip” method for painting large surface areas of a boat. This requires two people and both rollers and brushes. As one person rolls out the paint, another follows behind with a brush and lightly strokes across the paint to brush out the roller pattern.
- One important tip for creating the best surface is to apply multiple, thin, consistent coats, as opposed to one or two thick ones. Three coats of paint is generally considered best.
- Another important tip to keep in mind: be sure to allow the proper amount of cure-time between coats (again following the manufacturer’s recommendations). And if the work takes place outdoors keep an eye on the weather to ensure the temperature and humidity will be acceptable and consistent throughout the entire timeframe.
How to Paint a Boat Bottom
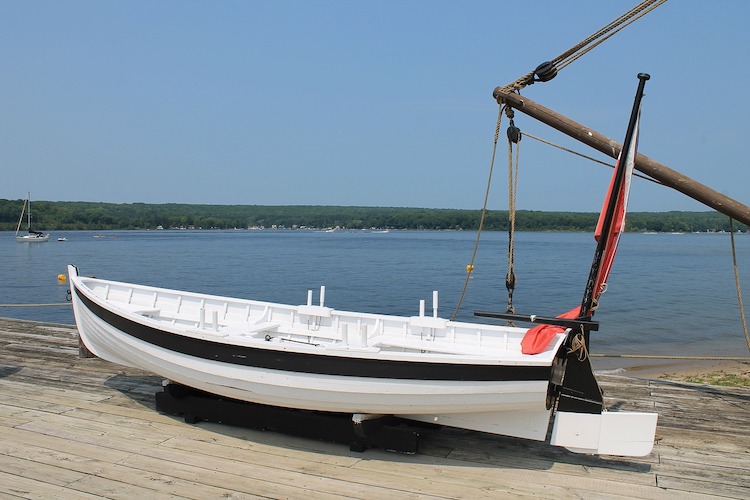
Painting a boat bottom is a completely different experience than painting the boat’s upper hull and topsides. In this case you’ll want an anti-fouling paint that prevents marine growth, and there are countless versions to choose from. Read Antifouling Paints: Which Paint is Best For Your Boat to learn more about some of the different options.
Here’s the good news: learning how to paint a boat bottom is much easier than it is for the rest of the boat, because bottom paint tends to be simpler to apply.
- If the bottom is fresh gel coat, the same sort of prep work (de-waxing and sanding) is necessary.
- If you’re applying over old bottom paint, you can skip the de-waxing process and simply sand or power wash away any old or loose paint. Also, you won’t need to roll and tip; most people skip the tip part of this equation since the bottom will be underwater anyway, and simply roll the paint right on.
- There is, however, one additional factor to applying bottom paint to a boat: you may need to properly time the boat’s launch. Some paints have a minimum dry time but a maximum time as well, and will need to be launched within a certain window.
How to Paint a Boat Hull
Painting a boat’s hullsides is usually a lot easier than painting the topsides, simply because you’re dealing with a large, smooth surface area. There will only be minimal hardware to remove (in this case you may want to simply protect it with masking tape, though this rarely provides as good a final finish), and you won’t have to worry about angled surface areas or tight corners.
There is one variable to note, however, about painting a boat hull. You will be working on a more or less vertical surface, and if you apply the paint too thickly, drips and runs will result. So it’s very important to apply the pint evenly and thinly.
How to Paint a Boat with Non-Skid
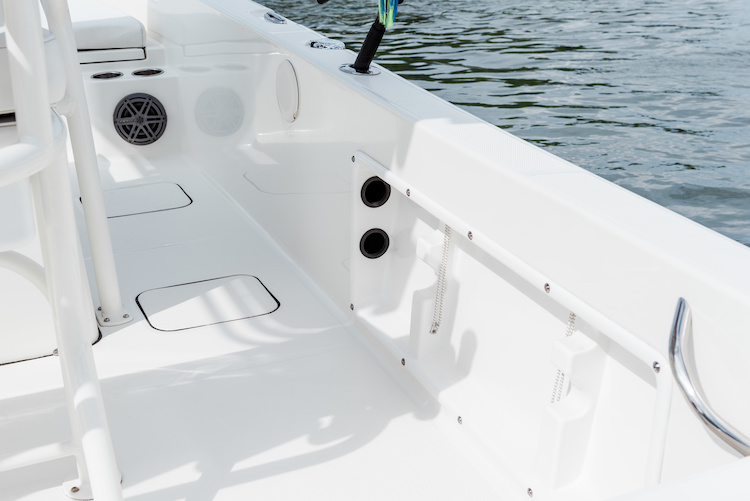
Molded fiberglass non-skid and non-slip surfaces can’t be painted the same way as the rest of your boat. It’s impossible to sand or apply paint between the tiny imprints, and even if you did paint it, it would wear unevenly as people walk across the top of the pattern without ever touching between the raised surfaces. But that doesn’t mean you can’t make that old non-skid look like new again.
- The best way to paint non-skid is to apply a textured compound. There are several on the market designed specifically to paint a boat deck. They have some sort of grit or tiny rubberized pellets mixed in with the paint, to give the boat’s deck a fresh look but still maintain its non-slip properties.
- Once again, each has its own set of specific application instructions, prep work is key, and several coats are usually necessary.
- On additional variable you need to know about is the roller; since these paints have solids mixed in, you usually need to use a roller brush specifically designed to spread them.
Yes, painting a boat is a big, time-consuming job. Sure, it requires some expense. But remember, there’s no better way to make an older boat look new again than to give it a fresh paint job.
Editor's Note: Remember that many paints, primers, and wax strippers emit chemical fumes, and sanding can also create potentially harmful conditions for both you and the environment. Before you paint a boat always read the warning labels on all of the supplies and be sure to use the proper protective equipment.
Learn More in our Boat Maintenance Guide
Looking for more on boat maintenance and upkeep? Read...
- Antifouling Paints: Which Paint is Best for Your Boat?
- Boat Storage: What Are My Options?
- How to Winterize a Boat
- Spring Start-Up Checklist

Join Our Newsletter!
Get community news, buying bargains, and how-to guides at your fingertips.
DIY Boat Building Plans
Yacht Painting Tips
Download over 500 Boat Plans. Click on the link below.
-->click here<--.
Table of Contents
Key Takeaways – Yacht Painting Tips
🖌️ Yacht painting involves applying a protective coating to both the exterior and interior surfaces, with options for DIY or professional services.
💡 Benefits of painting include increased value, enhanced appearance, protection from environmental factors, extended lifespan, improved performance, and personal expression.
🎨 Essential considerations before painting involve budget, time, yacht condition, paint type, tools , weather, and legal/environmental regulations.
⚠️ Safety precautions during painting include wearing protective gear, working in well-ventilated areas, and following manufacturer instructions to prevent injuries and environmental damage.
🌈 Yacht paint types include single-part and two-part paints, each with its own application method and finish options (gloss, semi-gloss, matte, or metallic).
🛠️ Choosing the right yacht paint depends on the yacht material, condition, and purpose, with different paints recommended for fiberglass , aluminum , gelcoat, wood, and steel.
🌞 Painting a yacht in hot weather requires careful consideration to avoid issues like bubbles, blisters, cracks, or peeling.
🎨 Choose a paint suitable for high temperatures and low humidity, such as a two-part polyurethane paint.
🕰️ Optimal painting times are early morning or late afternoon when temperatures and sunlight are lower.
🚫 Avoid painting in direct sunlight or windy conditions to prevent complications.
💦 Cool down the yacht surface before painting by spraying it with water or covering it with a wet cloth.
🔄 Apply thin and even coats of paint, allowing each coat to dry completely before applying the next.
⚠️ Be cautious not to thin the paint excessively, as it can reduce durability and resistance.
🖌️ Take steps to prevent runs or sags by avoiding excessive paint application or fast painting.
🔍 Thoroughly inspect the painted areas, removing tape and coverings, and cleaning up any spills or drips.
Did you know that painting your yacht can increase its value by up to 20%? Whether you want to sell your yacht, protect it from the elements, or give it a fresh look, painting your yacht is a worthwhile investment. But how do you paint your yacht the right way? What are the best products, tools, and techniques to use? How do you avoid common mistakes and fix them if they happen?
In this article, we will answer all these questions and more. We will show you how to paint your yacht like a pro, step by step, with tips and tricks from experts. Whether you are a beginner or an advanced user, you will find something useful in this guide. Read on to learn more!
What is yacht painting?
Yacht painting is the process of applying a protective and decorative coating to the exterior and interior surfaces of a yacht. Yacht painting can be done by hand or by machine, depending on the size, shape, and material of the yacht. Yacht painting can also be done by yourself or by a professional service, depending on your budget, time, and skill level.
Why paint a yacht?
Painting a yacht can have many benefits, such as:
- Increasing the value and resale potential of the yacht
- Enhancing the appearance and aesthetics of the yacht
- Protecting the yacht from corrosion, UV rays, saltwater, algae, and other environmental factors
- Extending the lifespan and durability of the yacht
- Improving the performance and fuel efficiency of the yacht
- Preventing leaks, cracks, and mold growth on the yacht
- Expressing your personality and style through your yacht
Benefits of a painted yacht
To illustrate the benefits of a painted yacht, we have created a table that compares a painted yacht with an unpainted yacht in terms of various factors:
As you can see, a painted yacht has many advantages over an unpainted yacht. Therefore, painting your yacht is a smart and beneficial decision.
Essential considerations before painting a yacht
Before painting a yacht, you should consider some important factors, such as:
- The budget and time required for the project
- The condition and age of the yacht
- The type and color of the paint you want to use
- The tools and equipment you need for the job
- The weather and season you plan to paint in
- The legal and environmental regulations you need to follow
These factors can influence the cost, quality, and duration of your yacht painting project. Therefore, you should do some research and planning before you start painting your yacht.
Safety precautions and guidelines
Painting a yacht can be a hazardous activity, so you should follow some safety precautions and guidelines, such as:
- Wearing protective gear, such as gloves, goggles, masks, and suits
- Working in a well-ventilated and shaded area
- Avoiding contact with skin, eyes, and mouth
- Cleaning up spills and drips immediately
- Disposing of paint and waste properly
- Following the manufacturer’s instructions and warnings
These safety measures can help you prevent injuries, accidents, and health problems while painting your yacht. They can also help you protect the environment and comply with the law.
Understanding yacht paint types and application
Yacht paint can be classified into two main types: single-part and two-part paints. Single-part paints are easier to apply and cheaper, but they are less durable and resistant. Two-part paints are harder to apply and more expensive, but they are more durable and resistant. You can also choose between different finishes, such as gloss, semi-gloss, matte, or metallic. You can apply yacht paint by brushing, rolling, spraying, or dipping, depending on the type of paint and the surface you are painting.
Choosing the right yacht paint for your needs
Choosing the right yacht paint for your needs depends on several factors, such as the material, condition, and purpose of your yacht. For example, you can use different paints for different parts of your yacht, such as:
- Fiberglass: You can use acrylic, polyurethane, or epoxy paints for fiberglass yachts, as they are flexible and adhere well to the surface.
- Aluminum: You can use epoxy or polyurethane paints for aluminum yachts, as they are durable and corrosion-resistant.
- Gelcoat: You can use acrylic or polyurethane paints for gelcoat yachts, as they are glossy and easy to apply.
- Wood: You can use oil-based or water-based paints for wood yachts, as they are natural and breathable.
- Steel: You can use epoxy or polyurethane paints for steel yachts, as they are strong and rust-proof.
You should also consider the color of the paint, as it can affect the appearance, temperature, and visibility of your yacht. For example, you can use light colors to reflect heat and sunlight, dark colors to absorb heat and sunlight, or bright colors to stand out and attract attention.
Preparing the yacht for painting
Preparing the yacht for painting is a crucial step that can affect the quality and outcome of your project. You should follow these steps to prepare your yacht for painting:
- Wash and dry the yacht thoroughly to remove any dirt, grease, or wax
- Sand and smooth the yacht surface to remove any imperfections, scratches, or old paint
- Fill and seal any cracks, holes, or dents with filler or epoxy
- Tape and cover any areas that you don’t want to paint, such as windows, hardware, or decals
- Prime the yacht surface with a suitable primer to improve the adhesion and coverage of the paint
These steps can help you create a clean, smooth, and even surface for your yacht paint to stick to and shine on. They can also help you avoid any flaws, bubbles, or peeling in your paint job.

Yacht Painting Techniques
In this part, we will show you how to paint different parts of your yacht using various techniques. We will cover the following topics:
Painting the yacht hull and deck
Painting yacht trim and accessories, painting yacht propellers, painting yacht topsides, painting yacht superstructures, painting yacht interiors, restoring yacht decals and graphics, protecting a painted yacht from the elements.
The hull and deck are the largest and most visible parts of your yacht, so you want to paint them with care and precision. Here are some steps to follow:
- Choose a high-quality marine paint that is suitable for your yacht material and finish. For example, you can use a single-part polyurethane paint for a glossy and durable finish, or a two-part epoxy paint for a matte and resistant finish
- Mix the paint according to the manufacturer’s instructions and use a paint strainer to filter out any impurities
- Apply the paint with a partner, using a roller and a brush. Start from the bow and work your way to the stern, painting in long and even strokes. Use the roller to cover large areas and the brush to reach corners and edges
- Let the first coat dry completely before applying the second coat. Lightly sand the surface with fine-grit sandpaper and wipe off the dust before painting the second coat. Repeat this process until you achieve the desired coverage and color
- Remove the tape and coverings from the areas that you did not paint and clean up any spills or drips.
The trim and accessories are the smaller and more detailed parts of your yacht, such as rails, cleats, vents, hatches, and windows. You can paint them with the same or a different color as the hull and deck, depending on your preference and style. Here are some steps to follow:
- Choose a marine paint that is compatible with the material and finish of your trim and accessories. For example, you can use a metallic paint for aluminum or stainless steel parts, or a water-based paint for wood or plastic parts.
- Remove the trim and accessories from the yacht if possible, or tape and cover them if not. Clean and sand them to remove any dirt, grease, or old paint.
- Apply the paint with a small brush or a spray gun, depending on the size and shape of the parts. Use thin and even coats and let them dry between each coat.
- Reattach the trim and accessories to the yacht or remove the tape and coverings from them.
The propellers are the parts of your yacht that propel it through the water, so you want to paint them with a special paint that prevents fouling and corrosion. Here are some steps to follow:
- Choose a marine paint that is designed for propellers, such as a zinc or copper-based antifouling paint.
- Remove the propellers from the yacht and clean them with a wire brush and a solvent to remove any barnacles, rust, or old paint.
- Apply the paint with a brush or a spray gun, covering the entire surface of the propellers. Use multiple coats and let them dry between each coat.
- Reinstall the propellers to the yacht and check their alignment and balance.
The topsides are the parts of your yacht that are above the waterline, such as the hull sides, the transom, and the cockpit. You can paint them with the same or a different color as the hull and deck, depending on your preference and style. Here are some steps to follow:
- Choose a marine paint that is suitable for your yacht material and finish. For example, you can use a single-part polyurethane paint for a glossy and durable finish, or a two-part epoxy paint for a matte and resistant finish
- Apply the paint with a partner, using a roller and a brush. Start from the top and work your way down, painting in vertical and even strokes. Use the roller to cover large areas and the brush to reach corners and edges
The superstructures are the parts of your yacht that are above the deck, such as the cabin , the mast, the boom, and the sails. You can paint them with the same or a different color as the hull and deck, depending on your preference and style. Here are some steps to follow:
- Apply the paint with a partner, using a roller and a brush. Start from the bottom and work your way up, painting in horizontal and even strokes. Use the roller to cover large areas and the brush to reach corners and edges
The interiors are the parts of your yacht that are inside the cabin, such as the walls, the ceiling, the floor , the furniture, and the appliances. You can paint them with the same or a different color as the exterior, depending on your preference and style. Here are some steps to follow:
- Choose a marine paint that is suitable for your yacht material and finish. For example, you can use a latex or acrylic paint for a water-based and easy-to-clean finish, or a oil or alkyd paint for a oil-based and hard-to-clean finish.
- Apply the paint with a partner, using a roller and a brush. Start from the top and work your way down, painting in smooth and even strokes. Use the roller to cover large areas and the brush to reach corners and edges
The decals and graphics are the parts of your yacht that have logos, names, numbers, or designs on them. You can restore them with a special paint or a vinyl sticker, depending on the condition and style of the original. Here are some steps to follow:
- Choose a marine paint or a vinyl sticker that matches the color and shape of your decal or graphic. For example, you can use a spray paint or a brush paint for a simple and solid color, or a vinyl sticker for a complex and detailed design.
- Clean and sand the area where you want to apply the paint or the sticker. Remove any dirt, grease, or old paint or sticker.
- Apply the paint or the sticker with a partner, using a spray gun or a squeegee. Align the paint or the sticker with the original decal or graphic and press it firmly and evenly.
- Let the paint or the sticker dry completely and remove any excess or bubbles.
The elements are the natural forces that can damage or fade your yacht paint, such as the sun, the rain, the wind, and the salt. You can protect your painted yacht from the elements with a special coating or a cover, depending on the season and the location of your yacht. Here are some steps to follow:
- Choose a marine coating or a cover that is suitable for your yacht paint and climate. For example, you can use a wax or a polish for a shiny and smooth finish, or a sealant or a varnish for a matte and rough finish. You can also use a canvas or a plastic cover for a temporary and removable protection.
- Clean and dry your yacht before applying the coating or the cover. Remove any dirt, dust, or moisture from the surface
- Apply the coating or the cover with a partner, using a cloth or a brush. Follow the manufacturer’s instructions and warnings and cover the entire surface of the yacht.
- Let the coating or the cover dry completely and check for any cracks or leaks
Advanced Yacht Painting Tips
In this part, we will share with you some advanced yacht painting tips that can help you achieve a flawless and professional finish. We will cover the following topics:
Troubleshooting common yacht painting mistakes
Dealing with difficult yacht surfaces, removing stubborn stains and oxidation, repairing minor scratches and dents, keeping a painted yacht looking its best.
Even with careful preparation and application, yacht painting can sometimes go wrong. Here are some common yacht painting mistakes and how to fix them:
- Runs and sags: These are caused by applying too much paint or painting in high humidity or low temperature. To fix them, wait until the paint is dry and sand them down with fine-grit sandpaper. Then apply a thin and even coat of paint over the area
- Bubbles and blisters: These are caused by trapped air or moisture in the paint or the surface. To fix them, wait until the paint is dry and pop them with a sharp knife. Then scrape off the loose paint and sand the area smooth. Apply a primer and a topcoat over the area
- Cracks and peeling: These are caused by poor adhesion of the paint to the surface or incompatible paint types. To fix them, scrape off the loose paint and sand the area smooth. Apply a primer and a topcoat over the area
- Orange peel: This is caused by spraying the paint too fast or too far from the surface, resulting in a rough and uneven texture. To fix it, wait until the paint is dry and sand it smooth with fine-grit sandpaper. Then apply a thin and even coat of paint over the area.
- Dust and dirt: These are caused by painting in a dirty or windy environment, resulting in particles sticking to the wet paint. To fix them, wait until the paint is dry and sand them off with fine-grit sandpaper. Then apply a thin and even coat of paint over the area.
Some yacht surfaces can be more challenging to paint than others, due to their shape, material, or condition. Here are some tips on how to deal with difficult yacht surfaces:
- Curved and rounded surfaces: These can be hard to paint evenly with a roller or a brush, resulting in drips or gaps. To paint them, use a spray gun and move it in a circular motion, following the contour of the surface. Keep a consistent distance and speed and overlap each pass by 50%.
- Non-skid surfaces: These can be hard to paint smoothly with a roller or a brush, resulting in a rough and uneven finish. To paint them, use a spray gun and apply a thin and even coat of paint over the surface. Then sprinkle a non-skid additive over the wet paint and let it dry.
- Old and faded surfaces: These can be hard to paint with a new color, resulting in a dull and mismatched appearance. To paint them, use a primer that is compatible with the old and new paint types and colors. Apply a thin and even coat of primer over the surface and let it dry. Then apply the topcoat over the primer.
Stains and oxidation can ruin the look and performance of your yacht paint, especially on light and metallic colors. Here are some steps to remove stubborn stains and oxidation from your yacht paint:
- Wash the yacht with a mild detergent and water to remove any dirt and grease. Rinse and dry the yacht thoroughly.
- Apply a marine cleaner or polish that is suitable for your yacht paint type and color. Use a soft cloth or a buffer and rub the cleaner or polish in a circular motion over the stained or oxidized areas.
- Wipe off the excess cleaner or polish with a clean cloth and buff the surface to a shine.
- Apply a marine wax or sealant that is suitable for your yacht paint type and color. Use a soft cloth or a buffer and rub the wax or sealant in a circular motion over the entire surface.
- Wipe off the excess wax or sealant with a clean cloth and buff the surface to a shine.
Scratches and dents can happen to your yacht paint due to accidents or wear and tear. Here are some steps to repair minor scratches and dents on your yacht paint:
- Clean the scratched or dented area with a mild detergent and water to remove any dirt and grease. Rinse and dry the area thoroughly.
- Sand the scratched or dented area with fine-grit sandpaper to smooth out the surface and remove any loose paint. Wipe off the dust with a clean cloth.
- Fill the scratched or dented area with a marine filler or epoxy that is suitable for your yacht material and paint type. Use a putty knife or a spatula and apply the filler or epoxy in a thin and even layer over the area. Let it dry and harden according to the manufacturer’s instructions.
- Sand the filled or epoxy area with fine-grit sandpaper to smooth out the surface and match the surrounding paint. Wipe off the dust with a clean cloth.
- Apply a primer that is compatible with your yacht paint type and color over the filled or epoxy area. Use a small brush or a spray gun and apply a thin and even coat of primer over the area. Let it dry according to the manufacturer’s instructions.
- Apply a topcoat that matches your yacht paint type and color over the primed area. Use a small brush or a spray gun and apply a thin and even coat of topcoat over the area. Let it dry according to the manufacturer’s instructions.
To maintain the beauty and durability of your yacht paint, you should follow some simple steps to keep it clean and protected. Here are some tips on how to keep your painted yacht looking its best:
- Wash your yacht regularly with a mild detergent and water to remove any dirt, salt, or algae. Rinse and dry your yacht thoroughly.
- Wax or seal your yacht periodically with a marine wax or sealant that is suitable for your yacht paint type and color. Use a soft cloth or a buffer and rub the wax or sealant in a circular motion over the entire surface. Wipe off the excess wax or sealant with a clean cloth and buff the surface to a shine.
- Avoid abrasive cleaners, brushes, or pads that can scratch or dull your yacht paint. Use only soft cloths, sponges, or brushes that are designed for marine use.
- Avoid direct sunlight, high humidity, or extreme temperatures that can fade or crack your yacht paint. Cover your yacht with a canvas or a plastic cover when not in use or store it in a shaded and ventilated area.
- Repair any scratches, dents, or chips on your yacht paint as soon as possible to prevent further damage or corrosion. Follow the steps mentioned above to repair minor scratches and dents on your yacht paint.
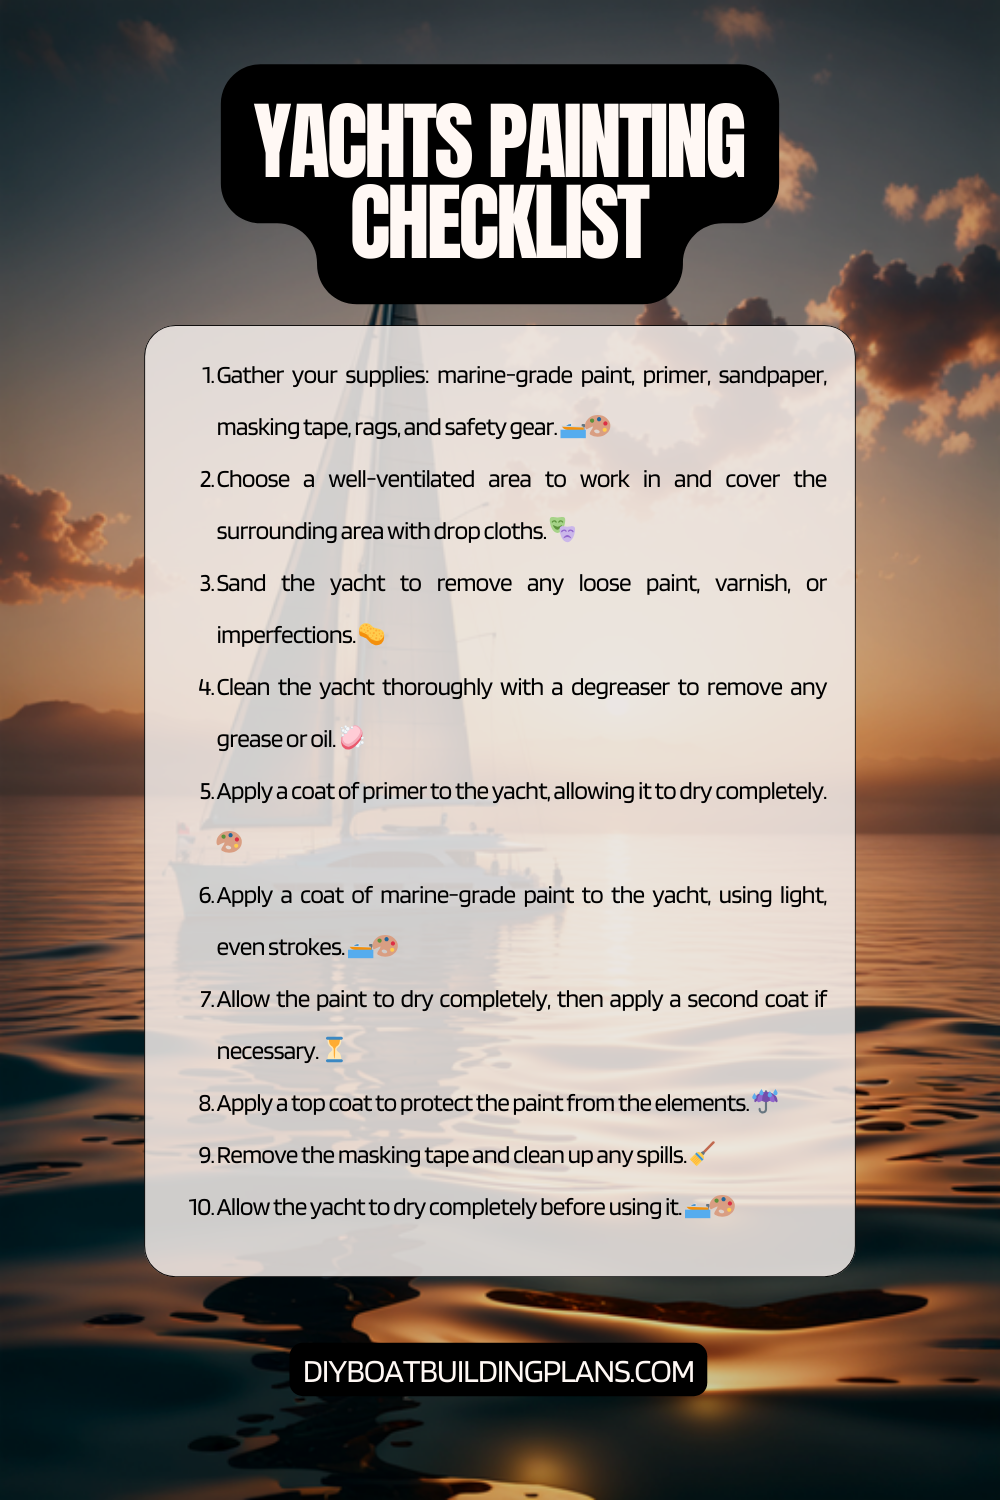
Yacht Painting Checklist
FAQs – Yacht Painting Tips
In this part, we will answer some of the most frequently asked questions about yacht painting. We will cover the following questions:
How often should I paint my yacht?
What are the best yacht painting products to use, how can i paint my yacht by hand, how can i paint my yacht with a machine, what are some tips for painting a yacht in hot weather.
The frequency of yacht painting depends on several factors, such as the type and quality of the paint, the condition and usage of the yacht, and the exposure to the elements. Generally, you should paint your yacht every 2 to 5 years, depending on the signs of wear and tear. However, some parts of your yacht may need more frequent painting, such as the propellers, the trim, and the decals. You should inspect your yacht regularly and look for any cracks, peeling, fading, or staining on the paint. If you notice any of these, you should repaint your yacht as soon as possible to prevent further damage or corrosion.
The best yacht painting products to use are the ones that are designed for marine use and are compatible with your yacht material and finish. You should also consider the color, the durability, and the resistance of the paint, as well as the cost and the availability. Some of the most popular and reputable yacht painting brands are International, Hempel, Awlgrip, and Interlux. You can find their products online or at your local marine store. You should also use the appropriate tools and equipment for your yacht painting project, such as rollers, brushes, spray guns, sandpaper, tape, coverings, filler, epoxy, primer, cleaner, polish, wax, and sealant.
You can paint your yacht by hand using a roller and a brush. This is a simple and inexpensive method that can yield a good finish if done properly. Here are some steps to paint your yacht by hand:
- Prepare your yacht for painting by washing, sanding, filling, taping, and priming the surface.
- Mix the paint according to the manufacturer’s instructions and use a paint strainer to filter out any impurities.
- Apply the paint with a partner, using a roller and a brush. Start from the bow and work your way to the stern, painting in long and even strokes. Use the roller to cover large areas and the brush to reach corners and edges.
- Let the first coat dry completely before applying the second coat. Lightly sand the surface with fine-grit sandpaper and wipe off the dust before painting the second coat. Repeat this process until you achieve the desired coverage and color.
You can paint your yacht with a machine using a spray gun. This is a fast and efficient method that can yield a smooth and professional finish. However, it requires more skill, equipment, and paint than painting by hand. Here are some steps to paint your yacht with a machine:
- Apply the paint with a partner, using a spray gun. Start from the top and work your way down, painting in horizontal and even passes. Use a consistent distance and speed and overlap each pass by 50%.
Painting a yacht in hot weather can be challenging, as the heat and sunlight can affect the drying and curing of the paint, resulting in bubbles, blisters, cracks, or peeling. Here are some tips for painting a yacht in hot weather:
- Choose a paint that is suitable for high temperatures and low humidity, such as a two-part polyurethane paint.
- Paint in the early morning or late afternoon, when the temperature and the sunlight are lower. Avoid painting in direct sunlight or in windy conditions.
- Cool down the yacht surface before painting by spraying it with water or covering it with a wet cloth. Dry the surface thoroughly before painting.
- Thin the paint slightly with a compatible thinner to improve its flow and leveling. Do not thin the paint too much, as it can reduce its durability and resistance.
- Apply thin and even coats of paint and let them dry completely before applying the next coat. Do not apply too much paint or paint too fast, as it can cause runs or sags.
Conclusion – Yacht Painting Tips
In conclusion, yacht painting is a valuable investment that can significantly enhance the overall condition, appearance, and value of your vessel. Whether you aim to sell, protect, or refresh your yacht, the benefits of proper painting are substantial, including increased resale potential, improved aesthetics, and enhanced protection against environmental elements.
This comprehensive guide provides valuable insights into yacht painting, covering essential considerations before starting the project, safety precautions, understanding paint types and applications, and step-by-step techniques for painting different parts of the yacht. The benefits of a painted yacht are clearly outlined, emphasizing its higher value, better appearance, increased protection, extended lifespan, improved performance, and easier maintenance compared to an unpainted yacht.
Moreover, the guide offers advanced tips for troubleshooting common painting mistakes, dealing with challenging surfaces, removing stubborn stains and oxidation, repairing minor damages, and maintaining the painted yacht’s longevity and visual appeal. The FAQs section addresses common questions about the frequency of painting, recommended products, and techniques for both manual and machine application, as well as tips for painting in hot weather.
In essence, this guide equips yacht owners, whether beginners or advanced users, with the knowledge and practical tips needed to undertake a successful yacht painting project. Following these guidelines ensures not only a professional and aesthetically pleasing result but also contributes to the longevity and overall well-being of your cherished yacht.
Written by DIY Boat Building Plans

Utility Boats Polishing Tips

Yacht Plans & Blueprints

Refitting a Sailing Yacht: Painting the Interior
- February 24th, 2016
- Yacht Refit
Refitting an old yacht can be a tiring and never ending story. That´s what they´ve told me when I was proudly telling my story of having bought a 40 year old ship. And endless black hole. An ever hungry money-destroying machine. Well. To be honest, it is an ever hungry thing, but up to now I cannot say a single bad thing about a ship´s refit. May it be because I am sitting up to 10 hours in front of my computer screen staring at ones and zeroes – for compensation, at the weekends being absorbed completely by a work that demands real craft and hand´s work. I just love doing refit work on my ship. Just as last weekend, when I´ve finished another small milestone. Painting the interior completely white. I am so proud.
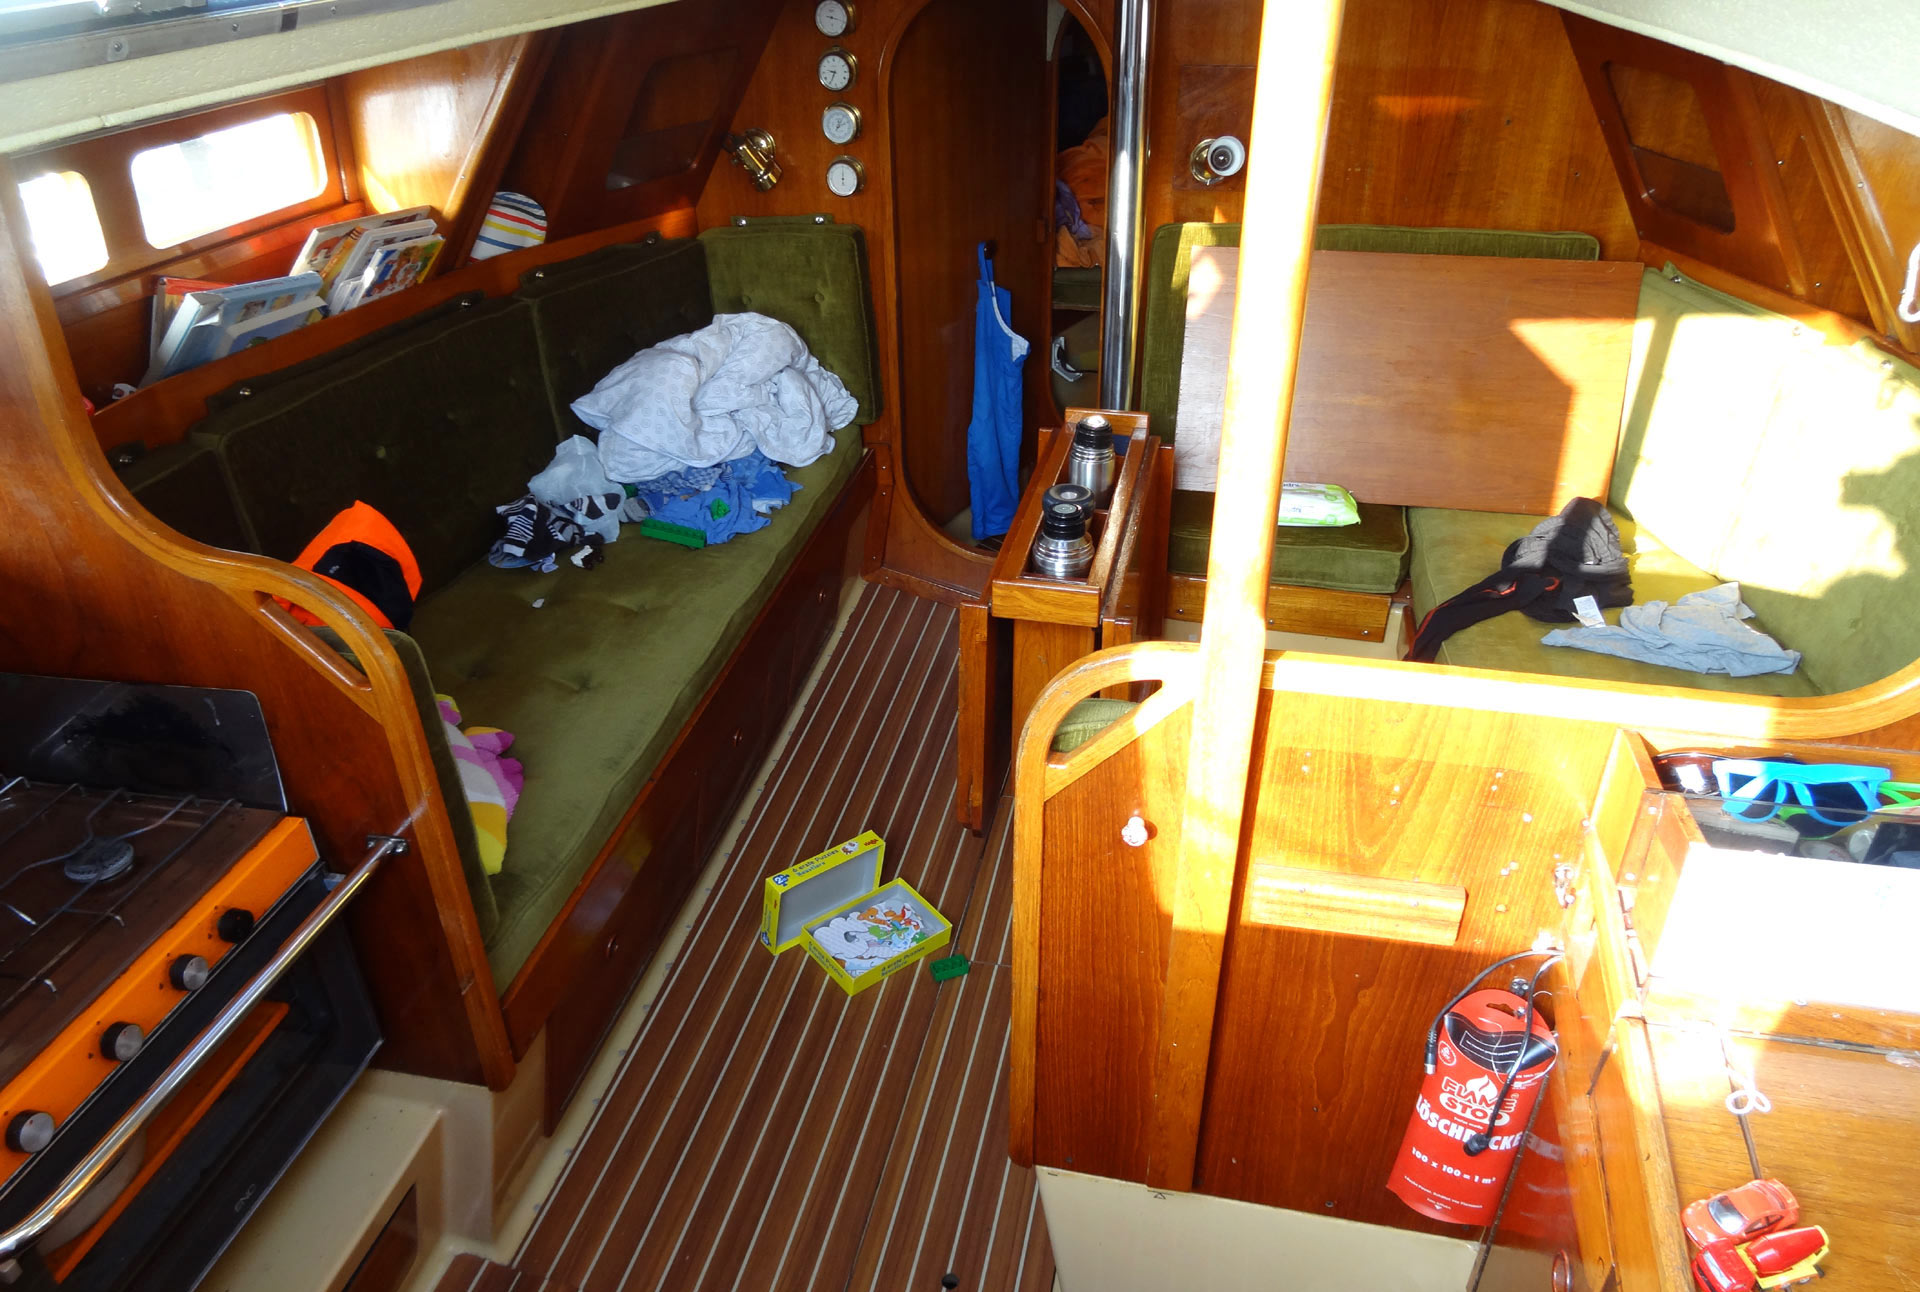
When I´ve bought her it was instantly clear to me that I would have to refurbish her interior due to the fact that no less than four previous owners had laid hands on the boat and over the time her internal outfitting was a bit worn off. Besides: When you move into a new flat, what´s the first thing you do? You paint the walls in fresh white. And that´s what I am working on since January for some 21 net hours of working. On Sunday I´ve made a huge leap forward: The first of three layers of yacht white has been applied.
Painting the internal Gelcoat Surfaces
Painting Gelcoat is a chunk of work. First step was to empty the boat and clean it thoroughly (here´s the complete article on that first milestone) and then it´s a backbreaking session to grind down the Gelcoat surface, break it up so that the new paint can find grip on the surface and sink in deeply to form a whole new hardened surface. Sanding the boat was a painstaking task since the production of hazardous fine dust poses a threat to one´s health (here´s my test of breathing masks ) and it produces an awful lot of dust to get rid of afterwards.
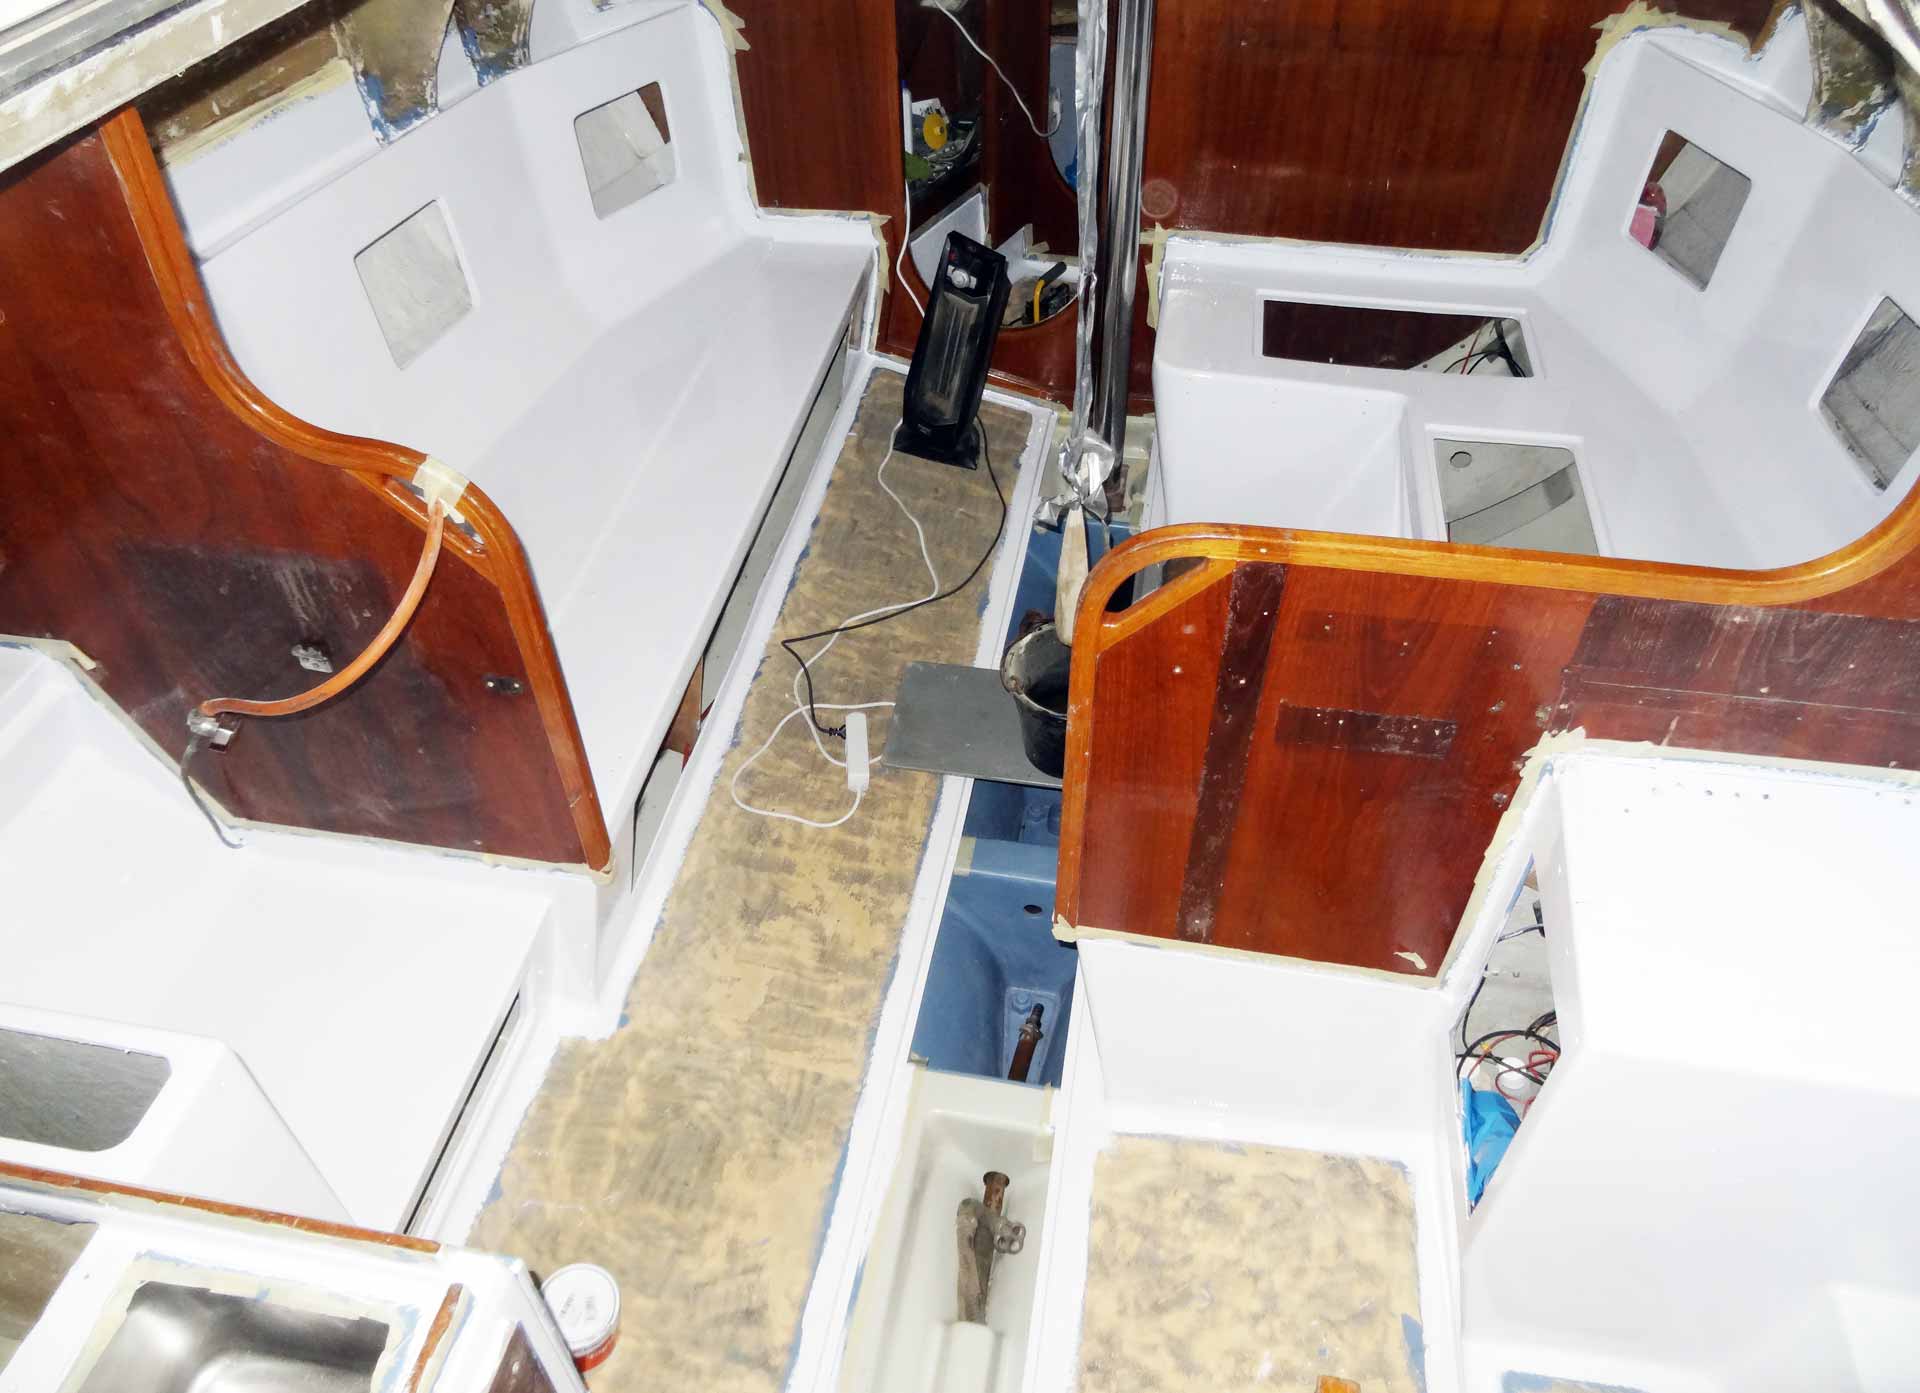
Nevertheless, after some weekend´s work it all was done and I was able to move to the next step: Priming . I don´t think it is that necessary when painting internal surfaces but I wanted a perfect finish so I opted to go the extra mile. Some three big cans of International´s Pre Kote (blue) went into the whole ship and it was not until I´ve had applied two layers of Pre Kote varnish and let it dry out properly when I could move on to finally paint the whole thing white. I was so excited to see the outcome of my work and after having accomplished that step too I can only say: I am so, so, so much proud, I can´t barely find words. Finally everything begins to fall into place.
Product Test: International Toplac
No experiments here and my product of choice was another can (five of them all in all) of International Toplac. As far as I know it is the omnipotent varnish for utilization both for the inside and the outside above waterline. I went for the high glossy finish . The linecard of Toplac comprises 21 colors all in all with three different shades of White. There´s White 001 which is a rather hard tone and suits an Emergency Room well, but not a yacht I think. Then there´s White 905 which has a rather pearl-like effect which reminded me personally of Eighties´ Lingerie Style and – in between – a shiny friendly and soft White 545 which I opted for.
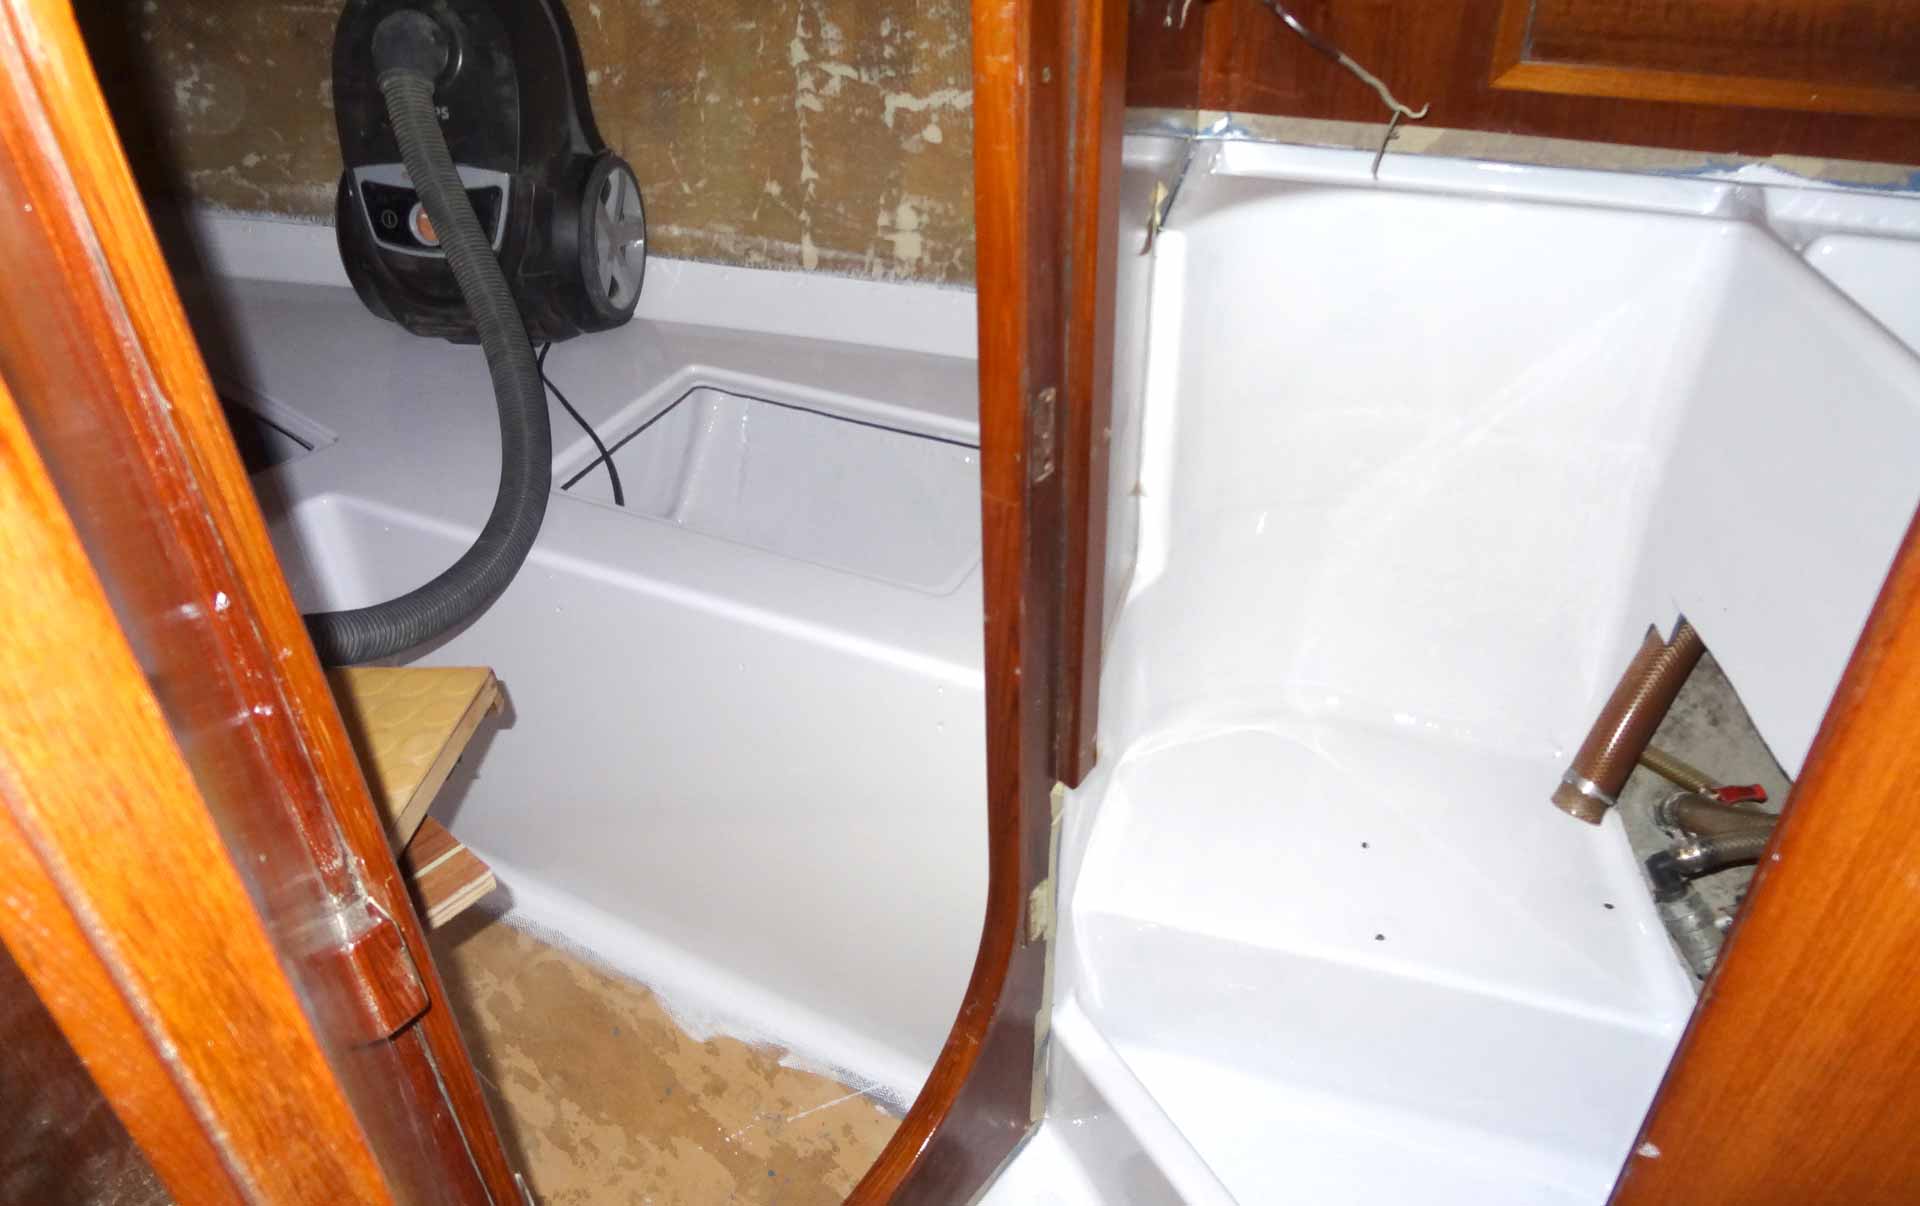
The big test was the fore cabin which I was priming and painting in white prior to the rest of the boat to have all my work tested here. Since all the Gelcoat surfaces of the forecastle will be covered either by upholstery or wood in the end, possible fails wouldn´t weigh in too much so it was good to have a trial of my craftsmanship and material here first . And what should I say? After having done two of three layers of white here, the outcome is just marvelous (besides, here´s an article on how I plan to go on with the fore cabin). Next up was the lavatory and the small entryway between saloon and fore cabin.
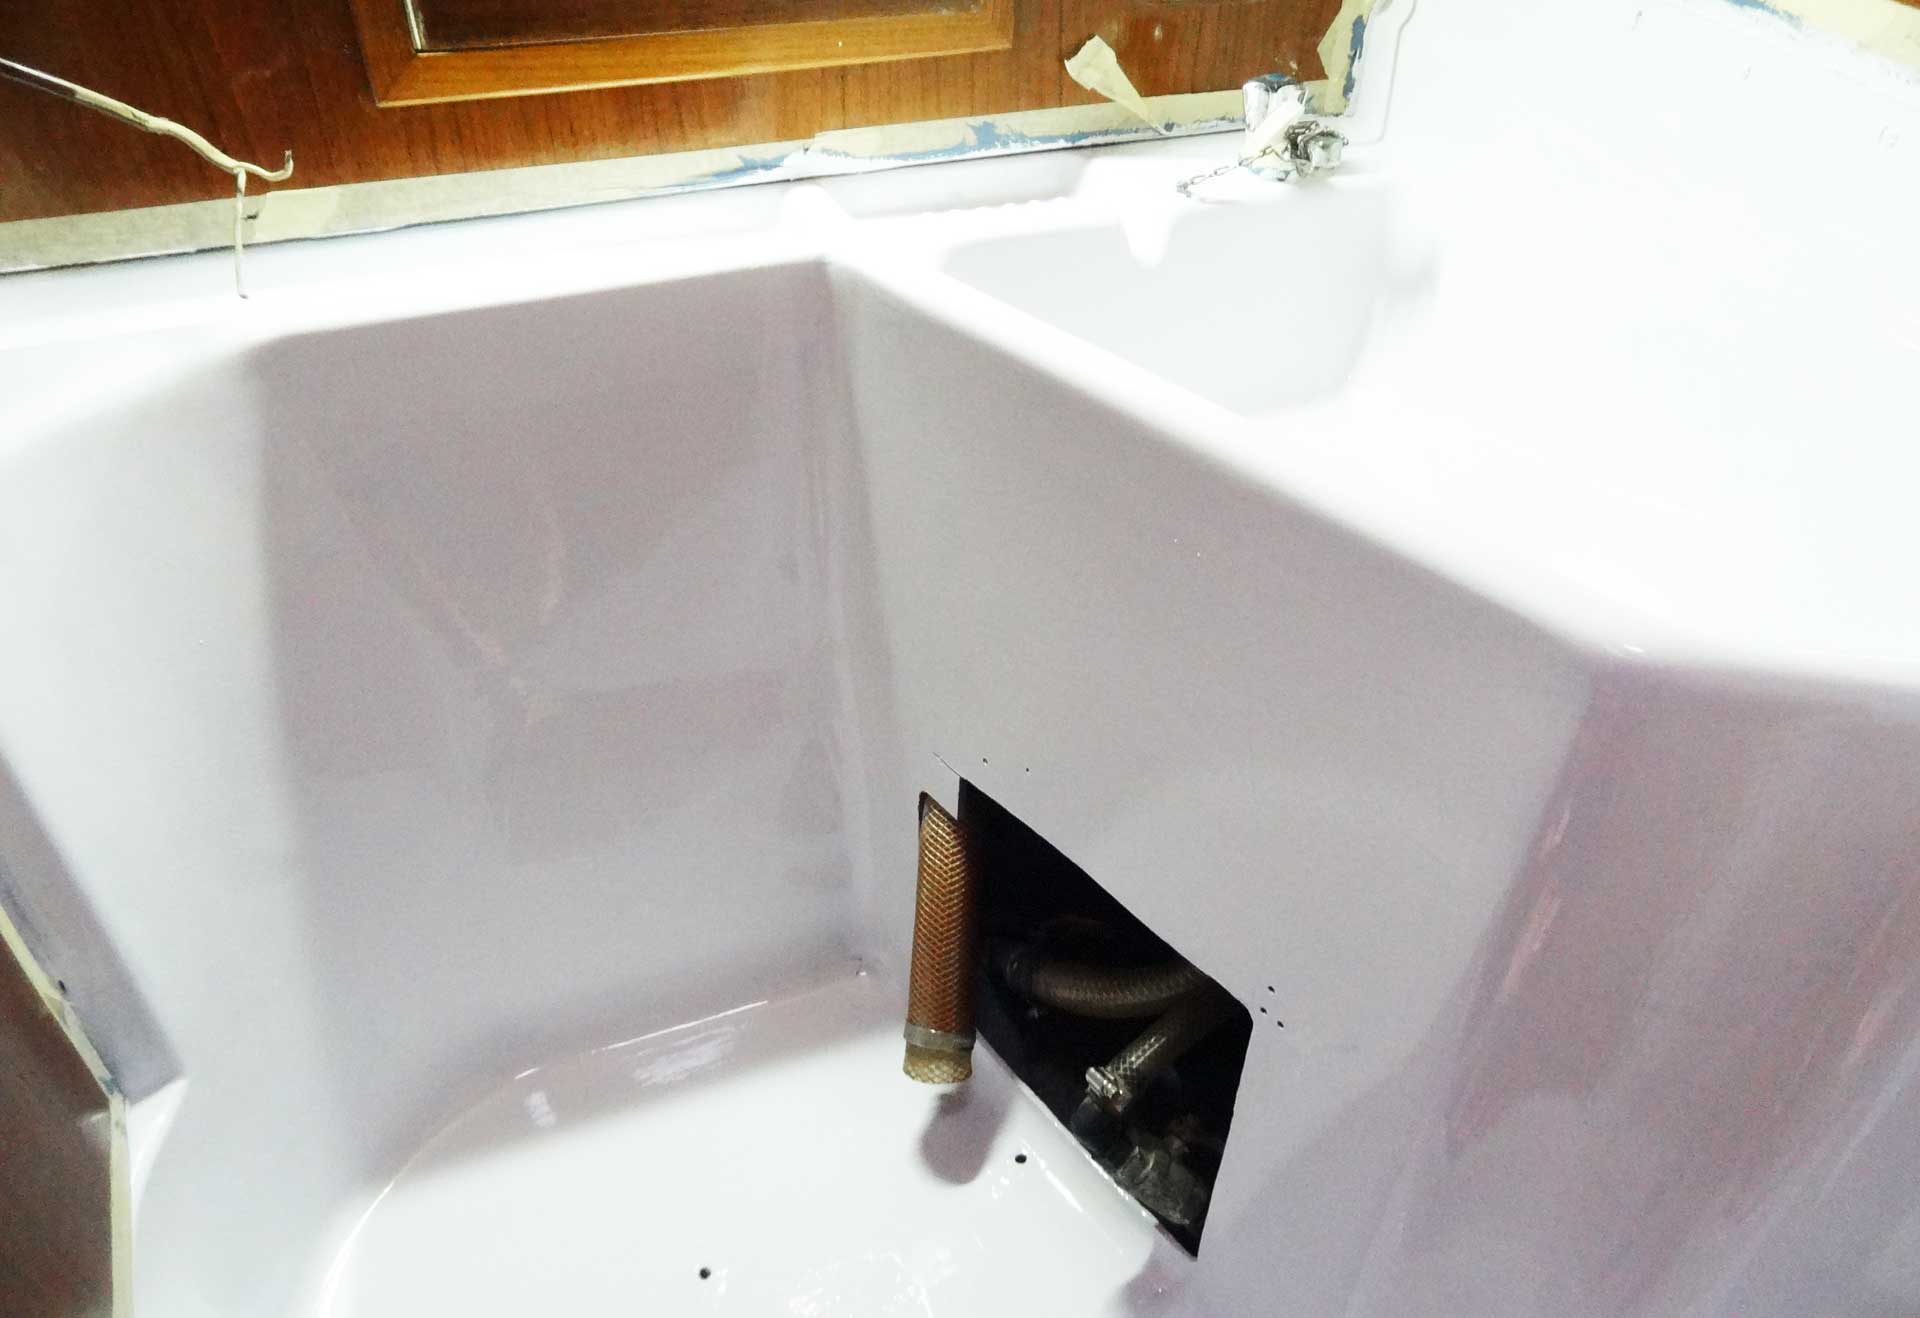
I may proudly state that the lavatory of my Kings Cruiser 33 is the smallest WC I´ve ever had the pleasure to put my butt onto. Nevertheless it´s a crucial part of the boat, especially when go sailing with my wife and children. So I was keen on getting a smooth and clean, yet inviting atmosphere here. Seeing it painted in white – without producing a single nose – is a big hit in my eyes. Can´t wait to see this room completed with a new pumping toilet, a solution for the then shut sink which will be converted into additional stowage, a new mirror and – if measurements will allow – a whole new (yet tiny) skylight. Speaking of noses …
Choosing the right Brush(-Sizes)
I don´t use a spray pistol since I think that´s a bit oversized for my project. Buying or renting equipment, getting it clean again for this relatively small area was too much work here for my personal taste. And I remember my first steps as a teenager when I was into modelling when I also tried to airbrush my Messerschmidts and Spitfires – it turned out to be a bad idea. I guess I am not the best sprayer in town. Nevertheless, it´s a different story with brushes . I do achieve quite satisfying results with just brushing the areas – with the help of the ease of flow of the paint itself. I could spot the tiny rills made by the bristles of the brush with the priming colors, but not so with the actual white paint. It´s a clean, smooth and spotless surface. Mostly.
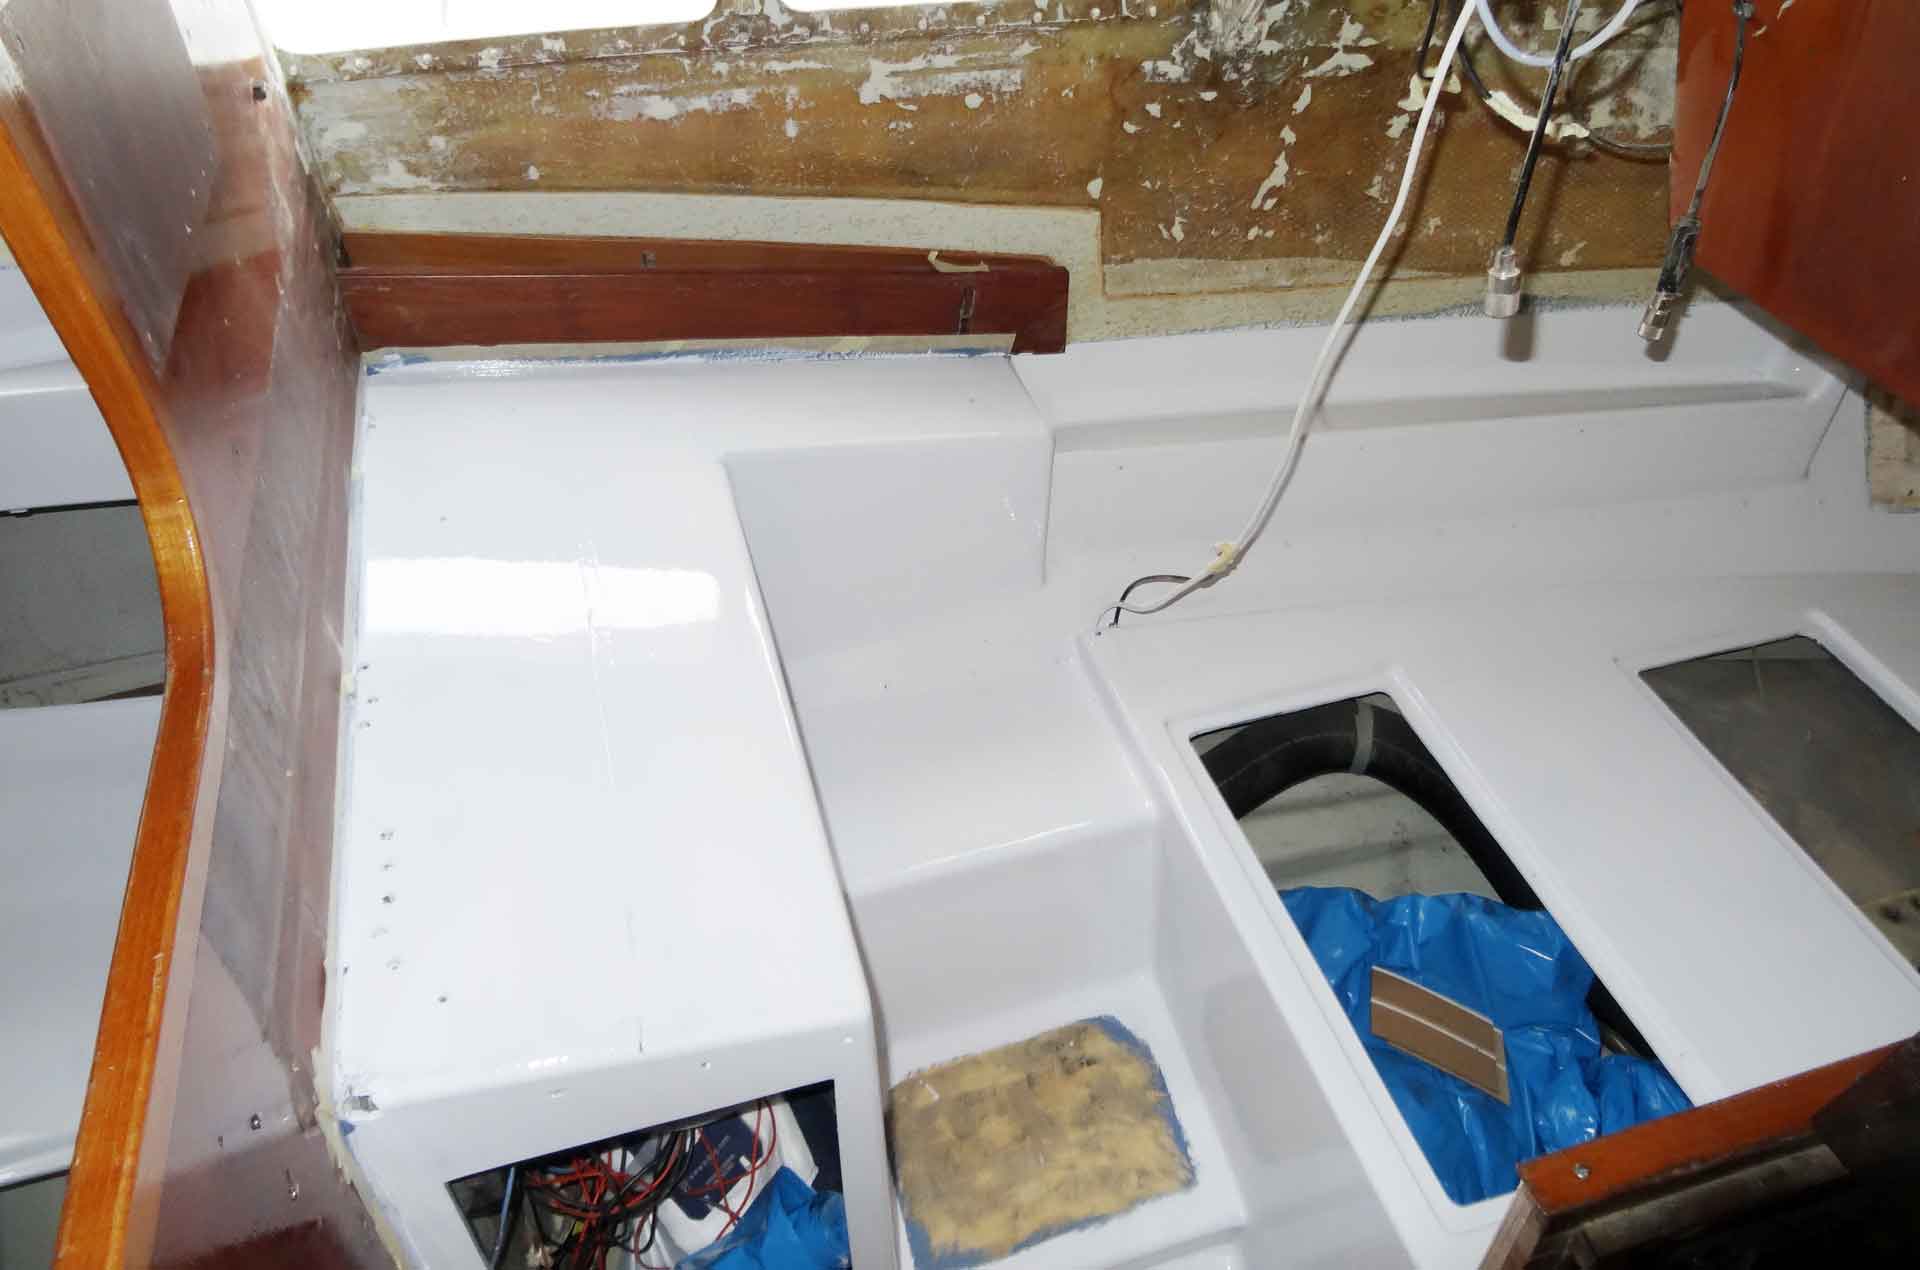
What I did discover too was that apparently slender brush sizes work better in terms of the quality of the finish. It seems that wide brushes do not produce smooth surfaces in the end although cutting working time. So I would recommend to go for the longer process and opt for a smaller brush (I chose a width of 1,5 centimeters) to achieve the best possible results here. Having painted the saloon completely and braking my back again in the pantry I cramped myself into the very aft edge of the quarter berth to apply the paint there as well. All was done after some 5 hours of work. Jeez! That back hurts now …
Painting two more Layers
I guess the best finish is achieved when Toplac is applied in three layers all in all. So after letting dry everything through thoroughly I will sand the surface off a bit, clean it again (with Acetone and sticky disposable tissue to collect the dust) and grab my brush to apply the second layer only to do the same – this time from fore cabin all the way down aft to the rear end of the quarter berth to paint the third and final layer. Then it´s done. I can´t believe another milestone will be reached!
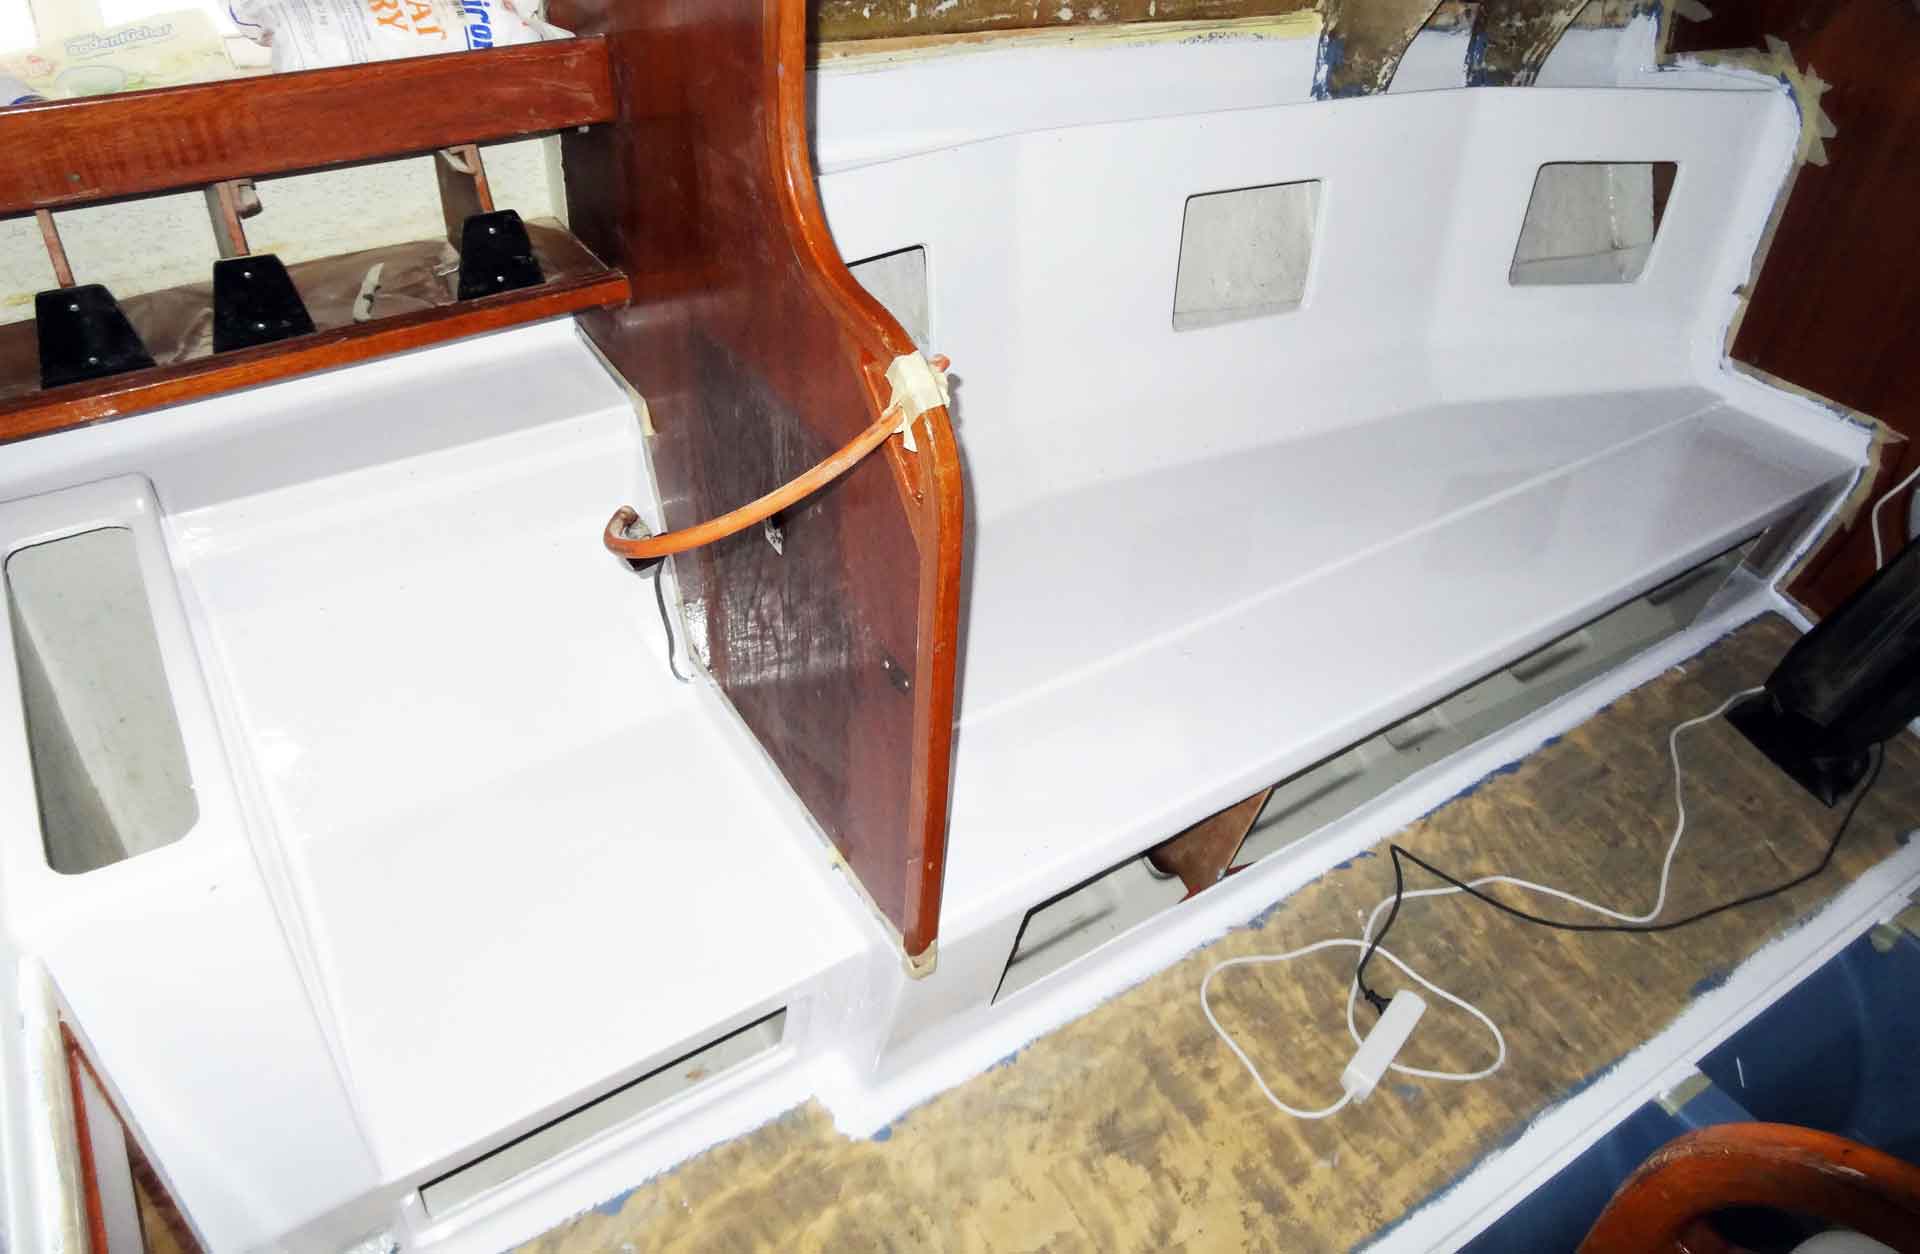
My wife was asking me why I do invest so much work and time in this simple task. She is right from her standpoint: Most of the areas I am painting white now will be covered later, most of them by wood or cushion. But you know, I do know that under the seating everything is just fine. And that´s a feeling I do really, really, really enjoy.
Next steps in my Yacht Refit-Program
So what´s up for the upcoming steps? I recently started two projects here: The first one will be the new decking made of Teak imitation (here´s a complete article on that topic) and so I´m going to make the patterns and take measurements for the production of the new decking. Second is the re-wiring and complete refit of the electric system of my Kingscruiser, which will be done with the help of yacht electrician Thomas Tschechne (another fine article on that one here). Until then it´s some 12 working hours to go to get the shiny new white onto the Gelcoat (and the Danboline into the bilge as well). Stay tuned, cheers.
- Weekly Newsletter
California's Boating & Fishing News

Sailing 101: Affordable DIY Designs and Projects for Boat Interior
Ahoy Sailors, we discussed the importance of changing your boat's oils and filters last week. This week we are getting creative so that we can spruce up your boat’s interior for an affordable price. Next week we will be getting festive as we break down how to decorate your boat for the holidays and what should be on your decorating checklist.
As personal styles and trends change, you might want to spruce up your boat’s interior— or maybe the time has played its role, and it’s necessary. Here are some tips to give your boat’s interior an affordable makeover.
Start by Deep Cleaning
A deep clean is the cheapest way to brighten your interior radically. Dirty boat upholstery, mildewed cabin liners, and salt-encrusted hatches make a boat feel old and dirty. Deep cleaning is a great start that will drastically improve the boat cabin’s appearance and give you a better idea of where your focus should be on your boat’s interior. You can also:
- Professionally launder your upholstery
- Wipe down the cabin liners with vinegar to prevent mildew and mold
- Wash hatches to increase natural light
- Clean under all the cabin soles and the edges of any rotting boards
- Wash the walls and treat any wood with the proper wax, oil, or varnish
- Scrub out the bilge to prevent any stale smells.
Install Interior Boat Lights
Living on a sailboat can be like living in a basement because of the lack of natural lighting. LED strip lights are a great and affordable way to brighten your cabin. LED strip lights look nice under cupboards or overhangs, and the light strip will be hidden, adding an elegant ambiance. They also make great courtesy lights. Tuck the strips on either side of walkways or at the base of any bench seating to help your guests navigate in the dark. Your boat will look classy, like a theater. Lastly, hide LED lights between panels or around hatches . LED strip lights don’t look good mounted in the middle of the wall. It looks much tidier if you tuck them around a natural border like a panel or hatch.
Fresh Bedding and Accents
Your boat’s interior will look great with decorative accents. This could be either a mason jar filled with fairy lights and seashells or firm and tidy throw pillows and blankets. Also, purchase nice bedding to make the cabin look fresh and clean. Bathrooms look nice with wall-mounted soap dispensers and hand towels that add a splash of color. Whatever your personal style is, you can implement it into your accent pieces.
Glam Up the Galley
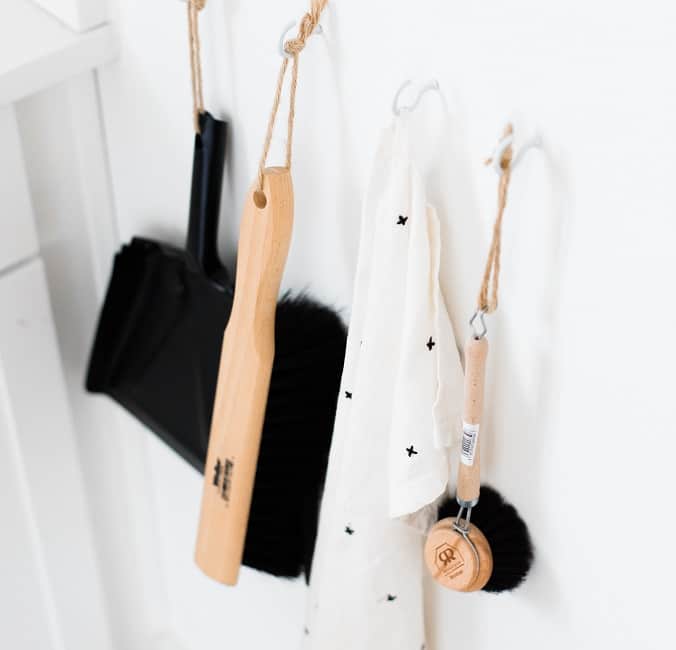
Clean up your galley by replacing rusted or dull faucets with shiny new ones. Add colorful dish towels to add some life and make the change to non-breakable dishes and glassware. There is no reason your galley can’t look as cute as your home’s kitchen. Next, create extra space on your countertops by adding a chopping board stove cover. Then you can bring in other fun pieces like spice racks or a kitchen utensil holder.
Interior Upholstery Alternatives
Reupholstering a boat is a costly part of a sailboat interior revamp, but it makes a huge difference. Suppose you want to spend less than the thousands of dollars it costs to hire someone to do it; there are a few tricks to avoid a complete upholstery overhaul.
– If your upholstery is in poor condition, you may want to sew elasticated cushion coverlets that go over the top side of the cushion—it’s also an excellent way to protect new upholstery from boat projects that bring dirt, grease, and sweat stains.
– Packed-out seat cushions can be fixed by inserting a layer of high-density foam and batting it on top of the existing foam.
Accent Rugs Cover Worn Out Cabin Soles
Depending on the state of your cabin sole, it may be possible to refinish it, but it’s a big job, and results are not guaranteed. A sensible solution is to cover worn cabin soles with boat-friendly rugs, preventing further wear and tear. In addition, add slip-proof matting underneath to ensure your rugs are secure.
Bring Your Walls to Life
Securely fasten art, photos, and souvenirs to your walls. In addition, mirrors are great for creating the illusion of space. Privacy curtains are also an excellent way to add a splash of color and are easy to make yourself if you choose.
Whiten Your Interior
Nautical colors are traditionally bright white with a solid contrasting navy blue. However, painting panels a light color can brighten and modernize a boat cabin and set off teak trim.
A fresh coat of paint is an excellent way to make your interior look fresh and new.
Tasteful Storage Bins
Boats are notoriously short on storage space, but a few decorative baskets and storage containers can improve the space’s look while giving you more room to tuck things away.
Personalized and Functional Window Coverings
The interior of a boat is usually function-first – you can’t go sailing if you have trinkets and souvenirs cluttering your surfaces. However, window coverings are a great way to personalize your space and comprise your color scheme. Choose a material that gives you privacy and keeps out the sun but be creative and reflect your style. If you have a sewing machine and know how to use it, a small amount of research will give you some great examples.
If you’re still feeling overwhelmed about revamping your sailboat interior or aren’t confident in your creative DIY skills, you can still consider hiring professional help. Plenty of interior designers would welcome the challenge of working on a boat but look for someone with experience designing small spaces.
- ← New Park maybe in the future for Ormond Beach in Oxnard
- Rain, Rain, Don’t Go Away: How rain will benefit your fishing. →
Comments Cancel reply
Your email address will not be published. Required fields are marked *
Your Thoughts are Appreciated
Save my name, email, and website in this browser for the next time I comment.
Rearranging the interior of a boat is often enough to make it more comfortable and welcoming. If you have just bought a used boat , these tips can help! Decorate the interior of a boat and match design, comfort and functionality. This article will give you some ideas for an easy renovation without spending a lot of money.
1 – Refitting your boat by optimising storage space 2 – Customise and revamp the interior of your boat with a little paint 3 – Decorating the interior of a secondhand boat: fabrics
1. Refitting your boat by optimising storage space
For certain secondary boat interior refits you don’t always need to call in the professionals. You can in fact do some cheap renovations yourself with a little ingenuity and a few good tips. Roll up your sleeves and get out your toolbox… let’s go!
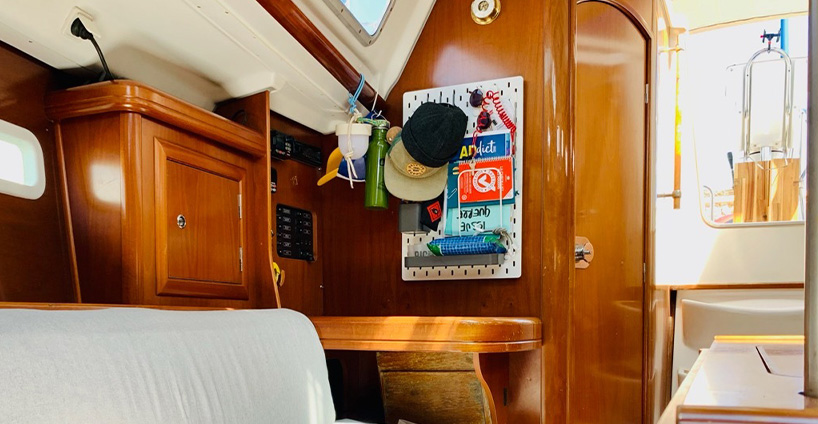
Without committing yourself to a total overhaul, you may want to start by renovating a few things inside your boat. Opting for furniture with rounded corners, making fittings as functional as possible or adding shelves and drawers to every nook and cranny to cut down on lost space are just some of the arrangements that will make your life easier once at sea.
- A fridge with drawers enables you to compartmentalise storage and keep things cooler.
- Wooden, melamine or metal tableware will prevent breakages once on the water.
- To store fruit and vegetables and prevent them from spoiling prematurely, you can use nets that you can hang up in the kitchen.
Become a boat owner
Discover now the ads of new and used boats for sale!
2. Customise and revamp the interior of your boat with a little paint
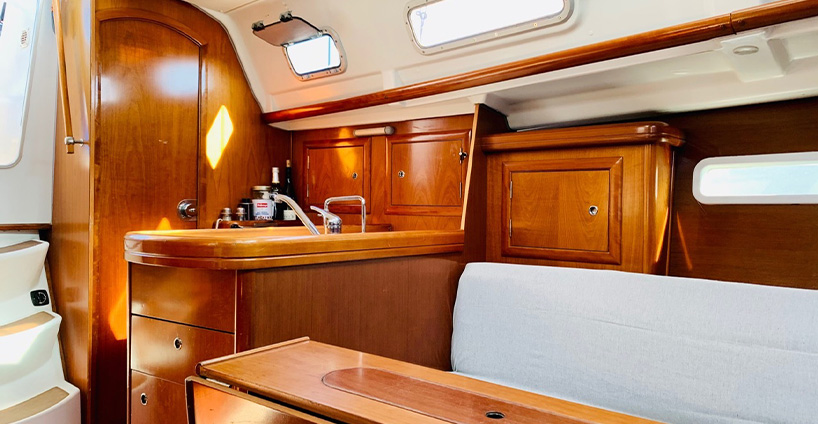
Just like the interior of an apartment or house, when it comes to decoration, it’s worth considering repainting certain surfaces. You don’t have to of course, if the existing colours and materials suit you as they are. But in some cases, a lick of paint can give your boat’s interior a new look, enabling you to personalise it . Giving one or two wooden surfaces just a simple coat of varnish will bring a touch of charm and authenticity to certain spaces.
However, repainting surfaces using white or pastel tones will make them brighter because even when there are a lot of portholes, they are often narrow. Light-coloured walls or ceilings will also help to optimise the light sources
To keep things looking warm and cosy, why not repaint a section of the boat in the colour of your choice? Adding touches of paint here and there will harmonise and brighten up the whole interior. Cupboard frames, finishing strips, handrails, fold-out tables, handles or even shelves are all elements that you can opt to repaint.
Want to renovate a sailboat?
Discover our ads of sailboats to renovate
3.Decorating the interior of a secondhand boat: fabrics
Curtains, bed linings and cushion covers are all opportunities to refurbish the interior of a secondhand boat and customise it more to your own liking.
Les éléments en tissus
- Mattresses and benches
First step: measure the benches and bunks so you get the right size of mattress. This is a good way of making your secondhand boat more comfortable as well as a good option for replacing parts that are sometimes worn out by the weather. Once all your foam mattresses are ready, give them zipped protective covers made of waterproof fabric (this makes newly purchased items last longer).
Then choose sheets and fabrics in a soft and durable material (linen or cotton) that you can cut to the right size to cover the mattresses and benches. You can select either bright, neutral or pastel colours that match the colours you’ve used on the rest of the boat interior. Then opt for the bedlinen of your choice.You can make a cabin with dark wooden walls brighter using light-coloured bedlinen. On the other hand, if your walls are white, why not go for warm or dark coloured sheets to make the space more welcoming? Just like at home, you are advised to keep a spare set of bedlinen, so that you can rotate it while you wash the others.
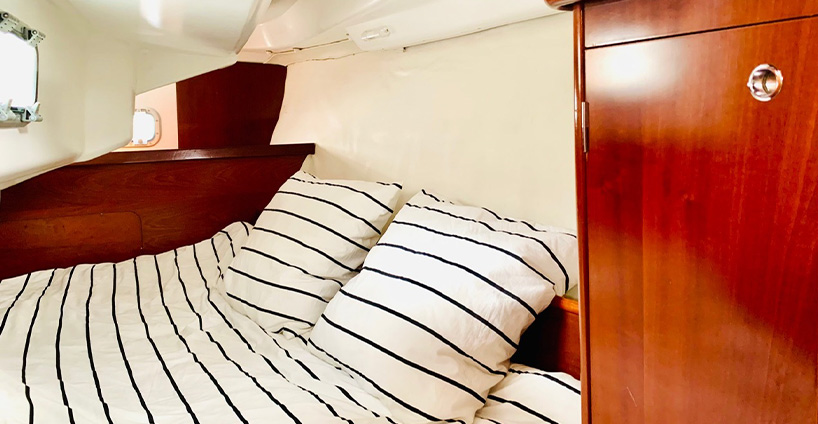
Cushions are another decor option you should capitalise on! As backrests or to frame a bench, they are both useful and decorative. Again, you should give them waterproof, zipped covers. You can then choose a fabric in the colours and patterns of your choice and sew it to the right size. Extra tip: get two sets of covers, so that you can wash them regularly
For curtains, start with some porthole-sized cords, which you can attach with small open hooks for when you want to “”pull the curtains””. Depending on your preferences, you can then choose fabric of varying degrees of opaqueness, based on how much light you want to pass through, if any. As for colours and patterns, go wild! Be careful though not to overload the whole design scheme and to try and keep a sense of consistency with the rest of the decor you’ve chosen.
And why not a few frames!
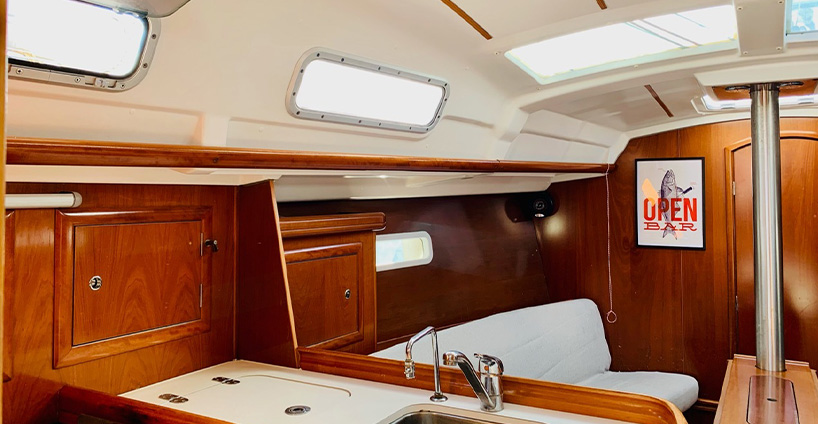
The last little touch to decorate the interior of your boat and make it look like this: add a frame or two! Choose an illustration, a nice photo or why not a poster of a nautical event you attended. Choose a lightweight frame with Plexiglas glass and fix it securely to avoid a disaster during a turbulent navigation.
We hope you find these tips useful.
Feel free to leave a comment with your best ideas for a boat interior.
You might like these articles:


- Yacht Painting
- Yacht Refits
- Interior Refinishing & Varnish
(954) 327-3009
South Florida's Leading Yacht Painting & Refits Company
Looking for Yacht Painting, Fiberglass, Varnish, or Teak Decking Services?

STATE OF THE ART FACILITIES
Newmil operates from state of the art marina facilities at Lauderdale Marine Center in Fort Lauderdale and Rybovich in West Palm Beach, Florida, as well as Savannah Yacht Center and Thunderbolt Marine, both located in Savannah, Georgia. We are a fully mobile crew and can complete projects anywhere in the world.
“Newmil were set up in such a way as to make best use of the time available to carry out the work. They showed exceptional skills in accomplishing all that they were originally asked to do and to remain within the agreed budget of that provided at commencement of the project, in fact they carried out additional work beyond that originally agreed upon.” – Anthony, Beveridge, Technical Superintendent at Fraser Yachts
“With the assistance of the professional paint & carpentry services provided by Newmil Inc the yachts maintenance project have always been completed “On Time” and Within the agreed budget. It was a pleasure to work with a team of skilled professional painters & carpenters.” – Dave Johnson, Captain of M/Y Te Manu
“Work on vessels you painted in the past looked good but what sold me on Newmil was the professionalism of yourself and crew. You were always willing to do what it took to make this customer pleased. I will recommend Newmil Marine to any discerning yacht Captain and Owner in the industry and will use you again on future projects.” – William Capone, Captain of M/Y Miss Sarah J
“Newmil has always followed manufacture recommendations and has never had an issue using SeaHawk. Newmil is a SeaHawk certified applicator and I would highly recommend them.” – Brad Kleinsasser, South Florida Sales Manager at SeaHawk Premium Yacht Finishes
“During this association with NEWMIL MARINE INC, I have dealt with Sauer van den Berg and his team or workers and I would have no hesitation to recommend NEWMIL MARINE INC to any other Captain that is requiring refinishing on his yacht.” – Paul Jukes, Captain of M/Y Moon Sand
“It is always a pleasure to work with a crew that knows how to put in a full day, and get the job done.” – Dirk Sachse, Captain of M/Y Kelly Ann
“Newmil Marine has been involved with Amorazur II for a number of years. Newmil has always provided a large team of painters or varnishers in order to minimize production time. I have found the workers to be meticulous and quality conscious. The end result has always been fist class and I’m happy to recommend Newmil team without reservation.” – Oskar Schonback, Captain of M/Y Amorazur II
“Newmil Marine Yacht Refinishing specializes in painting, varnishing and refinishing of interiors and exteriors. They are trained and knowledgeable in the application of premium urethane coatings, fairing and bright work. Newmil did a fabulous job on restoring Keiki Kai to a previous high standard.” – Trevor Usher, Captain of M/Y Keiki Kai
“The paint job was completed well ahead of the yachts other work, with Newmil continuing to assist us with bright work maintenance to finish in good form. Sauer furthermore stood behind his guarantees, immediately addressing any item requiring additional attention after the job’s completion. I would be very pleased to work with Sauer and Newmil Marine on any future project. Please do not hesitate to contact me if you require further information.” – Richrd Fuher, Master of M/Y Our Toy
FLAWLESS YACHT PAINTING

Ready to Start?
OUR MAIN OFFICE
Phone numbers, send us a message.
Send Message
Newmil Marine can undertake most forms of refinishing work on your Super Yacht. We specialize in full vessel painting, interior/exterior varnishing, fiberglass repairs, caulking, hardware, teakdeak sanding, and more! Just on this vessel alone Newmil was responsible for the painting, varnishing, window and cosmetic caulking😎 #yachtcaptains #yachtrefinishing #superyacht #superyachts #yachtingprofessionals

The reveal is finally here! Our first full refit of 2024 is back in the water after a quick shipyard period. The team put in monumental effort and dedication to turn this beautiful Palmer Johnson into a new work of art. Check out these new upgrades! Completely new color scheme and 3 new colors, to bring together this uniquely designed super yacht. #superyachts #yachtpainting #yachtlife #yachtdesign #awlgripfinishes
Our first full refitted vessel of 2024 is about to be revealed. Scaffolding & tenting schedule to come down this week. Stay tuned for a completely redesigned vessel! #superyachts #yachtcaptains #yachtdesign #awlgrip #yachtlife
Project Update!! Vessel has been fully Primed and is now ready to be prepped for top coat application. Stay tuned for the final finish!
Full vessel refit starting now!

After 4 weeks on the Interior of this Super Yacht, our team was able to complete over 10 different revarnishing projects! Take a look at what our team was able to do with this section! Newmil Marine has the best of both worlds, world class Painting & Varnishing!
Summer Vibes ☀️😎 Whether it be a complete vessel painting, touch up, or interior refinish job, Newmil’s expertise in all areas of yacht refinishing speaks for itself. With over 25 years in the business, our history of repeat customers is a testimony to our industry knowledge and highly superior craftsmanship. ⭐️⭐️⭐️⭐️⭐️ #superyacht #yachtlife #yachtlifestyle #awlgripfinishes #yacht #yachtdesign #yachtlife #yachtrefinishing #yachtrefit #yachtpainting #yachtdetailing #superyachtpainting #yachtcaptain #yachtcrew
Our team is wrapping up another successful and beautiful job in Savannah, Georgia. With a lot of hours of hard work and dedication we can leave this boat looking beautiful and fresh for years to come! Whether it be a complete vessel painting, touch up, or interior varnish job Newmil Marine has you covered!! Thank you to the crew for helping this to be a smooth and enjoyable experience. Swipe ➡️➡️➡️➡️➡️➡️ #superyacht #superyachtfinishing #yacht #yahctlifestyle #newmilmarine #savannahgeorgia #thunderboltmarine #feadship #feadshipyacht #southflorida #oceanlife #superyachtcrew #yachtpainting #yachtfishing
- Articles and Guides
Boat Interior Restoration: How to Create a Dazzling Boat Interior?
1st may 2023 by samantha wilson.

If you’re thinking about Buying a Project Boat , then no doubt you will have started daydreaming about the beautiful interior you will be able to create for your boat. To transform a space from something mediocre and unloved into a beautiful, serene place where you can relax and enjoy your time on the sea is a true joy.
So where do you start when it comes to planning a full interior restoration?
Get Inspired
You might have a clear image of the colour scheme and décor you want in your new interior, but for those that need some inspirations take the time to plan what you want to do before you get started. There is an abundance of information and images out there and you could peruse some boat and sailing magazines, get hold of some books about decorating boat interiors or, most accessibly, look through images online on sites such as Pinterest or boating websites and see what jumps out at you. You could also visit local boat shows and see some boat interiors in real life. Once you have a clear picture of which design style speaks to you, keep a file and then make a plan about which items you will need to source.
Remember, the outside of boats tends to look very similar, but the interior is where you will be able to let your personality and style show, so don’t be afraid to be creative – this is where you will be spending a lot of your precious leisure time and you should love it.
Boat Interior Decorating Basics
While it might be tempting to treat your boat interior in the same way as you would your home, it’s vital to remember that practicality needs to remain the number one priority. Filling an interior space with trinkets and accessories might look appealing, but they will be nothing short of annoying the moment you get under way, and they start falling all over the place.
When sourcing your materials for your brand-new interior, there is a fine line that you need to follow. On the one hand, accessories intended specifically for boats can be eye-wateringly expensive and non- nautical products can be an excellent budget alternative. Storage boxes, galley items and accessories bought from high street shops can all be a way to save money. On the other hand, everything from upholstery to electronics, curtains and flooring needs to be suitable for marine use, and you will need to source and buy marine grade products. Even a boat’s interior will be subjected to water spray, and salt water is particularly corrosive and destructive to materials and equipment. While it might be tempting to buy cheaper, non-marine grade products it will be false economy when you need to replace them in a few years.
The last key rule to consider when decorating the interior of your boat is not buy breakable or fragile items for obvious reasons. It’s easy to forget, while bobbing gently in the marina, how much movement occurs on a boat on the open water, and anything that can fall over most likely will at some point. Avoid glass where possible so consider replacing picture frame glass with plastic, and having plastic drinking cups.
Boat Interior Restoration
With all this in mind it’s now time to take a look at what you can change which will have the biggest impact on your new restoration project;
Update your boat furnishings:
Nothing makes more of an impact on your boat’s interior than the soft furnishings. The seat covers, biminis and cushions will add a real bolt of colour, whether you opt for bold shades or more subtle hues. You could consider a leather interior too, or patterned fabrics. Think long and hard before committing to a colour because it will be the biggest statement you make. Many new boats will leave the shipyard with neutral tones to suit all tastes. It’s your boat though, so don’t be afraid to let your personality shine through – add bright splashes of colour for a fun and vibrant vibe, or choose a sleek black and grey colour scheme for a luxurious feel. Keep in mind the size of the space you’re restoring and don’t overcrowd small interiors with busy patterns or dark colours.
Be Creative with your Yacht’s Storage:
Storage space on most boats is at a premium, and you will need to design your interior carefully to make the most of every square inch. Clutter all over the place will make your boat feel smaller and more crowded, so aim for a minimalist style with everything you need neatly stowed away. It is not only a more pleasant environment but is practical for when you’re cruising too. Putting pull drawers in the steps adds a lot of useful small item storage, while the space under any berths is a valuable storage area too for items such as towels, bedding and clothes. You might even want to consider raising the beds to make the most of an otherwise wasted space. Invest in pretty storage boxes which fit with your colour scheme and integrate them into the overall design.
Revamp the Flooring:
Another big change you can make in your new interior is the flooring, and you’ll be amazed at the outcome. Marine vinyl flooring is a popular choice thanks to its durability and waterproofness, and it is also easy to clean. Marine vinyl comes in a dazzling array of colours and styles, so get creative and pull it into your overall design image. Again, avoid anything too busy or highly patterned in a small space or it can be overwhelming. If you prefer something softer underfoot (this is especially popular in colder climates) then marine grade carpets are up to the job and are available in a myriad of colours.
Don’t Forget about Window Coverings:
We’ve looked at soft furnishings, which would include curtains, but you have a whole host of options to choose from when it comes to window coverings. Blinds in various shades or wood tones can be an elegant addition to an interior, or you could opt for blackout curtains in the cabins for a better night’s sleep. If budget allows then motorized shades can be activated at the flick of a button and can be customised to your décor style.
Make it Yours:
Whether you’re planning to live on your boat , sail around the world , or spend weekends cruising inland waterways then you want the interior space to feel like home. Family photos, wall paintings or bedding can be brought from home to give a cosy and familiar feel. Accessories will help bring the whole design together and it’s where you can add your personal touch. Choose some decorative pillows to complement your upholstery (either matching or in contrasting colours) for evenings snuggled on the sofa, add some throw blankets – perhaps engraved with your boat’s name for added pizzazz – and don’t forget about lighting. Stark white lights are functional but not very atmospheric. Coloured LED lights (long-lasting and efficient) can be used to mark stairways or access ways, while softer lighting in the form of wall uplights or lamps in the cabins and saloon create a sophisticated and calming vibe.
Taking on an unloved boat and restoring it to its former glory can be enormously satisfying and give you a huge sense of achievement. Rightboat.com lists hundreds of boats for sale all around the world to fit all budgets. So whether you want a true fixer upper, or are simply looking to revamp the interior of a boat to make it your own, then start your search here on rightboat.com. We’re always on hand to offer guidance and advice so your boat-buying journey is smooth sailing.
You May Also Like ...
- Top Tips to Negotiate the Best Deal
- 15 Tips for Winter Boating
- 10 Ways to Make Money with Your Boat
Written By: Samantha Wilson
Samantha Wilson has spent her entire life on and around boats, from tiny sailing dinghies all the way up to superyachts. She writes for many boating and yachting publications, top charter agencies, and some of the largest travel businesses in the industry, combining her knowledge and passion of boating, travel and writing to create topical, useful and engaging content.

More from: Samantha Wilson
Related Articles and Guides
18th Oct 2023
How to Winterize a Boat: Steps, Checklist and Costs
20th Sep 2023
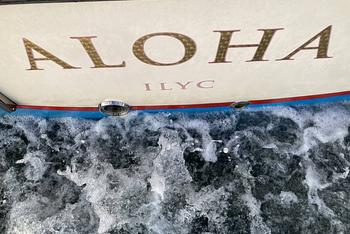
Painting a Fiberglass Boat: A Detailed Guide
19th Sep 2023
Renaming a Boat the Proper Way

31st Aug 2023
How to Drive a Boat with Confidence
- Explore Rightboat
- Boats for Sale
- Boating Articles
- Buyers Guide
- About RightBoat
- Sell Your Boat
- Boat Selling Advice
Enter your email to keep up to date with the latest news
Join for free
Sign up now for free and discover how easy it is to keep up to date with THE latest boats for sale. Find your right boat, and tailor your voyage to finding your next boat.
Benefits of becoming a member:
- Set up tailored alerts
- Personalise your experience
- Download full specifications and broker details
- Keep tabs on your favourite boats
Are you a broker? Join as a Broker
Rightboat - join for free.
Do you have an account already? Login
Save this search
Save your search and receive new boats in your email..
You can unsubscribe from your alerts whenever you like. By pressing the button you accept the Legal Terms and conditions

- Forums New posts Unanswered threads Register Top Posts Email
- What's new New posts New Posts (legacy) Latest activity New media
- Media New media New comments
- Boat Info Downloads Weekly Quiz Topic FAQ 10000boatnames.com
- Classifieds Sell Your Boat Used Gear for Sale
- Parts General Marine Parts Hunter Beneteau Catalina MacGregor Oday
- Help Terms of Use Monday Mail Subscribe Monday Mail Unsubscribe
What paint to use on inside wall of a boat?
- Thread starter sd1953
- Start date Apr 27, 2014
- Forums for All Owners
- Ask All Sailors
Chris Patterson
Them's true words Center. If the boat is dry inside, and there's no reason to think an Endeavor 38 is not, any decent paint will work. If it's white you want, I've been using Valspar's porch and floor paint for years, in fact, I'm looking at it right now on my raceway panels. It looks great. And 22 bucks. Don't get into getting suckered into 'boat paint' on this one.
Charlie Jones s/v Tehani
For onto 20 years now in my own boats, and boats I've built for customers, for interior painting I've used (and will continue to use) a good quality ACRYLIC Latex enamel in semi gloss. Note the emphasis on Acrylic. I also use Zinzer 1-2-3 primer.. Used to use a different one (Kilz), but I've had it bubble with condensation. It's a very different animal from the old latex's. Water wash up, scrub-able, fast dry and low odor.
Interlux Brightside or Pettit Easypoxy, both one part polyurethanes. Easy to put on and durable/scrubable.
Thanks for the help... I'm off to the paint store in the morning. This is what I LOVE about this site... there is so much hard won knowledge and experience and y'all share it so readily. Fair winds and following seas!
Stu Jackson
One of the best pieces of advice I've read is when you paint something inside a boat in white, is to use a tad of blue in it. Takes the glare out. Lin & Larry Pardey. Pretty good folks to listen to. Good luck.
Stu Jackson said: One of the best pieces of advice I've read is when you paint something inside a boat in white, is to use a tad of blue in it. Takes the glare out. Lin & Larry Pardey. Pretty good folks to listen to. Good luck. Click to expand
Attachments

I used BINZ sealer and stain remover then topside paint. The BINZ(home depot) gave the finish coat a great base to adhere to.
Barnacle Bill
Why do people go to home stores to buy paint for boats? Two different things. PETTIT has a product called "Cabin Coat" which is a mildew resistant marine paint. The other nice thing about this you can apply if over a glossy surface without sanding. Now how cool is that and see if you can find that at home depot?
miamitreasurehunter
centerline said: any topside paint would work.... but also to keep in mind, where as latex is not a good choice if you do the proper prep work, but if you are not sanding down to a solid surface to apply the new paint to, then latex will be as good as any other. the reason is, if you are painting over old paint, and the adhesion is questionable, it will probable fail and the quality of paint that is going to peel away because of it matters little. even latex on a good clean surface will adhere well for a long time, but if you are working at prepping the surface like it should be done, then dont waste your efforts by applying anything but the best over it, as it takes no more work to paint on a good quality paint than it does to apply the cheap stuff. a lot of people use an exterior house paint with good enough results to keep them happy for a long time... Click to expand
As I emphasized- HUGE difference between the older latex paints, and the ACRYLIC (note- acrylic) latexes. And yes, you can add a mildewcide. Comes in a small package to stir in I can show you a boat in our marina that I repainted the interior of in 1998, and it's still in great shape, except where there have been damages from scrapes. Personally, I would never even dream of putting Brightsides on a boat interior. But that's me and I've come to not like Brightsides. I don't like the way it works, either brushing or spraying. I DO like EasyPoxy, but that would be on the outside, not inside. And someone asked- why a house paint instead of a marine paint? Several reasons- 1. It's just as good- designed to hold up on a house for years and years. The research has been done, and it last's 2. I can walk back into a Sherwin Williams store anywhere and give them the paint numbers, and walk out with a dead match in color. Even from that 1998 paint job. 3. It's a LOT cheaper, because it doesn't say "marine" Note- we ARE NOT talking boat exterior- that's a whole different subject.
Roadking Larry
The three most important stpes in any paint job are: 1. Preperation 2. Preperation and of course 3. Preperaton
TSBB 2 said: Personally, I would never even dream of putting Brightsides on a boat interior. But that's me and I've come to not like Brightsides. I don't like the way it works, either brushing or spraying. I DO like EasyPoxy, but that would be on the outside, not inside. Click to expand
mitiempo said: Why? Click to expand
Preparation is the key . Paints fail because of adhesion problems. If you want the job to last and to be scratch resistant you should use a bonding primer. The absolute best for adhesion is XIM 400W available at Sherwin Williams. If it were me I would use an oil alkyd topcoat with gloss finish. The downside is that combination of paint and primer will smell for a couple of days. The upside is that you will have a very durable finish that won't scratch easily and will be easy to clean. Acrylic latexes are soft and subject to easily being scratched. Urethanes and epoxies are hard but not too flexible which might lead to some cracking as the hull flexes.
Wednightracer said: Acrylic latexes are soft and subject to easily being scratched. . Click to expand
- This site uses cookies to help personalise content, tailor your experience and to keep you logged in if you register. By continuing to use this site, you are consenting to our use of cookies. Accept Learn more…

Home » Blog » Live on a boat » Give your boat interior a fresh look
Give your boat interior a fresh look
By Author Fiona McGlynn
Posted on Last updated: August 4, 2023
12 AFFORDABLE BOAT INTERIOR DESIGN IDEAS
When we first moved aboard, our sailboat interior was a mess and we didn’t have the money to update it . We wanted to go cruising and our priorities were things like new sails, rigging, fiberglass repair, and electronics.
As much as I wanted a beautiful boat interior it was impossible to justify hiring an interior designer or updating the upholstery when we didn’t even have a dependable bilge pump! Fortunately, I found some creative boat interior design ideas and was able to makeover our sailboat for next to nothing.
In addition to sharing our boat interior restoration ideas, I’ve included my favorite boat interior photos from Pinterest and Instagram to further stoke your inspiration!
A quick note that this post contains affiliate links (so if you purchase through a link we’ll earn a small commission). The opinions are our own.
1. START BY DEEP CLEANING
As un-fun as it might be, a deep clean is the cheapest way to radically brighten your interior. It’s especially affordable if you use homemade boat cleaners. Dirty boat upholstery, mildewed cabin liners, and salt-encrusted hatches made our boat feel damp, dark, and generally unpleasant.
Deep cleaning (after years of neglect) drastically improved the boat cabin’s appearance and gave me a better idea of where to focus our boat interior makeover.
- Professionally launder your upholstery
- Wipe down the cabin liners with vinegar to prevent mildew and mold
- Wash hatches to maximize natural light
- Clean under all the cabin soles and the edges of any rotting boards
- Wash the walls and treat any wood with the appropriate wax, oil, or varnish
- Scrub out the bilge to prevent that boaty smell.
2. INSTALL INTERIOR BOAT LIGHTS
One of the great challenges of sailboat interior design is lighting. I’ve always felt that living on our sailboat is like living in a basement apartment because it is totally lacking in natural light !
One of the quickest ways to brighten things up is to install marine LED lights. The key to making LED boat lights look great, is placement.
The 3 best places to places to put LED strip lights on a sailboat
1. Under counter lighting. They look especially nice under cupboards or overhangs because the light strip is hidden.
View this post on Instagram < New battery installed! Lights and radio work. There’s LED strip lights which are great, but in the future we may need to swap those out for the multi colored ones. Our house has party-mode, the boat should too! #catalina22 #sailing #boatlife A post shared by SV Buza Sasha (@sv_buza_sasha) on Jul 11, 2018 at 5:18am PDT
2. LED rope lights make great courtesy lights . Tuck strip lighting on either side of a walkway to help guests navigate in the dark.
Battery operated fairy lights look cute coiled in a jar of seashells and are another easy way to add decorative lighting because no wiring is required. For the same reason, Solar Luci lamps and Solar Luci strings are a great option for lighting the cockpit.
3. COZY-UP TO NEW BEDDING
Ditch those damp cotton sheets and invest in hydrophobic options like 100% polyester. If you have a vberth, quarter berth, or non-standard sized bed, you may want to spend a few extra bucks on custom fitted boat sheets.
I know many cruisers who swear by memory foam mattresses and the Hypervent mattress pad for preventing condensation. If you like duvets and comforters, consider a mulberry silk option because it’s mold and mildew resistant.
4. FRESHEN THE HEAD
Add a splash of color to a dark bathroom with cheerful microfiber towels , Or, if you don’t want to feel like you’re camping, try the more luxurious quick-drying Turkish towels .
Tie them in with a cute wall-mounted soap dispenser and a spill-proof whicking air freshener and you’re on your way
5. GO GALLEY GOURMET
- Replace a rusted or dull faucet with a sparkling new one with a pull-down sprayer.
- Splash-out with colorful dish towels
- Use biodegradable loofas and scrubbies instead of plastic
- Pick up non-breakable dishware and glassware in fun patterns and designs.
- Create extra space with chopping board stove and sink covers
- Add custom knife, wine, and spice racks
- Add a green bar to keep greens fresh without a fridge
View this post on Instagram Boat decor #sundance #sailboat #sailboatlife #sailboatlifestyle #1969 #tartansailboat #sailboatinteriordesign #sailboatinteriors #maltetaller A post shared by Sundance Sailboat (@sundancesailboat1969) on Aug 15, 2017 at 5:32pm PDT
6. BOAT INTERIOR UPHOLSTERY IDEAS
Reupholstering a boat is the single most expensive part of a sailboat interior refit but it makes a huge difference. It costs thousands of dollars if you hire someone to do it. Fortunately there are a few tricks we used to avoid a full upholstery overhaul.
- Fun throw cushions and blankets can give your interior new life (and cover stained or threadbare upholstery)
- Packed out seat cushions can be easily fixed by inserting a layer of high-density foam and batting on top of the existing foam.
- If your upholstery is in really bad shape you may want to sew elasticated cushion coverlets that go over the top side of the cushion (it’s also a good way to protect nice new upholstery from boat projects (see: dirt, grease, and sweat stains).
- You can reupholster your boat for a fraction of the cost if you do the sewing yourself. It’s possible to score good deals on durable materials and marine-grade fabrics online. Also, if you’re not a sewer but you’re going cruising, you may want to bring your boat interior fabric with you and have the cushions sewn up in a place like Mexico or Fiji. We eventually had all of our saloon cushions sewn up for $100 USD in Ensenada, Mexico.
If you choose to reupholster your boat, look for boat interior upholstery fabric . You don’t have to worry (as much) about finding a waterproof or UV-resistant fabric (because it will be inside). However, always choose a synthetic fabric , heavy-duty nylon thread, and plastic zippers. Cotton will eventually rot and metal zippers will rust. You can get away with not using marine upholstery but natural fibers are a big no-no!
7. CUT A RUG
8. LOVE YOUR WALLS
Securely fasten art, photos, and souvenirs to your walls. Mirrors are great for creating the illusion of space.
Privacy curtains are also a good way to add a splash of color and are straightforward to make
View this post on Instagram My husband’s an artist…the cat approves 🐙🤣 . . . . . #catvskraken #sailboat #chalk #artist #sailboatinteriors #chalkboardart #kraken #catsofinstagram #meow #liveaboard #fridayvibes #fridaymood #instamoment #talent #husbandskills #saltytails @sv_saltytails A post shared by Erin 🌊🌴⛵🐚👙☉ (@erin_svsaltytails) on Jul 27, 2018 at 2:42pm PDT
View this post on Instagram After all of the sanding, refinishing, painting, ripping out old floors and carpet, we’re really loving our space. There are more projects to do, but we’re enjoying the results so far! When we originally bought our boat back in December, we had enough time to take care of the “must do’s” so this summer we are spending the time to really make her ours! . . . . . . #lightandbright #sailboat #sailboatinteriors #woodwork #overhaul #huntersailboats #cherubini #interiordesign #laboroflove #tinyliving #liveaboard #boatlife #sailors #ourhome #takingabreak #fornow #summerprojects #traveler #travelblog #results #saltytails @sv_saltytails A post shared by Erin 🌊🌴⛵🐚👙☉ (@erin_svsaltytails) on Jul 22, 2018 at 11:27am PDT
9. WHITEN AND BRIGHTEN YOUR SAILBOAT INTERIOR
Painting panels in light colors can brighten and modernize a boat cabin and set off teak trim. We repainted our red and blue fiberglass bathroom white and it made the space feel much bigger. It also makes it easy to clean because you can see the dirt.
View this post on Instagram #beforeandafter #boatrestoration #vintagesailing #menorca #sailing #boat #sailboat #sailboatinteriors #boatinterior A post shared by Velero Vintage en Menorca (@vintagesailing) on May 1, 2018 at 5:02pm PDT
10. STOW SIMPLY WITH CUTE STORAGE SOLUTIONS
Boats are always short on storage space but a few decorative baskets and storage containers can really improve the look of the space while giving you more room to tuck things away.
11. FUN AND FUNCTIONAL WINDOW COVERINGS
12. CHOOSE A FUN FEATURE
Let your imagination run wild. A feature wall, table, or piece of artwork can really change the feel of a sailboat interior. Have fun with colors, patterns, and make your new floating home your own.
View this post on Instagram #sailboat #boatlife #boatlifestyle #sailboatinteriors #ceder #liveedge #boatlifestyle #vancouver #boatinterior #art #windspirit #homesweethome #liveaboard #westcoastliving A post shared by @ arana_arte on Nov 2, 2017 at 9:13am PDT
If you’re still feeling overwhelmed about revamping your sailboat interior you may want to consider hiring professional help . There are plenty of interior designers who would welcome the challenge of working on a boat! Look for someone who has experience designing for small spaces and tiny homes.
We hope you enjoyed this list of custom boat interior ideas…
Good luck with your sailboat makeover.
Fiona McGlynn is an award-winning boating writer who created Waterborne as a place to learn about living aboard and traveling the world by sailboat. She has written for boating magazines including BoatUS, SAIL, Cruising World, and Good Old Boat. She’s also a contributing editor at Good Old Boat and BoatUS Magazine. In 2017, Fiona and her husband completed a 3-year, 13,000-mile voyage from Vancouver to Mexico to Australia on their 35-foot sailboat.
Terms and Conditions - Privacy Policy

Please verify you are a human
Access to this page has been denied because we believe you are using automation tools to browse the website.
This may happen as a result of the following:
- Javascript is disabled or blocked by an extension (ad blockers for example)
- Your browser does not support cookies
Please make sure that Javascript and cookies are enabled on your browser and that you are not blocking them from loading.
Reference ID: 7f86757a-dbe4-11ee-a516-a5dd94f59119
Powered by PerimeterX , Inc.
- Bahasa Indonesia
- Slovenščina
- Science & Tech
- Russian Kitchen
Further inside the mysteries of St. Basil's

Moscow. Cathedral of the Intercession on the Moat (St. Basil's). South view. February 20, 1972.
Although Russian chemist and photographer Sergey Prokudin-Gorsky is best known for his photographs of the Russian Empire in the early 20th century, he also established a business that produced color postcards and illustrations in books. Among the publications with his color photographs was a large volume published in 1913 on the occasion of the tercentenary of the Romanov dynasty. The illustrations included his reproduction of a tinted watercolor made for an album presented in 1673 to Tsar Alexei Mikhailovich in commemoration of the enthronement of his father, Mikhail Fedorovich, the first Romanov tsar.

Red Square. Proclamation of Enthronement of Tsar Michael Romanov. From left: St. Basil's, Lobnoye Mesto, Kremlin wall & Savior (Spassky) Tower. Reproduction of 1673 tinted engraving published in P. G. Vasenko, Romanov Boyars and the Enthronement of Mikhail Fedorovich (St. Petersburg, 1913).
The watercolor purports to show the solemn occasion on February 21, 1613 when the people swore fealty to the newly chosen Tsar Mikhail on Red Square. The main architectural feature of the watercolor is the multi-domed St. Basil's Cathedral. Despite its fame, the complex structure continues to pose riddles. Even its name varies: from the popularly accepted “St. Basil’s” to its formal designation as the Cathedral of the Intercession on the Moat. In the 17th century it was also referred to as “Jerusalem.”
Having photographed this consummate landmark for decades, I was able in 2012 to re-photograph the interior with a digital camera.
Monument to Muscovy and Orthodoxy

St. Basil's. Southwest entry stairway. May 26, 2012.
St. Basil's is located on high ground above the left bank of the Moscow River and provides a visual landmark over a large space known since the middle of the 17th century as Red (or "beautiful") Square. The church accordingly served as a symbolic link between the Kremlin, the center of political power, and the posad, the densely settled mercantile area in Kitay-Gorod. The origins of St. Basil’s are as complex as its form. Soon after Tsar Ivan IV (the Terrible) captured the city of Kazan on October 1-2, 1552, he commanded that a church dedicated to the Holy Trinity be erected on the square outside the Kremlin at the Frolov Gate.

St. Basil's, interior. Southwest entry stairway. June 21, 1994.
Ivan intended to rebuild that church on a scale reflecting the importance of his defeat of Kazan, which not only eliminated a troublesome relic of Mongol power, but also opened a vast area for colonization and trade. Although the temple might seem a chaotic agglomeration of parts, its architects – generally recognized as Ivan Barma and Postnik Yakovlev – created a logical plan with a wealth of layered meaning.

Left: St. Basil's. Church of St. Varlaam Khutinsky, southwest view. May 26, 2012. Right: St. Basil's. Church of St. Varlaam Khutinsky. Interior with icon screen. June 2, 2012.
The new construction had a dual purpose – to express the triumph of Orthodoxy and of Muscovy. Ivan’s victories were not simply an episode in interminable border warfare, but a defining event in the identity of a nation endowed with a sense of destiny.
To celebrate these ideas, each component of the cathedral was endowed with iconographic and symbolic meanings. Composed of churches grouped around a central tower, this monument has served as a symbol of unifying power since its completion in the mid-16th century.

St. Basil's. Church of the Intercession, south portal. June 2, 2012.
The Intercession Cathedral ensemble (St. Basil’s) consists of a central tower surrounded by eight free-standing churches on a common terrace that was enclosed and painted in the 17th century. The plan of the ensemble embodies the trinitarian concept: each axis, diagonal and side has three towers, and the structure on the terrace level is divided into three parts.
On the interior, the plan creates an enchanting maze of decorated portals and low passageways that link the compact towers of the individual churches. Each of these spaces can accommodate only a few worshippers, and services at the temple complex were often held outdoors on an adjacent part of Red Square.

Left: St. Basil's. Church of the Velikoretsky Icon of St. Nicholas, southwest view. May 26, 2012. Right: St. Basil's. Church of the Velikoretsky Icon of St. Nicholas, interior. View of tower with upper tier of icon screen. June 2, 2012
My preceding article examined the five tower churches on the west, center, and north together with the connection. This one will survey the remaining five, including the small shrine that was dedicated to Basil himself.
An exploration of the interior begins with the main entrance gallery, located on the west side with flanking stairways (capped with pitched roofs that leads to the elevated terrace connecting the component churches. Originally open, the terrace was enclosed during a renovation of the ensemble in the 1680s. Although tightly constrained, the gallery has a festive appearance with elaborate decorative motifs painted in phases during the 18th and early 19th centuries.
Honoring family

St. Basil's. Church of St. Nicholas Velikoretsky, interior. View of upper tower & dome with image of Christ Pantocrator. June 2, 2012
Two churches on the south flank relate to Ivan and his family. The dedication of the southwest church to St. Varlaam of the Khutynskii Monastery near Novgorod commemorates
Ivan's father, Basil III, who shortly before his death assumed the traditional role of monk and adopted the name Varlaam. The tower interior is of unadorned, whitewashed brick. The small, exquisite icon screen was renovated in the 18th century, yet the icons show an earlier style.

St. Basil's. Church of St. Nicholas Velikoretsky, interior. Image of Christ Pantocrator. June 2, 2012.
The south church (one of the four major towers at the points of the compass) is dedicated to the icon of St. Nicholas of Velikoretsk, a “wonder-working” icon brought to Moscow from the village of Velikoretskoe (near Vyatka) at Ivan’s command in 1555. Originally placed in the Dormition Cathedral , many miracles were attributed to the icon. It also can be seen as having a dual symbolic reference to the River Velikaya near the ancient city of Pskov, whose monks played a role in articulating the mission of Muscovite authority.

St. Basil's, interior. South gallery passage with 18th-century wall paintings. Left: painting of St. Catherine. June 2, 2012.
Like the interior of the north tower, the interior of the St. Nicholas Church was lavishly repainted with religious images in the mid-19th century. The culminating point is a youthful image of Christ Pantocrator on the dome vault. The icon screen was renovated in the mid 19th century.
Walls like brick

Left: St. Basil's. Church of St. Alexander of Svir, southwest view. August 5, 1994. Rigth: St. Basil's. Church of St. Alexander of Svir, interior. View of tower with upper tier of icon screen. June 2, 2012.
The southeast church, dedicated to St. Alexander of Svir, commemorates the Russian victory on August 30 over Tatar cavalry led by Prince Yepancha, thus eliminating a major threat to Moscow’s hold at the siege of Kazan. St. Alexander (1448-1533) was a monastic leader active in the Novgorod diocese and know for his rigorous asceticism. In 1485, he laid the foundation of what became the Alexander Svirsky Monastery, near the Svir River.

St. Basil's. Church of St. Alexander of Svir, interior. View of tower with painted bricks. June 2, 2012.
Alexander was canonized during Ivan’s reign at the initiative of Metropolitan Macarius. St. Alexander’s feastday occurs on August 30, and thus both the northeast Church of the Three Patriarchs and the southeast church symbolize the Russian victory on that day.
Although not painted with religious images, the walls of this small tower are a fascinating example of a technique known as pod kirpichi (“like brick”) in which the walls were painted brick red, with white seams limned to resemble mortar. This practice, imported from Italy, was also applied to the brick exterior of the entire ensemble in the late 18th century. The paint not only protected the walls from moisture seepage, but also enhanced the color of the surface.

St. Basil's, interior. South gallery passage with 18th-century wall paintings. From left: St. Catherine, St. Sergius of Radonezh, Metropolitan Peter. June 2, 2012.
The main axis concludes on its eastern end with the major tower dedicated to the Trinity. This church is the holy of holies for the ensemble by virtue of its dedication to the trinitarian concept, which forms the numerological system of the cathedral. The sole decorative element on the whitewashed interior walls is a brick spiral on the vault of the dome. The icon screen was renovated in the 18th century.
Why St. Basil’s?
Left: St. Basil's. Church of the Trinity, north view. Lower center: Dome of Church of Basil the Blessed. May 26, 2012. Right: St. Basil's. Church of the Trinity, interior. Tower with icon screen & decorative brick spiral in dome. June 2, 2012.
When all the original churches are accounted for, there is still the popular name of the temple –St. Basil’s. Basil the Blessed (1469-1552 or 1557) was a Muscovite yurodivy — or "fool in Christ" — revered by the tsar himself as well as by the common people for his saintliness and gift of prophecy. With the support of Metropolitan Macarius, a wooden shrine in his honor of Basil (Vasily Blazhenny) was erected to the east of the original Trinity Church.

St. Basil's, northeast view. From left center: Trinity Church, Church of Basil the Blessed, Church of the Three Patriarchs (in shadow), Church of Sts. Cyprian & Justina. Background: Tower of Church of the Intercession. East view. August 6, 1987.
The shrine was maintained during the building of the Intercession Cathedral. Basil’s official veneration took place in 1588, during the reign of Ivan’s son Feodor and with the support of Boris Godunov). At that time, a small brick Church of Basil the Blessed was attached to the northeast corner of the cathedral. Renovated in 1672, its architecture retains archaic features of the 16th century. The small interior is dominated by a lavish icon screen and by the sarcophagus of Basil.

St. Basil's. Church of Basil the Blessed, interior. View east toward icon screen. Right: Sarcophagus of Basil the Blessed. June 21, 1994.
The Church of Basil the Blessed also became the resting place of another “fool in Christ,” Blessed John — popularly known as “the big cap” (Bolshoy kolpak ) — who before his death in 1589 expressed the desire to be buried near Basil the Blessed.
Despite the modest size of the church in relation to the surrounding towers, the cult of Basil grew to usurp in common usage all the cathedral's previous designations, official or unofficial. Indeed, it was the only part of the ensemble that held liturgical services daily. Services at the other churches were held only on their dedicatory day and on the 12 major feastdays.

St. Basil's. Ground level passage to Church of Basil the Blessed. Ceiling painting of Nativity of the Virgin at Nativity Altar near grave of John the Blessed. June 21, 1994.
More could be written about the layers of symbolic richness displayed in St. Basil’s, a richness that has evolved over the centuries since its original construction. The Intercession Church itself has become an icon of Russia, a complement to the Kremlin as a statement of national identity.
St. Basil's. Ground level passage with display of construction artifacts & different layers of wall decoration from 16th- 19th centuries. June 21, 1994.
In the early 20th century, the Russian photographer Sergey Prokudin-Gorsky developed a complex process for color photography. Between 1903 and 1916 he traveled through the Russian Empire and took over 2,000 photographs with the process, which involved three exposures on a glass plate. In August 1918, he left Russia and ultimately resettled in France where he was reunited with a large part of his collection of glass negatives, as well as 13 albums of contact prints. After his death in Paris in 1944, his heirs sold the collection to the Library of Congress. In the early 21st century the Library digitized the Prokudin-Gorsky Collection and made it freely available to the global public. A few Russian websites now have versions of the collection. In 1986 the architectural historian and photographer William Brumfield organized the first exhibit of Prokudin-Gorsky photographs at the Library of Congress. Over a period of work in Russia beginning in 1970, Brumfield has photographed most of the sites visited by Prokudin-Gorsky. This series of articles juxtaposes Prokudin-Gorsky’s views of architectural monuments with photographs taken by Brumfield decades later.
If using any of Russia Beyond's content, partly or in full, always provide an active hyperlink to the original material.
to our newsletter!
Get the week's best stories straight to your inbox
- U.S. professor continues photographic legacy of Prokudin-Gorsky in new book
- The Dormition Cathedral: Regal monument in the Kremlin
- Exploring the mysterious interior of St. Basil's
This website uses cookies. Click here to find out more.
- Images home
- Editorial home
- Editorial video
- Premium collections
- common:links_news
- common:links_sports
- common:links_royalty
- common:links_entertainment
- Premium images
- AI generated images
- Curated collections
- Animals/Wildlife
- Backgrounds/Textures
- Beauty/Fashion
- Buildings/Landmarks
- Business/Finance
- Celebrities
- Food and Drink
- Healthcare/Medical
- Illustrations/Clip-Art
- Miscellaneous
- Parks/Outdoor
- Signs/Symbols
- Sports/Recreation
- Transportation
- All categories
- Shutterstock Select
- Shutterstock Elements
- Health Care
Browse Content
- Sound effects
PremiumBeat
- PixelSquid 3D objects
- Templates Home
- instagram-all
- highlight-covers
- facebook-all
- carousel-ads
- cover-photos
- event-covers
- youtube-all
- channel-art
- etsy-big-banner
- etsy-mini-banner
- etsy-shop-icon
- pinterest-all
- pinterest-pins
- twitter-all
- common:links_templates_twitter_banner
- infographics
- site-header:zoom_backgrounds
- announcements
- certificates
- gift-certificates
- real-estate-flyer
- site-header:logos
- travel-brochures
- cards-anniversary
- cards-baby-shower
- christmas-cards
- easter-cards
- mothers-day-cards
- cards-photo
- cards-thanksgiving
- cards-wedding
- invitations-all
- party-invitations
- wedding-invitations
- book-covers
- About Creative Flow
- Start a design
AI image generator
- Photo editor
- Background remover
- Collage maker
- Resize image
- Color palettes
Color palette generator
- Image converter
- Creative AI
- Design tips
- Custom plans
- Request quote
- Shutterstock Studios
0 Credits Available
You currently have 0 credits
See all plans

Image plans
With access to 400M+ photos, vectors, illustrations, and more. Includes AI generated images!

Video plans
A library of 28 million high quality video clips. Choose between packs and subscription.

Music plans
Download tracks one at a time, or get a subscription with unlimited downloads.
Editorial plans
Instant access to over 50 million images and videos for news, sports, and entertainment.
Includes templates, design tools, AI-powered recommendations, and much more.
Search by image

Custom Car Paint royalty-free images
7,325 custom car paint stock photos, 3d objects, vectors, and illustrations are available royalty-free., close up of the flames on a vintage hot rod.

Retro hot rod car tuning show.Custom painted classic American vehicle with orange flames. MOSCOW-7 AUGUST,2016:

Yellow Flames on Red Vintage Car

Racing Flames

Chameleon holographic colour car. Side view. Driver's door and side mirror. closeup. Car wrapping. Car exhibition.

Tuned Customised Cars

Busy male mechanic in mask sticking tape on car before painting in workshop

Unique purple and orange automotive background

Spray gun. Vector illustration.

Details of a customized vehicle on display at a car show.

Paint protection film installation on fender panel surface of luxury sports car. PPF is polyurethane film applied to car surface to protect the paint from rock chip and scratch. Shallow DOF. Hand move

classic auto paint and tire detail

SANDOWN PARK, UK - MARCH 26: Custom graffiti paintwork on a VW Beetle, used to help raise money for and advertise the Comic Relief aid charity. Volksworld, Sandown Park, UK. March 26, 2011.

Red vintage

Kiev / Ukraine - 04.10.19: car Volkswagen Golf 7 R is covering film of color iridescent. Car Parking Concept

colorful flaming paintwork and headlamp on a custom hotrod

Set of nine colorful cartoon cars

BMW M3 F80 wrapped in chameleon vinyl wrap, equipped with custom wide body kit, carbon fiber parts, forged wheels and low profile race tyres on Drift And Cars Show. KYIV-15 MAY,2021

Tampa, FL - August 25, 2021: Tesla Model Y Performance with custom wheels and a custom vinyl wrap covering the car's paint parked on top of a parking garage during the middle of the day.

Hot 442 engine, found on cars in the 50's to early 70's

60s sports car head light

Front of vintage car, white with blue flames paint job

Car design with carbon sticker

Paint protection film installation on door panel of luxury sports car. PPF is polyurethane film applied to car surface to protect the paint from rock chips & scratch. Shallow DOF. Hand movement

Chameleon colour car on the parking among other cars. Unique bright colour vehicle. Custom paint wrap. Eye-catching concept photo.

Hot Rod Racing Flame Graphics

Old African toy - Bush taxis from Dakar to M'Bo ur (Senegal)

colorful flaming paintwork on a custom hotrod vehicle

Classic Street Rod At Show

MOSCOW, RUSSIA - JULY 23, 2021: Car. Automobile on street of Moscow city, Russia. Unusual tuning car. Custom car, customized cars. Tuning auto, cars at Tuning Open Fest in Moscow. Custom paint cars

Flame graphic paint job on hot rod car

Carbon mat metallic grey car wrap

black tuning car with a lot of Light Bulb

Vintage car on dark background. For other views or colors of this car please check my portfolio.

BANGKOK, THAILAND - JULY 8, 2020: Paint protection film attached to front panel of Audi TT. PPF is polyurethane film that help protect paint from scratch. Selective fous & shallow DOF.

GLOUCESTER, VA- MAY 12:A Chevy P/U at the relay for life car shows sponsored by Auto Max & the MPCC at the Main St shopping center in Gloucester Virginia, 2012 in Gloucester Virginia on May 12, 2012.

Close-up LED headlight expensive car part with exclusive iridescent painting. Vehicle covered with vibrant chameleon film

painted flames on car

Bordeaux , Aquitaine France - 05 27 2021 : Jeep Wrangler zebra car paint 4x4 model all road custom paint

Wheel and Side of Car with custom graphics

black chevy truck, with blue sky reflected in bodywork

car graphic design for t-shirt

customized muscle car with supercharger and flames

door handle of vintage car

Hot American muscle car cartoon. Purple and black paint, aggressive stance, low profile, big tires and rims.

Chevrolet Camaro new concept car. Detroit Motor Show 2008. The same as "Bumble Bee" in the "Transformers" movie.

Closeup of a vehicle hood receiving a custom paint job

Vintage car. Sepia

Custom car flames

BUDAPEST-MARCH 19: Tuned Nissan Skyline R34 GT car with fresh green painting and special bumper (Bomex bodykit) on international tuning show in Hungexpo at 19th of March, 2010 in Budapest, Hungary

Classic Red Custom Street Rod Car with Hotrod Flames and Chrome Rims Isolated Vector Illustration

Details of the engine and graphics on a customized vehicle.

green classic car

Custom Flame Paint Job

Closeup of a classic custom car.

Kiev / Ukraine - 04.10.19: car with painting color iridescent color in the parking lot in the evening

Detail of a beautifully restored and chromed engine

Vector Illustration of old vintage custom collector's car on Urban abstract background in grunge style

Classic Custom Car

Flames on a Street Rod

Classic hot rod fifties muscle car with a cool man and cute blonde woman cruising, low profile, big tires and rims, jet black paint, cartoon vector illustration

Dual exhaust pipes on a custom car with rear spikes and teal paint. Custom cars in Southern California summer 2017

GLOUCESTER, VA- SEPTEMBER 6: T Bucket right side in the 23rd Annual 2013 MPCC(middle peninsula car club)meeting at the Main St shopping center in Gloucester, Virginia on September 6, 2013

PRAGUE, CZECH REPUBLIC - SEPTEMBER 3rd 2017: Close view of custom built chameleon painted Mercedes on display during Prague Car Festival on 3rd September 2017 in Prague, CZE.

GLOUCESTER, VA- JULY 13: A 67 Ford Mustang in the (middle peninsula car club) blast from the past car show at the Main St shopping center in Gloucester, Virginia on July 13, 2013

Custom hot rod

Man driving SUV.

SAN FRANCISCO - NOVEMBER 21: A custom painted Chevrolet Camaro is on display during the 2011 International Auto Show at the Moscone Center in San Francisco on November 21, 2011

A Red Antique Truck Isolated on White

Vintage red car on dark background. For other views or colors of this car please check my portfolio.

DETROIT - JANUARY 17: Concept cars from the North American International Auto Show on January 17, 2010 in Detroit, Michigan.

auto paint logo template

Auto Body Painting

GLOUCESTER, VA- JULY 13: A Custom Chevy S-10 P/U in the (middle peninsula car club) blast from the past car show at the Main St shopping center in Gloucester, Virginia on July 13, 2013

Paint protection film installation on bonnet panel of luxury sports car. PPF is polyurethane film applied to car surface to protect the paint from rock chips & scratch. Shallow DOF. Hand movement.

classic car hot rod

Purple Delight

red sport and fast car over mirror; three dimensional shape

Classic Car Interior

Car detailing custom logo design retro badge baroque luxury element polish coating service

Paint protection film installation on door panel of luxury sports car. PPF is polyurethane film applied to car surface to protect the paint from rock chips and scratch..car coating detailing sticker .

65 chevelle engine

BMW M3 F80 vehicle wrapped in purple matte chameleon vinyl wrap,equipped with custom wide body kit with carbon fiber parts and laser led headlights on Drift And Cars Show. KYIV-15 MAY,2021

GLOUCESTER, VA, USA -SEPTEMBER 16: Vintage 1970 Ford Boss 427 Mustang in the Middle Peninsula Classic Cruisers Club weekly Car Show. Main Street Center. September 16, 2011 in Gloucester, VA, USA

The modern handle of a door of the red car

Vector Stripes Decal Stickers fits for all racing car, Door Side Car Accessories

MANILA, PH - NOV. 6: Customized car sound system at Manila Auto Salon on November 6, 2016 in Manila, Philippines. Manila Auto Salon is a annual gathering exhibit for automotive aftermarket industry.

Close up of matching orange leather upholstery of custom classic vintage car interior

GLOUCESTER, VA- MAY 25: 1969 Chevy Camaro SS in the (middle peninsula car club) relay for life car show at the Main St shopping center in Gloucester, Virginia on May 25, 2013

Auto car paint logo design with creative concept and business card design Premium Vector

Key hold with door handle of vintage car

Our company
Press/Media
Investor relations
Shutterstock Blog
Popular searches
Stock Photos and Videos
Stock photos
Stock videos
Stock vectors
Editorial images
Featured photo collections
Sell your content
Affiliate/Reseller
International reseller
Live assignments
Rights and clearance
Website Terms of Use
Terms of Service
Privacy policy
Modern Slavery Statement
Cookie Preferences
Shutterstock.AI
AI style types
Shutterstock mobile app
Android app
© 2003-2024 Shutterstock, Inc.

IMAGES
COMMENTS
Sand well. Fill any small holes with wood/wall filler. Mask your edges carefully. Use a good primer (we used two coats since it was being applied to a sanded varnish surface) Wear a mask and/or keep as much airflow/ventilation going as possible. Choose a paint that's durable and good in wet areas.
Right up front, what most experts suggest is disarmingly simple—clean the interior wood you want to upgrade with cotton rags and a spray bottle (the 32-ounce size works well) filled with water and a couple of tablespoons of Murphy's Oil Soap. "Spray it on and then quickly wipe the surface off—you don't want water spots," says John ...
YachtWorld provides an overview on the evolution of yacht design. We asked Tim Gosling, a London-based interior designer at the forefront of superyacht design for his expert comments on the different segments of yacht design. Space and Sound. Minimalism is key and the latest cutting-edge technology supports a clean, simple look.
The interior of this boat has over 40 years of scrapes, marks, dirt and water marks. It needed a fresh coat of paint. I did some local research and found Res...
A local paint store will be able to work from the Pantone codes to create these colours for you. 3. Paint the walls a light colour. Painting a lighter colour throughout your boat will reflect natural light and onboard lighting. The higher the gloss finish of a paint, the more reflection you'll get.
We're painting the inside of our boat, it's not complicated right? The DIY sailboat interior paint job episode. KEEP US SAILING!Support us and gain early acc...
Prep the surface by washing, de-waxing, and thoroughly sanding it. Apply the primer, then the paint. Wax the boat from stem to stern to protect the new paint job. Then, simply keep it clean, and rinse it thoroughly after use in saltwater. Remember, before you paint a boat always read the warning labels on all of the supplies and be sure to use ...
Key Takeaways - Yacht Painting Tips ️ Yacht painting involves applying a protective coating to both the exterior and interior surfaces, with options for DIY or professional services. Benefits of painting include increased value, enhanced appearance, protection from environmental factors, extended lifespan, improved performance, and personal expression.
Refitting a Sailing Yacht: Painting the Interior. February 24th, 2016. ·. ·. Yacht Refit. Refitting an old yacht can be a tiring and never ending story. That´s what they´ve told me when I was proudly telling my story of having bought a 40 year old ship. And endless black hole. An ever hungry money-destroying machine.
In this video, we tackle the interior painting of our yacht. It has come a long way in the four months since we started this journey. We used oil-based ename...
Whiten Your Interior. Nautical colors are traditionally bright white with a solid contrasting navy blue. However, painting panels a light color can brighten and modernize a boat cabin and set off teak trim. A fresh coat of paint is an excellent way to make your interior look fresh and new. Tasteful Storage Bins
Summary. 1 - Refitting your boat by optimising storage space 2 - Customise and revamp the interior of your boat with a little paint 3 - Decorating the interior of a secondhand boat: fabrics. 1. Refitting your boat by optimising storage space. For certain secondary boat interior refits you don't always need to call in the professionals.
Interior Refinishing Projects with Newmil Marine. After 25 years of working on some of the most exceptional yachts, we have learned a few things about caring for your boat. Not only have we perfected our processes, but we have been innovators when traditional refinishing techniques wouldn't suffice. Here is a brief look at just some of the ...
Whether it be a complete vessel painting, touch up, or interior refinish job, Newmil's expertise in all areas of yacht refinishing speaks for itself. With over 25 years in the business, our history of repeat customers is a testimony to our industry knowledge and highly superior craftsmanship. ⭐️⭐️⭐️⭐️⭐️
Update your boat furnishings: Nothing makes more of an impact on your boat's interior than the soft furnishings. The seat covers, biminis and cushions will add a real bolt of colour, whether you opt for bold shades or more subtle hues. You could consider a leather interior too, or patterned fabrics. Think long and hard before committing to a ...
For onto 20 years now in my own boats, and boats I've built for customers, for interior painting I've used (and will continue to use) a good quality ACRYLIC Latex enamel in semi gloss. Note the emphasis on Acrylic. I also use Zinzer 1-2-3 primer.. Used to use a different one (Kilz), but I've had it bubble with condensation.
1. START BY DEEP CLEANING. As un-fun as it might be, a deep clean is the cheapest way to radically brighten your interior. It's especially affordable if you use homemade boat cleaners. Dirty boat upholstery, mildewed cabin liners, and salt-encrusted hatches made our boat feel damp, dark, and generally unpleasant.
Follow along for real time updates on insta @cruisingmeraki Buying a budget Bluewater sailboat means there is inevitably going to be a lot of projects! Come ...
Find Stores. Only search stores in Puerto Rico. Find a West Marine Store near you. Ask our experts about boat parts, sailing, fishing, or paddling. Shop with confidence - get free shipping to home or stores + price match guarantee!
The Sixty Restaurant - Bar (the name refers to the interior, which has been executed just like in the 1960s) on the 62 floor of the Federation tower, which makes it the highest restaurant in Europe.
The paint not only protected the walls from moisture seepage, but also enhanced the color of the surface. St. Basil's, interior. South gallery passage with 18th-century wall paintings.
Painting the interior of a Jon Boat Paint the inside of jon boat easily with spraypaint. This interior jon boat paint I used was recommended to me by a profe...
7,262 custom car paint stock photos, 3D objects, vectors, and illustrations are available royalty-free. See custom car paint stock video clips. MOSCOW, RUSSIA - JULY 23, 2021: Car. Automobile on street of Moscow city, Russia. Unusual tuning car.